The Wedding business workflow
Lesson 14 from: Getting Started with Wedding PhotographyPhilip Ebiner, Will Carnahan
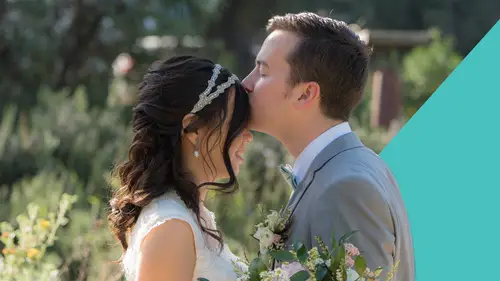
The Wedding business workflow
Lesson 14 from: Getting Started with Wedding PhotographyPhilip Ebiner, Will Carnahan
Lessons
Introduction
1What this course is about and how to succeed
01:48 2Why you should become a wedding photographer
01:32Starting Your Wedding Photography Business
3Business Section Intro
00:28 4Building your kit
06:00 5Where You Should Invest Your Earnings
04:30 6Will's Wedding Photography Kit
09:57Choosing Your Business name
04:50 8Action Item - Choose Your Name
00:25 9How to build your Wedding photography package
06:58 10Setting Your Wedding Photography Prices
10:16 11How to Get Your First Clients
06:54 12Talking with Clients
09:41 13The Importance of Contracts
04:27 14The Wedding business workflow
06:34 15Good Accounting Practices
02:26 16The philosophy of a well run business
03:38Wedding Day Overview
17Wedding Day Overview - Schedule of Common Events
13:32 18Taking care of Business before the shooting day
02:37 19Tips for working with a wedding coordinator
03:31 20Action item - List out the key moments - Try to memorize
00:31 21Know what you will be photographing ahead of time
02:23 22Conclusion to section/ recap
01:32How to Photograph a Wedding
23Introduction - The meat of the course
01:11 24Equipment checklist/ cleaning lenses and cameras
08:24 25Do you need an Assistant/ 2nd shooter?
05:07 26Being a second shooter
08:32 27What to wear as a photographer
05:09 28How to shoot: Getting Ready/ Hanging out
05:18 29How to Shoot: Dress/ Rings/ Bride details
10:41 30How to Shoot - Groom Portraits & Posing
09:11 31How to shoot: Groomsman
12:51 32How to shoot: Bride Portraits & Posing Interior
04:49 33How to shoot: Bride Portraits & Posing Exterior
08:14 34How to shoot Bridesmaids
12:56 35How to shoot: First Look
03:28 36How to Shoot: Posed Couples Portraits
06:34 37How to shoot: Walking down the Aisle
10:17 38How to shoot: Ceremony Coverage and vows / ring exchange
09:17 39How to shoot: First kiss and walking out
05:39 40How to shoot: Formal family and group Photos
12:26 41Action Item: Save your fav pose
01:14 42Action Item: Find inspiration
02:07 43How to shoot: Reception intro and Grand entrance
01:34 44How to shoot: Reception Details
04:55 45How to shoot: Reception Speeches and toasts
04:41 46How to shoot: Reception First Dance
06:23 47How to shoot: Reception Bouquet and Garter toss
04:46 48How to shoot: Reception Dancing and Partying
05:58 49Recap of “How to shoot”
02:47Editing Wedding Photos
50Introduction to Editing Section
01:25 51Photo applications and Profesional Apps
03:42 52Organize, rate, and cull
28:21 53Editing detail shots
31:42 54Editing bride getting ready
29:23 55Editing Demo: Editing Outdoor Ceremony
23:10 56Editing single portraits
52:10 57Editing Demo: Black and White editing
09:39 58Editing Demo: Stylized Editing/ Finding your editing Style
12:20 59Advice on how to edit hundreds of photos efficiently
06:01 60Exporting your photos for client/ portfolio/ print
10:05 61Delivering Digital images to your client
07:06Succeeding with Wedding Photography
62Intro to Succeeding in Wedding Photography
00:48 63Being happy as a wedding photographer
07:05 64Making it as a business and sticking with it
03:14 65Getting Testimonials
01:35 66Using Social Media and networking to expand business
02:08 67How to deal with unhappy or difficult clients
04:37 68Competing with mobile phones and family/ friend photographers
01:58 69Working with other wedding vendors
03:16 70Section conclusion
00:53Conclusion
71Thank you!
01:29Lesson Info
The Wedding business workflow
The business workflow from beginning to end as a wedding photographer is something that you need to familiarize yourself with. Totally. You need to understand this because you will have to apply this workflow to every single project, every single wedding. And if you know it, you won't miss anything. There are times where you could miss a certain step and it may leave you without getting money or a contract or getting paid or delivering. Um And as you start to get busy, it's good to have this system in place. If you don't have the system in place and you start to get busy, it's very easy to lose track of where each project is at. Um And if you start this practice now and understand it while you're starting out before you start to get busy, you will be seasoned veteran at it by the time, uh, you're real busy and shooting tons of weddings and you won't miss a thing. So let's go through beginning to end the process of what needs to happen from a business standpoint for each single wedding.
The first thing that's gonna happen is your initial contact with your client that means someone reaching out or you're meeting someone and it's the whole start of the whole thing before you actually booked your client. Um Also a good time to take notes about everything that they need and want because you will be able to plug all that into your contracts and information later. The second thing that will happen will be you actually having a conversation with them. So we've had the initial contact. Now you're having a conversation and you're gonna say all those wonderful things that I said earlier to them. How important photos are, uh where did they meet? Nice to see them together in person or over a zoom call or something like that. Basically, this is when you're going to try and lock them down and book them as clients and get to know them as your first meeting. The third thing is that you're gonna finally create a quote, give them pricing uh and send it off. Now, all these things could sort of all happen at once, but this is just sort of the order of things, right? Initial contact your first meeting with them and then showing or sending them a quote and price for what your services may be based on what you've talked to them about what packages they want, how many hours they may need. Number four. Now that they've gotten all that they've decided. Yep, you're our person. We want you to shoot our wedding. So let's go ahead and sign the contract and collect the deposit. Now, we didn't talk about this earlier, but typically I do about a third of the total budget for the deposit. So at this point, we want them to look at the contract, sign it, hand over a check cash, however, you accept payment for your deposit. So we've gone from initial contact, we've met them, we've sent them a quote, they've approved it and they've signed our contract. The next step is sort of up to you. Now, I like to have one or two meetings before the wedding, but just a follow up because typically all those other things have maybe taken place three months, six months, even a year, sometimes before their wedding. Now, we wanna reconnect with them. We wanna remember to look at the contract, remind yourself of everything that needs to be done, remind yourself that you've been paid, check everything and just check in with them. Say, hey, how are you doing looking forward to your wedding in a couple of months or a month or in two weeks? Um Just wanna get you guys on the same page and make sure you know that I'm thinking about you. It's a really nice way to like connect with them, but also a good way to just make sure everything is still good to go. So reaching out either meeting with them, emailing chat on the phone, just another, you know, confirmation and meeting them next, the wedding day. I'm not gonna get too into this, but this is when the wedding happens. We've met them, we've signed their contract, we've checked in with them. We've gotten our deposit. We are now at the wedding. We're shooting the wedding also on the wedding day, I collect my final payment. Now that is in the contract for me. The deposit comes earlier when they book the day and sign the contract. The final payment is due on the wedding day. Now there are times where I've had couples come up and pay me right at the beginning of the wedding day. Great, wonderful. Put it in the bag we'll deal with later. There have been other times where they pay you at the end of the wedding day, which is kind of the last time that you're supposed to get that payment. Um which is actually very typical that you get your final payment on the day of the wedding after the wedding. It is time to drink your coffee and edit all your photos. Now, this is a process for you alone. You're gonna go through and edit all your photos, get ready for delivery. There used to be a time where I would select a lot of photos and I would send them to the couple to pick the ones that they want edited. But I stopped doing that mainly because couples tend to not know what photos they want based on what you have shot, they end up wanting all of them and you can charge them for all those and make more work for yourself and more money. But sometimes it took them a year to get back to you. And that is just incredibly frustrating when you're editing a wedding a year or two later because they could not decide what photos they wanted. So best practice is now that you're editing photos, you decide what photos you were sending to them and that you're editing them. And if they ask for more later, you can always have that conversation another time. Now that you've edited the photos, the next process is to send those puppies off to the couple, whether it's in a drive or online. Remember, we had an online gallery in our package, that's the best delivery and easiest for me. So now that we have met them, we have uh learned about them, we've sent them a quote, they've signed our contract, we checked in with them, we shot their wedding. We've edited the photos. You are now sending the photos to them for final delivery and hopefully they respond with how much they love the photos. Now, the very last thing to close out this project is for you to go in and pick out the photos that you wanna show for your portfolio. Now, I can't stress this enough because it is better to do it while you're editing and while your mind is fresh on it, pick out one or two photos that you'd wanna share as like the best two photos of the entire wedding or you can also select the best 10 to 20 photos for the collection of the wedding that you can share later uh on your website. Better to do this now and put them in a specific folder so that you don't forget about it. And that's the whole process of the wedding. If you can get through all of this business in the wedding, write all these steps down and apply them to every single wedding or even every single project that you have with a client, you'll be doing great.
Class Materials
Bonus Downloads
Ratings and Reviews
Student Work
Related Classes
Wedding Photography