How to shoot: Formal family and group Photos
Lesson 40 from: Getting Started with Wedding PhotographyPhilip Ebiner, Will Carnahan
How to shoot: Formal family and group Photos
Lesson 40 from: Getting Started with Wedding PhotographyPhilip Ebiner, Will Carnahan
Lesson Info
40. How to shoot: Formal family and group Photos
Lessons
Introduction
1What this course is about and how to succeed
01:48 2Why you should become a wedding photographer
01:32Starting Your Wedding Photography Business
3Business Section Intro
00:28 4Building your kit
06:00 5Where You Should Invest Your Earnings
04:30 6Will's Wedding Photography Kit
09:57Choosing Your Business name
04:50 8Action Item - Choose Your Name
00:25 9How to build your Wedding photography package
06:58 10Setting Your Wedding Photography Prices
10:16 11How to Get Your First Clients
06:54 12Talking with Clients
09:41 13The Importance of Contracts
04:27 14The Wedding business workflow
06:34 15Good Accounting Practices
02:26 16The philosophy of a well run business
03:38Wedding Day Overview
17Wedding Day Overview - Schedule of Common Events
13:32 18Taking care of Business before the shooting day
02:37 19Tips for working with a wedding coordinator
03:31 20Action item - List out the key moments - Try to memorize
00:31 21Know what you will be photographing ahead of time
02:23 22Conclusion to section/ recap
01:32How to Photograph a Wedding
23Introduction - The meat of the course
01:11 24Equipment checklist/ cleaning lenses and cameras
08:24 25Do you need an Assistant/ 2nd shooter?
05:07 26Being a second shooter
08:32 27What to wear as a photographer
05:09 28How to shoot: Getting Ready/ Hanging out
05:18 29How to Shoot: Dress/ Rings/ Bride details
10:41 30How to Shoot - Groom Portraits & Posing
09:11 31How to shoot: Groomsman
12:51 32How to shoot: Bride Portraits & Posing Interior
04:49 33How to shoot: Bride Portraits & Posing Exterior
08:14 34How to shoot Bridesmaids
12:56 35How to shoot: First Look
03:28 36How to Shoot: Posed Couples Portraits
06:34 37How to shoot: Walking down the Aisle
10:17 38How to shoot: Ceremony Coverage and vows / ring exchange
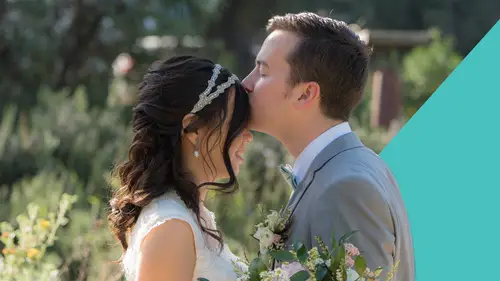
09:17 39How to shoot: First kiss and walking out
05:39 40How to shoot: Formal family and group Photos
12:26 41Action Item: Save your fav pose
01:14 42Action Item: Find inspiration
02:07 43How to shoot: Reception intro and Grand entrance
01:34 44How to shoot: Reception Details
04:55 45How to shoot: Reception Speeches and toasts
04:41 46How to shoot: Reception First Dance
06:23 47How to shoot: Reception Bouquet and Garter toss
04:46 48How to shoot: Reception Dancing and Partying
05:58 49Recap of “How to shoot”
02:47Editing Wedding Photos
50Introduction to Editing Section
01:25 51Photo applications and Profesional Apps
03:42 52Organize, rate, and cull
28:21 53Editing detail shots
31:42 54Editing bride getting ready
29:23 55Editing Demo: Editing Outdoor Ceremony
23:10 56Editing single portraits
52:10 57Editing Demo: Black and White editing
09:39 58Editing Demo: Stylized Editing/ Finding your editing Style
12:20 59Advice on how to edit hundreds of photos efficiently
06:01 60Exporting your photos for client/ portfolio/ print
10:05 61Delivering Digital images to your client
07:06Succeeding with Wedding Photography
62Intro to Succeeding in Wedding Photography
00:48 63Being happy as a wedding photographer
07:05 64Making it as a business and sticking with it
03:14 65Getting Testimonials
01:35 66Using Social Media and networking to expand business
02:08 67How to deal with unhappy or difficult clients
04:37 68Competing with mobile phones and family/ friend photographers
01:58 69Working with other wedding vendors
03:16 70Section conclusion
00:53Conclusion
71Thank you!
01:29Lesson Info
How to shoot: Formal family and group Photos
In this section. Let's talk about the formal photos. Now we went over this a little bit when talking about groomsmen and bridesmaids and it's sort of similar concepts, but this time we're mixing in more family and more proper formal photos. Any formal photo to me is basically an actual posing photo. Now to start off with. Um Let's go ahead and, and look into this wedding that we shot up in Napa and we'll go back to our bridesmaids type photos. This was an outdoor wedding. So the idea when you're picking a place to shoot formal photos is shade, if you're outdoors, we want shade and if you have to have the sun in it, you wanna put it behind them. You can see in this photo specifically um the uh girl on the very far left, the sun is hitting her shoulders and hitting her hair, but it's back lit and she's not having to squint her eyes that way, the shade is causing a perfectly even um lighting, soft lighting across everyone's face and we're not in and out of lighting in spots you see as we ...
move on. Remember our tips from our uh bridal party that we talked about in the earlier lesson, looking at each other, the gentlemen are holding hands, they're putting their arms around each other. We got hands and pockets, but the sun is behind them. I wanted to move all of these folks a little further from the background because it would make it go more out of focus. But sometimes the situation doesn't call for that. You can see in these cases, they are a little bit further back and they're showcasing their uh their groups. But even in the close up shots in these formal, specifically, the backgrounds farther away were a little bit closer. And we're using my 24 to 70 which is closer to uh 65 in the middle um or towards the end of the, of the zoom itself. And the background is very much out of focus and the lighting is even on our subjects. And that's, that's what I'm trying, trying to achieve this. This positioning is really good. Once I found that took a few shots and did our normal sort of posing with the, with the verticals and horizontals, them looking at each other like we talked about earlier, they actually wanted photos with the bouquets and without the bouquets. So we went ahead and did that. That's not something that I normally like to do because it adds time. But if your clients uh request that, then we can go ahead and do that again. Here's another really great example, even soft lighting in the shade with the background further away and farther away from the subject so that it's more out of focus. This is at a 70 millimeter at 2.8. I felt comfortable with the 2.8 because it's only two people and they're on the same plane. So I like this spot, right? I did a lot of these formal photos of, of them together, But let's talk more about the bigger groups like the family groups, right? At this point, you know, I brought back um either before or after the ceremony, the groups of families that we need to write, like the siblings, the parents, the grandparents, uh the extended um godparents. And basically you go to the same spot that you feel comfortable with formals before if it's still in the shade and it's still accessible and it's still a really good place to do all these shots. This is gonna be a little bit harder to pose as far as people listening to you. Usually the bridal parties are easier to pose in the sense that they understand what's going on. They know that they're there to be photographed, but sometimes groups of parents, groups of extended family, they're just there to take a beautiful picture. So you can't always uh necessarily count on being able to oppose people easily. Also, there's going to be a lot of people around during this time. So you'll have to make your presence known. Um This form of photos. I'm gonna be honest, is not my favorite thing to do because of my style. My style is much more kick back uh photojournalist documentary style. I don't like people knowing I'm even there, right? Because I want them to just relax and candid kind of photos. But in this sense, you can't really be that way. You have to be present, you have to be a little bit commanding. Um because if you're not, you're not gonna get poses, you're not gonna get people where you need them to be and you're gonna have a lot of distractions with people around that you need to be boisterous over, right? This is when it helps to have an assistant or have a second shooter um to help you pose these which isn't always the case, but you can see in these, it's very similar, right? We wanna get people as close together as we can. They're in the shade. This is a really good example of the sun being behind our subjects and backlighting if we must. So it doesn't affect their eyes squinting we're exposing for uh that shade and their faces. I actually again, don't mind if things get blown out in the background. Like in this photo, the background is a little blown out. It's a little bit hot on her hair, but I think it looks nice. It's coming out the the the brightness that's hitting the back of her hair isn't taking away from the photo of anything. It's creating a highlight. So it's OK to expose for the shadows here. But what's more important is that you're exposing for the faces because these are formal photos. We want to emphasize who is there to take a photo with the couple. Um And again, having, having the in between moments like this and her dad kind of dipping in and out but snapping it really quick because she has a smile. He has a smile. Those are really great candid moments. So don't always feel like you need to be shooting when everyone's lined up, you can be taking photos the entire time, obviously switched up to black and white because it's so good. And the other thing is to think about the people you're photographing, this is his mom. So he's gonna get a little closer and there's also a single one of, of her and him. Um But there's also a group photo between the two and her. And then in the, in the past, there was one of the parents who are all there. So in thinking about cycling through all these things, you really have to uh get everyone down. And this is when it's a good idea to make a list of who wants to be photographed with your couple or who your couple wants to be photographed with. Typically, it's a lot of um you know, immediate family and you start to develop a sort of sense for that as you start to get to know them throughout the day of the wedding. But my recommendation for when you're taking formal and family photos is to start as big as possible and whittle your way down to uh just two people. So that means if we wanna have both groups of parents and both groups of siblings of the couple, start with that start with all start with everyone. Start with both sets of parents, both sets of grandparents, both sets of sib nice big giant photo. All the um all the other partners of the siblings that need to be in there. Do one with do one without this is why it helps to create a list and then start to section them off, right? Tell the groom's family. Can you guys just hang out, wait for a second now? Just shoot the the couple with the bride's family but do all of them right? Start big, get small. So grandparents, parents, siblings, big photograph, right? Great siblings. Can you guys leave but stand by now? Just do the grandparents and the parents, great parents. That was great. Can you step to the side and now we're just gonna do the grandparents now. It's just the grandparents, right? So we're knocking them out first, obviously, like generally they tend to be older and we want them to get done with their photos sooner. And so when they're done they can go. Now, we're, instead of having to keep everyone around, we know we started big and we can work our way down. And that way when we start big, we know that everyone's there that needs to be there. And that's a really good way for organization and to start to like, move down the line of shooting everybody. So now we're gonna do the parents. Now when I get to the parents on tip, they're like, ok, great. Let's do the parents with the couple, let's do the parents with just their kid. Now let's do the other sets of parents. So there's two parents, two sets of parents if they're both there or however combination that works out. So again, starting big and then um move them out and then the siblings, right? Siblings come in, then siblings from the other side at the same time. So just the couple and both sets of siblings and then we can whittle down each one on that way. And then at that point, we're good with the bride side, right? We've done everything so they can sort of go if they need to go and then we'll say, hey, groom's family, come on over and we'll do everyone in the groom's family and do the same process that we just did with the bride's family. And you can see I'm just rallying this off because I've done it so many times. I'm so used to it. So we'll start with groom and grandparents and parents and siblings and work our way down. Siblings, parents can you just step to the side? We're just gonna do the grandparents, grandparents are done. Parents come in just the parents, parents get out, siblings come in, siblings and parents knock it out and then let's just do individual photos with our groom uh bride and one parent to parent, siblings, one sibling, two sibling, mom and dad and son, you know, just mom and son, dad and son. Uh So you have to, I, you know, an action unimpressed is gonna be and we'll get to that in a second is just to make a list, right? And on top of your list, start to compare that list with what your clients want because that will be important. Someone that can help you with. This is, is the wedding coordinator. They don't all like to help you with this, but sometimes they will be able to um I recommend having a uh um maid of honor or a groomsman or a, a best man, if not both of them there to help you identify who people are as well as you know, help usher people in. This is another really great resource for a second shooter to come help you out whether they're just taking Candid photos on the side or actually helping you pose and organize people. Um I've actually been a second shooter where the main shooter wanted me to take the photos as a second shooter and they just focused on making sure they had the right people um in the photos and they made sure everyone was posed, right? They trust my photographic skills, which was nice because then I just had to take the picture and focus on the the exposure, uh the background, the f stop the technical stuff while they just focused on making sure everyone was there, which is very important. Um getting all the correct shots and the people that are there is just as important, if not more so at this point than the technical stuff. And I would say as far as the technical stuff goes, um you know how to take a photograph, right? This is basic one on one photography. Uh We're not gonna go deep into um you know, really technical stuff because this is a formal photo, make sure you're exposing for their faces, position them with the sun in the background, make sure the lighting is even take off sunglasses, have everyone as close together as possible. Um Make sure they're away from the background if we can create that more out of focus, aesthetic. And even if you mess one of those things up, we can still usually salvage that right? As long as we're in focus, we can salvage a lot of that. And so in thinking about that know that these formal photos are important, but they're also even more important for record. Keeping than they are for artistic style necessarily. These aren't necessarily all the photos that you'll be showing on your portfolio, but they are going to be incredibly important to the couple um that they can print them out, put them on a desk, put them over the fireplace, stuff like that. So just to go back and recap, making sure they're in the right spot. Think about F Stop again, right? If you're shooting a big group, uh think about shooting a deeper F Stop like an A four or a 56 so that your focus can go deeper, right? So in case they're staggered, everyone's in focus, the bigger your group gets, the more you're gonna want to up your F stop just to make sure everyone's in focus, right? Um And again, that's going back to, it's OK if things are all in focus or the background is a little in focus, like it's more important to see people's faces than it is to have that crazy, uh shallow depth of field, sort of aesthetic. And then, um, like I said, whittle your way down, have someone help you out and, um, you know, just be calm, be patient. Uh Keep an eye on everybody and when in doubt, stop, take a moment, tell everyone just hold on one second. I just need to look at the camera and check, focus on every single face in that photo and make sure it's OK. Zoom in on your camera. It's ok to take a moment to make sure you have the right photo even if you tell everyone, hey, hey, let me just get one more shot. Uh We're just gonna do that one more time. Everyone look here right here, big smiles, big faces and and then you can get it. Let's go on to the next lesson.
Class Materials
Bonus Downloads
Ratings and Reviews
Student Work
Related Classes
Wedding Photography