Editing Demo: Editing Outdoor Ceremony
Lesson 55 from: Getting Started with Wedding PhotographyPhilip Ebiner, Will Carnahan
Editing Demo: Editing Outdoor Ceremony
Lesson 55 from: Getting Started with Wedding PhotographyPhilip Ebiner, Will Carnahan
Lessons
Introduction
1What this course is about and how to succeed
01:48 2Why you should become a wedding photographer
01:32Starting Your Wedding Photography Business
3Business Section Intro
00:28 4Building your kit
06:00 5Where You Should Invest Your Earnings
04:30 6Will's Wedding Photography Kit
09:57Choosing Your Business name
04:50 8Action Item - Choose Your Name
00:25 9How to build your Wedding photography package
06:58 10Setting Your Wedding Photography Prices
10:16 11How to Get Your First Clients
06:54 12Talking with Clients
09:41 13The Importance of Contracts
04:27 14The Wedding business workflow
06:34 15Good Accounting Practices
02:26 16The philosophy of a well run business
03:38Wedding Day Overview
17Wedding Day Overview - Schedule of Common Events
13:32 18Taking care of Business before the shooting day
02:37 19Tips for working with a wedding coordinator
03:31 20Action item - List out the key moments - Try to memorize
00:31 21Know what you will be photographing ahead of time
02:23 22Conclusion to section/ recap
01:32How to Photograph a Wedding
23Introduction - The meat of the course
01:11 24Equipment checklist/ cleaning lenses and cameras
08:24 25Do you need an Assistant/ 2nd shooter?
05:07 26Being a second shooter
08:32 27What to wear as a photographer
05:09 28How to shoot: Getting Ready/ Hanging out
05:18 29How to Shoot: Dress/ Rings/ Bride details
10:41 30How to Shoot - Groom Portraits & Posing
09:11 31How to shoot: Groomsman
12:51 32How to shoot: Bride Portraits & Posing Interior
04:49 33How to shoot: Bride Portraits & Posing Exterior
08:14 34How to shoot Bridesmaids
12:56 35How to shoot: First Look
03:28 36How to Shoot: Posed Couples Portraits
06:34 37How to shoot: Walking down the Aisle
10:17 38How to shoot: Ceremony Coverage and vows / ring exchange
09:17 39How to shoot: First kiss and walking out
05:39 40How to shoot: Formal family and group Photos
12:26 41Action Item: Save your fav pose
01:14 42Action Item: Find inspiration
02:07 43How to shoot: Reception intro and Grand entrance
01:34 44How to shoot: Reception Details
04:55 45How to shoot: Reception Speeches and toasts
04:41 46How to shoot: Reception First Dance
06:23 47How to shoot: Reception Bouquet and Garter toss
04:46 48How to shoot: Reception Dancing and Partying
05:58 49Recap of “How to shoot”
02:47Editing Wedding Photos
50Introduction to Editing Section
01:25 51Photo applications and Profesional Apps
03:42 52Organize, rate, and cull
28:21 53Editing detail shots
31:42 54Editing bride getting ready
29:23 55Editing Demo: Editing Outdoor Ceremony
23:10 56Editing single portraits
52:10 57Editing Demo: Black and White editing
09:39 58Editing Demo: Stylized Editing/ Finding your editing Style
12:20 59Advice on how to edit hundreds of photos efficiently
06:01 60Exporting your photos for client/ portfolio/ print
10:05 61Delivering Digital images to your client
07:06Succeeding with Wedding Photography
62Intro to Succeeding in Wedding Photography
00:48 63Being happy as a wedding photographer
07:05 64Making it as a business and sticking with it
03:14 65Getting Testimonials
01:35 66Using Social Media and networking to expand business
02:08 67How to deal with unhappy or difficult clients
04:37 68Competing with mobile phones and family/ friend photographers
01:58 69Working with other wedding vendors
03:16 70Section conclusion
00:53Conclusion
71Thank you!
01:29Lesson Info
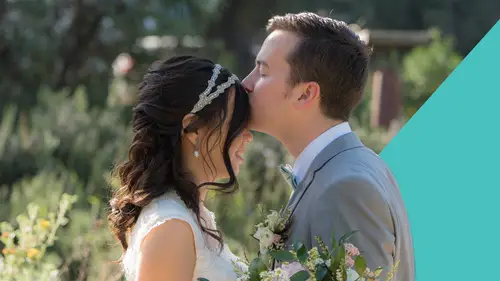
Editing Demo: Editing Outdoor Ceremony
Hey, friends, welcome to the next lesson. Now, we're gonna talk about editing an outdoor ceremony. The reason I want to talk about an outdoor ceremony is because highlights really more than anything indoor ceremony. It's kind of self explanatory, right? Bring up the lights. We can cover it a lot of everything else in the wedding or it's going to be indoors. But we do get a lot of outdoor ceremonies and you do have to compete with the sun. It depends on the time of year, it depends on where you are in the world. It depends on what time of day it is. This wedding that I'm going to show you is in California, in Northern California, Napa Valley. Specifically, it was around two or three o'clock in late summer. So you don't really have control over when the wedding is right. You can make suggestions like you don't want the, the light to be toy in the middle of the day. Typically weddings are later in the day. So that's helpful. But then you get into running, uh, you know, racing the sun if i...
t's going down, um If there's a big mountain by the sun's gonna be gone very quickly. So let's go in and I'm just gonna go through a couple of these. We're not gonna go deep deep into editing faces and stuff, but I just a general edit and continuing to move our motion with the edits and also preserving details or letting them go. So let's start with this photo we have here. So again, it's kind of an order. It's the groom walking down the aisle with his mom white jacket. OK? My friend. So keeping in mind like we want to preserve some of the highlights. And again, this is all dependent on how your style is and how you're gonna edit it. This is just a general. As soon as I start to go up in exposure, you can see the histogram as soon as I start to go up in exposure that that the whites in there are pretty much gonna be gone. So I'm gonna start by actually coming down a little bit going to the highlights and bringing those down just so that you can see the jacket immediately is coming back into detail. And if I bring them back up on the exposure, continue to ride the highlights down and just slowly work my way. So I feel like there's enough detail in the jacket and there's enough detail in the photo. Add a little bit of contrast, bring down the blacks. Again, this is very basic editing and then maybe I'll bring down the clarity like we had before. Texture D Hayes is gonna add more contrast like we talked about earlier or less. Um I like it contrasty. Um That's kind of my style. So again, right. Checking out the highlights, let's just move down a little bit on the backside. So to start off with, this is one of my favorite shots to do, right? We talked about this in shooting the ceremony, but I wanna make sure they're centered so I will crop. I'm gonna hold shift down to maintain the aspect. Let go hit return. They're pretty much centered. But again, I'm starting to lose some of the highlights in both the sky on the right side and his jacket a little bit. So I'm going to bring the highlights down just a little bit and you can see it's bringing color back in and bringing uh bringing that tone in. So I'll bring the whole thing down now as an aside. So you can see right away if we brought the exposure all the way down, you see how much detail that my camera is picking up in the sky, but that's not appropriate for below. So we're gonna bring that back up. We're gonna look at the faces and the people for now, let's look at that. How, how is our exposure there? I'd say a little bit down right there. We're getting some nice, we can see people's faces, we can see the coat we've brought in the highlights down in general to bring this jacket back in. That's a decent decent finding. Again, just looking at the bottom frame add some contrast a little bit because there's some sky in there and I kind of want some detail in there. I'm going to go ahead and add a gradient filter to the top. We'll go to a mask, it's like a more of a mask filter or a gradient filter you'd use like if you're shooting landscape, you could put one in your camera, but this is post, right? So we'll go to linear gradient instead of radio. It's just a line. I'm using a line because it's just the sky. Now, there's two ways of doing this right? Lightroom classic now allows you to pick the sky out specifically but learn the, learn the linear gradient because you can use that in a lot more situations than just sky. So we'll click on the linear gradient. We'll come over here and I'll drag down and I just want to affect that red area, right? So I'm not gonna get into the crowd because I feel like they look good. So we'll stop it. You can see how it feathers, it feathers in. So it's not gonna, it's gonna sort of dissipate as it comes down towards the crowd. If we went too far down, it would affect that whole area, but we don't want to affect the crowd. Just the sky looks pretty good. Reset this to make sure we know we're good. And now I'll bring down the exposure just in the sky, especially the highlights, maybe a little shadows, maybe a little bit more. It's a little more pop and now you can go back in and you can actually move it around like that so you can see exactly what it's doing or you can turn it off and on up here, it's a little bit of an aggressive look, but you're still preserving the color. You're still preserving uh the background and the highlights, especially if you expose to make sure that you didn't clip your highlights. If we had clipped our highlights out there, there'd be zero detail and they'd just be white. So this is a really good way to sort of bring that back. If you're sort of, uh you wanna detail a shot is doing these gradients, let's get rid of this and I'll show you the sky filter. So if you click on sky there it goes, look, it just isolated exactly the sky, but it's not necessarily affecting some of the mountains out here, which is probably a little bit better. So let's do the same thing. We'll reset to make sure we're good and I'll bring the exposure down. Same thing, right. Same sort of attitude, but we're only affecting a little bit there. I'll bring the whites down, I'll bring the shadows down a little bit and you can see in the on the left side, it's a little bit darker in the upper left corner is in the right. And that's because look at the shadows, where's the sun coming from? The sun is literally coming from over those hills on the right. So the sun is going to create a sort of gradient, especially like this area. There is a little haze, a little cloud haze in the sky, it will create that gradient, but this looks a little bit more, you know, poppy intense. I don't know if I would really go that extreme for my style. I would probably let it let it be a little brighter like that. I think that looks a little more natural, but I want you to have the ability to create your own style, right? The idea here is to learn these tools so that you can push yourself in your style. Um All right. So let's go down again with this guy with this, with this white jacket. This came out pretty good, right? There's no sky in the highlights we see his face. And so if we bring down the highlights a little bit, we can get a little bit more detail on his jacket, but I don't want to lose his face. So I'll actually bring it up a little bit. I like these photos to be a little brighter. I do like the contrast, but I don't wanna you lose the highlights necessarily. So we'll kind of run down our things in the same sense, clarity and texture just to bring his face back and it looks pretty good. That's about when he's ready to see his groomsmen, um getting ready to see his wife. So we'll continue to go down here. Here's a really good example. These two photos of um some pretty fair skinned humans coming up the aisle in direct sunlight like that is an aggressive amount of sunlight. And both these uh females are, we are a little bit uh more pale. So the light is gonna be a really aggressive and you have to think about skin tone in this sense. It's also in very much contrast to their black clothes. So we have to be careful. We don't get too contrasty. Let's start with this one and immediately I'm just gonna see right. I'll bring the highlights down a little bit that's bringing a little bit more detail back in their faces. And if I bring the exposure down, that's also draining. If we do too much contrast, it's going to get too crunchy. It's too like too dark and too bright in one direction. So I'll bring that back a little bit to soften it. Um It's also hard because, you know, she's squinting into the sun and he's got sunglasses on. Same with this one. The guy has sunglasses on and she's a little squinty. So not ideal, not ideal place to be uh having a wedding for photography. This is the best that we could do. And again, you have to be OK with getting what you can in this type of uh situation. There are other photographers who will dive in and you'll get like, make sure you have very structured where people are going, where people are looking. However this ceremony set up before I even have any interaction with a lot of people. The venue is very specific. They're walking down this aisle, it's happening at this time. So you sort of need to figure it out and in a way where you're not affecting uh the rest of the the crowd or affecting the ceremony in any sort of way. So the the main problem I have here in this photo and I can show you a deal with it is right here, right? Super reflective, super shiny, it's a hot day and even if we come way, way down on the highlights, it looks like they're pretty much gone, right? It's always, and this is what I mean by clipping, right? It's always going to be white. There's no information there whatsoever. No matter how much I push and do to it, bring down shadows, bring down whites, it just won't bring, I can go almost black and the whites are still going to be there because there's no information in it. So if I reset this whole photo, because we went pretty extreme, that's where we started. Now, if I start to bring the highlights down, you can see how it's affecting the area around it where there is information but no information here. And I did not see that while I was shooting because it's a very small area on the camera and looking in the backdrop. So if we do, if we do go too far down on the highlights, we have this gnarly little spot right here that doesn't look flattering at all. So again, you have to save your highlights, but also you have to adjust to what you got right. Like that's, that's a little too extreme. Now, an advanced way of editing that is I would normally take that in a Photoshop and, and really hone it in create a mask, create layers and probably replicate some of her skin. Now, you could uh you could do that with a healing tool and sort of aim, aim for that and you can see how that just that quickly is starting to, we'll bring it back over here um replicate her skin so that we can make it a little softer, it's blending with the green there. But the problem here now is we have this necklace. I don't think that this photo is important enough for me to spend the time to necessarily do that. So I won't if this were the bride and she was walking down with her um with her father or whoever she's walking down with, I would take a little bit more heed in correcting this. But for the most part, if I bring the contrast up and I don't bring the highlights too far down and the shadows and the whites and make it look natural. I may throw in a brush with a light skin tone brush and we'll talk more about this when we're editing people's faces. I may go in there and brush that up a little bit just to soften it very quickly. But this photo and I don't want to be offensive, but it's not worth my time spending on this for the amount that I've been paid for this wedding, the amount of photos I have to deliver. Um and I can live with that and I think that that's ok if you start to get into detail, like really, really, really gnarly details like this, you'll be editing for days and you can do that or you can hire an editor. But for my money and my time, it's just not gonna be worth it. And so that little correction come back here, maybe I'll just this a little bit. That's ok to me like that's gonna be fine if this were the only photo I was delivering and I was paid, you know, tons of money to deliver this photo. I would take the time to go in and fix that, but you don't need to looks great. We got this story moving on. So here's a couple of really great ones. Um this one's a really good shot because we have the blue, his skin tone is a little darker obviously. And we're starting to lose a little bit of detail on his right side. I might bring this up a little bit and we know we, I know that it's in the shadows. Right. So we will bring up the shadows a little bit to get a little bit more detail. We don't want to be unnatural subtle, right? Little contrast highlights are good, maybe in a shirt, we can bring them down a little. So we get a little bit more detail there and I will soften a little and texture a little bit. Let's zoom back out. That to me looks pretty good. Maybe I'll bring it up a little bit more just bright and add a little bit of saturation because his jacket is so cool. A lot of colors here. This looks awesome, right? We did bring up a little bit of shadows in his face. So if we reset it to see how dark in contrast it was before this is the new shot, a little bit more storytelling, a little bit more vibrant, a little bit more fun. Um And you can see where I'm going with that. So now we get to the bride. Now we knew that our groom in this wedding had a white jacket, so we already know that this is gonna be a thing right now. The bride is more important than anyone else uh at this wedding in particular. So we wanna make sure we're not losing all the detail in the dress because this is really when it's kind of featured. And if we click down, we can see our groom seeing her for the first time as she walks down. So we know we want to see what he's looking at in the delivery of the photos in the storytelling. So not bad. It looks like I preserved the highlights a little bit in shooting. We'll zoom in here. I'm losing a little detail in the flowers. So we'll go ahead and just start there by bringing the highlights down to see where we're at and yeah, sure enough, some details coming back in the flowers. Let's look at it globally. Detail looks pretty good in the dress. I'm not losing anything in particular. Um Wow, I never saw that. Look at that. So it's not looking too bad and I might bring up exposure a little bit since we've got the room. More highlights, add a little contrast, bring shadows because I like it to be a little crunchy but not unnatural black. We could go way high with the highlights. C we start to blow them out. We don't need to because we have the detail. There we go. So I would go in and maybe adjust some facial things and stuff. But that's a general global edit for uh the white dress in aggressive daylight, um, which can be hard. So let's reset that and see what we did. So, really everything we did just kind of added a little bit of contrast, a little bit more detail to the dress. That was the original. Here's our edit, right, more detail in the dress, a little bit more contrast in the shadows on the pattern on her dress and that kind of makes it pop a little bit more. So let's go ahead and down here and here's the reverse shot again, right? This is one of my favorite shots to do when people are coming down the aisle is step in and do a little bit of a of a quick establishing shot. We are losing some details in the highlights. So let's bring those down a little and we'll bring the exposure down just a little, add some contrast, add a little saturation and again, same thing with the sky, right? So let's do our sky trick lightroom, Classic click show overlay. There it is. Bring it down just a little. Now, if you really want to bring it down, obviously, you could do that. Um And you see the haze out of there, let's de haze. It creates it more blue again, way too extreme for me. So let's reset. I would probably bring it down a little bit here, bring the highlights down, add a little contrast drop the blacks, a little tiny bit of das tiny, tiny bit I don't want it. Oh, this way, don't want to get it super GN like that. Even to me, that little blue in the right corner is a little much so I might warm up on that side just to make it a little bit more natural. So let's see what it looked like before. Super blown out and white. Right? And here's what we did more colorful, more contrasty, vibrant, telling a story, more natural, more than anything else. Right. Again, let's look at before and after big difference, right? So that's generally like we can go through and, and do this, I would kind of do the same things. This wedding is a little bit harder because the sun was just nailing uh on the right side here, the the groom's back and the bride's face and again, there's not much you can do about that and you can see I exposed for the shadows because I want to see his face more than anything. If I exposed for this white part right here, it would have been a little rough, right? It would have been uh or we can see if we, if we bring that into exposure, it would have looked more like this and then I would have had to go in and bring up the shadows, but I like making sure that I can see their faces and that's more of a film attitude is like preserving the shadows in digital. You should be more cautious of preserving the highlights, which I don't necessarily do all the time. So, you know, there are rules you can bend them. But even here, the bride is being just, just tons of sunlight on her, on her left side or right side. And even when I do bring in the highlights, we bring back a little detail in her skin, but I've lost this sort of corner and I may go in and fix that. But also this is not too aggressive that I don't need to necessarily fix that because all the emotion is in her face. This isn't a glamorous glamour photo. It's a documentary photo of the story and emotions. I can't sit there and go, wait, wait, wait, wait, let me, let me block the light. Let me, let me put up a diffuser. Let me pull in a flash. You could, the flashes I don't like using during ceremonies, even outdoors ones because they are distracting and that's not what we're there to do. So you can see it's difficult. But as long as you expose to her face, we're gonna be able to really dial in the edit and it's ok if it's a little brighter than not, if that's your style, that's ok. Even with a little cropped, a cropped vignette, that kind of looks nice. Let's go over and see if we can find a shot. Here you go. So here is our groom and I was using a little bit of foreground and again, right, the highlights are coming from behind him, not in his face. And I, I think actually like the amount of light that's hitting her dress is bouncing light on his face so we can kind of see a little bit more. And if I brought the highlights down here, there's more detail in his, in his shoulder. But it, it's not, it's not aggressively important. What's important is his faith and his expression and the storytelling. So you don't need to spend a lot of time worrying about that. But we also want to make sure that it looks natural. That's pretty nice. We'll do a little clarity, a little texture. I might go in and adjust under his eyes a little bit, but uh we're gonna, we're gonna focus on single people here in a little bit and you'll be able to apply everything to each edit. Now, reverse. Here's our brat. She is just being just blasted by the sun, right? Which in a sense can look, OK. She's getting uh emotional here. And again, it's about the story and if we brought the highlights down, we can bring a little bit back in her skin and make sure that it's not totally aggressively blown out. So it makes sense um in this photo in these photos, uh She's getting the ring. My least favorite part about this photo is the fact that he's in frame. So I would actually, if you're going to be outdoors and have this extreme sun and shadow if you have the opportunity, maybe crop, crop in a little bit. And now we're out of the shadow and we're still getting the emotion in our bride using the rule of thirds there and we're not as distracted. It doesn't look as off right with like a really dark area and a really bright area. And then I might actually bring it up a little bit because we're now we're under one type of light, not multiple shadows or shades and some light, not light. This is all one light. It's kind of like having like a big flash over behind you. It's just the sun and it's just hitting her from that direction and then we can kind of soften it and texturize it and her skin is starting to look a lot nicer right hitting the blacks. So yeah, we came up at a little contrast great that using the bright bright sun to shoot. That is great. And you can see my settings up here iso 100 because there's tons of light. I'm at 200 millimeter. I use the 70 to 200 like we talked about, but it's an F four which doesn't matter because it's so bright and we're shooting at a 1 25th of a second. Great nail. That timing the fall off is good because we're at 200 millimeters, we're using the light and now we've softened it with the clarity and texture. We've brightened it a little bit because we're under one light. It doesn't matter as much. We're not worried about the shadows. Let's see what it looked like before. Pretty dull, pretty, like raw and now like a beautiful wedding photo. And again, this is another thing where you can change your style. I've seen a lot of wedding photographers will make it more bright, more contrasty, you know, a lot softer if they want to. It just depends on your editing style. I'm much more of a natural sort of look for myself and it's about the emotions and the storytelling. Um And we wanna make sure that the editing doesn't take away from that. So that's pretty much a, a real quick outdoors uh outdoors tutorial. You can see I'll zoom through here, the, the raws that you can see. Um This was nice because it did light up the background. We would have been in a rough place if we had a darker background and they were brighter or the other way around. Um And like I said, you can use those gradients in the skies for, for that kind of thing. Um It's always like a really great way to do that. I this is again, is like the same sort of situation. I'm focusing on them and I want them to be good and then I might create a linear gradient for the sky or I'll use the sky selector. I'm not used to the sky selector so much because that's a new thing in Lightroom Classic that didn't exist when we had done this course before. So I gotta remember to, to talk about that more. But if you're using Lightroom Classic, again, it will detect the sky show the overlay and you can adjust it to how you see fit. You can also detect it's a great mask, the people which you talked about before, but the subjects, right? So that actually found that found the subjects, but we don't want to affect that guy, right? We just want to affect them. So I would actually uh subtract and you can use a brush and subtract whatever is not in the mask that you want there to be. So now if it's just them and I knock out the people behind them, we will just be affecting our heroes here. So if we just wanted to affect them and bring up the brightness or bring on the highlights and the jackets and stuff and make it more natural, you can. So that's a really quick lesson on uh quickly editing outdoor stuff and what to look for, what to not look for, what to be subtle about what not to be subtle about. Um Let's move on to the next lesson.
Class Materials
Bonus Downloads
Ratings and Reviews
Student Work
Related Classes
Wedding Photography