The Tour de Lightroom
Lesson 2 from: Editing and Organizing your Photography in LightroomJared Platt
The Tour de Lightroom
Lesson 2 from: Editing and Organizing your Photography in LightroomJared Platt
Lesson Info
2. The Tour de Lightroom
Lessons
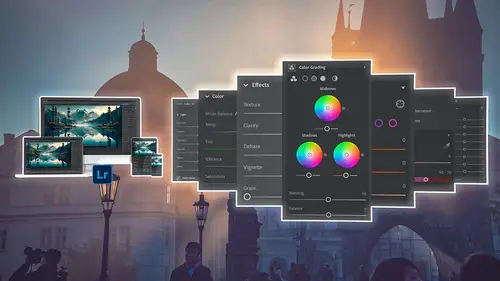
The Lightroom Ecosystem
08:33 2The Tour de Lightroom
07:49 3Image Organization
05:20 4Finding Your Images in Lightroom
14:28 5Lightroom's Right Hand Panel
13:43 6Lightroom's Lower Panel
13:03 7Setting Lightroom Preferences
18:57 8Adding Images in Lightroom
06:46Adding Metadata to Your Images
06:32 10Lightroom Cloud vs Local File Management
11:35 11Selecting Images in Lightroom
16:49 12Adjusting Images: The Light Panel
23:09 13Adjusting Images: The Color Panel
17:30 14Adjusting Images: The Effects Panel
12:47 15Adjusting Images: The Details Panel
09:50 16Adjusting Images: The Optics Panel
10:16 17Adjusting Images: The Lens Blur Panel
15:16 18Adjusting Images: The Point Curve Tool
09:17 19Image Enhance: Noise Reduction
16:31 20Image Enhance: Details and Super Resolution
05:05 21Image Merge: HDR
11:50 22Local Adjustments
10:47 23The Crop Tool
09:51 24Image Merge: Panorama + Full Image Edit
16:25 25Masking and Retouching
11:54 26Range Masks
07:46 27Creating Adaptive Presets with AI Masks
10:24 28Importing Presets
04:34 29Retouching Brush: Clone, Heal, Remove
09:53 30Sharing Your Images
13:05 31Customizing Sharing Web Pages
08:44 32Conclusion
01:25Lesson Info
The Tour de Lightroom
1 So let's begin with a tour of Lightroom. 2 Now, inside of Lightroom, 3 everything is always present all the time. 4 So if you're used to Lightroom Classic 5 and you would go from module to module 6 to do different things, 7 it's a very different feel here inside of Lightroom itself. 8 So the new version of Lightroom, on the left hand side, 9 let's go through that first, 10 you'll see that you have an option for cloud. 11 So up here in the top right hand corner 12 there is a cloud option. 13 That is what Lightroom wants to do. 14 When I put an image into Lightroom, 15 it wants to put it on the cloud, 16 it's gonna take the full image 17 and it's going to take all of the, 18 so if it's a 30 megapixel file, 19 it's gonna take the entire 30 megapixels 20 and throw it up in the cloud. 21 You can tell it, and I'll show you how to do this later, 22 but you can tell it to keep that image on the computer 23 as well, or you can allow it just to put it in the cloud 24 and it will disappear fr...
om your computer 25 and just be referenced. 26 So that way if you happen to have a small laptop 27 with not a lot of storage space on it, 28 you can put your images in. 29 They will go to the cloud and they will stay in the cloud, 30 but only a reference. 31 A small smart preview will stay on your computer 32 saving you space. 33 But you can also set your computer, 34 especially if you have a big desktop that has lots of space, 35 you can set your computer to store it on the cloud 36 and on the computer at the same time. 37 So that's really up to you and your preferences, 38 and we'll talk about those preferences in a little bit. 39 But you can do cloud-based storage of your images, 40 or you can browse your local hard drives 41 and you can look at photos by using this local option, 42 and we'll talk about that in a little bit as well. 43 So there's cloud 44 and there's local cloud is mostly up in the cloud. 45 You can also save it on your computer at the same time. 46 So it can be in both places or it can just be in the cloud. 47 Local is just a file browser, 48 so it browses your images the same way 49 if you know Lightroom or if you know, 50 so it's kind of the same as if you were to use Bridge 51 or Photoshop to just browse through photos 52 and open them up and work on them. 53 You can do that here inside of Lightroom now. 54 Okay, now there's an add photos button. 55 If I want to add photos to Lightroom, 56 I'm going to click add photos, 57 and then I will choose the location where they are 58 and we'll bring them in 59 and I'll show you how to import in a minute. 60 But right now we're just going through the tour. 61 Below that you'll see Learn and Community 62 that is just places for you to learn how to use Lightroom 63 and also to see inspiring images. 64 And then after that you have all photos, 65 and this is where it starts to break down 66 all of your images inside of Lightroom. 67 Again, like I said, Lightroom stores everything in folders 68 based on the date that they were taken. 69 So as you import images into Lightroom, 70 it's actually going to store them in folders 71 that are by date. 72 That's all it does to organize them on a file structure. 73 So you can organize your images and look at them 74 based on the dates they were taken. 75 You can look at every photo all at once 76 by clicking on all photos. 77 And so now every photo is gonna show up here 78 inside of the grid. 79 You can look at those images that were recently added. 80 You can drop any of these down 81 by clicking on this little Chevron. 82 And so you can see the recently added images in January, 83 January 9th, January 7th, December 24th. 84 You can look at recent edited images. 85 You can look at things by date. 86 So if we bring this down, 87 I can actually look for a very specific date. 88 So 2021 January, oh, there's something, 89 Saturday, January 20 or January 2nd, 90 I can look at the 103 images that were taken on that date. 91 And this is not the date they were imported. 92 This is the date that they were actually shot. 93 Okay, so I can look at things by the date they were taken. 94 I can actually look at things based on people. 95 So if I click on people, 96 I'm going to get a list of all of the people 97 that are available in all of my photographs. 98 And so that's a lot of people, but you can name them. 99 And so if I click on someone that hasn't been named 100 like this one, this is my nephew Mitchell. 101 And so I can name this person by just simply, 102 first of all, I'm gonna confirm 103 that this is the person I want 104 and then I'm gonna go up to their name, 105 which is up at the very top left hand side, 106 and I'm going to call him Mitchell Platt. 107 And then I'm gonna hit Enter. 108 And now he's named. 109 So then when I go back to the people, 110 he actually has a name now. 111 Okay, so people is another way for us to review our images. 112 Now there's another way 113 and that's through what's called connections. 114 Connections are groups of photos 115 that we have on our computer, 116 so we have them in our system inside of Lightroom, 117 but we have shared them with some kind of a service. 118 You may not have any connections in here right now, 119 but if you hit this plus button, 120 it will open up an option for all of the different types 121 of connections that are available to you. 122 So Adobe Portfolio is a way that you can share it 123 with a website that you can create on the Adobe ecosystem. 124 So you can actually create a free website 125 because you're already paying for the service of being 126 connected to Adobe's ecosystem. 127 There is a web creator, kind of like Wix, 128 or something like that, 129 where you can create your own website. 130 You can share them with Blurb to make books. 131 You can share them with SmugMug to share them with clients 132 or make websites on SmugMug. 133 You can share 'em with White House Custom Color 134 to make prints. 135 And there are other options like Printique and Media Graph, 136 these are additional options 137 that you can then share your images to these services 138 that allow you to then share them with other people 139 or print them, et cetera, et cetera. 140 So these are just web connections. 141 They are services that people have created 142 and they allow you to then connect 143 right from within Lightroom to those services 144 and then you can share them out to the world. 145 So, and then you can of course look at deleted images here 146 by clicking on the deleted option. 147 You can see that I have 51 that I've recently deleted, 148 and you can un-delete those. 149 So any image that you delete from Lightroom 150 will get deleted everywhere. 151 So it'll delete it from the web, 152 it'll delete it from your mobile device, 153 so it just removes it from the entire ecosystem. 154 If you make a mistake and you don't want to 155 delete those images, 156 you have 30 days to go and un-delete them. 157 So they're still in the cloud for 30 days, 158 even if you've deleted them. 159 And then you can un-delete them. 160 That's why they're there. 161 Those deleted images, that option for deleted images.
Class Materials
Bonus Materials
Ratings and Reviews
Ross Copperman
Jared really does have a fantastic style. His pace and articulation are perfect for following along and the detailed editing of the videos, themselves, makes it really easy to absorb. Well worth the clams, for sure.
Tim Byrne
Great job, Jared! You have delivered a master class for anyone beginning a journey into Lightroom, presented in absolutely clear and relaxed style. And for those with more experience with the program, every old dog can learn a few more new tricks. Teaching software is tough. Jared does it by breaking down each function and including not only the what, but the how and why as well. And each step is amplified by crystal clear photos which are manipulated with the function at hand. Bring a pad of paper, some snacks, and a cup (or two) of coffee. He is relentless in his presentation. You might watch this course as a freebie, but buy it to be able to refer to it for specific steps and processes. I've been using Adobe products since the mid 1990s and this is the best instructional presentation I've taken. ABSOLUTE WINNER1 Thanks, Jared
Caroline Faure
Really good class!! A lot of classes I've taken thus far have gone too fast or had an instructor that just tells you everything without you being able to actually follow along with your hands on the software. I learn best by doing... not just listening. With this class, it was easy for me to split the screen and do everything the instructor did - and really learn in the process. I will definitely watch for more classes from Jared Platt!