Lesson Info
21. Image Merge: HDR
Lessons
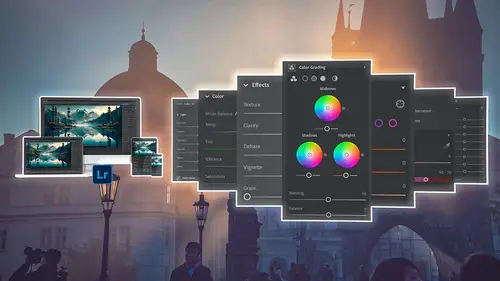
The Lightroom Ecosystem
08:33 2The Tour de Lightroom
07:49 3Image Organization
05:20 4Finding Your Images in Lightroom
14:28 5Lightroom's Right Hand Panel
13:43 6Lightroom's Lower Panel
13:03 7Setting Lightroom Preferences
18:57 8Adding Images in Lightroom
06:46Adding Metadata to Your Images
06:32 10Lightroom Cloud vs Local File Management
11:35 11Selecting Images in Lightroom
16:49 12Adjusting Images: The Light Panel
23:09 13Adjusting Images: The Color Panel
17:30 14Adjusting Images: The Effects Panel
12:47 15Adjusting Images: The Details Panel
09:50 16Adjusting Images: The Optics Panel
10:16 17Adjusting Images: The Lens Blur Panel
15:16 18Adjusting Images: The Point Curve Tool
09:17 19Image Enhance: Noise Reduction
16:31 20Image Enhance: Details and Super Resolution
05:05 21Image Merge: HDR
11:50 22Local Adjustments
10:47 23The Crop Tool
09:51 24Image Merge: Panorama + Full Image Edit
16:25 25Masking and Retouching
11:54 26Range Masks
07:46 27Creating Adaptive Presets with AI Masks
10:24 28Importing Presets
04:34 29Retouching Brush: Clone, Heal, Remove
09:53 30Sharing Your Images
13:05 31Customizing Sharing Web Pages
08:44 32Conclusion
01:25Lesson Info
Image Merge: HDR
1 In addition to the enhanced feature, 2 which is found by right clicking an image 3 and using the enhanced feature in the dropdown menu, 4 there's also a couple other tools 5 that are available only via right click. 6 And so those tools include things like HDR 7 and Panoramic. 8 So I'm gonna do an HDR set of images here. 9 This is a set of images that I shot in Venice. 10 So you can see that I did one really bright exposure 11 and one really dark exposure, 12 and I'm going to merge the two. 13 There is no way that I could get 14 the shadows on the buildings 15 and the highlights up in the clouds 16 all in one shot. 17 It was just a little bit too drastic. 18 And so I got two quick shots, 19 and I basically just had my camera take two 20 quick successive shots at different exposures, 21 bam, bam, as quickly as possible, 22 because I have movement down here. 23 So you can see that I've got this guy that's gondolier, 24 and I've got this boat that's moving over here as well. 25 And so ...
I wanna just quickly shoot two images 26 that are exposed differently. 27 So I'm going to go to the grid, highlight both of 'em. 28 So I just click on one and then shift click to the other. 29 Right click it. 30 And then I'm gonna go down to the photo merge option 31 and click on HDR Merge. 32 There you go, by clicking on the HDR Merge, 33 it shows me a preview of what it's gonna look like. 34 See how I have the clouds up here? 35 I've got perfect shadows down here. 36 And amazingly, it does a pretty good job 37 at dealing with the moving people and boats down here. 38 So the things that are moving, it kind of calculates 39 and finds the appropriate version of each of those. 40 Now, there are some options over here 41 in the top right hand corner that you need to know about. 42 Of course, when I click merge, it's gonna merge them up. 43 But right now what I'm concerned with is auto align, 44 which yes, we wanna do that. 45 So it's gonna automatically align the two. 46 I don't necessarily need to apply the auto settings, 47 but you can, 48 'cause it's gonna make a DNG, a digital negative. 49 So you can readjust it, you can reset it, 50 do whatever you want with it. 51 So if you leave that apply auto settings on, 52 it's not like it's something you can't back out of. 53 It does a pretty poor job at adjusting, 54 'cause this is way too bright 55 for the photo I want out of it. 56 If I click on that, see, that's normal. 57 And then it tries to make everything perfect, 58 and it usually does way too much. 59 And it starts to look a little HDR. 60 It's not quite. 61 Lightroom is much better at HDR than most programs 62 because it tries to keep it normal. 63 But apply auto settings is fine. 64 You can leave it on or you can turn it off. 65 Either way is fine because it's making a digital negative, 66 which is raw, 67 and you can adjust it to your heart's content. 68 But we'll leave it on for now. 69 And then there's the deghosting option up here. 70 So right now we're at none. 71 We're not deghosting anything. 72 But let me show you what happens when I turn it on. 73 So I'm gonna take it all the way up to high, 74 and I'm gonna tell it to show the deghost overlay. 75 Do you see what happened? 76 It found all of the areas that we're moving, 77 and it shows them to you via this red circle 78 so that it's saying, 79 look, this is the stuff that was moving. 80 So I have to do some computations 81 in order to replace stuff 82 so that I only have one of the things that are moving, 83 like the two boats. 84 I don't need to go high on that. 85 I think I could just go kind of a minimal amount on it, 86 because now what we're seeing is the red is right here 87 at the tail end of this boat. 88 But I know that he's moving a little bit 89 over here on the gondola, 90 and I can see that it's doing a little bit 91 of stuff right on his leg, 92 but I think maybe I need to go up one click more. 93 There, that's good. 94 So that's showing you where it's gonna work. 95 And that's about right. 96 That seems like all the moving parts 97 that I want it to deghost and make sure that I don't have 98 two of those items when I finish up 99 having this merged HDR image. 100 So I'm gonna click on merge, 101 and it's gonna create a stack out of all of this. 102 And the stack is going to have a DNG on the top 103 that is a merged HDR image. 104 So now we have three images 105 that are stacked on top of each other 106 instead of two for like, you know, 107 noise removal or something like that. 108 We have three. 109 And those three include my HDR image, which is here, 110 and then my light image. 111 Let me open these up. 112 So I've got my HDR, I've got my light image, 113 and my dark image. 114 So now we can go and adjust the images. 115 And I just wanna show you the difference 116 between a non-HDR image. 117 The exposure goes down. 118 The exposure goes down five and up five. 119 That's it. 120 So you've got 10 stops of latitude here on the exposure. 121 But if I go to this HDR image and grab the exposure, 122 I can go down 10 and up 10. 123 So I've got twice. 124 Well, I've got, instead of 10 stops of latitude, 125 I've got 20 stops of latitude. 126 That's a significant change. 127 And so in this case, what I'm gonna do 128 is I'm going to bring the exposure down. 129 So you can see that it did an auto exposure on this, 130 but I'm gonna bring the exposure down just a bit, 131 and then the shadows up a little bit more. 132 And then I'm gonna play around with the highlights. 133 And I want this to look pretty good, 134 but keep in mind that it's a raw image. 135 And so I don't need it to all look great 136 just from the adjustments that I'm making globally. 137 I also have the ability to do other things to this image 138 outside of global adjustments. 139 And this is where we're gonna start getting into some other 140 interesting tools. 141 So I'm gonna play around with this 142 and get it to be nice and rich the way I want it. 143 Make sure that just globally, I've got the right settings 144 for general contrast. 145 Make it look realistic. 146 I don't need any extra contrast on it. 147 Then I'm gonna go into the effects panel. 148 So this is where we're starting to use all these tools 149 that we're talking about together. 150 I'm gonna go to the effects panel. 151 I'm gonna do a little clarity. 152 And by the way, I like the Adobe color that I already had. 153 I'm not gonna change it, 154 but I mean, you could go in and do maybe like landscape, 155 so it's a little bit more vibrant, but eh. 156 I'm pretty happy with the Adobe color that I'm getting. 157 So I'm fine there. 158 Play around with the effects and get some clarity in there, 159 maybe even some texture in those buildings. 160 And then I'm gonna go into the detail area. 161 I'm just gonna zoom in as far as I can 162 and make sure that my detail looks nice, 163 that the sharpening looks good. 164 I'm gonna take the radius up a bit 165 so that those windows look nice and crisp. 166 That looks really good. 167 This is a, let's see, what's the ISO on this? 168 This is 100 ISO. 169 So it's not really in need of some noise reduction. 170 So I'm gonna not worry about the noise reduction area. 171 Optics wise, I might end up with a little bit of, 172 yeah, you can start to see it right up here. 173 If I zoom in, you can see 174 that there's some fringing happening right up here. 175 There's magenta there; there's green there. 176 So I'm gonna turn on the remove chromatic aberrations. 177 Took care of it perfectly. 178 And then I'm gonna, I don't want to do any lens blur 179 because this is a very sharp image all the way around. 180 I'm gonna zoom in and take a look at the people. 181 Look at that. 182 So it merged two photographs of a moving boat 183 and a gondolier who is, oh, look what it did though. 184 See how it kind of messed up on that. 185 So that's the one thing that it messed up on, 186 'cause he was paddling, 187 and it kind of did a weird thing there. 188 That's something that I can't fix inside of Lightroom. 189 I'll have to fix that later inside of Photoshop, 190 but it shouldn't be too hard to fix. 191 All I have to do is just copy this here 192 and move it over to there. 193 Shouldn't be too hard to fix. 194 So that's an easy Photoshop thing. 195 I'm gonna go here, take a look at this. 196 That looks really quite good. 197 So that boat is fine. 198 And now I'm just gonna go into the color option. 199 And inside of color, 200 I can play with a lot of different things in color. 201 But the main thing that I want to play with 202 is obviously the temperature and the tint. 203 So I'm gonna play around with what the temperature should be 204 and the tint. 205 And I'm really looking at the clouds up here. 206 Make sure that that's the right white, 207 and then make sure that this building looks about right. 208 I'm gonna take the vibrance up a little bit more. 209 There, that looks pretty good. 210 Okay, the last thing that I think I'm gonna do 211 to this image is in the light area, 212 I'm gonna go to the curves, 213 and I'm just gonna make a general curve 214 that gives it just a little bit more of a pop. 215 So see, I'm looking now at the buildings themselves. 216 The highlights are staying where they are 217 because they're kind of locked up at the top. 218 So I'm just bringing up the kind of the white area, 219 and then I'm bringing the shadows down just a little bit 220 so that there's just a slight deepening of the shadow. 221 Not too much. 222 And so I'm just trying to get those midtones 223 up just slightly. 224 I don't wanna go too far. 225 The curve, you never want to go too far with the curve. 226 Just slight curves are very useful 227 and very, very good at changing your images. 228 Okay, so I think that pops really well. 229 But what I need to do now is I need to actually 230 brighten up all of these buildings on the shadow side. 231 So the highlight side over here is doing just fine, 232 but the shadow side is quite dark. 233 But it is an HDR image, which is great, 234 because I have total control over the pixels, 235 and I've got extra latitude in all these pixels. 236 So I don't have to do it with global adjustments. 237 I can do it with local adjustments. 238 And that's where we'll start working on some other tools 239 that we haven't talked about yet, 240 and then we're gonna talk about 'em now.
Class Materials
Bonus Materials
Ratings and Reviews
Ross Copperman
Jared really does have a fantastic style. His pace and articulation are perfect for following along and the detailed editing of the videos, themselves, makes it really easy to absorb. Well worth the clams, for sure.
Tim Byrne
Great job, Jared! You have delivered a master class for anyone beginning a journey into Lightroom, presented in absolutely clear and relaxed style. And for those with more experience with the program, every old dog can learn a few more new tricks. Teaching software is tough. Jared does it by breaking down each function and including not only the what, but the how and why as well. And each step is amplified by crystal clear photos which are manipulated with the function at hand. Bring a pad of paper, some snacks, and a cup (or two) of coffee. He is relentless in his presentation. You might watch this course as a freebie, but buy it to be able to refer to it for specific steps and processes. I've been using Adobe products since the mid 1990s and this is the best instructional presentation I've taken. ABSOLUTE WINNER1 Thanks, Jared
Caroline Faure
Really good class!! A lot of classes I've taken thus far have gone too fast or had an instructor that just tells you everything without you being able to actually follow along with your hands on the software. I learn best by doing... not just listening. With this class, it was easy for me to split the screen and do everything the instructor did - and really learn in the process. I will definitely watch for more classes from Jared Platt!