Lesson Info
22. Local Adjustments
Lessons
The Lightroom Ecosystem
08:33 2The Tour de Lightroom
07:49 3Image Organization
05:20 4Finding Your Images in Lightroom
14:28 5Lightroom's Right Hand Panel
13:43 6Lightroom's Lower Panel
13:03 7Setting Lightroom Preferences
18:57 8Adding Images in Lightroom
06:46Adding Metadata to Your Images
06:32 10Lightroom Cloud vs Local File Management
11:35 11Selecting Images in Lightroom
16:49 12Adjusting Images: The Light Panel
23:09 13Adjusting Images: The Color Panel
17:30 14Adjusting Images: The Effects Panel
12:47 15Adjusting Images: The Details Panel
09:50 16Adjusting Images: The Optics Panel
10:16 17Adjusting Images: The Lens Blur Panel
15:16 18Adjusting Images: The Point Curve Tool
09:17 19Image Enhance: Noise Reduction
16:31 20Image Enhance: Details and Super Resolution
05:05 21Image Merge: HDR
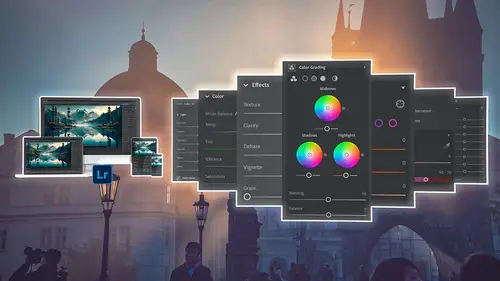
11:50 22Local Adjustments
10:47 23The Crop Tool
09:51 24Image Merge: Panorama + Full Image Edit
16:25 25Masking and Retouching
11:54 26Range Masks
07:46 27Creating Adaptive Presets with AI Masks
10:24 28Importing Presets
04:34 29Retouching Brush: Clone, Heal, Remove
09:53 30Sharing Your Images
13:05 31Customizing Sharing Web Pages
08:44 32Conclusion
01:25Lesson Info
Local Adjustments
1 So we have our HDR image, 2 we've done the global adjustments, 3 it's generally the way we like it, 4 but we've stopped short of trying to make major compromises. 5 We don't want to compromise on global adjustments 6 when we have the option of doing local adjustments 7 to that same really high bit-depth image. 8 We've got all of this latitude to play with. 9 We might as well do it locally 10 specific to the areas that we want to work on. 11 So what I'm going to do now, 12 is I'm going to go into the masking options, 13 which are down here a little bit further down the road. 14 So this is our adjustment area. 15 Here's crop. Here's our retouching area. 16 And then here's the masking area. 17 So I'm going to click on the mask 18 and it's going to give me 19 a bunch of different options of masks. 20 I can choose the subject: sky, background, specific objects. 21 I can brush things in. 22 I can use a linear gradient, a radial gradient, 23 or even select a specific range, either color o...
r luminance. 24 And if there were people in it, 25 I could also select the people. 26 And we'll deal with those in a bit. 27 So what I want to do here is I want to select the sky. 28 That's the first thing I'm going to do is select sky, 29 because that's the easiest thing to select. 30 So I'm going to click on sky, 31 it's going to find the sky, did it already. 32 And now I'm going to go to the triple dot button, 33 which is right up here in the top right-hand side 34 of the mask area. 35 Click on that triple dot 36 and then I'm going to invert that sky selection. 37 So now it is just the buildings. 38 Now, I don't want to adjust this building over here. 39 And so I can subtract anything from this mask that I want. 40 So I can subtract the water, 41 I can subtract this building over here. 42 So I'm going to click on subtract, 43 and it's going to give me all the same options 44 that I had before, 45 but this time I'm going to choose an object. 46 And I'm going to go over to this building here 47 and I'm just going to tell it that I don't want this object 48 here in my selection. 49 So I don't want any of this building here. 50 And you don't have to be super precise. 51 I'm just saying don't, there, see that? 52 It just cut it out 'cause it knew 53 I was talking about this particular object. 54 Now I can also come in and say, 55 and I don't want, actually, I could probably just say, 56 subtract and then use a brush, 57 and then just come in and say, I don't want to use, 58 and by the way, I need to change the amount of this brush 59 so that the... 60 So I'm going to go into the brush area here, 61 right below the histogram, 62 click on that little dropdown menu, 63 and I'm going to choose the flow at 100% 64 so that I can just paint out. 65 Let me grab my pen tool. 66 And I'm just going to remove, 67 got to change the size of this brush. 68 There. 69 Okay, so now I have this selected by simply 70 selecting the sky and then inverting it 71 so that I was getting everything but the sky. 72 Then I just removed this specific building 73 and then brushed out this, the water. 74 Now this area here is still a bit selected, 75 so I can decrease the size of this brush 76 and come in and just remove, 77 and by the way, you can click on Automask, 78 which is right over here, 79 and once you have Automask on, 80 then when you go in and try and remove the brush, 81 when you try and brush from the sky, 82 it's going to know the difference 83 between sky and those rooftops. 84 So I'm able to clean up the sky just a little bit 85 and it knows the difference between sky and roof. 86 There. 87 Now, what I can do with this is I've got my brush, 88 I've created my mask with all of these components. 89 So that's the total mask up here. Let me zoom into this. 90 This is the total mask here. 91 This is the brush part of the mask, which is a subtraction. 92 This is the building part of the mask, 93 which is over on the left 94 but you just see this edge right here. 95 So you can see that's the object that I selected. 96 And then there's the sky, and this is the inverted sky. 97 So all three of these make up this one mask. 98 So I'm going to go into the settings now, 99 I'm on this mask, 100 so this is what I've done and I can come in 101 and I can adjust any of these things 102 like color effects, detail, and then I can readjust 103 how much those things are affected here. 104 And I can choose a preset as well. 105 Okay. 106 So I'm going to go to light 107 and I'm going to bring up the exposure just a little bit. 108 You see that? 109 So now I'm using the full capabilities of my HDR image, 110 but I'm working on individual areas of the photograph 111 rather than just trying to do it globally, 112 because that's kind of a fool's errand in order to try and, 113 and just because you have an HDR image doesn't mean that 114 all of it's going to just work out magically, globally. 115 And so I'm going to adjust those images. Nice. 116 There we go. I like that. 117 I'm going to bring the black point down a little bit. 118 Again, shadows up just a little bit. 119 And I definitely want the white to pop. 120 So I'm just trying 121 to bring up the light areas on those buildings 122 so that they are getting a nice pop. 123 That looks really quite nice. 124 Then I'm going to go into the color area, and this is where 125 I can actually take the saturation up just a little bit 126 and kind of make those colors pop too. 127 So just a little bit of saturation there works really well. 128 And then the other thing is 129 that I can go in with a point curve. 130 Remember that point curve 131 that we have the ability to target a specific color 132 and then do something with it. 133 I can do that here too. 134 I could choose different points here 135 and say, "I want this color to be a little bit brighter," 136 or "I want this color" 137 and I can choose a lot of different colors. 138 Like I can choose this yellow, 139 and then I can choose this color, 140 and I can choose this color, this green, 141 and I can choose this kind of tan color back here. 142 And I have all of these different colors 143 that I can play with and I can intensify 144 just because I chose them. 145 So the green, 146 that'd be nice if I added a little bit of saturation 147 to the green so it pops. 148 And then I want that brown color 149 to just be a little bit more luminescent. 150 So just, just a little bit. See that? 151 I'm just increasing the brightness 152 of all of that brownish color. 153 The yellow, I want to actually bring 154 the luminance on the yellow down just slightly 155 so it's a richer color. 156 And then those kind of mid tone 157 or those kind of tan-gray color, 158 I want to brighten it up. 159 So I'm going to go into the luminance and just... 160 See that? Just brightening up all of those colors. 161 And it's even brightening up this one over here 162 on the right-hand side, right over here. 163 That's getting brighter as well as those down there 164 and all of the places in between. 165 Okay, so now that I've done that, 166 I'm going to go back into my, 167 so I'm done with this mask. 168 I like what I've done to the buildings in general. 169 I'm going to click on that plus button again up here 170 and create a new mask. 171 This time I'm going to collect the sky again, 172 but now I'm just going to use the sky 173 and I'm going to go into the sky. 174 So I've got my mask. I'm not going to adjust the mask any. 175 I'm not going to change anything to it. 176 And I'm going to go into the temperature 177 and I'm going to get it just to be right. 178 And then I'm going to go into the point color 179 and click on that a little dropper. 180 And I'm going to go choose blue. There. 181 And now I'm going to take blue 182 and I'm going to bring the luminance down. 183 See that? 184 All it took was just a little bit of deepness in that blue 185 to make that entire sky look great. 186 I can also go down a little bit further into the effects 187 and I can increase the clarity just a little bit 188 so that the clouds get a little bit more definition to them. 189 And that's it. That, I like that. 190 That image looks quite nice. 191 And it's because it was HDR 192 that I was able to go in and paint. 193 Now I could have taken a photo that was slightly dark 194 so that the sky was in, and I could have gone in 195 and painted and done exactly the same thing on one image. 196 But because it was HDR, two images, 197 I was able to get a far superior image 198 where I'm not risking getting noise in the shadows 199 because I'm brightening them up. 200 So HDR is a great tool. 201 Just use the right-click merge option and create an HDR. 202 And then once you're in the HDR, 203 don't forget that masking is the best way 204 to work on that image and kind of bring out those areas 205 that are a little too dark or a little too light. 206 Don't try and do it all globally. 207 That's why we have masks.
Class Materials
Bonus Materials
Ratings and Reviews
Ross Copperman
Jared really does have a fantastic style. His pace and articulation are perfect for following along and the detailed editing of the videos, themselves, makes it really easy to absorb. Well worth the clams, for sure.
Tim Byrne
Great job, Jared! You have delivered a master class for anyone beginning a journey into Lightroom, presented in absolutely clear and relaxed style. And for those with more experience with the program, every old dog can learn a few more new tricks. Teaching software is tough. Jared does it by breaking down each function and including not only the what, but the how and why as well. And each step is amplified by crystal clear photos which are manipulated with the function at hand. Bring a pad of paper, some snacks, and a cup (or two) of coffee. He is relentless in his presentation. You might watch this course as a freebie, but buy it to be able to refer to it for specific steps and processes. I've been using Adobe products since the mid 1990s and this is the best instructional presentation I've taken. ABSOLUTE WINNER1 Thanks, Jared
Caroline Faure
Really good class!! A lot of classes I've taken thus far have gone too fast or had an instructor that just tells you everything without you being able to actually follow along with your hands on the software. I learn best by doing... not just listening. With this class, it was easy for me to split the screen and do everything the instructor did - and really learn in the process. I will definitely watch for more classes from Jared Platt!