Lesson Info
24. Transitions Part 1
Lessons
Day 1
1Introduction
18:02 2Key Terms
27:06 3System Configuration and RAID Storage
19:22 4Q&A with Creating an Efficient Workflow
19:36 5Interface and Media Management
31:02 6Importing Media Part 1
30:40 7Importing Media Part 2
11:58Ratings and Keywords
32:21 9Reviewing Clips for Edit
25:13 10Importing Clips
19:26 11Editing an Interview Demo
33:20 12Replace Edit and Timeline Index
32:50 13Compound Clips and Auditions
18:27Day 2
14Editing Review
13:34 15Trimming Part 1
28:43 16Trimming Part 2
39:03 17How We Hear
21:51 18Audio Key Terms with Q&A
12:14 19Audio Basics, Meters, and Inspector
31:01 20Audio Q&A
08:55 21Dual System Sound and Audio Analysis
28:58 22Multicam Editing Part 1
27:08 23Multicam Editing Part 2
15:02 24Transitions Part 1
23:27 25Transitions Part 2
24:06 26Formatting and Animating Titles
30:18Day 3
27Additional Effects
12:36 28Editing and Trimming Review
11:58 29Changing Speed of a Clip
31:31 30Inspector Effects
36:35 31The Effects Browsers and Generators
19:37 32Blend Modes
17:10 33Effects Q&A
13:58 34Simple Effects
16:52 35Intro to Color Correction
18:20 36Video Scopes
19:25 37Color Correcting for Video
20:28 38Color Correcting Skintone
23:11 39Color Correction Q&A
08:54 40Audio Effects Part 1
26:20 41Audio Effects Part 2
23:08 42Exporting and Sharing
21:28Lesson Info
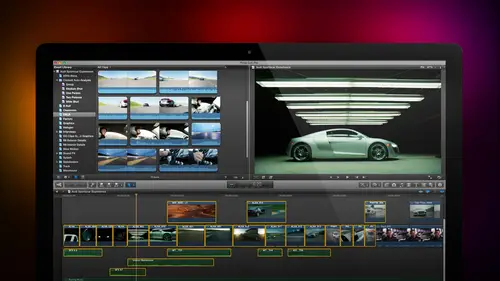
Transitions Part 1
I was wondering a fun cut seven had pretty good multi cam functions. What? What are the benefits to ten? What? What? They're big jump there there's several there's several big benefits that ten provides that seven does not one of those is creating proxy files automatically, so if I'm working with multi cams that are more than eight cameras, switching to proxy files makes life a lot easier. I was doing a test of a really high speed rate of about six, six months ago, and I could get pro rest for two to h q, which is a really fat format I could get ten cameras rolling of progress forty two h q I switched to proxy files and I lost count twenty four I mean, the ability to handle lots and lots and lots of counters and proxy is good, but one of the really cool things there's something I didn't have time to talk about, so I'm glad you asked the question here if I could hear the cow the computer for a second, I'm doing something which we do all the time we're doing a stills montage way this's h...
ow we build a stills montage we put in still number one we put in still number two in a minute, you're gonna learn how to do dissolves and we bounced back and forth, but wouldn't it be cool if we could do this with a multi cam clip instead, so I'm going to select my my still images I'm working with five of them here it is there's the fifth one, but you could work with fifty it makes no difference select them all go up to file new multi cam clip and it says, how you going to do this? I'm going to just call this stills mix, and we're going to store it there, and we're gonna have the angles be synchronized automatically and click okay. Well, final cuts going to get really confused and laugh at me because it says, larry, I have no idea how to synchronize thes stupid clips because you just gave him to me, and so each clip is on its own track inside the multi cam clip. So what we're going to do is I want to take this clip, I'm gonna trim it inside the multi cam clip, I'm gonna make it whatever length I want, I'm arbitrarily do stuff with it and notice that I just drag one still image into the same track than another still images in. So I'm gonna grab this clip I'm going to just trim it back, drag it up the track and bounce it between grab this clip, drag it across and bounce it up into a track here and then I'm going to delete this track by clicking the downward pointing arrow and say delete angle because there's no clip in it going to delete this angle because there's no clip in it and that's just trim this over here, grab that drag it put it up to the top track and now I'm going to trim the clips inside the multi cam clip until they look the way that I want himto look, I could spend a lot of time worrying about the details, but in this case I don't have to I could if I wanted to add the audio clip into this tracks let's go find our audio clip there it is right there click on it, drag it down into track number three and make sure that everything suits for time shift z and we'll just keep this really short the music is going to just sort of fall off the end of the clip will grab the fade dot here fe dot faded out shift z and now look what I've done I have built a multi count clip with the same checkerboard pattern that were used to inside final cut in a regular regular edit click the gold back button and this time highlight everything deleted go to our multi cam mix it's here somewhere you who montage well let's try this one by that double click no that's, not it where'd I put it stills next there it is so go back and at this down to the timeline and shifty and let's just go to the angle viewer window viewer show angles and as I play this back, we're gonna take the audio tapes always set the play had at the beginning of a multi cam clip when you're switching angle set this to be audio and now when we play it back, I should be able to hear the computer. Okay, I made this really quick, so it's fastest I see the image I'm gonna click on it no, we're switching audio member you've gotta have if you want to keep the audio the same, make sure that you don't have the audio way form selected up their space done and that quickly I can now edit that in the feeling if I was editing with the beat of the music, I did it with the beat of the music but notice that there's no flashes of black now here's the cool part command a to select all the clips command t toe add a transition and that quickly I've now had between my lips that is not cool we couldn't do that we couldn't have multiple clips in the same track inside final cut but we can do it here we can work with stills in the way that we couldn't work was stills there and we can integrate final cuts audio either inside the multi cam clip or as a standalone clip I could just drop the audio down and what's also interesting is if I wanted to let's go back to this stills mix again let's say that I have two clips touching as I do here okay I'm going to get rid of that clip I select this type command tea which adds a transition in here I can add transitions inside the multi cam clip so when I now play this back watch this stills mix headed it downplay it watch the transition occur see how it dissolved that dissolve is not in the timeline that dissolves built into the multi cam clip all this stuff makes multi cam much improved in final cut ten than it ever was final cut seven and in seven it was amazing so what I want to do now we're going to write mouse click on the library closed the library and we're goingto open up knew what am I going to do one open up a new library we'll call this transition's oh really all right well then we'll open the file called transitions I'm easy I can work either way other and locate t do we have any transitions right there not trimming with done dreaming I don't want trimming I was so distracted by the power of that question on what makes multi cam clips different that I did not properly configure my computer okay this is the really good examples long as we're here let's show this notice here that I've got thes exclamation points this indicates that there's missing media inside our project let's close the doctor surf and this is what missing media looks like we get the missing file window will turn off a viewer display heidi angles this is typical when I've moved a file from one hard disk another renamed the folder moved a file from one folder to another in this case as I was preparing for this session I was copying files from one hard disk to another and I didn't change the links so I command a to select all of my clips go up to the file menu go down to re link files and it says these other files that are missing so let's go find this audio file here let's just select him all noticed that under missing they're all missing on let's go find the file click on locate selected and we've got a siri's of air show footage right here let's just double click that and let's go find the clip that ends with nine thirty two forty four nineteen thirty two forty four klick choose and it now found that he's heir to audio files quick on selected I happen to know their audio files they be stored inside the audio files folder they start with ss for smart sound fifty eight four o six in hayes will click that it found them and then I click reeling files and it automatically links the files inside the browser rebuilds the thumbnails for the way for monitor and now let's take a look at uh what else do we have that link up? We've got some transitions. Ok command a select all the clips file re link files this is all from our glass blowing video that we took a look at when we were starting yesterday so let's look for something that has the letter glass in the glass blowing right there choose know you found it even better simple software and now it will automatically update both the browser and the time one okay let's just take a look at this this is silent so we can kill the computer for a bit and we've got glass blowing. I love that shot of him holding molten class in his bare hand but I've got a just two separate I've got one clip, two clips, three clips, four clips go down to the the tab down here it will set it all video no go back to sleep don't need you yet and we'll make sure that that set all video and we'll click this to turn it off if we want to apply a transition between clips we've already learned what the keyboard shortcut is his command tea for transition it automatically applies the default transition of a dissolve which is called a cross dissolve crossing between one shot and another the duration of the dissolved is based on the speed of the dissolve is based on its duration if I grabbed the edges and make the dissolve longer it takes longer for the transition to occur it lingers a bit more to make the dissolve occur faster grab the edges and drag them closer together and we have a faster dissolved if you notice across the top there's a couple of icons here let's zoom in so we can see this a little better. What this allows us to do is to trim under the transition because if you think about it this clip here actually continues under the transition until right here and this clip actually starts at the beginning of the transition getting brighter and brighter so you can see this one fading in while this clip is fading out, the left hand clip is getting narrower and narrower fading out the right hand clip is getting wider and wider fading in if I grabbed these thumbs up here I can trim the of the incoming clip without changing the duration of the transition I can trim the out of the outgoing clip without changing the duration of the transition, and if we watch this up here, notice it as I'm trimming, I see the changing in on the right because that's what I'm trimming when I'm rippling the inn or here, I'm changing the out off the outgoing clip or here I'm doing a roll trimm changing the timing of where the transition itself occurs between the two clips. This is a very, very useful technique, which allows me to apply the transition, adjust the duration of the transition, and then without removing the transition there by losing the time that I spent adding the transition, I can then true the clips underneath it. We can also adjust the time the duration of the transition by highlighting a typing control d for duration notice. It's a two second twelve frame transition. This is like way too long. I prefer twenty frames, so I just type in twenty frames and it now runs twenty frame transition uh, okay toe highlight to delete a transition, highlighted like you would any clip hit the delete key and it's gone toe apply a transition command t change the duration of a transition, grab a wing and dragon to delete a transition, highlighted hit the delete key and it's gone we've already seen when we were talking about audio trimming that the way that we do audio trends, audio transitions is that we have to overlap the two audio tracks there's no icon that we can apply to an audio effect that will apply audio transition there we have to overlap the clips would be nice to have a transition but doesn't exist yet now I can tell by looking at it he's saying larry dissolves your boring I'm not a boring editor I do high quality, high impact, high intensity, high movement kinds of work, says add dead to himself. I need a transition that does mohr then just dissolve from one shot to another, and I can appreciate the fact that ed likes living on the edge and soto solve that problem. We're going to discover a new part of the interface, which of these buttons over here we've already seen that this left hand side helps us with editing, which is the first part of working with final cut. This is the locator tells us how to display the audio meters where we are in terms of time, code and what's happening in the background this is the inspector the rest of these are browsers and effects, we're going to discover the re timing effect in just a minute, which is these two eye over here, but these air six browsers this allows us to see themes. We'll talk about that tomorrow. This allows us to see generators again tomorrow. This allows us to add titles in about fifteen minutes. This allows us to add transitions in about twenty seconds. This allows us to access music and sounds, including our itunes collection. This allows us to edit photos such a czar I photo collection. And this is where we spend the bulk of our time, which is the effects browser. We're going to look at every single one of these tomorrow, except for transitions, which is coming up and titles so let's, take a look at transitions. When you click the browser, it opens up a browser. Now there are a few transitions here, which are third party transitions, because I do some additional work writing and training on third party plug in that worked with final cut, which I won't have time to cover here. Your actual transition count will be different than my three hundred and ninety two items. I think if I remember correctly, there's one hundred eighty four, but there is a heck of a lot of transitions inside the final cut, and they are categorized on the left that's. What the left hand side is the's are categories of transitions, and then, on the right, are the specific transitions, for instance, here under dissolves we have a cross dissolve and a dip to color dipped a black or dipped a white. We can also see, for instance, another good one or stylized, which will talk more about stylized transitions and there's all kinds of groups on the left, you select the groups category and then once you're in the group category, you can see the individual transitions that apply to it on the right to apply a transition. We have one of two ways that we can do it. I'm going to do a gaussian blur transition between these first two clips you either grab the transition and drag it on top of the other point that you want notice how one image blurs out and the other image blurs in this is an example where having a longer transition will make that effect more pronounced or if the added point itself is highlighted you khun double click the transition and it is automatically applied toe whatever edit point is selected, sometimes transitions have the ability to modify them what are called on screen controls. For instance, here I'm going to grab zoom and pan drag it over just because I'm in the habit of dragging make it just a little bit longer, but drag it out and now I'm using the arrow keys to step through notice that we're zooming in panning over and zooming back again this is actually an effect that I like a lot because it sucks the eyes out of your head washes your eyes, put them back in your head there we go look at that all right, now, when I select the transition look at what's happened here in the viewer this is something we haven't seen before we have on screen controls. It says I'm going to start at the green dot I'm going to finish at the red dot so where do I want this zoom to start? I want to zoom to start right there on his thumb and I want the zoom to finish right here in the center of the orange globe. So by dragging the on screen control, I can precisely determine where I want that particular effect to appear now it's a subtle thing and it happens quickly but sometimes it's nice to be able to say I want to control where that effect starts and stops as opposed to some arbitrary point determined by the developer again to delete the transition highlighted hit the delete key there's multiple transitions that we can add another one that we can do is slide select the all category we have a slide, drag it on space bar play and it slides on from the left hand side but to change it we would go to the inspector command for your and noticed that when the slide transition is selected, aiken say, do I want it to slide in or do I wanted us to swap the two images again? Here we go it's like shuffling a deck of cards or I can say we can push one image pushes the other out or I can have it slide out I'm not going to show you all the different transitions that we have to work with, but the point is when you select the transition, go up to the inspector and this tab at the top changes to transition and it allows you to specify different settings and the settings very depending upon one transition to another. Now there is a special kind of transition, and I want to show that to you here notice that when I've selected a transition, a siri's of strange yellow dots appear across the top the yellow dots control still frames and these still frames appear as part of the background and the image. When we do a transition, I want to just use the arrow keys to step through. There can only be two moving pieces of video in a transition it's the shot that you're going from and coming too, so I'm going to go from the orange globe of glass and go to the burning fire and as I do this in high speed notice that there's only two the moving ical moving orange and the moving flames but in the background I have all these other images each of these is a still image based upon the poster frame yellow dot I want to select this poster frame and move it to there notice that shot inside number four is changing. I'll find something it's got lots of flames coming out of it. Then I'll find a good shot of his hand holding about there and then the fire burning. I don't see that so that's just strange positions here, there we go. I'm adjusting the flame so that I see mohr off of what I want to take a look at so these air poster frames that I can adjust by sliding the yellow dots to affect the background. Not all transitions allow me tohave poster frames, but something it has the word pan or has thes backgrounds with multiple images in it does in fact there they are. Those multiple images allows me to have the yellow dots, which allows me to control the still frames, the background images that show up now interesting thing about effects inside final cut every affect, every title, every transition, everything is actually emotion project motion is a separate piece of software, which is developed and sold by apples the mac app store and motion is the actual effects generator for everything inside final cut so if you're someone that likes enjoying creating their own effects, you can create a motion project and save it in such a fashion it becomes a template that we can use inside final cut pro ten this template can be used for titles that could be used for generating artificial video could be used for effects that can be used for type out see tile transitions is the fourth category titles, transitions, effects and generators are the four different projects that we can create inside motion if you're a graphic artist not that I know in a graphic artists in the room but want to experiment with the creation of effects one of the burgeoning third party markets it exists inside final cut is people that air creating motion projects which can be installed inside final cut and you create the project once you sell it to people around the world and you can have transitions and titles and templates which are available to everybody there's a huge third party market editors are insatiable for effects that gives their projects that different looking field and they don't all necessarily have the skills to work with motion. So if you have the skills to work in motion, you can develop a very profitable sideline in in selling effects both into companies like fx factory, which is a packager or other developers that package titles were just selling them on your own so, jim, in terms of looking out for you and your third career of motion graphic artist, creating motion graphics using motion makes the creation of effects inside final cut very, very straightforward and simple and very cool. You know, I'm just looking out for you. You know, it's all about him. And I appreciate that, larry.
Class Materials
bonus material with purchase
Ratings and Reviews
a Creativelive Student
Absolutely one of the best & easy to follow teaching / learning sessions for this product. Larry has a great approach & insight into delivering a wealth of information from his years of experience that budding video engineers will certainly benefit from with a product that is powerful & great to use. I'm enjoying the journey to better understand & use this great product, expanding my experience in producing awesome video presentations. Great work Larry, & also huge fan of creativelive Keep up the great work you all do to assist budding producers in mastering their skills. Noel Blake Melbourne Australia
plb42
Final Cut Pro with Larry Jordan has been of enormous help to me just stating in FCPX. Larry has a unique way of getting the message on the basics across in an easy to understand manner. I have not yet looked at the entire course as I am practicing the steps as I go through the course. Many programs of FCP are not presented in the easy to follow manner thatL array does so well. I am 100% delighted with my purchase. I am in Sydney, Australia, and, due to the time difference it is impractical to view courses live. So I had to purchase on trust which in this case was a good choice. It would be good if Creative Live could perhaps rerun programs so overseas folks could view them at a convenient time. The courses still need to be purchased as I find it best to run it on another monitor and put what is taught into practice. Well done and thanks for the special offer in July.
a Creativelive Student
Attending this class was really a life-changing experience. Larry is a wonderful teacher and clearly on top of the program and methodology, and the way he structured the course, did frequent reviews and constant technique reminders (naming keyboard shortcuts as he did them, for example) really added a lot to the presentation. The depth of the class was very much appreciated, and his command of a complex subject showed that it was possible. I have wanted to understand FCP for several years and have only gotten the beginnings of a handle on it in the last 6 months or so. This class was an exponential knowledge upload and I hope will allow me to do lots of things I've only wondered about. I thought Jim was a good foil for Larry and did a nice job keeping things together, even when there was a technical problem. The value for me of being able to sit through the class before deciding to purchase was huge, and I am very much looking forward to reviewing the videos as questions come up. The class was very thorough and I didn't feel anything was being left out. Thank you so much for making it available.
Student Work
Related Classes
Final Cut Pro X