Lesson Info
28. Editing and Trimming Review
Lessons
Day 1
1Introduction
18:02 2Key Terms
27:06 3System Configuration and RAID Storage
19:22 4Q&A with Creating an Efficient Workflow
19:36 5Interface and Media Management
31:02 6Importing Media Part 1
30:40 7Importing Media Part 2
11:58Ratings and Keywords
32:21 9Reviewing Clips for Edit
25:13 10Importing Clips
19:26 11Editing an Interview Demo
33:20 12Replace Edit and Timeline Index
32:50 13Compound Clips and Auditions
18:27Day 2
14Editing Review
13:34 15Trimming Part 1
28:43 16Trimming Part 2
39:03 17How We Hear
21:51 18Audio Key Terms with Q&A
12:14 19Audio Basics, Meters, and Inspector
31:01 20Audio Q&A
08:55 21Dual System Sound and Audio Analysis
28:58 22Multicam Editing Part 1
27:08 23Multicam Editing Part 2
15:02 24Transitions Part 1
23:27 25Transitions Part 2
24:06 26Formatting and Animating Titles
30:18Day 3
27Additional Effects
12:36 28Editing and Trimming Review
11:58 29Changing Speed of a Clip
31:31 30Inspector Effects
36:35 31The Effects Browsers and Generators
19:37 32Blend Modes
17:10 33Effects Q&A
13:58 34Simple Effects
16:52 35Intro to Color Correction
18:20 36Video Scopes
19:25 37Color Correcting for Video
20:28 38Color Correcting Skintone
23:11 39Color Correction Q&A
08:54 40Audio Effects Part 1
26:20 41Audio Effects Part 2
23:08 42Exporting and Sharing
21:28Lesson Info
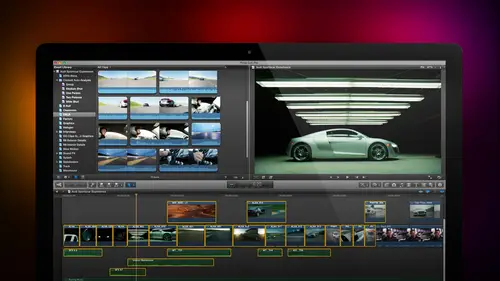
Editing and Trimming Review
Today, what I want to do is we're going to cover a whole lot of different things. For instance, we're gonna talk about in this first section and editing and trimming review to make sure you know how to edit the way we did and learned over the last two days, then it's all defects all the time we're going to change clips, speed, we're going to look at inspector effects. What final cut seven calls motion effect will look a browser effects in the second section will look att an introduction to video scopes and color correction, which ed has been telling me he is going to be listening to very carefully to make sure I give the correct information and then in session for we're going to do audio effects were going to share export output. And jim, if we're lucky, we're also going to be able to take some listener questions to make sure that we get everybody's questions answered during the course of the of the show. Oh, this specific session though this first session I want to start with an editi...
ng and trimming review because if you're working with final cut, you use final cut because you want to cut your videos together and if we do nothing else, I want to make sure that you clearly understand how to use final cut for importing, editing and trimming your media then we'll shift over into what I call inspector effects we introduce the inspector yesterday when we were looking at audio now we're going to look at how we can use the inspector to create video effect will look att image stabilization rolling shutter correction working with still images special special con form transformed settings and animation cropping trimming and the world famous ken burns effect and if there's time we'll also talk about distortion so there's a lot to cover, but first let's take a look at reviewing what we did over the last two days, which is editing and trimming the way that final cut works is you import your media, you look at your media, you decide where you want a particular clip to start or stop by setting the inn and the out you edited to the timeline and then you adjust where two clips touch by trimming them so we've weaken do import by goto file import media keyboard shortcuts command I and this opens up the import window and we'll go down to wherever our media is stored in this case the source media window and I'll just import another doctor surf clips so it's up here with dr cerf to do what starts with a d and this is I get my elf about functioning there it is doctor vint cerf and we'll just click on tech is a tool and we see that we have a big picture here which allows us to see what the shot looks like and a small thumbnail and when skimming has turned on keyboard shortcut is the letter s we're able to quickly look at the entire clip once you know that's the shot that we want or shots because we khun select multiple clips at the same time click on imports selected this opens up the import preferences setting now this will remember either the settings that you have set in final cut preferences or the last settings you used when you imported media generally I recommend especially if you're starting out copy the files into the library, create optimized media don't check any of the video check boxes do check all the audio check boxes and depending upon whether you have folders named in a particular way if you want to bring folder names in his keywords, check this on because this demo is only going to last for the duration of my time here a creative live I'm going to leave the files in place because I'm going to erase this library as soon as I'm done so I'm gonna click import after like a nanosecond I'm back inside the application and even though importing is going on which is what that small circle in the left corner represents, I could start to work with that piece of video and if I was trans coating it meaning creating optimized or proxy media I'd be ableto start editing even while that trance coded media was still being transported still being converted trance coating, by the way is a technical term that just means to convert we're converting it from one format to another we can now review the clip by skimming across and we could say I wanna have this clip start here and we could have this clip in say right about there and we set the end by typing the letter I or grabbing this vertical line, dragging it back and forth grabbing this vertical line that changes where the clip ends dragging it back and forth now in real life we would actually we would actually listen to this clip and hear what dr cerf has to say and decide how it fits in with the story. But as we talked about on the first day the process of setting where eclipse starts establishing the inn is the same whether I play the clip or not in both cases you type the letter I or you click hold and dragged to set a range or you select the entire clip whatever works best for you the process the technical side of this is exactly the same so consequently for this review I'm not going to concentrate on what dr surface saying at all because it just gets in the way I want to focus on the technology itself so now we edit this down to the timeline type the letter e will just open this up and make a little bit bigger type the letter e and the clip shows up at the position of the play head no types the letter e and the clip is admitted into the timeline the primary storyline which is this dark channel ignoring the position of the play head sorry that's old speech habits coming out ignoring the position of the play head and editing it into either the beginning of the timeline as it did here or the end of the last clip in the project let's just go to a different piece of video here will click on this typed letter I typed the letter o type the letter e and noticed that the clip is added the magnetic timeline allows it to snap together we can do a pen debts let's just add a couple here the letter e and will type this and this the letter e will type this in this I'm just typing the letter I the letter o to set this start again weaken grab and drag again we could delete the enemy out with option x and I have now built a four clips sequence into the timeline now this has no story this is about the most meaningless piece of garbage you would ever want to see but the concept is the same now we would add a b roll clip by putting our play had where we want the b roll that is to say, a picture that illustrates what dr surface talking about, and when we select the clip in this case will find some exploding sun here we select the clip and typed the letter q or click this icon this icon doesn't a pen at it adds it to the end of the timeline this icon doesn't insert at it let's, just delete this will delete this highlighted hit the delete key up and down arrow keys to move between shots will move there and now I click on this middle iconic doesn't insert at it, inserting this new clip, pushing everything else to the right to allow room for that cliff to be inserted or command zito undo put the play head where you want the the clip to be superimposed, click on the clip, click on this icon right here, which then superimposes that clip, and when final cut is playing, we see the bottom we see whichever clip is on top. Here is dr cerf and then it's the clip of mars well, that's, what the whole process of editing is editing is being ableto look at our clips, listen to it, by the way keyboard shortcut to play a clip is the space bar keyboard shortcut to stop playing a clip is the space bar to set the night to set the out. Oh, ted it down to the timeline is one of four letters a e to do independent it w to do an insert d to do it over right and cue to do a superimpose once we've got those clips edited now we have to trim them. Trimming is the process of adjusting where two clips touch and we'll just add it to clips down to the timeline toe. Have the timeline expand to fill the total window is his shift is shift z shifty command plus zooms in command minus zooms out shift z fits the window and you khun size your clips by going to this little icon down here. Click the icon and you could determine dough. I want to just see the audio so I want to just see the video. Do I want to see audio and video? Or do I want to squeeze these down into into what I call lozenge size, which allows me to see a lot of tracks all at the same time? I tend to run with one of these two middle icons so I can see both picture and sound all right, now we can trim trim allows us to grab the edge of one clip. This is called trimming the out notice that I'm making the first clip shorter or longer by grabbing near the edge of a cliff. Click on the other clip the inn of the incoming clip, click hold on drag and I make the incoming clip shorter or longer and noticed this. This first frame has turned to a red bar. The red bar means I've reached the absolute beginning of the media file, which is stored on the hard disk there's no more media that was recorded at that time when I trim, if I have handles extra video before the inn or after the out, this is going to be yellow. If I've stretched this all the way to the beginning or all the way to the end, it goes red, meaning there's just no more media there. It's not on the hard disk. It was never recorded a ripple trim to the out, a ripple trim to the end or select the trimming tool, which is in this tool section right here called trim keyboard shortcut is the letter t click hold on drag on both, and now I can do what's called a roll trimm adjust the edit of both clips at the same time. Rippled trims air generally used to match the action so the action flows smoothly from one shot to another a roll trimm is used to determine the emotion of the cut. We spent a lot of time yesterday talking about that sometimes we want to be able to edit the audio and video separately to do that make sure you're on the air o'toole keyboard shortcut us the letter a and double click on the audio noticed that when I double click on it the audio separates from the video but they're still attached there still in sync you can't move the audio without also moving the video, but now when I select the trim to liken roll trim the video in a different fashion that I can roll trim the audio now it would be nice toe roll trim the audio and we just have to click on it with the trimming tool and we can do that so this is called a split at it there's two types of split at its this is called a j at it because the shape formed by the video compared to the audio and it forms the letter j and this is called an l edit because the shape form by the video add it to the audio edit forms the letter l ah split at it it's where the video edits at one point and the audio edits at a different point inside the timeline we spent a lot of time talking about trimming and the emotional impact of doing different trims, and you can watch yesterday session to learn more about it. But the key that I want to get across and jim, I'm going to come back to you in just a second. The key that I want to get across is that you need to understand how to import media howto select the clips that you want, how to determine the portion to clip you want to work with by setting an inn and setting it out, edit it down to the timeline and then trim it that's, the heart of why you would purchase a program like final cut. This allows you to edit the video with complete freedom and the flexibility to be able to tell the story that you want to tell. And before we moved into effects, I wanted to make sure that we covered off on the basics of why you're using a video editing package in the first place, which is to import review at it and trim your media.
Class Materials
bonus material with purchase
Ratings and Reviews
a Creativelive Student
Absolutely one of the best & easy to follow teaching / learning sessions for this product. Larry has a great approach & insight into delivering a wealth of information from his years of experience that budding video engineers will certainly benefit from with a product that is powerful & great to use. I'm enjoying the journey to better understand & use this great product, expanding my experience in producing awesome video presentations. Great work Larry, & also huge fan of creativelive Keep up the great work you all do to assist budding producers in mastering their skills. Noel Blake Melbourne Australia
plb42
Final Cut Pro with Larry Jordan has been of enormous help to me just stating in FCPX. Larry has a unique way of getting the message on the basics across in an easy to understand manner. I have not yet looked at the entire course as I am practicing the steps as I go through the course. Many programs of FCP are not presented in the easy to follow manner thatL array does so well. I am 100% delighted with my purchase. I am in Sydney, Australia, and, due to the time difference it is impractical to view courses live. So I had to purchase on trust which in this case was a good choice. It would be good if Creative Live could perhaps rerun programs so overseas folks could view them at a convenient time. The courses still need to be purchased as I find it best to run it on another monitor and put what is taught into practice. Well done and thanks for the special offer in July.
a Creativelive Student
Attending this class was really a life-changing experience. Larry is a wonderful teacher and clearly on top of the program and methodology, and the way he structured the course, did frequent reviews and constant technique reminders (naming keyboard shortcuts as he did them, for example) really added a lot to the presentation. The depth of the class was very much appreciated, and his command of a complex subject showed that it was possible. I have wanted to understand FCP for several years and have only gotten the beginnings of a handle on it in the last 6 months or so. This class was an exponential knowledge upload and I hope will allow me to do lots of things I've only wondered about. I thought Jim was a good foil for Larry and did a nice job keeping things together, even when there was a technical problem. The value for me of being able to sit through the class before deciding to purchase was huge, and I am very much looking forward to reviewing the videos as questions come up. The class was very thorough and I didn't feel anything was being left out. Thank you so much for making it available.
Student Work
Related Classes
Final Cut Pro X