Lesson Info
6. Importing Media Part 1
Lessons
Day 1
1Introduction
18:02 2Key Terms
27:06 3System Configuration and RAID Storage
19:22 4Q&A with Creating an Efficient Workflow
19:36 5Interface and Media Management
31:02 6Importing Media Part 1
30:40 7Importing Media Part 2
11:58Ratings and Keywords
32:21 9Reviewing Clips for Edit
25:13 10Importing Clips
19:26 11Editing an Interview Demo
33:20 12Replace Edit and Timeline Index
32:50 13Compound Clips and Auditions
18:27Day 2
14Editing Review
13:34 15Trimming Part 1
28:43 16Trimming Part 2
39:03 17How We Hear
21:51 18Audio Key Terms with Q&A
12:14 19Audio Basics, Meters, and Inspector
31:01 20Audio Q&A
08:55 21Dual System Sound and Audio Analysis
28:58 22Multicam Editing Part 1
27:08 23Multicam Editing Part 2
15:02 24Transitions Part 1
23:27 25Transitions Part 2
24:06 26Formatting and Animating Titles
30:18Day 3
27Additional Effects
12:36 28Editing and Trimming Review
11:58 29Changing Speed of a Clip
31:31 30Inspector Effects
36:35 31The Effects Browsers and Generators
19:37 32Blend Modes
17:10 33Effects Q&A
13:58 34Simple Effects
16:52 35Intro to Color Correction
18:20 36Video Scopes
19:25 37Color Correcting for Video
20:28 38Color Correcting Skintone
23:11 39Color Correction Q&A
08:54 40Audio Effects Part 1
26:20 41Audio Effects Part 2
23:08 42Exporting and Sharing
21:28Lesson Info
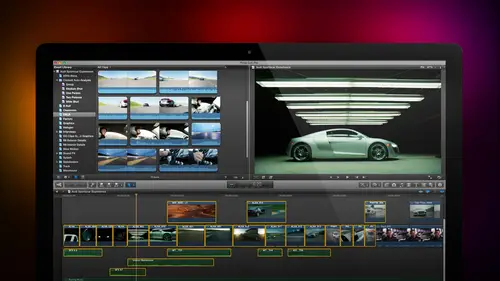
Importing Media Part 1
Now we're going to spend a lot of time with important cause we actually have a lot of choices we can import from camera cards or we can import from cameras or we can import from cellphones or we can import quicktime files whatever your computer could play we could import I'm going to work with a file first I'll show you how to import off account card second if I have a camera here I've gotta face time camera but this face would scare small children so we will we will not click it, but if I had a deck attached it would show up here if I had an iphone attached it would show up here you would click on on the iphone it would automatically display all the still images and all that video that you've captured with your iphone it's dragging across the same assist with a videotape deck or same as any other camera it's just plugs in it shows up at one point it says do you trust this device? You say yes. So anyway I have all of my I have all of my media stored down here in a folder called source ...
media and if I open source media I've got lots and lots and lots of clips and will be working with a lot of them during the next three days I use this so much would be really nice if I could make this a favorite location so I don't have to scroll down and find the folder I just click wants to make a favorite grab the source media folder that you are whatever folder you want to make a favorite from grab and drag it on top of the word favorites and poof I have now created a favorite location if for instance I always want to be palmed five is a source media of supplier that I use a lot so if I want to use pawned five I grabbed the pond five folder dragon on top of favorites enough I want to go to the pond five folder I click on if I want to go to source media I click on one of his many favorites as you wanted favorites could be stored on different hard drives its just a fast way of creating essentially an alias that points teo wherever you want to go so I can keep going back to the same source all the time. Okay, well let's go to source media and let's see what I want to talk about let's show you how to import a file the folks at um that's see where to go model railroad builders fran on dh mike hale sent me some abc hd footage let's see where to go miles hale not mike foolish double click the folder and now the import window changes we see a spinning gears, it has to access the file and here's a clip we see if I I've got a entire thumbnail of the entire train moving around and a picture of the train I click on a different clip, we see a big picture up here and, uh, thumbnail, down here the size of this picture depended upon your screen. I'm running this in a very small resolution of running my screen of twelve, eighty by seven twenty because I want to have everything be really easy. The text easy to read, big to see, especially on computer displays, but normally if I'm running to sound twenty seven inch I mac, I've got huge pictures in huge thumbnails the screen scales to support the size monitor you're working with notice that I'm just simply moving my mouse across the screens called skimming premier calls it hover scrubbing as I move the mouse, I'm not holding a mouse button down, I'm just dragging and it allows me to quickly see at high speed what that particular shot looks like. I think it's appropriate for all of us tow get into training, don't you think anyway, I'm done now so we can hover, scrub, weaken, skim this clip to bring in a clip, we simply highlight it and click the import selected button and whatever clip I have select it shows up. But there's actually a much cooler way to do this interface and that's this button right down here. Now I'm looking at thumbnails of all the clips that are stored in this particular folder on my hard drive click on the clip that I want don't even click just simply grab the mouse and dragged across and I can quickly hover scrub I have to show this to you. This is very tricky. Brace yourself. This is a really time train watch. This is coming out of the tunnel. It's getting closer boom! You just witnessed a real time train accident. Watch again. The lens was just a shade too close the track so just to prove that we can get it right. Ah, no boxcars were injured in the making of that film. So what we've got is the ability to skim quickly across all these clips. I love skimming it's just so fast. And then, if I click noticed that when I click it now sets us little mini play head here. That little orange or vertical line hit the space bar and it plays the clip in real time space bar stops. Type the letter j goes backwards in real time k stops l forwards in real time k stops twice backwards at double speed l twice forwards at double speed j three times backwards a triple speed l three times forward triple b j five times backwards five times speed l five times forward five times we've got complete control going forward or backward using that j k and l keys except watch this very carefully if you hold jay and kay down at the same time slow motion going in reverse k and l a at the same time slow motion going forward without even touching the mouse we can high speed forward or reverse or play and a clip well how do we select a clip I'm going to click on this entire clip notices of gold box around all of it I like this clip here so I'm gonna hold the command key down and click I've now selected two golden boxes and I happen to like this station shot right here so I'm gonna hold the command key down this is called a symmetric selection the command key allows me to select whatever clips I click on when I click the import selected box button it opens up the media import proxy window now time up it opens up the media import preference window I'm going to spend a lot of time talking about this because this one is really important we haven't seen this before, we haven't seen it premiere we haven't seen a final cut seven this allows us to control how we're going to process the media. We can say what event member than event is a folder? What event? So I want to add this to it's going to go inside the library called my first library, but I could have multiple events, multiple folders I could create a folder, so I'm going to create a new event in my library that I'm going to call, uh, running trains supposed to construction so I can create a new event or add to an existing event that's already created. Remember I talked about the difference between managed media and external media. This media has to be copied into the my life, my first library library because it's in a format which cannot be played natively by the computer abc hd some formats have one file for the video, a second file for the audio, a third file for time code in a fourth file for metadata because these are different files there's no single file for r browser our player are quick time player or even final cut to be able to play it's got up all these different assets together, so what the media import window is doing is it's merging all those assets into a single media file when that happens then it must be copied into the library. You can point to it as external media because it doesn't exist yet. His media it's media elements, but it's not integrated. Consequently, copy the files into my first library is required, which means it's, now in the library folder, it's managed media, other files will see this in just a minute. Quicktime movies can be left in place, they are left wherever they are that's, external to the library. This is where we were talking about your seahawks footage, where we want to be able to use it, multiple editors, multiple times, I'm goingto have that be external, so you click, leave files and place most of the time for the demos that I create. For this training, we're going to be leaving the files in place because I don't want to take the time to copy it into the library, because that demo files not could exist more than a minute or two, and I'm going to delete it again when I click on trance coating and remember, trans coating simply means to convert from the camera native format into the optimized or proxy files who talked about in the first segment. When I create optimized media, it is converting the file from its camera native abc hd, into progress for two, to both of which codex but progress for two to is a much more efficient kodak for editing a much bigger better format for effects and color grading so my recommendation is to use optimized media wherever possible your file sizes will be three to four times bigger so it takes more storage it never ever touches your camera native footage your source files are always left untouched but when you're starting out I recommend copy files into the library always I always recommend optimized media creating proxy media is also a check box and this is useful if you're doing multi cam editing it's also useful if you're doing two k or four k editing because this is standard hd because my computers more than fast enough because my storage is more than fast enough I'm not going to create proxy media will do that with multi cam editing tomorrow just to show you how that works there's a lot of discussion about what these choices mean but I don't check any of the video choices except import folders his keyword collections will see that more in the next segment remove pull down is only necessary when you are taking film that's been transferred to videotape the process of transferring to videotape ads frames that don't actually exist remove pull down lights up which will remove those frames it's only relevant for film transferred to videotape if you shot with your own camera that will always be great don't worry about it analysed for balance color is used for color correction it could be done at any time and it is not even necessary to be done it takes a little bit of time I recommend not checking it I've got a better way and we'll talk about that on day three when we talk color correction finding people is not facial recognition instead what it's doing is it's saying is this a close up a medium shot or a wide shot? Are there one two or four people in the shot which then adds a key word to say here's all your close ups here's all your medium shots here's all your wide shots I appreciate apple coming up with this it's a really cool concept it takes forever and I don't really need it because I can look at the shot and say you know that's a close up that's a two shot anders actually five people in the shot so I think it's a cool feature that I never turned on because it makes importing take too long create smart collections after analysis will talk about smart collections in the um in the next section after lunch I do check all the audio check boxes however one audio analysis is very very fast too we can override them you'll learn how tomorrow and so the way that I generally have stuff set is I'm going to change my media storage whether I want to manage it copy the files or leave it external leave files in place. I will almost always create optimized media, especially when working with camera native I won't change any of the video. I'll leave them all unchecked. I will check all of the audio and I click import the media important to put itself away, and the video is instantly virtually instantly imported and it's ready for playback notice that it shows up in the browser. I can skim the same as before. I can see all of my clips and aiken start to tell stories with the clips that I've got and notice that it created a new event here. Come here, people are watching that we g o a credit event called running trains, and I could look at media that's stored in that particular folder by clicking on the folder. There's nothing inside media, there is media inside running trains, we can copy media by grabbing a clip and dragging it from where it is to where we want it. And then I click on media. I can see the media that I just moved, I can highlight all my clips, move it to media, and if I want to get rid of an event that I no longer need, notice that running trains is now empty, right mouse, click on it, say, move event to trash, so I can move media files around by simply clicking on dragging from where it is where you wanted to go philip can you trim that media before you import? The answer is yes but I haven't gotten area so what we've just done is that we are able to look at media inside final cut inside the media import window we can skim across it to see if we like that never not weaken then select clips that we want to bring in an important and based upon how those import preference settings are we can manage the media have the media be external we can optimize that we can create proxy files around a camera native I generally recommend always optimizing however there's a couple reasons why you would not want to do that optimizing does take more disk space and it does take time if you're in a news environment where deadlines or everything at a camera native bring it in final cut we'll edit it native legal I'll put natively and you could've done quicker when speed is essential or you're just cutting stuff together think of the same day coverage of a wedding and you need to have this thing really, really, really fast because you gotta turn the dvd around about four hours then don't transco don't convert toe optimized optimizing, however, makes sense if you're doing a lot of effects especially if you're doing color grading if you're doing a lot of transitions because optimized media will render faster, then camera native media will also, if you have a slower system, optimized media will tax a slower system less than camera native media will so in general, when speed is of essence, then leave it camera native when quality and efficiency and editing is of the essence than optimized the media and on lee use proxy files when you're doing multi cam work or if you're doing high resolution to k four k proxy will make a difference. Bernard that's still making sense you still with me, philip? With me? Okay, james with you two I'm sorry, jim jim's with you too. You know that alone is pretty darn stunning. But how about one for leah? Leah lorna um if you don't optimize media, do you run the risk of files on linking has no relationship? What willen linka file is if you change the file's location if you rename the folder that contains the file or if you re named the hard disk that contains the folders containing the file this will up, this will cost far more problems. There's there's no greater or less risk of unlinked king if you leave a camera native or if you leave it optimized bernard just a question you're talking about optimizing the camera needed, but there's some formats that air camera need of that are less important knows that you could get away better with optimizing as opposed to some that definitely you would definitely want optimized what optimizing is here's the problem there's two ways to compress media. One way is where we compress each in double individual frame as a totality this's called intra inside the frame intra frame compression formats like did you beta devi pro rez are all in truck frame. Each individual frame is compression and of its own think of ah, a piece of film. Hold a piece of film up to the light and you see anybody tiny images but each image is told and complete in and of itself. Now that little film images a fraction of the size of reality because of the magic of lenses but it's a complete images you look at that film strip against the light. This is optimized where each individual frame is compressed on its own, the other type of compressions called inter frame. And this is where the first frame of a group of pictures is compressed, and the next set next frame is on ly that which part of the frame has changed think of a chess match. We all know that a chessboards eight squares by eight squares and we all know the chess pieces at the start of the match are always put out in exactly the same position because we know the size of the board because we know where the pieces are I don't need to show a photograph except maybe the opening for somebody who's never seen a chessboard before to say here's where the pieces are now I could describe an entire chess match by simply describing the one piece per play that moves on the chess board because all the other pieces haven't moved ah chess piece I only have to describe that which changed the chess piece itself that's what inter frame compression does it takes the first picture of the chessboard and then it only describes that one small piece that moved from one frame to the next. This allows me to get files much smaller from two hundred thirty five megabytes tow three megabytes because I'm on ly describing those pixels that have moved from one frame to the next. But what happens is sometimes that that list of changes gets confused for whatever reason it's not under our control so every so often I will re compress a standalone frame so I have on igh frame on image frame followed by a bunch of changes followed by another I frame followed by a bunch of changes this in truck frame inter frame compression work compressing a group is really really compact but extremely hard mathematically to play back in real time because if my image frame is here and I stopped the play head here the computer's got to go back to the image frame calculate all the changes to get to the frame that's there and then display that frank well that's a lot of mouth that's got to go through by me simply claret grabbing the play had dragging it from point a to point b now if I've got five or six clips that are all playing at the same time they're all using that in trump insure frame compression and I've got to catch it well processes going nuts trying to figure out where everything is it's really inefficient it takes a lot of hardware to be able to pull that off so what final cut is doing is it's converting formats like h dot to sixty four h dot to sixty five abc hd a vc camp x decamp extra county x all of which used these in dr frame compression into progres which is all individual frames which is why it's bigger because a single frame compressed has to be bigger than just the changes so optimization is converting it from this very highly mathematically dense compressed format into the individual frame which is much higher quality much faster easier playback easier to edit but takes a lot more disk space so that's what's happening when we optimizes that's converting from aa group of pictures a gaap compression into an I frame compression if I want to now let's go back let's leave our media folder selected and go back to file import media keyboard shortcuts command I this time I want to select a clip oh let's take let's take this train shot right here I want to set where I want the clip to start I'm going to click and type the letter I which sets and in and noticed that my gold box which used to be around the entire clip now is actually where I'm dragging my skimmer find a spot where the train is coming and type the letter I and it defines the gold box at the start the beginning the end of a clip I dragged my skimmer to the right find where I want that shot end typed the letter o which sets and out and now I have a portion of the clip selected I too set where the in the in the start the beginning of that clip is and oh to set the out what's really cool is not only can I set thean not on this clip, I can click hold and drag and set the enemy out totally with the mouse without having to use the I and the okies though again on the keyboard shortcut junkie or I can go over here and I'm just going to pretend I'm going to set an in and an out there hold the command key down command drag set another portion command drag set a third port shin command drags out of fourth portion I've now set multiple ends and outs on the same clip by first setting the enemy out using dragging orion oh then command dragging to set additional regions within the sand clip I've set for here if the clip was longer I could set eight fifteen I could set to but this ability to select the entire clip or just a single region within the clip or multiple regions inside the same clip is really, really flexible and something that no other software will do to bring them all in hold the command key down and I'm command clicking to select all these regions at the same time notice that when it's not selected when it's not selected it glows a dark gray when it is selected it grows up ah golden now when I click import selected when a bring all these clips in again I'm going to leave all my settings the same I've already explained that there's all of my other clips now quickly they're important see that small white circle that's the time necessary for it to build transco did clip that happens in the background I could be busy importing all those clips I can start editing it'll edit camera native innocent is the optimized media is ready then it'll automatically instantly and invisibly switch over from camera native toe optimized okay one more thing but sorry let's go back to file import media and let's, go to, um, we've seen that weaken switch between list view by clicking on this icon and thumbnail view we've seen that weaken skim by grabbing our play had on dragging left and right we've seen that weaken select entire clips or weaken select portions of a clip by setting the letter I in the letter o we've also seen that we can create multiple reaches on a clip of what happens if I want to get rid of a region highlighted type option x option x will delete the enemy out of whatever clip is selected I sets in in oh sets the out an option x, the lead standing out. Why option x aiken here at asking? Well, what's the keyboard shortcut jim, I know you know this because you are an expert what's the keyboard shortcut toe cut a clip that would be commanding so therefore option x makes perfect sense you're not cutting the clip, you're just cutting out the end and the out, you know, for a still sky you're pretty bright. I'm very impressed now another thing we can do is see this check box down here let's say that you want to bring in a lot of different clips from a lot of different folders when you unchecked this check box, it will leave the media import window open so that you can import and it will import in the background you can switch another folder and important air switch another false report from their swishing folder import from there. So this is really useful when you want to bring stuff in from a variety of sources, create archive imports but stores it into a special kind of folder called a bundle. This is most useful when bringing in stuff from videotape. You can bring it in tow an archive this sort of parks it in a separate file in a separate corner and allows you to them open at archive later so you can store it without creating a libraries you can start without creating events. It just sort of transfers all your video tapes from tape into a digital format in stores in an archive, archives could be named anything stored anywhere, and your media is stored inside the archive and it's stored in the camera native format so you can open an archive and get access to that media inside final cut or inside the operating system whichever you prefer. Um, ju my need to read my notes for second are there any questions while I'm thinking about the next step yet let me take a quick peek so waldo capote would like to know hello for avoiding duplicating media when I imported from camera cards. How should I import it? Copy it or leave the file always what a great question I was thinking of going right there so read that again because that is so important for avoiding duplicating media when I imported from camera cars how shy important copy it or leave files in place out come the cars first first you always want to duplicate media you never wanna have one copy of your source files. What happens if something happens to those source files there's a point where we're penny wise and pound foolish you always wanna have two copies of anything that you cannot easily replace and shoots shoots are something that are very very hard to replace ed's waving three fingers at me three finger basically as many copies and as many places as you could get because as soon as you don't you lose it here's my philosophy this is a camera card okay I shot this probably a couple years ago I use it for examples I'm going to just put it into the macintosh slot here this camera card fits natively there's many camera cards need to have a reader for but however it is it's going to show up is the what's the hard disk on your computer and as you can see, I carefully name all of my camera card so I know exactly what's on them all the time right never name that I have no clue what's on my camera cards on my second drive I create a folder I want to call this native media I normally call its source media, but I'm already using source media because that's for my training media's and I'm too lazy to rename training media holland native media let's just open it's up inside here I create a folder for each client I call this a client folder except I would use the name of the client inside the client folder I create a folder for each job not my job has a job code followed by a name I use a two letter to number code j m o too j m is the client just a moment? Production zero two means it's a second job I've done for just a moment productions everything that I do in my company building accounting tracking inside the editing system everything is based on this two letter to number job code so I've got a code for the client just a moment productions called j m o too inside jomo too I create a folder for each card that I shoot and this folder is first that starts with a job go j m o to underscore the date that I shot at fourteen oh six twenty three followed by us at the a camera the b camera or the si camera and is that the first the second or the third card that I shot that day now by looking at this folder I know the client I know the job I know the date that I shot it I know what camera angle it was. I know where that's the first second or third folder and this folder name is associated with this media in perpetuity eye then grab the card and I grabbed the entire contents of the card everything and drag it into that folder that's it and it copies across now it's got fourteen gig it's gonna take like forever I'm going to cancel the copying because we don't have that much time to spare but I copied the entire contents of the card to that folder because I find myself recycling cards because I recycle cards I don't just simply keep these I have to make a copy and you never in just from the card you always copy from the card into a folder and in just from that folder that's on the hard drive first it's faster second it's safer third you've got a backup fourth it's really good practice and fifth you will kick yourself if for any reason you try to copy off the card because if that card isn't in your computer and you ever need to re import that media, how you going to find it? The card maybe erased it maybe lost you always always, always want to have a backup
Class Materials
bonus material with purchase
Ratings and Reviews
a Creativelive Student
Absolutely one of the best & easy to follow teaching / learning sessions for this product. Larry has a great approach & insight into delivering a wealth of information from his years of experience that budding video engineers will certainly benefit from with a product that is powerful & great to use. I'm enjoying the journey to better understand & use this great product, expanding my experience in producing awesome video presentations. Great work Larry, & also huge fan of creativelive Keep up the great work you all do to assist budding producers in mastering their skills. Noel Blake Melbourne Australia
plb42
Final Cut Pro with Larry Jordan has been of enormous help to me just stating in FCPX. Larry has a unique way of getting the message on the basics across in an easy to understand manner. I have not yet looked at the entire course as I am practicing the steps as I go through the course. Many programs of FCP are not presented in the easy to follow manner thatL array does so well. I am 100% delighted with my purchase. I am in Sydney, Australia, and, due to the time difference it is impractical to view courses live. So I had to purchase on trust which in this case was a good choice. It would be good if Creative Live could perhaps rerun programs so overseas folks could view them at a convenient time. The courses still need to be purchased as I find it best to run it on another monitor and put what is taught into practice. Well done and thanks for the special offer in July.
a Creativelive Student
Attending this class was really a life-changing experience. Larry is a wonderful teacher and clearly on top of the program and methodology, and the way he structured the course, did frequent reviews and constant technique reminders (naming keyboard shortcuts as he did them, for example) really added a lot to the presentation. The depth of the class was very much appreciated, and his command of a complex subject showed that it was possible. I have wanted to understand FCP for several years and have only gotten the beginnings of a handle on it in the last 6 months or so. This class was an exponential knowledge upload and I hope will allow me to do lots of things I've only wondered about. I thought Jim was a good foil for Larry and did a nice job keeping things together, even when there was a technical problem. The value for me of being able to sit through the class before deciding to purchase was huge, and I am very much looking forward to reviewing the videos as questions come up. The class was very thorough and I didn't feel anything was being left out. Thank you so much for making it available.
Student Work
Related Classes
Final Cut Pro X