Lesson Info
16. Trimming Part 2
Lessons
Day 1
1Introduction
18:02 2Key Terms
27:06 3System Configuration and RAID Storage
19:22 4Q&A with Creating an Efficient Workflow
19:36 5Interface and Media Management
31:02 6Importing Media Part 1
30:40 7Importing Media Part 2
11:58Ratings and Keywords
32:21 9Reviewing Clips for Edit
25:13 10Importing Clips
19:26 11Editing an Interview Demo
33:20 12Replace Edit and Timeline Index
32:50 13Compound Clips and Auditions
18:27Day 2
14Editing Review
13:34 15Trimming Part 1
28:43 16Trimming Part 2
39:03 17How We Hear
21:51 18Audio Key Terms with Q&A
12:14 19Audio Basics, Meters, and Inspector
31:01 20Audio Q&A
08:55 21Dual System Sound and Audio Analysis
28:58 22Multicam Editing Part 1
27:08 23Multicam Editing Part 2
15:02 24Transitions Part 1
23:27 25Transitions Part 2
24:06 26Formatting and Animating Titles
30:18Day 3
27Additional Effects
12:36 28Editing and Trimming Review
11:58 29Changing Speed of a Clip
31:31 30Inspector Effects
36:35 31The Effects Browsers and Generators
19:37 32Blend Modes
17:10 33Effects Q&A
13:58 34Simple Effects
16:52 35Intro to Color Correction
18:20 36Video Scopes
19:25 37Color Correcting for Video
20:28 38Color Correcting Skintone
23:11 39Color Correction Q&A
08:54 40Audio Effects Part 1
26:20 41Audio Effects Part 2
23:08 42Exporting and Sharing
21:28Lesson Info
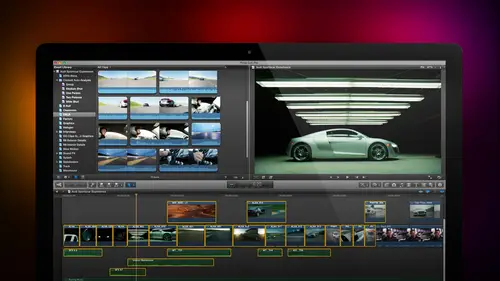
Trimming Part 2
This is some space footage here's a clip, it starts with a red hot son and it goes dissolves to a a green yellow sun. We've seen that weaken trim the edge of a clipped, but what I want to do is I want to trim the content of a clip. The easiest way to think about this is is I used this in b roll constantly, it's called a slip trim where I'm slipping the content inside the shot let's just pretend for the sake of discussion that this is a clip which is laid against the music track. We're gonna pretend there's music here, there isn't, but pretend with me for just a minute and this shot starts on a down beat to the music and it ends at the next down beat to the music and I'm locked into the length of the shot because the music defines how long that clip is going to be, but I'm not sure what I want the content of the clip to be. I know the duration has to be what it is, I can't change the duration and I know what has to be at this particular point of the music because the music beat structur...
e requires it to be there, but I want to change the content of the shot to do that, go back to the tools. And select trim, but rather than clicking on the edit point which selection roll trimm clique in the middle of a clip, I'm now in slip trim mode. Watch the pictures if I grab this and drag it to the left notice that I'm using less and less of the red sun and maura and more of the yellow green son, I am slipping the content and you can see the transition looking the two windows in the upper right corner left hand picture represents the start of the clip I'm making that red sun totally disappear. So now when I play it back, I have all green glowing sun or I say, you know now I really want to have more of the orange son now I'm grabbing it with the trim tool in the center of the clip on dragging to the right. The duration of the clip remains the same. The location of the clip remains the same. But the content of the clip is now totally changing until the green son is gone and the red sun remains it's all red sun I am slipping the contents of the shot duration remains the same location remains the same I used the slip trim just about everywhere. I drop in a piece of b roll remember where dr cerf was talking about the interplanetary internet what's the best martian footage to use what's the best interstellar footage to use what's the best burning sun footage to use I cut that clip to match the time that I've gotten and I dragged the content so it exactly fills the time it's it's like in football or or or soccer we're watching now we want to see just show me the highlights the essence of that play what's the best six seconds before that score that's where the slip tool is so important with the trim tool selected keyboard shortcut is t if I grab the edge of a clip I'm doing a role if I grabbed the center of a clip I'm doing a slip makes a huge difference I love the slip tool because it allows me to really find tune my content I wanted to be all glowing green son or I wanted to be all red sun or I wanted to be something in between is not cool so oh now a couple more things before before I forget um hang on a second because we want to work in audio but I want to talk about a couple of other things first jim we doing okay? Yeah greta says in the olden film days we offset the cut by two frames to create continuity is that still true if by offset, she means the video would edit to frank's different from the audio, I would say no there's, no standard like that. What we would do is is, uh, well, hold that thought because I'm coming to it in about five minutes, but I would say no other questions. Yeah, this is from ari should we add it? Only one scene in the timeline at one time for longer projects? If yes, then how do we connect all the individual scenes together for the final edit? Just ask me that question again. Sure, should we edit only one scene in the timeline at one time for longer projects? If yes, then how to connect all the scenes together? We're getting to this really? This really depends upon first, this is personal preference, so let's say that you're doing a one hour film and the one our film has, we'll just say pretend has six scenes in it should each scene be its own project? Or should you have it the full one hour movie in the timeline of one time? It really depends upon your style of editing how how fast you're cutting, how you want to navigate around this is all. Personal preference let's say just hypothetically that this is a completed scene. We'll just pretend it is complete trash, but we'll pretend command a to select all your clips. So in scene one of command data, select all the clips, go up to the edit menu or type command see to copy the clips. Go to this the a project that you want to add them, too and say let's, just say this is scene one. Put your play head at the end of scene one type command v and paste it in and you've now moved the images from scene, too, to be next to the images from scene one so it copy paste between projects is easy. Okay, anything else? Guys? You okay? All right now, let's, go back to here and as you as you've no doubt learned, we're not worrying about the content. In terms of showing how trimming works. I'm not exactly sure what snow covered mountains and hawaiian waterfalls have in common with each other. So I just like the fact this is blue and this is green. So it's easy to see the difference between the two clips and this is kind of red and green at the same time if I stack this clip on top and notice I just simply picked it up and dragged it to make a connected clip. The rules that we discovered yesterday are when the play head gets to a connected clip it automatically plays whatever clippers on top well there's a couple of interesting tricks that we can take advantage of here let's say that I want my scene to end right here a tte the position of the play head we'll just pretend that the correct case so I want to do a cut to get rid of all this garbage to the right we do this and effects all the time where we're building clips on top of each other and I need to have the clips all end at the same moment go back to the tools and select razor blade command a to select all the clips the razor blade will cut a single clip at the position of the blade even if I've got multiple clips selected shift command ada di select razor blade is keyboard excuse me keyboard shortcut the letter r and it will cut a single clip so I cut and then I I cut again razor blade larry not range tool be not are okay, so I'm going to cut this clip on notice that now I have two clips where I cut it or I cut this clip and I now have two clips where I cut it and I like the razor blade tool it's a perfectly okay tool. And I never used it because I want to be able to cut all of my tracks at the same time. There's no easy way to do that unless you know the secret keyboard shortcut the keyboard shortcuts command be command to be, and it automatically cuts all selected clips at the position of the play head. Now, let's, just do that one more time and add one more clip here and I'm going to switch this toe laws inge view so I can see what I'm doing if I select all of my clips, put the playhouse where I want to cut. I want to select this clip and this clip, but not the middle clip when I type command be notice that these two clips were cut. But the middle clip, which was not selected, was not cut here. I'll select the middle clip command to be the middle clip is cut, but not the two that were not selected or putting my play head here and selecting everything command be cuts all selected clips on all selected layers at the point of the play head question it are you doing okay so the razor blade tool? Keyboard shortcut the letter b allows me to cut a single clip wherever I click and the benefit is I'm able to see the exact frame that I'm cutting on his eye drag which is something we could not do in final cut seven. But for me, a much more useful feature is being able to select all the clips that I want to cut. Put the play head where I want to cut to occur. Type command b as in boy and all selected clips. Command a. Make sure the razor blade tool is not selected beyond the air. O'toole command. Theon the arrow tool and command be. We'll cut everything at the same time. All right, so that's, the razor blade tool, the trim tool we use for roll trims and for slip trims. Now the position tool there's. Another kind of trimming that we can do here. Let's. Um, add, uh, teo much to our hawaiian waterfall on let's do our blue mountains. Okay, so now I've got two clips. We can also trim what's called the top intel. See if I remember how to do this. Oh, two things I can show you one I just discovered yesterday. If I select the out of a clip and I typed the left square bracket, it selects the end right? Square brackets elects the out left and right square bracket means I can select the appropriate added pointe theater point, which is nearest to play head left and right. Square bracket. And if I type the backslash key aiken, select both ian and the out. So the out left square bracket thean, right square bracket and the n nd out with the backslash qi here's. Why? This is important. Make this bigger so we can see what's going on. If I select the out and I type a comma, I move the selected at point one frame to the left fight type of period. I move the selected at a point. One frame to the right shift comin ten frames to the left shift period. Ten frames to the right. So if you were really keyboard centric, which is me, if I type the left square bracket, does it work? No, gotta selected. It's got to be a way to do that. I will look that up and get back to you with the end of the break. If I select another point, I can now select whichever part of the edit point I want left square bracket, right square bracket or vertical pipe, then comma moves to selected, appoint one frame left. Period one frame right shift comma ten frames left shift period ten frames right and these air cool. I used them frequently because sometimes I just need to make a one frame change and I don't want to grab it, drag it with the mouse, but what I often use even mohr is this. I typed the plus ki plus and noticed this is now shifted into a timecode offset mode. Six enter and the selected one point move six frames positive to the right minus twelve and two, sir. The selected at a point moves twelve frames to the left or I could say let's, just ripple trim the out minus five enter and the out moose five frames plus ten enter the out moves ten frames to the right or I could put the play head where I want the edit point to jump to type shift x and the selected edit point jumps to the position of the play head again trim tool select both or backslash key shift x automatically jumps selected at a point to the point of the play head this is especially useful if I have multiple clips, you can select us and we can have it shift x the selected at a point jumps to the position of the play head uh, okay, I'm about to shift into, uh audio trimming but before I do, um oh, I gotta talk connected clips. Jim, we doing okay? Yeah, we're doing solid. Okay, now notice this is called a connected clip. Ah connected clip I could make longer or shorter, but if I have two connected clips if I have two connected clips, even if I select the trim, I cannot select the edit point itself, by the way, notice here that when I select the edge of this clip it's yellow when I select this edge of the cliff it's red remember when we opened up the precision editor we talked about the fact that handles are extra video before the end and after the out when the edge of the clip is yellow, I have extra video handles that I can use for trimming when the edge of the clip is red. I am at the edge of the clip. I can't go any farther to the left there's no more media the actual media file is on is at the end I could go to the right notice the edge of the clip now turns yellow. I can always make the clip shorter, but once you reach the red and that's the end of the actual media file and you can't go any farther than that but notice that when I have two connected clips touching, unlike clips in the storyline primary storyline when I have two connected clips touching, even if I select the trim tool, I can't select the edit point and that's because there are two types of connected clips there's, a connected clip which just acts like a standalone clip happy go lucky no problems but there's also a connected storyline watch the difference if I come on people are watching all right if I have or we go if I have a clip on top notice that there's nothing above the clip if I select a clip or if I select a group of clips let's select a group of clips here let's just give this shot q find our handsome skier coming down the slope he's in the wrong aspect ratio will just pretend we're not going to notice that I'll show you how to fix that tomorrow when we talk about effects but for day we're just going today we're gonna pretend selected clip period moves the selected clip one frame to the right common moves the selected clip one frame to the left I can't select the other point select the clips that are connected to the primary story line primary storylines clips in this dark track with the clip selected go up to the cliff menu and say create storyline keyboard shortcut his command g I use this all the time and if you have eagle vision, you'll notice that now a thin dark gray bar appears over the top of both those clips see the bar this is what it looked like without notice there's no bar and now I select the clips type command and now they're in a connected storyline aiken grab that storyline bar and move the clips as a group when they're inside a storyline either the primary storyline or in a connected storyline then when I select the trim tool now trimming works now when I grabbed one edge of a clip I'm doing ripple trims justus I am inside the primary story line but I have to create a connected story line first if I just have clips by themselves if I just have clips by themselves when I dragged the edge of one clip noticed the other clip doesn't move it's only when the two clips are connected inside ah connected storyline command gi that I can now move as a group which brings me to another really important point and that is this if you have eagle vision get rid of this no no no no no no if you have eagle vision right here she that little hookey thing coming down that little hookey thing is called the connection as I move a connected clip the hook that connects that clip into the primary storyline is located at different frames inside the primary storyline that hook is important because it determines what clip the connected clip connects to so if I were to delete this primary storyline clip notice that the hook is connected into the primary storyline when I delete the primary storyline clip every clip that's connected to it every clip that's hooked into it is also deleted. Well, now let's see what that means in terms of real life um she okay here? For instance, I have one two three primary storyline clips. I wanna have this pink son clip. Okay? He's skiing and now I take a different angle and I see him skiing down the side of the mountain. This b roll clip relates to this a roll clip. The cool thing about the magnetic story line is this if I grab this a roll clip and dragon all the clips that are associated with it that air hooked into it all three of these clips move with it so I don't have to move b roll clip separate from a roll clips this clip here is connected to this story line I grabbed this clip the magnetic timeline shift will shuffles the clips for me. I see the first clip now and then the clips that I just moved or this clip I want to grab this whole story, his key, his b roll everything as a single clip I move them together why? Because they're all hooked the connected clips are all hooked into the primary storyline and they're all hooked based upon the first frame. Sometimes you want to move the position of the hook. This pink son should actually this emcee you two camera, even though it starts see the hook at the end of the through trees shot it really needs to connect two pink son, hold the option and the command case down and click in a clip and noticed that wherever I option command, click the hook moves to that location option command click the hook is here option command click the hook becomes they're the reason that's important is now when I grabbed this clip and move it all the clips that air hooked to it, move with it so I don't have to move say all of my b roll clips and my title clips and the other clips just shuffled and get out of the way stacking order's important pink son is now on top of them. See you two camera if you want him to see you too camera to be visible, just hold clip down, drag until it's on a higher layer and now the emcee of the camera is visible and pink sun is not thes hooks are really important for being able to answer the question where is stuff connected? And the hooks are visible when you select the clip or depending upon how you have this setting down here noticed that show connections is off. That means that you only see the hooks when you select a clip. When you show connections on, we now see all hooks of all clips, whether they're connected or not for simple project showing connections on allows you to see the hooks of everything which is ok, but for really complex projects that air fifteen, twenty, thirty layers it becomes a jumble of hooks. You can just turn off the display and on ly see the hooks for those clips that are selected. Okay, what we spent a lot of time doing this have been spending a lot of time looking at trimming connected story lines, then how they're connected, but we haven't talked about probably the most important thing, which is editing audio and video separately, which gets back to the story of john and martha. So let's, take a look at that. All right? And here I need to have some audio with second yes need to have audio. Uh huh. It ain't too late to change. Start acting nice, maybe could assaulting people. Look, hon ain't too late to change who start acting nice and maybe stop salt people khanum names really give it a try sometime. I'm just sorry this is a scene from a film called route thirty two, directed by john potshots in independent film and part of a trilogy, and he shared his clips with me for which I'm very grateful, but we've got a couple of problems here one we've got a blocking problem where she walks the blonde walks next to the red had twice, which just violates the laws of physics and number two I don't want to see the blonde talking because the change that's occurring is in the redhead, so I wanna have the blonde to be the instigator, but I really want to see the emotions of the woman on the right, so we have a bunch of different trimming that we have to do. So let me just take the next ten minutes and explain how I'm going to trim up the scene that you could sort of watch over my shoulders so what's happening first noticed that we see the audio wave forms here and in the next section we're going to talk about audio, the audio's a little bit on the low side so you may need to just crank the vine up in the control room just a hair to make this a little bit more more audible with that being said, let's, start the scene and we'll just play this back and stop and start over the next couple minutes and put this together okay, I'm going to get rid of that so I'm going to grab the very beginning of the clip on drag it so we start there and now play okay now at this point I would like to see the other person it ain't too late to change start acting nice maybe quit assaulting people there she wanted him and that's where I wanna have the shot change occur so first thing I want to do is I'm going to grab the out of this clip and drag it back to where she says look on let's see if we get it here and now I'm going to grab the end of this clip and drag it over so now we've got the action to match look it ain't too late to change okay but here's where it gets exciting notice that right now the audio and the video are together in the same clip we see the way forms down here this black horizontal line allows me to play with the audio levels we'll talk more about that in the next section just a small net I think that was the latest release that little white dot that shows up in the middle of the clip they're this is called the what this does is this indicates the clip that's visible it's the timeline indicator dot if I put this clip up here notice that they're stacked as I move the play head across the white dot indicates which clip is visible in the timeline? So it allows you to say, ah, this is my visible clip for people that don't understand that stacking order makes a difference when you put a clip on top, it explains that the clip on top becomes visible because the white dot represents what is visible in the visible clip at that point in the timeline. Okay, not a problem notice that we've got the audio here, and this black course on line represents the audio level. If you double click on the wave form, it separates the audio from the video but doesn't knock it out of sync. So this allows me to say, I want to adjust the audio differently than the video, or I want to just video differently than the audio again watch look ain't too late to change who start acting nice and okay. So now let's, go back up to here as I grabbed my trim tool, I can now trim the video, so the video is now editing at a different time than the audio, and I can click on the audio with roll tool with the role tool, and I can do an audio roll separate from a video roll, so now as I play this look, it ain't too late to change cannot there? We got it, we got it. She's saying it ain't twice we've got to be careful here gonna grab our audio and just roll it back a little bit huh ain't too late to change who started out too nice and too late to change okay now here we got audio so I'm going again zoom in so you can see what's going on you can see the little bit of away form where the redhead starts to talk I'm just gonna grab that trim the audio in and drag this over double click the audio aero tool and drag this audio over so I have a reaction and by having them stack underneath each other I can have the audio from one clip b playing while the audio from the other clip is ending now this may sound like a train wreck let's take a listen nice nice maybe stop stop okay she will get rid of that clear that out hey started okay I'm gonna go back to hear trim tool go back to the lawn together we got a gap it looks like lips hips, hips timeout I just zoomed in too much we go on dh zoom out a bit shifty see if you get so completely lost you have no idea where you are happens to be a lot ok so look what's happening look ain't too late to change who start acting nice and so I got a bad lip sync problems so I can't do that ice and maybe stop salt people khanum names okay again double click the audio and the role tool get a better sense of her reaction but I still have a lip sync problem here I'm feeling guilty about this he started acting nice and maybe stop salt people khanum names really give it a try sometime notice how by staying with her the red had longer even though the blonde is still talking we watch as she rustles within herself to decide is she going to change or not just really give it a try sometime and I could just cut here look at the emotional difference if I cut to her right here and I'm don juan is waiting just really give it a try sometime I'm just so see here we're concentrating is the blonde is thinking am I going to be able to do it? Am I finally going to be able to get her to see a difference by staying with her child's sometime or if I would just change the position of the edit, grab the roll tool and roll this back as far as I can notice how now we lose the blonde she's just becomes the catalyst and we're seeing the internal struggle of the redhead really give it a try sometime I'm just sorry the emotions are totally different and all that's the same audio but I'm playing with where I'm transitioning from one shot up to the next that's what trimming is all about now we're going to spend the whole next section talking about audio, so I'm not going to do a whole lot maur here, except to say that we can open up the audio with the aero tool by double clicking on the audio and double clicking again to close it back up. I am not losing sync wherever I move the audio the video moves wherever I move the video, the audio moves so there's no risk of losing sync the relationship between the audio in the video, but it does allow me to trim audio, to occur at different times and to clean up problems in a way that doesn't affect the video s o guest abc would like to know. Can you bring your clips onto the timeline with the audio already separated? Or do I have to double click every single clip the answers the it really depends upon the definition of the word separated you would hear, well, here's the other thing, if I select the answer is no, you cannot bring them to the timeline separated. But if I select all the clips that I want to separate, go up to the clip menu and type collapse audio video or used the keyboard shortcut control s whatever clips you have selected will all separate at the same time. So audio and video will always come in as a single clip where they're linked together, select the clips that you want to separate type control s and whether I had one or four or forty clips, all of them would open up the same time. You can do the same thing with the keyboard. Sorry, you could do the same thing with the mouse by going up to the clip menu and select collapse or expand audio video. The other four options we'll discuss in the next section on audio. I have a reminder, but not a question. Uh, okay, keyboard shortcuts. If that's, if now's a good time, a couple thoughts. First, we review clips because we shoot farm or material than we will ever be able to edit into our project. We added clips to determine the shot order. The basic flow of our story shot order determines what goes first on what goes second, but trimming makes it possible for us to smooth the shift. The transition, the cut from one clip to the next and it's surprising. But although editing takes a lot of time, the real time is spent in trimming because there's so many different emotional textures as you trim. First, you have to match the action what we I saw that in a variety of cases, whether it's, our snowboarder falling off the face of a mountain or the two women talking where she can only walk up to the the blonde could only walk up the red head once you can't have her walk up twice. That kind of trimming is easy, the trimming that takes thought and the trimming that really adds a professional tone to your work is trimming when you're starting to adjust the emotional context as we started to see the emotions change by simply changing the location off the the other point, whether it's something as simple as a snowboarder flying off the face of a mountain or the dramatic scene of ah ah woman having a change of heart, or even a music video where you're cutting on the b two, you're cutting just before or just after the beat. Every single one of those has an emotional meeting as well as a visual or an audio meaning, and so far, everything we've spent over the last day and a half is focused just on the pictures. It doesn't even talk about the audio on audio opens up ah, whole new range of emotional opportunities, which is what we're going to talk about in the next section don't underestimate the power of high quality trimming to change the quality of your show. It makes all the difference editing is important but trimming is what separates ah professional production from ah home movie that only the family wants to watch let me show you the keyboard shortcuts as long as we're here can I actually throw in a little throw little boomerang action you may throw in whatever you wish so we got a question here and I don't know if inappropriate but you will let me know from el production saying do we have time if we have time how do you use the position tool for trimming uh I've got a dr cerf clip here let's just take a listen to this for a second so let's be sure we can hear audio with their own teaching skills to shape the education of the kids your technology is a tool it does nothing unless you figure out how to apply it but once you understand that it multiplies your ability it's like an electric motor that multiplies muscle town computing and communication technology multiplies brainpower and if you understand it well enough to be able to use it it could make you far more effective okay so let's use the blade tool will cut this off here get rid of that clip we use the blade tool over here get rid of my question at the beginning cut that off and now what I want to do is I want to take the beginning of this cliff your technology is a tool and I want to add it to the end of the clip and if you understand it well enough to be able to use it, it could make you far more effective now I personally like the entire cut, but in this particular case I want to make a blade cut here and I want to make a blade cut here, get rid of that stuff in the center and because it's the magnetic timeline, all I have to do is to delete the clip and it automatically closes up to gap. Now, when we play this, your technology is a tool and if you understand it well enough to be able to use it, it could make you far more effective. Okay, so now let's zoom in a bit, shift dizzy and let's clean this up just a little bit. I'm gonna pull that in you're taking it so I havejust be technology will get the breath take no, no, not to grunt the breath technology is a tool grab the end drag it over I'm watching the way forms here the tool oh there's, this really cool thing as long as I've got a second let's make the wave form vigour go up to final cut pro preferences which I have not talked about and I need to and it's it's jim's fault that I haven't audio seaward says show reference wave forms notice how faint most of this audio is when you turn on reference wave forms, it adds a ghosted back image, which makes it look as though you're way forms or as loud as they can be. So if you're dealing with really, really soft audio as I am over here, the reference way forms enable you to see what the audio is if it was loud enough to actually hear most of the time because I'm comfortable reading way forms, I don't use these, but it's a really neat display on lee doesn't change the levels, doesn't change read it just changes the display of the audio so that you can actually see what the wave forms look like. Technology is a tool, and if you understand it well enough to be able to use it, it could make you a case and I'm going to grab this. I'm going to take it all the way over to here and listen to how tight this sounds. Technology is a tool it can make you far more effective. Okay, technology is a tool it could make you far more effective now. There's a couple problems here one I've got a slightly bad inflection. Because the music of his voice isn't quite the same but also notice how tight this is the two phrases air slamming into each other I've lost the rhythm of his speech he has a natural rhythm of how he talks and I'm too type the second half of the quote slams up against the first technology is a tool it can make you form if I use the position tool if I use the position to elikann now grab this clip and drag it over just a little bit and now listen to the difference just opening this gap up now close your eyes and listen because they have black flash is going to distract you technology is a tool it can make you far more effective fact will move that over a period movie one more frame technology is a tool it can make you far more effect she hauled by adding that little bit of the gap in there, which is what the position tool allows me to do. The position tool allows me tow override the magnetic timeline listen to how much this is tight it can make you and this with the position tool is muchmore natural sounding and if I cover it with b roll, no one in the audience is ever going to notice that that it was made there is a tool it could make you far more effective so the position tool allows me, jim, to temporarily suppress the magnetic timeline. So the clips are not forced to touch to each other. I can pull them apart to give me room toe, add gaps and pauses. And in a trimming point of view it. It allows me to get back into the natural rhythm that that speaker is using for their communication.
Class Materials
bonus material with purchase
Ratings and Reviews
a Creativelive Student
Absolutely one of the best & easy to follow teaching / learning sessions for this product. Larry has a great approach & insight into delivering a wealth of information from his years of experience that budding video engineers will certainly benefit from with a product that is powerful & great to use. I'm enjoying the journey to better understand & use this great product, expanding my experience in producing awesome video presentations. Great work Larry, & also huge fan of creativelive Keep up the great work you all do to assist budding producers in mastering their skills. Noel Blake Melbourne Australia
plb42
Final Cut Pro with Larry Jordan has been of enormous help to me just stating in FCPX. Larry has a unique way of getting the message on the basics across in an easy to understand manner. I have not yet looked at the entire course as I am practicing the steps as I go through the course. Many programs of FCP are not presented in the easy to follow manner thatL array does so well. I am 100% delighted with my purchase. I am in Sydney, Australia, and, due to the time difference it is impractical to view courses live. So I had to purchase on trust which in this case was a good choice. It would be good if Creative Live could perhaps rerun programs so overseas folks could view them at a convenient time. The courses still need to be purchased as I find it best to run it on another monitor and put what is taught into practice. Well done and thanks for the special offer in July.
a Creativelive Student
Attending this class was really a life-changing experience. Larry is a wonderful teacher and clearly on top of the program and methodology, and the way he structured the course, did frequent reviews and constant technique reminders (naming keyboard shortcuts as he did them, for example) really added a lot to the presentation. The depth of the class was very much appreciated, and his command of a complex subject showed that it was possible. I have wanted to understand FCP for several years and have only gotten the beginnings of a handle on it in the last 6 months or so. This class was an exponential knowledge upload and I hope will allow me to do lots of things I've only wondered about. I thought Jim was a good foil for Larry and did a nice job keeping things together, even when there was a technical problem. The value for me of being able to sit through the class before deciding to purchase was huge, and I am very much looking forward to reviewing the videos as questions come up. The class was very thorough and I didn't feel anything was being left out. Thank you so much for making it available.
Student Work
Related Classes
Final Cut Pro X