Lesson Info
37. Color Correcting for Video
Lessons
Day 1
1Introduction
18:02 2Key Terms
27:06 3System Configuration and RAID Storage
19:22 4Q&A with Creating an Efficient Workflow
19:36 5Interface and Media Management
31:02 6Importing Media Part 1
30:40 7Importing Media Part 2
11:58Ratings and Keywords
32:21 9Reviewing Clips for Edit
25:13 10Importing Clips
19:26 11Editing an Interview Demo
33:20 12Replace Edit and Timeline Index
32:50 13Compound Clips and Auditions
18:27Day 2
14Editing Review
13:34 15Trimming Part 1
28:43 16Trimming Part 2
39:03 17How We Hear
21:51 18Audio Key Terms with Q&A
12:14 19Audio Basics, Meters, and Inspector
31:01 20Audio Q&A
08:55 21Dual System Sound and Audio Analysis
28:58 22Multicam Editing Part 1
27:08 23Multicam Editing Part 2
15:02 24Transitions Part 1
23:27 25Transitions Part 2
24:06 26Formatting and Animating Titles
30:18Day 3
27Additional Effects
12:36 28Editing and Trimming Review
11:58 29Changing Speed of a Clip
31:31 30Inspector Effects
36:35 31The Effects Browsers and Generators
19:37 32Blend Modes
17:10 33Effects Q&A
13:58 34Simple Effects
16:52 35Intro to Color Correction
18:20 36Video Scopes
19:25 37Color Correcting for Video
20:28 38Color Correcting Skintone
23:11 39Color Correction Q&A
08:54 40Audio Effects Part 1
26:20 41Audio Effects Part 2
23:08 42Exporting and Sharing
21:28Lesson Info
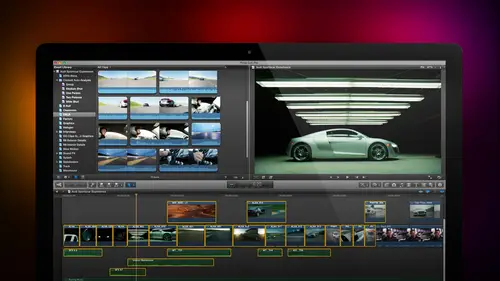
Color Correcting for Video
notice this line that goes up left. It's right around the 10 30 position. This is called the flesh tone Line or the skin tone line. Skin tones are considered accurate when they are parked on the skin tone line. Now, Jim, I know that in the stuff that you do, you work with actors and actresses and models time and you look at any three people and you're going to see three different skin colors because everybody is different. Have you ever known an actor to wear makeup every day? And the reason we wear makeup is one. We want to make our faces, whatever blemishes we've got to hide them. But number two, we're trying to come up with a standard color so that people, the reason people look and reason people wear makeup is because they want to look. Quote normal, not because they want to look really. If people want to look real, nobody would wear makeup. Nobody wants to look real. They wanna look normal. Normal is defined as this skin tone line, and the skin tone line represents the color of re...
d blood under skin. Now I won't ask anybody in this room because It's an embarrassing question. So I'm gonna ask you instead when you get yourself cleaned up in the morning and you've got a piece of dead skin like all of us. If we're alone in the bathroom, we study that dead skin with an intense scrutiny to see. Is this part of a larger body part that's falling off when you look at dead skin? What color does it have? And the answer is, it is always great. Skin is gray. What gives skin its color is not skin itself. What gives skin its color is the red blood flowing underneath the skin. Our skin determines how light or dark in gray scale it is, but not in terms of color. Therefore, we set the grayscale value on the way for monitored of to make sure that we've got the right value for the skin will talk more about this in a minute, but we set the color based upon the skin tone line, which represents the color of red blood under skin. And what you're going to find out is if we're above or below this line by more than about two degrees, the skin is going to look yellow going to brass or it's going to look very red going to sunburned. And we've got about a two degree latitude, two degrees below in two degrees above the line to keep skin looking. Quote normal. Now everybody's different. But our goal is not to have people fall out of the story because all of a sudden somebody looks like they've been sunburned. Walks on the set and I give you an example. Cast your mind back back through the centuries to the early days of program called Star Trek. You may have heard of it. One of the evil villains on the first version of Star Trek were Klingons. Okay? You remember you heard the word Klingons. You can say yes. Yes, yes. OK, good. Had me worried because otherwise is gonna take for, like, ever. It was that dancer that was green. But cling on does not have human color skin. I know. It's a shock. Klingons are green, huh? Now, here's the question. Yes. You're sitting down. I'm ready. Do Klingons really exist in a script? Do Klingons really exist? I don't know. It's a vast. You keep working on it, guy. The Klingons exists not in are not existing. Do green skinned Klingons exist that we can point to anywhere on this planet? No, no, of course they don't. It's an actor wearing a costume and make an actor wearing a costume with green face paint. So what has to happen when a cling on walks on board the Star Trek Enterprise, the Starship Enterprise for the first time? Kirk, who's sitting in the caption share cause that's where Kirk always sits, has got bones next to it. Because Bones is a doctor has got absolutely nothing to do. Bones looks up, the door opens the Klingon walks through, Bone says, Get that green skin cling on off the bridge because we have to establish in the dialogue that this is not an actor wearing green face paint. We have to suspend our disbelief to say this Green is the normal green of that actor because our brains are hardwired to know exactly what skin tone looks like. There's three things we have to get right skin tones, greens and blues greens because our brains are programmed to know the color of green grass and blue because our brains are programmed to know the color of Blue Sky. Now give another question. This is in a generic question. I'll pick on June because he's clearly just sitting here listening. Jim, you ready? This is a brand new purple iguana from the Galapagos. Silence. Is that not an amazing purple iguana? Beautiful. It's not a purple iguana from glass. Besides, it's a pink iguana from Easter Island. Is that not a great pink iguana? No, no, no. It's a green iguana from Tahiti. Is this not the most incredible green iguana you've ever seen? An angle iguana? An iguana is any color, I tell you it ISS because nobody knows what a color of iguana is. But we do know the color of skin tone. And if I put somebody's face on camera in a well lit environment in their skin tone is and plus or minus two degrees of the skin tone woman, people are gonna look and say, Why are you so cheap that you can't afford to hire? Add to color, correct your video? Why are you so cheap that you can't afford to put makeup on your actors? And all of sudden they lost track of your story because you're actors don't look normal. I'm not saying riel. I'm saying normal. That's what color correction is all about. We need to make stuff look normal. So our audience doesn't fall out of the story and discuss the fact that the gravel wanted it. That train is blue, green, and gravel doesn't look blue. Green gravel looks brown. That's what color correction is all about. So let's see how we can go solve this problem. Jim, you still with me, huh? If we take a look at faces, let me just give an example. Notice here with her. She's right on the skin tone line. Here's a Hispanic woman again. Where is she? She's right on the skin tone line, but she's not a saturated and with a black woman, she would be right and guy. She would be right exactly on the skin tone line, just not a saturated as well. The skin tone line is your friend to figure out where colors are. So how do we go about the process off manually? Color correcting. Well, let's go back to our scopes. You always start color correction using the wave form on it now. Ah, person has been color correcting for a long time can adjust color and grayscale at the same time because they're very comfortable doing both. I find it easier to teach and to do if you consider it as two separate steps. One is the Karla correct the grayscale value and the second is to color, correct the color value. And Jim, I need your help for one second. Let's take a look at this. This we're gonna look at this from a grayscale point of view. Notice how high are black levels are they're pushing around. 18% are white levels are writing 100%. That's perfectly OK, although personally, I keep my white levels around 97%. The only rule with white levels is that your white levels cannot exceed 100%. But there's no rule that says they have to be equal to 100%. They can be equal or less. Back when PBS had standards, they would require that white levels not exceed 90%. I tend to color grade with my white levels between 97% because I want to just make sure I've got a little bit of latitude toe in case something spikes a little high. Um, I don't I don't get in trouble Thinking of getting in trouble. I was doing color correcting of a behind the scenes piece for a DVD release for the HBO series Rome. And for a variety of reasons, the producer and I did not have a whole lot of time to put the color grading together. I had just a Knauer to color great an hour show, which was a little bit tricky because normally you need to sort of look at every frame and make sure it's going to call a great properly. But in this particular case, schedules did not allow that. So I did the very best that I could and I color grated the entire show, and we sent it off to the network to be included as part of the DVD. And I got a call from the producer who was screaming, upset the next day, accusing me of all kinds of bad things. But the reason he was so upset is that two frames of this one hour behind the scenes documentary two frames had white levels. It had 102% not 100% but 102 and the network rejected it and bounced it back to the producer to get it recovered. Rated well, Clearly, it was my fault because I was the color grader, but two frames out of our long video. See what happens is when you send up a program off for professional use. They take that video when they run it through what's called a recording scope, and there's a little ticker tape that plays. And it looks at this, says Whitelaw, will succeed zero at this point, and chroma levels air oversaturated at that point, and nobody looks at it. Nobody looks at the quality of your content there, just simply judging the entire program based upon whether it meets spec or not. And I was out by two frames. What happened is in our hurry. One of the actresses was wearing name badges, which gave her security clearance to get behind the scenes with the rest of the set, and that badge on her chest caught a set light and flashed white because of the set light reflecting on the plastic of the badge, it went to 102% and cause the white levels to go over 100% and and cause the program to be rejected because we didn't catch it is part of the color green. Well, number one that taught me a very important lesson, which is the white levels. Can't go over 100%. Gave me a good story to tell because it was my fault that it it was too hot. But it also proves the third point, which is that producers never hired me again to do color grading because I screwed up that first time. You want to make sure your white levels cannot go over 100% when you're working for anything except the Web. The Web is very forgiving, but nobody else is. So how do we adjust this? Select the clip. Go to the inspector keyboard shortcut his command four. And you'll notice here at the very top of the inspector without applying any effects. Built into every clip is what's called the color corrector, and the color setting allows us to do things like match color or balance color that we saw from this Magic wand menu. But I really want to go down here to the color correction menu. We can apply multiple color corrections to the same clip. There's no limitation. You could have 10 even 20. And we can color correct the entire clip, called a primary correction or a secondary clip called or a secondary correction, which corrects a portion of the clip here. I want to make changes to the entire clip to make changes. You go to the correction and you see this right pointing arrow. Here you click on it. It takes you to the color board. There's a keyboard shortcut that takes us to the color board. That's command six. So if I close this command four opens, the inspector Command five opens the effects browser commands. Six. Opens the color board most the time. I tend not to use the keyboard shortcut. In this particular case, I tend to always want to go into and out of the color board by clicking the right pointing arrow next to correction and the left pointing arrow up here to go back. Once we're inside the color board, there are three settings that we can work with exposure, which controls the grayscale value of the video color, which controls the hue of the video and saturation, which controls the amount of color, and inside each of these three settings are four pucks, as Apple calls them. This is a global puck. It allows me to change the grayscale value globally, higher or lower. It's one of the most useless sliders I've ever seen. But it's nice to have their because as soon as it wasn't there, I would probably need it so I can have the global slider instead, I want much more control. I want control over the highlights, or I want control over the mid tones or I want control over the black levels again. This would be highlights mids and shadows ed on that Global wouldn't do that when they can. The global up and down. You have a different perspective on it. When you do it all the way down, find out when you find out where black is in your picture because you're gonna be keying off of what's black. You want to know what black is, and when you go all the way to the top, you find out what is really white in the picture. That kind of keys you off on what toe white in the picture. In other words you're using this is a way to say black. Is this shadow detail right in here? And why does the highlight on that piece of paper by using this is a way to see that which disappears, last, darkest. And that which disappears. Last is the brightest. Absolutely. That's that's ah, really good point. And I appreciate knowing that I would probably So what? We've seen this with exposure. I'm able to adjust the grayscale values. So I'm gonna pull the highlights down a bit. Notices I pull the highlights down. The picture itself gets darker. Okay? It loses life highlights our life, their energy, their their punch. Okay, that's what the highlights do. But they can't go over Ah, 100%. The black level is richness. Its its solidity. It's power. Okay, that's the black level. But they can't go below zero. And the mid tones the mid tones are the emotion. Is it noon? Is it middle of the afternoon? Is it evening? I can change the time of day by adjusting the mid tones. The emotion of a scene is controlled from the mid tones. The energy, the punch is controlled from the highlights and the richness, the vibrancy is controlled from the shadows. So just by playing with these three controls, I can start to affect the emotional tone off this particular scene again. White levels can't go over 100%. I tend to write it just a little bit south of that, and I may have crushed the blacks a little too much. I'll pull it up a little, but this is what it looks like before turning us off. This is before, and this is after We're not turning the green and the purple. We're not making big, gigantic differences, but notice how this is OK right there. That's OK, but that's better. It's richer. It's fuller. It has a nice feel. It feels more like about to go on a balloon ride in the middle of the afternoon. The second shot here is dark. Look at where it is on the way for monitor, and I don't want to mess with the dark. The black levels the shadows because this is a blue balloon. It's not a black balloon again. If I go to color correction and click to the right and pull the black levels down. Okay, The balloon changes its color to black. It really isn't a black balloon. So I don't want to mess with this, but I can mess with the highlights. And generally, if a picture is too dark and we're gonna ignore this speculator right here to make a point for a moment if I grab this and drag it up look at how the life, the energy, the enthusiasm, the excitement just to faint. The plane fund of that shot increases as I pull the white levels up again. If I go back again, this is what it looks like. Before we raised the highlights. This is what it looks like. I mean, this is this is a depressed young kid watching his balloons fly away. This is a young kid excited to be able to go outside in the summer. School is out, they've got the whole day ahead of them and they've got these balloons to play with. The difference in energy is astonishing. And all we did is we simply took in the exposure and we pulled the white level up. Let's take a look at one more shot. Here. Here. I've got white levels that are too hot. Virtually every camera, virtually every digital camera shoots white levels to 109% because it shoots on a digital flight level scale. Not a ah broadcast white level scale. Again, if you're going to the Web, you could get away with it. But it's really bad form to not know that you're white levels air too hot. I'm gonna pull the white levels down, select the clip which loads it into the inspector, grabbed the white levels and pull it down a little bit. And now I'm gonna pull my black levels down toe, make my shadows a little bit richer. But where do I pull the black levels down? Where is the point that I need to find black levels? Well, that's where the hissed a gram comes in. The history Graham shows the distribution of black levels from the assisted, the distribution of gray scale levels from black on the left of white and super white on the right. I'm gonna change the settings so I don't look at the RGB overlay. I just one look, a loomer, which is gray scale and look for my black levels are the hissed a gram shows me exactly how far I could move my block levels before I get into trouble, grab the black level and just pull it down. So the mountain kisses the edge of the scope right there. We bring the mountain to Mohammed, and it touches the zero line. Now my black levels are not crushed. That would be bad, and they're not elevated, which makes it a foggy day. My black levels are right where they need to be, which is right at the zero line. Just by making simple adjustments to the grayscale level, I've added a late afternoon romantic field to our balloon ride. I've added life and enthusiasm toe young kids Summer day, and we've made the train look like it's a believable train as opposed to a washed out and grayscale. And I haven't touched color. I'm just adjusting grayscale. I'm wearing a blue shirt is blue shirt. You would look out and say, Open up. That's Ah, blue shirt. If you were to look at Jim, we'll just take a quick close up of Jim. He's gonna be working busily on his computer, but Jim is wearing a pink shirt with a blue T shirt. One of things that you really need to work on as you are looking at color is you need to separate in your mind the grayscale value of the particular shirt or object that your color correcting and the color value. I have a dark gray shirt to which is applied. The color blue gym has a light gray shirt to which is applied the color pink. Jim's T shirt is a medium grey T shirt to which it's applied the color blue. You need to separate in your mind the grayscale value of something. It's black and white. It's lighter darkness from its color ness. Now this is really, really hard. I have yet to get a single student. Get this right when I go through it in class because we are so used toe intermingling color with gray scale. But the sooner did you can start to separate the color value from the grayscale value, the easier it becomes to color, greater or color. Correct a particular clip because you're able to look first at what should the grayscale value B and then second, what should the color value being? Let's go back to our our people again
Class Materials
bonus material with purchase
Ratings and Reviews
a Creativelive Student
Absolutely one of the best & easy to follow teaching / learning sessions for this product. Larry has a great approach & insight into delivering a wealth of information from his years of experience that budding video engineers will certainly benefit from with a product that is powerful & great to use. I'm enjoying the journey to better understand & use this great product, expanding my experience in producing awesome video presentations. Great work Larry, & also huge fan of creativelive Keep up the great work you all do to assist budding producers in mastering their skills. Noel Blake Melbourne Australia
plb42
Final Cut Pro with Larry Jordan has been of enormous help to me just stating in FCPX. Larry has a unique way of getting the message on the basics across in an easy to understand manner. I have not yet looked at the entire course as I am practicing the steps as I go through the course. Many programs of FCP are not presented in the easy to follow manner thatL array does so well. I am 100% delighted with my purchase. I am in Sydney, Australia, and, due to the time difference it is impractical to view courses live. So I had to purchase on trust which in this case was a good choice. It would be good if Creative Live could perhaps rerun programs so overseas folks could view them at a convenient time. The courses still need to be purchased as I find it best to run it on another monitor and put what is taught into practice. Well done and thanks for the special offer in July.
a Creativelive Student
Attending this class was really a life-changing experience. Larry is a wonderful teacher and clearly on top of the program and methodology, and the way he structured the course, did frequent reviews and constant technique reminders (naming keyboard shortcuts as he did them, for example) really added a lot to the presentation. The depth of the class was very much appreciated, and his command of a complex subject showed that it was possible. I have wanted to understand FCP for several years and have only gotten the beginnings of a handle on it in the last 6 months or so. This class was an exponential knowledge upload and I hope will allow me to do lots of things I've only wondered about. I thought Jim was a good foil for Larry and did a nice job keeping things together, even when there was a technical problem. The value for me of being able to sit through the class before deciding to purchase was huge, and I am very much looking forward to reviewing the videos as questions come up. The class was very thorough and I didn't feel anything was being left out. Thank you so much for making it available.
Student Work
Related Classes
Final Cut Pro X