Lessons
Introduction & Basic Controls
08:44 2Mode Dial
18:10 3Other Top Deck Controls
07:58 4Back Side: Camera Controls
11:36 5Live Demo: Manual Focus
02:52 6Back Side: Quick Menu
15:25 7Live Demo: Playback Displays
03:47 8Live Demo: Wifi
08:10Lesson Info
Introduction & Basic Controls
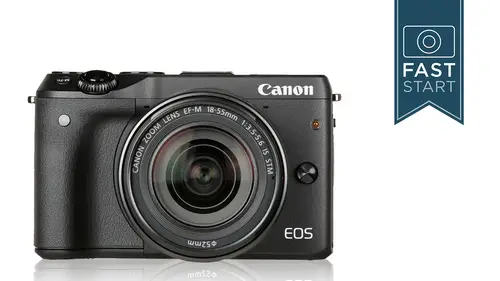
tune in and we got the Canon Eos M three here Those of you who have been following the muralist developments and cannons tiptoes into those waters will know that this is now easily and it's not really hard to say their best muralist cameras. So far, it's just their third version. Thus the M Premier A list three in the number and it's their most capable. It's got the best collection of features on it, and it does have a lot of stuff. So we're gonna get right into things and go through the operation and functions of the camera and really help you get your camera set up for the way that you want to shoot photos. So let's get to the keynote and get started on this class. All right, so what we're gonna be doing in here is after a very brief introduction, we're gonna be going through the controls of the camera, which is all the buttons and dials on the outside. If there is an important function, it probably has a dial or button on the outside of the Cameron. So that's gonna be our opportunit...
y for going through and figuring out what those do and how to utilize them. The second half this class is going through the menu system. This is really the brains of the camera in my mind, and so there's a lot of things in here that will never, ever use. But there's a lot of things that you want to tweak once or twice, or there's a couple that you're gonna want to come back to on a regular basis. And so this is a great place to go through as you get the cameras so that you can get it set up to yourself. Now I should mention that as we get to that section, we do have a download for this class, and there is, ah, four page handout pdf that you can download that has the entire menu. On one page. I'm a very visual person, and I like to see things all laid out so I can just kind of glance around and find what feature I'm looking. At fact, when I was just preparing right before this class or something, wanted to turn off on the camera, and I couldn't remember where it was in the menu. But I'm visually orientated, and so I was able to just scan up and down, and I found it in a few seconds. And so I have one page that has a number of recommendations on where I think is a good place to start setting the camera out. You'll want to adjust from there. I have another page where I have all the recommendations blank so you can write your own in there if you want. And then at the end, there is some recommendations on how to set the camera up for various other features. And so you'll want this during the second half of the class, and I like to have a nice print out of it here so I can scan it over. All right, so the camera does come with a reasonably lengthy instruction manual and this class I expect to be about three hours in length, and there is no way for us to cover everything that is in the instruction manual. So it still might be handy for some of you who have further deeper questions on particular issues that we just don't go into that far. We will be covering pretty much everything on the camera, but I am very, very mostly, uh, going to be concentrating on the features that are most important to getting the highest quality photos. And so, for instance, on this camera you can print directly from the camera to a printer, and that's just something we're not going to spend a lot of time on. And so whatever is most important for getting the best quality photos is how our time is going to be spent in this class. If after a while the class you're wondering, Hey, Joan, what about composition and lighting isn't that important in photography, and it absolutely is. But this is not the time and place for it. That's something you would doom or in a general photography class. And they do have a couple of classes that I can pointing towards if you're interested in learning more about photography. In general, I have a short class called the Photography Starter kit, and that's a great way to get you out the door in a few hours with all the basics that you might need. But for the folks that really want to dig in and learn all of it, the fundamentals of photography is essentially the encyclopedia of my brain in photography. And so that's a much more in depth class. And you don't need both of these classes. You can choose one, or you can go short an angle big if you want to do that a little later on. But that's where we talk about all those other things in photography in this class, we're gonna be concentrating how to use this camera. And so if you're looking for a review of this camera, we're not gonna be comparing this camera to any other cameras were just concentrating on how to make the best use of this particular camera. So if you're watching, I encourage you to have your camera out and ready with your hands on it, ready to play around and make your changes as we do this. So you're gonna wanna have a charged battery, takes a couple hours, charge that battery. You could expect to get around 250 shots on it, of course, won a lens in there, have a memory card in there. And if you just bought a brand new memory card, you should format it. We'll talk about that towards the end of the class. Obviously, your cameras turned on. And just to start with, make sure your cameras in the little A plus mode right now, which I'm gonna do with my camera. I'm gonna do the same thing. Turn this on, make sure we're ready. And then I'm gonna go ahead and take a picture of Ken over here cause she's the only other person here in the studio. And make sure that my camera is working properly and it looks like we're all ready to go and simply you are as well. So let's get started on the good stuff here. This first section is on camera controls all the buttons and dials on the outside of the camera. And what we're gonna do is we're just going to take a tour and talk about what they dio and when you would want to use them. So when you turn the camera on and off, the camera goes through a sensor cleaning system where it tries to clean off any dust that's on the sensor. Now, there still could be dust that sticks to the sensor, and you will see this in spots on your photograph and I'll talk about cleaning this later on. But in general, you probably won't have to worry about anything. Be very careful about taking the lens off and leaving it off for a prolonged period of time. You want to keep that front end of the camera Covered. The shutter release, obviously, is where you're gonna be taking photos, but by pressing halfway down, it wakes the camera up. Now, a camera like this goes through batteries relatively quickly, and so the camera wants to conserve as much power as possible. And so, in order for you to wake it up from its napping, you might say, Just press halfway down or lightly on the shutter and that'll kick the camera back into gear, ready to go and start shooting photos. We have a dialled located around the front shutter release there. And this is gonna be a dial that we use for changing lots of different features on the camera, from shutter speeds to changes in the menu system. So that is just a general control that we're going to use as well as the control dial on the back of the camera, which also operates as an up, down left right mouse. If you will. And so we're gonna be using this in a couple of different ways, mostly navigating through the menu system but also moving the focusing point around and in a few other features will be using it as well to make changes. And then in the middle of that is a set button, and this is kind of our confirmation or inter button on the camera whenever we are wanting to make a change and confirm that change in their now in this class, I know that there's a lot of you that have been using this camera for a little while and you're just say a little bit faster on the pickup, you might say, And you want to get in and make changes right away. So I'm gonna give you a number of shortcuts. And so any time you see a little box, this one's got the yellow wrench on it. Which means it's a shortcut to where I'm gonna be talking about. And so this camera does have a special ICO mode where if you want to be very conservative with battery life, you can turn the ICO mode on and the camera will shut down more quickly in order to save battery life. And so if you wanted to do that, you would dive into the menu system into set up menu number two. You see that little yellow box is the second of four tabs and look for the ICO mode, and then you could turn it on or off. You know, I tend to want to get the highest performance out of my cameras, and so I usually leave that type of setting off. And I'm just willing to carry an extra battery. Or make sure that my batteries are fully charged and so you'll see the shortcut modes, and I'll just quickly refer to them. And if you want to go in and make those adjustments, you can just pause the video, go in, make those changes and then come back to the video. All right, so we're starting on the top deck of the camera. We have our shutter releases, I mentioned halfway down will wake the camera up, but this is also what you would do in order to shoot a photo, and by pressing halfway down, it activates the auto focusing and the metering system and will generally lock it in. And so it'll lock your focus, lock your metering system so you can recompose the photograph. And then when you want to shoot the picture, you would press all the way down to take the photo. But get used to that halfway feel of it is something that most photographers become very, very acclimatized to on their particular camera. When you do focus, you will see a green box in the camera showing you the focus E.
Class Materials
Bonus Materials with Purchase
Ratings and Reviews
Sue Baylis
I am a complete beginner with photography, I've only used my phone until now. I bought my camera about 3 weeks ago and I've really struggled, as, for example, the manual says turn the dial to select, not which dial, or how to get to the correct place, setting or menu, so that the dial will then work. I'm only up to the 5th lesson and I feel that I understand my camera so much more. I wish I had bought this on the first day. I'm not connected to this company, author or anything else, I was just frustrated, and feeling like giving up as I couldn't get an unblurred photo on my new camera. Thank you so much for this wonderful, easy to understand and follow guide.
Bryan Sarty
I wasn't too impressed by the M3 until I found this course. It changed my whole outlook. John gives a great delivery and fully explains in plain English.
a Creativelive Student
Student Work
Related Classes
Camera Guides