Lessons
Introduction & Overview of Skillset
01:00 2Pattern Envelope Overview
06:12 3Measuring Your Body
02:13 4Cutting out the Pattern
03:44 5Understanding Fabric Anatomy
02:02 6Cutting out the Fabric
08:25 7Cutting the Notches & Second Pieces
03:57 8Gathering Skirt to Yoke
11:18Lesson Info
Hemming the Skirt
So now it's time to create the hem on our garment in this case we're going to do a double fold hem which means we fold the fabric of once and press it and then we take this raj and took it down and press it again and we're going to stitch right along the fold of the fabric this is one of the most common hems and this is super easy because this is a long straight line the edge of your skirt so what I'm going to do is take it by the side seams here and straighten it out and lay it flat on my table I can't even move these two edges so they're right on top of each other make it us flat as I can and I'm going to use my ruler and my chalk to make a mark one inch above the bottom edge of this fabric if we look on the pattern instructions it tells us that that's the hem allowance one inch using the ham allowance means that your skirt is going to end up being the length that you wanted that said if you tried this on and you said ok, well it's a little too long you could make the ham allowance a...
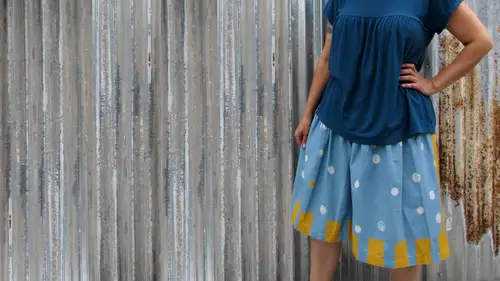
little bit bigger if you wanted to it's a little adjustable you wouldn't want to go six inches but something like two inches as opposed to one inch is just fine you also wouldn't want to go too much less than one inch, because when we fold it a second time, it's going to be closer to half a niche by the time we so it so what? I'm going to d'oh his line up, my ruler with that straight edge of the bottom of the skirt, I made this edge straight with my hands, so if your edges and straight, then just take a minute to smooth it out and get it as flat as you can line up your ruler one inch up, and the trick here is to hold on to the ruler pretty tightly and then go lightly with the chalk back and forth. If you press too hard with the chalk it's just gonna bunch up your fabric like that, and you won't get a clean line so tight with the ruler and a light touch with the chalk to go back and forth, you still want a line that you can see pretty clearly. I'm going to go all the way over to this edge and over here I've got a situation where I have two edges that don't meet up so much just like that, the way to smooth this out, it's a line up your ruler at the one, inch over here somewhere, and then tow line it up at the one inch over here, so I kind of have that irregular bit halfway in the middle of the chalk line you're drawing, and I'll just draw from here right across that bit that doesn't match up to over here, where it matches up again, this is going to make this him nice and smooth when we're finished. So all the way around the bottom edge of your skirt so that you have a line that meets up and then we're going to start to pin it. We're eventually gonna press right over these pins so it's really important at this stage that you do use your glass head pins and not something like quilter's pins that air plastic you don't want to get melted plastic all over your iron or all over your garment, so what I'm going to do here is fold up my edge to the wrong side of the fabric, so it can just see that chalk mark that I made this choc has a little bit of wax in it, so the darker chocks like the blue and the red constrain a later colored fabric if we fold this so that we can't see it on the inside and we got to worry about it, so I'm folding it up and I'm putting some pins in poking straight into my hem like this, I'm gonna pin this going up all the way around when I get to my side scene I've pressed it pointing in a certain direction so when I folded up I want to make sure I maintain that direction so have it going in the same direction and not twisting like that and as soon as you've got your pins in all the way around the bottom edge of your skirt you can meet me over at the iron so now we're gonna press right on top of our pins I'm gonna have you grab a little bit of your him just separately have the rest of your him kind of out of the way and smooth it out on the ironing board and again we're pressing so you don't want to iron because that'll pull those pins right out we're going to take that iron and just put it right down on top of the pin and hold it there for a few minutes up and down just so we get that nice crease along the bottom then I'm going to grab my fabric, give a little shake and spread out the next little part and I'm going to keep doing this all the wear on the bottom edge of the skirt until my crease for the ham is pressed in nice and smoothly so now we're ready to do the second fold of our double fold him you're going to want to start with a couple pins, pull them out and then you'll take this raw edge of the fabric and tuck it right down, so it meets the fold that you just made. If there are any little fuzzy bits of fabric hanging out, you can tuck those in, then pick up that fold in your fingers and put your pins back in through all the layers. So when you pin in and out, you see the pin on the other side of the fabric, we're going to do that all the way around the edge of our skirt. You may find that you need a few more pins because this one doesn't like to sit as flat as the first fold. Keep turning. You can take a couple pens at a time to tuck that edge in same exact thing on the side seem you want to make sure that you're folding it right on top of itself. You don't want it to twist up in there that makes too much of a lump and it's hard for most sewing machines to go over a big lump like that. So the smoother we keep it, the easier it will be for your sewing machine, so you can kind of experiment and see how it's easiest for you to hold this fabric to get those pins in this top folded edge. That's the edge that we're most concerned about we're going to so along that edge, so we want to try to make it is even in a straight as possible, and when you're pinning, make sure that you catch that top edge with your pin. So you wanted to look like this the tip of the pin coming out on the fold. You don't want to pin off the fold so that this flops around like that once I go all the way around the bottom of my skirt, I'm going to give it a second press it's just like the first one smooth it out so it's nice and flat on the ironing board and take your iron and go straight down on top of all of your pins to just squish that fabric in place. If you have steam on your iron and you can use a little bit of steam and that's really going to help, it flattened out and now we're ready to get started with the sewing, and this is a little bit different from sewing a seam with a scene. We have a seam allowance, and that tells us what line on her sewing machine tow line the edge of the fabric up with ah hem allowance can be. Any allowance that the pattern tells you so it can be a skinnier one like this, or it can be wider, and the part that we're going to be sewing on is this top edge of the fabric, so we're going to line it up a little bit differently on our sewing machine. I'm going to start on one side seam because I have to do a little back stitch, and I want that to be as unobtrusive is possible, I'm going to slide it onto my machine here, and what I'm looking at now is where the needle goes down in my machine on my press, her foot, I have a hole in the middle here where the thread goes through and under off to the back, and I'm going to be lining up at the edge of my fabric that I'm going to be so in close to just to the left of that line, on my press, her foot, that makes sure that I'm going to be stitching right on the edge of this fold here, I don't really want to look at this edge and these lines because this hem is not perfectly, perfectly straight all the way around it's much more important to be getting this close to this folded edge is possible, so because I'm sewing in a circle there's a couple things I can do here first. Most sewing machines have a free arm, which means that you can pull off the accessory tray and send it off to the side and then it's really easy to take something circular and slide it onto the end like our home here additionally, because I'm sewing in a circle I don't need to do a back stitch when I start and I stop I can start out just sewing and I'm going to go all the way around and when I meet up with where I started I'm going to sew over those first couple of stitches and do a back stitch of then and that's going to stick here both edges of my hem so I'm going to start right here next to my side seam and lower my presser foot take out my first pin and just start sewing my goal here like I said it's two stitches close as I can to this top folded edge without sewing on just the fabric and not getting too far down close to this lower folded edge this is really what's going to keep the hem in place don't forget to take your pins out as you get to them you have to stop every once in a while to rearrange your fabric and as always you want to be careful to sew on ly what you intend to do so so here's where you could pick it up again so I'm approaching that beginning of where I started stitching, so I'm going to sew right over it. And then I'm going to do a little back, stitch right on top of it, back, stitch. And then I can pull it out and trim those threads on both sides. And when I'm finished sewing to him, I'm going to bring it over to the iron and give it one more quick little press this double fold. Him. Make sure that the inside edge of my fabric is completely covered up and the raw edges and sticking out so it finishes the inside of my garment, ahem, is also really important for the shape of the garment. It adds weight to the bottom of the garment, so that it hangs correctly on the body. In this instance, instead of the skirt going straight down like this, the hem is going to make it bell out a little bit, which is much more flattering to everybody's figure.
Class Materials
Bonus with Purchase
Ratings and Reviews
Diane
The course was as clean and precise as her sewing. I haven't sewn for some time, but the techniques Shaerie taught will serve me well. Thanks~
Jude
Shaerie is an exceptionally clear and focused teacher. She points out essential steps for beginner sewers and doesn't get caught up with extraneous details.
Melissa Fritzsche
Wondering if there's any way to still get this pattern. Thanks!