Cutting out the Fabric
Lesson 6 from: How to Sew Your First Skirt and Understand PatternsShaerie Mead
Cutting out the Fabric
Lesson 6 from: How to Sew Your First Skirt and Understand PatternsShaerie Mead
Lessons
Introduction & Overview of Skillset
01:00 2Pattern Envelope Overview
06:12 3Measuring Your Body
02:13 4Cutting out the Pattern
03:44 5Understanding Fabric Anatomy
02:02 6Cutting out the Fabric
08:25 7Cutting the Notches & Second Pieces
03:57 8Gathering Skirt to Yoke
11:18Lesson Info
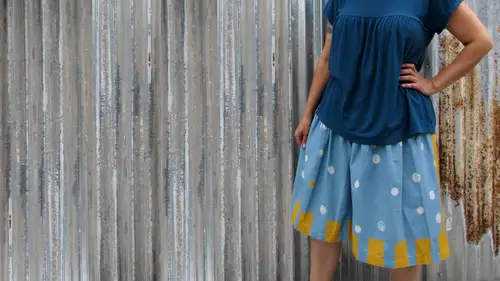
Cutting out the Fabric
So now it's time to place are already cut out pattern pieces onto our fabric so that we can cut around them and make just the right shape pieces for our project. This fabric is called caspar and it's from the alexander henry fabric company, and you can see I've got my two silva judges here, and my full dedge is the closest to me. I'm gonna have it set up like this because we're going to be cutting mostly along this fold edge, so when you set up your fabric, have that fold edge facing towards you, take a look at the direction of your fabric. We're going to be cutting the top of the skirt to the bottom of the skirt, so make sure the direction is going the way you like it so that things were correct on your skirt. We're going to be using the layout in her instructions right here, as we do the layouts there's a different set up for forty two to forty four inch fabric and then fifty four to fifty eight inch wide fabric, so this is determined by the width of your fabric. The fabric that I ha...
ve in front of me is forty two inches wide, so I'm going to be using these layouts and because I'm a size medium, I'm going to end up using this one right here. The one on the top this is for size extra small here this says sizes small through extra large so all patterns will have these kind of breakdowns in the layout first you pick the width of your fabric and then you pick the size that you're going to be using for a fifty four to fifty eight inch wide fabric it's a little bit different that's down here and for here I have sizes extra small they're small on the top and then medium through large on the bottom and then size extra large over here. So like I said, we have forty two inch wide fabric and I'm a size medium so I'm going to be using this layout right here that means I want to start out with my big pattern peace peace number one this says one skirt front and back it also says cut too on the fold this is really good information to have and it says right here with my little arrow place of this edge on the fold so if I take this edge of the skirt and put it on the fold of the skirt, this is telling me that I want to cut around these three edges just like so and I'm going to end up with a piece of fabric that's twice the width of this pattern so this is going to end up being the whole front of the skirt we're going to cut a second one on the fold and that's going to become the whole back of the skirt. We're going to do the same thing with the two yoke piece is it says right here cut too on the fold, and this is the edge that says place this edge on the fold, so when you're pinning on the fold, the first thing you want to do is line your pattern up, so you've got a little bit of room from the top edge of the fabric, and we want to anchor it along that fold edge, so I'm going to take my pins and I'm going to pull the fold edge right up next to my pattern there and put some pins in I like to put the pins sticking in, and I'm going to put about three or four pins along this edge to secure it. The whole goal here is to secure your pattern to your fabric, so it doesn't shift around or move while you're cutting. This is really important because the goal of using a pattern is so that you end up with fabric pieces that are exactly the same size as your paper pieces, so the first thing I do hear his anchor it with my pins along the fold that I'm going to smooth this out, and I'm going to put some pins in the corners now when I'm pinning, I'm not sticking my hand underneath the fabric because that creates the lumps, and I want to make sure this stays as smooth as possible, so the way on pinning here is I'm keeping my pin pretty parallel to the table. I'm not trying to stab the table, I want to slide it in and run it along the table, so I'm going through the paper and both layers of fabric, and then I let it pull up just a little bit so I can push my finger through just like that, and that makes a nice, smooth pin without having me having to stick my hands underneath. Once I've got the corners, I'm going to put a couple pins along each edge in this instance because we're going to be cutting around the edge of the fabric. We want to make sure that the pins don't stick out, so they have to be contained within the edges of the pattern, so I'm going to start here and do a couple of tens on either side. I like to put my pins in parallel when I'm using a manageable fabric like cotton, I'm just gonna put my tens in like so, and I have my second piece, my yoke piece that needs to go on the fold as well, but if I look at my layout, it shows me that I've got to skirt pieces right next door to each other and then to yoke piece is right next door to each other so I can leave a space for the second skirt piece because I only have one pattern piece I'm going to have to unpick knit and reap in it and then I'm going to pin my yoke down here I'm going to slide the whole thing down just like this and I'm going to use my tape measure to make sure I have enough room for that second pattern piece, so if I measured this guy about twenty inches, I'm going to do twenty one just to give myself a little bit of extra space and I'll measure it there I'm just going to put a pin right here where it says twenty one and then I know I've got enough room so that I can ten my yoke piece down here like this and this is going to be the same thing securing the fold edge right along the edge of my pattern I want to make sure like I said it's right up even with that fold edge, you're the one that has to make it even you have to use your fingers to get it in the right spot and then you use the pins to hold it in place so couple pins and then this is going to go up here up in the corners they will put a couple of pins in the middle to make sure it doesn't move around and now I'm ready to cut out my first two piece is going to slide this down a little bit and grab my fabric shears these air definitely different from my paper cutting scissors the's air my fabrics shares they're all metal, they're extremely sharp, so you want to be really careful when you're using them and when you start to cut fabric there's a couple different ways that you can do it and you should choose whichever way feels comfortable to you some people like to put their hand on the pattern and cut so that the pattern is on the left and extra fabric is on the right and some people like to hold on to the fabric and cut in the other direction. It really depends on what feels most comfortable to you and how close you can get to that pattern without cutting the paper off so I like to so I'm sorry I like tio cut just like this holding onto my fabric and right up against the edge of my pattern and there's nothing that's gonna happen up here in this fabric so I could just cut rate by like and I can also keep turning my fabric around to cut in the direction that I prefer I could just do this right now to cut up in this side you can see this is what it would look like. Like I said, it can just right here, the fabric like that, and turn it down. It helps to keep the tips of your shares on the table to give yourself a little bit more stability. And I like to do nice long cuts, open the scissors up really wide to make a nice v and get that be right up into the end of my cut to do a nice long cut like that, right through to the end. So that's, my first piece cut out. I'm going to do the same thing to my second piece, and then we'll talk a little bit about notches and re pending to get our second sets cut on the fold.
Class Materials
Bonus with Purchase
Ratings and Reviews
Diane
The course was as clean and precise as her sewing. I haven't sewn for some time, but the techniques Shaerie taught will serve me well. Thanks~
Jude
Shaerie is an exceptionally clear and focused teacher. She points out essential steps for beginner sewers and doesn't get caught up with extraneous details.
Melissa Fritzsche
Wondering if there's any way to still get this pattern. Thanks!