Gathering Skirt to Yoke
Lesson 8 from: How to Sew Your First Skirt and Understand PatternsShaerie Mead
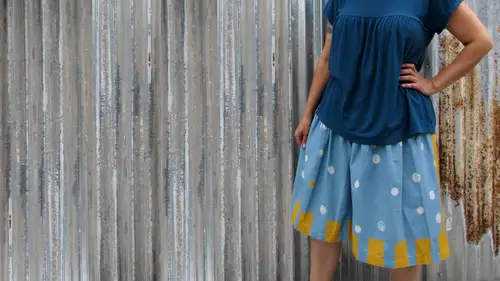
Gathering Skirt to Yoke
Lesson 8 from: How to Sew Your First Skirt and Understand PatternsShaerie Mead
Lessons
Introduction & Overview of Skillset
01:00 2Pattern Envelope Overview
06:12 3Measuring Your Body
02:13 4Cutting out the Pattern
03:44 5Understanding Fabric Anatomy
02:02 6Cutting out the Fabric
08:25 7Cutting the Notches & Second Pieces
03:57 8Gathering Skirt to Yoke
11:18Lesson Info
Gathering Skirt to Yoke
So once you've un pinned everything, we're ready to start constructing our garment step number two in your instructions tells you to lay your fabric pieces out the skirt, fabric pieces so the right side of the fabric is facing up it, you and the edge with the notches at the top, we need to mark with our chalk and our ruler some lines to start and stop our first set of stitches, so I'm gonna line up my ruler. This is a two inch wide ruler, and I want to mark one inch in from the edge, so I'm going to use the line in the middle of my ruler and lined it up with the edge, the side edge of my fabric, and I'm going to use my chalk to make a little mark right there on my fabric so it can see clearly where to start and where to stop same thing over here on this edge and then the same thing with my other skirt fabric piece one's going to be the front of the skirt and the other one is going to be the back of the skirt. You don't want to make this line too long, you just needed to be close to the...
top edge of the fabric. This makes sure that are gathering stitches don't get too close to the side scene. So now we're ready to sow some gathering stitches it's always a great idea to practice a little bit on the scrap fabric first, so I have my muslin with my marks marked here, and I'm going to start looking at my machine, so I've got my machines set up for my regular standard straight stitch you can check your manual to see what your settings are and to do a basting stitch, which is going to create our gathers. I'm going to jump the stitch length up to the longest stitch link on my machine at stitch length, for when you do a basting stitch, you want a poll, one of the threads, therefore, you don't want to secure it with something like a back stitch, and you also want to leave the red ends nice and long, so you have something to pull on. I'm going to do two lines of basting stitches, and I'm going to use the seam allowance marks on my sewing machine tow line them up correctly. I want to start at one of my marks and I want to, so until I get to the second mark, the first line of stitching I'm going to do is going to be a three eighths of an inch or one centimeter on my sewing machine, so I'm gonna line my mark up with where my needle goes down. And I'm get along the edge of my fabric up with my one centimeter line I like to use blue painter's tape so I can see it really clearly and I'm just going to so from one mark to the other without doing any back stitches or any securing stitch if you have a fix on your sewing machine, you'll want to turn it off this is on a single layer of fabric and I'm gonna pull it out and snip it so my threads are nice and long so this is the first line of stitching that I'm going to do now I'm gonna move my tape to the two centimeter mark three quarters of an inch or two centimeters and I'm going to do a second line of stitching right next door to the first line, starting and stopping again right on this chalk marks so this is what your stitches should look like on your practice fabric and then in a minute on your skirt. So now I want to do the gathering stitches on my actual skirt fabric make sure that you're selling them on the side that's got the notch at the top, the other edge is the hem just like on our practice fabric, we're going to start at the blue chalk line and we're going to go all the way down to the other blue chocolate this time I want the fabric the printed side of the fabric facing up it me the reason why this works better is because the bob and thread is usually be easier threat to poll and that will be on the correct side of the fabric if you so with the printed side of the fabric facing up in you, so I'm going to line up my chalk mark with my needle and I'm going to line the edge of my fabric up with my one centimeter or three eights of an inch line and I'm just going to start sewing. This is really good practice keeping your edge of your fabric even with your seem allowance line don't forget that with a longer stitch length, the machine is going to pull the fabric through faster, so be prepared for that. I'm going to stop right on my mark, nice long threads now I'm going to move my tape over to my twenty line and so my second line basting stitches right next door to the first one lining up with my chalk mark. Now we can start to line up the top of the skirt with the bottom of the yolk so we can see what the gathering such as they're going to look like, so I have my yoke piece not she's at the bottom of the yolk and that's going to line up with the notch at the top of my skirt so I want to make sure that I'm pinning these right sides together. That means you want the right side or the printed side of the fabrics to be facing each other. The first thing I'm going to do is take my yoke piece and line it up with my skirt piece at that middle notch, so the two notches should be even with each other, and I'm going to put a pin in through both of those layers. This time, instead of pending parallel to the edges, I'm gonna pin perpendicular to the edges when I so I like to be able to take my pins out as I'm going so it's much easier to pin if your pins air sticking in perpendicular to the edge of your fabric, what I'm going to do now is establish a parameter. I want to be able to pull up on these threads to gather my fabric that basically means I'm going to be shrinking this larger piece of fabric to fit this smaller piece of fabric, and if I can pin the middle and the edges that I'm making sure that I'm going to gather the same amount on the left side and on the right side of this skirt. If I don't have this middle pin, it would be very easy for me to make it to gathered on one side and not gathered enough on the other side, so I like to have that pen in the middle so I can make my gathers even on the corner edge here I'm gonna put two pins in tow hold this all in place I'm matching up the corner of my yoke on the corner of my skirt and I'm going to put a pin in right close to the edge of the fabric like that, and then I'm going to put a second opinion a little bit closer to where there's gathering stitches start same thing on the other side of my fabric and you can see that the skirt piece is much larger than the yoke piece and this is what we're doing now, shrinking it to fit so right on the edge and then a little closer to where the stitches are and then I can start to pull on my threads. The important thing to remember is we have four threads coming off of our fabrics and you only want to grab the two threads on the wrong side of the fabric, so I'm going to kind of separate these this is the thread I want for this side and this is the threat I want for this one, I'm going to hold onto these threads to do the gathering it's kind of a dual action you need to think about it like you're drawing a curtain along a curtain rod so I'm going to hold onto these threads and gently I'm going to grab my fabric and start to slide it along those threads I don't want to pull too hard with my hand because I could easily break those threads and I don't want to clamp too hard on this fabric or I won't be able to smooth the fabric along with the reds so it's kind of a there's two things I'm doing with my hands I'm holding onto this thread pretty tightly I don't want to pull it too much but I am going to start to slide the fabric along those threads to gather up my fabric and every once in a while you can check by holding it up you basically want this fabric to be the same size is this fabric so I'm getting closer I'm going to continue to pull a little bit you don't have to worry about making it even quite yet and now so here's what happens to you if I pulled too much? You can see that my fabric and back here is now bigger and my fabric that I'm gathering is too small so all I have to do is release some of these gathers and this is what I'm looking for the two fabrics being the same length once I established this I can take these threads that I was pulling on and I can anchor them on this pin by making a figure eight I'm going to take my two threads and I'm going to wrap them around the pin in an eight shape just like that and that's going to anchor these threads so that they don't pull when I start to smooth this out because I want this to be pretty even when I'm ready to so so I'll take these gathers and I'll just start toe kind of ease them along to make it about the same amount of bunch e all the way down the skirt and you can take your time and play around with this we want to hold these in place it's pretty securely this lumpy fabric of gathering kind of wants to move around a little bit so we have to use our pins to control it so once I get it toe look pretty even I'm going to use my pins to pin this all in place I'm looking at these two edges of the fabric I want to make sure they're nice and even with each other like I said this fabric wants to move around a lot that means we have to use more pins to control it so I'm making sure that I'm getting this edges even and I'm putting in pins about an inch apart I really want to control this fabric all the way down. Just like this, right through where the stitches are on, right to the end, where I got my anchor threats. And this is what it should look like. Four separate segments for your whole project. This is the first segment. The second one would be the other side of the skirt, and then you've got your skirt back to work on.
Class Materials
Bonus with Purchase
Ratings and Reviews
Diane
The course was as clean and precise as her sewing. I haven't sewn for some time, but the techniques Shaerie taught will serve me well. Thanks~
Jude
Shaerie is an exceptionally clear and focused teacher. She points out essential steps for beginner sewers and doesn't get caught up with extraneous details.
Melissa Fritzsche
Wondering if there's any way to still get this pattern. Thanks!