Lesson Info
4. Shortcut Keys
Lessons
Class Overview
05:48 2What Is Lightroom Classic?
03:18 3Lightroom Classic vs. Lightroom vs. Photoshop
07:34 4Shortcut Keys
08:33 5An Overview of the Interface
11:48 6The Catalog System
09:34 7A Look Under the Hood
11:04 8Workflow and Presets
02:42Library Module Overview
07:44 10Library Module: Importing
50:13 11Library Module: Organizing Your Images
27:57 12Library Module: Picking Winners
20:18 13Collections and Collection Sets
23:52 14Develop Module Overview
11:14 15Develop Module: Global Changes
34:36 16Develop Module: Local Changes
42:37 17Virtual Copies
14:19 18Building A Develop Preset
14:38 19Exporting and Export Presets
32:32 20Creating a Watermark
17:53 21Creating an Import Preset
10:28 22Photoshop/Lightroom Integration
32:30 23Catalog vs Lightroom Preferences
21:35 24Managing Catalogs
30:08 25Tethered Shooting
14:37 26Publish Services
13:52 27The Map Module
12:32 28The Book Module
15:38 29The Slideshow Module
25:50 30The Print Module
20:15 31The Web Module
11:03 32Creative Cloud Integration
11:03 33Class Wrap Up
01:13Lesson Info
Shortcut Keys
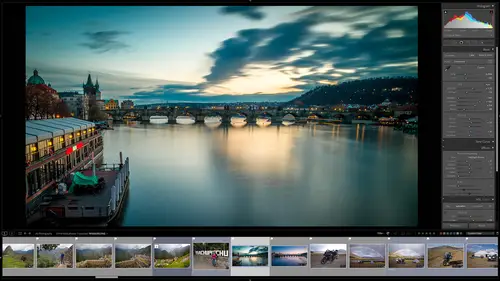
Light room Classic has a way to save a ton of time, It's called shortcut keys. And so instead of having to click on the interface to go and do different things, a lot of times, you won't just be pushing a shortcut key to hop between different modules. To change our view of things to zoom in, zoom out, all that kind of stuff. And so in this section, I want to show you what those shortcut keys are. Now, if we zip over to the computer, I'm gonna show you how I'm teaching. There's some some things that you'll see happening. One is I can hit a magic button and isolate different areas of the screen or zoom in or zoom out. I'll just be doing that to highlight different things as I'm teaching this class. The other thing I can do is hit another magic button. And then if I hit a shortcut key it will show up on the bottom. So I just pressed G. If I hit D. That will show up. If I hit G. Again it shows up, I hit the tab key that shows up. And so as we're going through this class, I will be telling ...
you what shortcut keys I'm using. But once I tell you um and we start picking up speed and doing things a little bit quicker. Instead of calling out all those shortcut keys, I'll just turn on that little magic bar so you can see all the keys, I'm pressing really rapidly. So if you need to pause, you can do that and see exactly the sequence of events. The other thing is there is a hidden shortcut key to rule all the shortcut keys, it will show you what they are. So on a pc is command slash, command forward slash or control forward slash. And on a Mac it's command forward slash. So by the way we all know this but I'll just highlight it on a Mac. It's command and on a pc it's control. So if I say command f command whatever on a pc, just think it through control to command equals control depending on what you're looking at. So let's look at the screen here. If I push and I'll turn on the magic bar, command and forward slash, you'll see that all of the library shortcuts show up so every single shortcut key that you want to use, so the escape key returns to the previous screen, the return key enters the loop view, G enters the grid mode etcetera. And so all of these shortcut keys will show up other thing that you can do if I just click right on this little tab, it makes it disappear. We have all these different modules. So those shortcut keys are specific to the library module. If I go over into the develop module, so I'll click on the develop module and again I will push command forward slash and you'll see that now we have all the shortcut keys that apply to the develop module. If I go over to the map module and I click on command forward slash, you'll see all the shortcut keys that show up to the map module, et cetera. And so depending on which module you're in, you'll get different shortcut keys. So if you ever feel like you're getting lost and you're not so sure which shortcut keys go to which module you can always hit, commander control forward slash and that cheat sheet will show up. It's also a great way to discover hidden features of light room Classic. You can see all these different things you can do just by pressing keys. It's really, really fun. So the other thing I want to do is introduce you to this. This is what we affectionately called the teacher tron 300 that we couldn't afford to 3000. So I will be doing some really groovy things with this. Don't be distracted by it, it's going to be here on the desktop here and so it will be helping me teach some things. Um the other thing I wanted to do is show you the common keyboard shortcuts that we're gonna be using during this class. So let's do this. You might want to take a pen or pencil and write these down because we're gonna be using these over and over and over and over again. And so let's go into it right now. So the first thing we want to learn is G. So the G key takes us to the Library module. So this library module here. So think of G as the grid it takes us where we can see all of the different images and sort so no matter where you are, if you press the geeky, it's going to take you back to this view, going to use that a lot. The other shortcut key will use a ton is the D. Key. So if I click on an image and I want to develop it, I hit D. That takes me to the develop module where I can change all of my different things. And so to go back to the grid, G go back to develop D. So we'll be going back and forth between these two views over and over and over again. So G and D are your friend. The other thing we want to do is we have some panels that sort of obstruct our view. So if we go in here and look at this, we've got the top panel on the side panels and this film strip down here, if we want to get rid of all of that stuff, we can hit shift tab and it gets rid of all of those side pounds, it kicks them out if I hit shift tab it brings them all back in. If I hit tab, it kicks out the two side panels, but not the top and bottom hit tab again, it brings back in the side panels again, so the philosophy with this and you'll see me do this really quickly a lot. If you hit shift tab gets boom, all the panels go away and then you can just bring in the two side panels on enough and so a lot of time I will kick the top and bottom away and just have the side panels. So let me show you that right now. So we have all of the panels here shift tab, gets rid of all the panels and now I'm just going to hit tab only tab and now I have the side panels so I can bring those in, bring those out, bring those in, bring those out just by hitting the tab key. Okay, the other thing that we want to do as we're going along is we want to see things full screen, so there's two different full screen shortcut keys. One is to control the interface itself. So let me show you that first we do that by hitting shift F. So shift F once puts Light room Classic into a window, you can see the title bar and all that kind of stuff. It's sort of clunky, I don't want to see all this stuff shift F. Again. Makes that top bar go away, shift F one more time. And now light room Classic is taking up all of the real estate. This is how I prefer to work. I don't want to see any menus or anything. I just want to concentrate on my work. If I need to see something going on up here, I can just hover up there and it will pop down when I go away it disappears. So shift F shift F shift F scrolls through those things now, just normal F will do something else that means full screen on what you're working in. So it's not the interface, it's the image. Let me show you that. So we have an image here. And let's say, I want to see this image, I can hit F and bam. It takes up the entire screen. It's a full screen view of this image. Now, I can go in there and I can zoom in and scroll around and zoom out and do all kinds of stuff. If I hit F again, it goes back to my normal interface networks, not only in the library module, but if I'm in the develop module, I'll hit D. Now I'm in the develop module. If I hit F again, bam full screen F again, bam I'm out after full screen. And so G back to the grid tab. Those panels go away, shift tab, everything comes back. And so as we're going forward, you will see me doing that a lot if you get lost. Remember I'm gonna have that magic bar showing up to show you what shortcut keys I'm using, but after we use them over and over and over and over again, you'll just get used to just hitting G to go to the grid, hitting D to go to develop. You won't even think about it, you'll just be click, click, click click. Light Room is really, really, really fast. Okay, So what we're gonna do is we're going to also show you some other shortcut keys as it's appropriate specifically to rating things and sorting things and choosing winners and all that kind of stuff. So I'll be introducing really popular shortcut keys as we go forward. So speaking of going forward, the next thing we need to do is understand the interface of light room Classic. Let's do that next.
Class Materials
Bonus Materials with Purchase
Ratings and Reviews
Karen Sessions
Great class - excellent content, excellent presentation. Thank you Mark, through this class, I finally understand the difference between Adobe Lightroom Classic, Lightroom and how they work together. And how excellent, there is so much more available to learn - photography essentials, lighting, Adobe products.
user-d55dc6
This is an excellent class to learn about Lightroom Classic. Since it's not the same as Photoshop, I found Lightroom Classic to be confusing and difficult to intuitively figure out. Mark Wallace is an expert and exceptional teacher for the program and I learned so much today in this free class presentation that I am planning to purchase the program so I can continue to have a solid understanding of Lightroom Classic basics. Thanks, Mark, for inspiring me to get back into computer photo editing with LR Classic!