Lesson Info
10. Library Module: Importing
Lessons
Class Overview
05:48 2What Is Lightroom Classic?
03:18 3Lightroom Classic vs. Lightroom vs. Photoshop
07:34 4Shortcut Keys
08:33 5An Overview of the Interface
11:48 6The Catalog System
09:34 7A Look Under the Hood
11:04 8Workflow and Presets
02:42Library Module Overview
07:44 10Library Module: Importing
50:13 11Library Module: Organizing Your Images
27:57 12Library Module: Picking Winners
20:18 13Collections and Collection Sets
23:52 14Develop Module Overview
11:14 15Develop Module: Global Changes
34:36 16Develop Module: Local Changes
42:37 17Virtual Copies
14:19 18Building A Develop Preset
14:38 19Exporting and Export Presets
32:32 20Creating a Watermark
17:53 21Creating an Import Preset
10:28 22Photoshop/Lightroom Integration
32:30 23Catalog vs Lightroom Preferences
21:35 24Managing Catalogs
30:08 25Tethered Shooting
14:37 26Publish Services
13:52 27The Map Module
12:32 28The Book Module
15:38 29The Slideshow Module
25:50 30The Print Module
20:15 31The Web Module
11:03 32Creative Cloud Integration
11:03 33Class Wrap Up
01:13Lesson Info
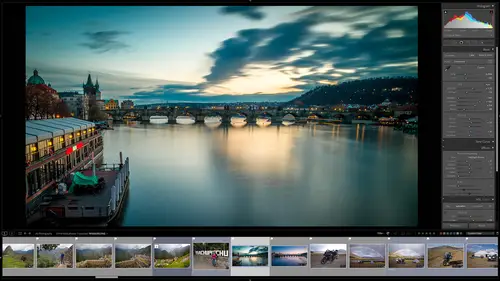
Library Module: Importing
how do we get images into Light room? Classic. And how do we organize them and fix up our hard drive and all that kind of stuff importing is the process that we're going to use now. In this section, I'm going to show you how to import from a normal card, right out of a camera. That's probably what you gonna do quite a bit. We're going to import some files off of a hard drive. And then also we're not gonna do it in this section. But in a future section we are going to import uh some images that are already in a Light room catalog. So we preserve all the key wording and choosing and sorting and filtering all the stuff that we already did. We're going to do that. So we can import not only from a card or a hard drive, but we can import from previous catalogs. And when we get to our managing catalog section, I'll explain why you would want to do that and trust me you do. So let's begin by understanding what's on this. So this is just a photo shoot I did a week or two ago. We're gonna import...
that. The other thing I want to do is show you on my computer here. Remember we have these random photos. What I wanna do is I want to copy the images from this random photos uh, folder here and I want to reorganize these things and copy them into my fake hard drive into the photos folder. So in real life, what this would be is maybe you have images on an external hard drive and you want to pull them into your local hard drive or to your master hard drive. So we'll figure out how to do that. So importing is sort of, well, it's understating what's happening. So let's take a look here at the workflow I use for importing my images. So I've got this little chart and what we're going to be doing here is when I say import, we're not just importing, remember this is workflow, So it's not just doing this and then the next and the next thing. So when we import, we're really going to do all of this at the same time, we're going to add metadata. We're going to do that with our very very first preset. Yeah. So what this does is we're going to add some copyright information, author, information, location, information and we're gonna save that. We only have to do it one time from then on. We can do it just a click of a button. We only have to enter that information once. We also are going to do a backup. So we're gonna take the files and we're gonna put them on our hard drive but we're also gonna put them on a separate place so they're backed up and safe. The other thing that we will be doing as we're going to be adding some keywords so we can search and sort and filter with those keywords. And then as a bonus, we would normally create a preset that takes all of this stuff that we would do and make it where we can do that with one little click of a button, we're going to do this later. So this import preset, we're going to create that at a later session because it's sort of involved, I'm gonna show you how you can automate all of this stuff. So we're gonna automate right now, we're gonna automate this metadata preset and then later we're gonna automate everything. So the cool thing is you can put presets inside of presets, sort of crazy. I felt like john madden, they're putting all the scribbles on the screen, but it's really, really cool. So let's get to it. So what we're gonna do first is we're going to do what you would normally do. I have a photo shoot on this card, This is a real life photo shoot. I also have some images on here that I don't want to import, I added them on intentionally. So I think there's a couple of pictures on here of uh, of a camera lens or something like, so what I want to do is I'm just going to go into light room, but before I do, I'm gonna take this card, this physical card and plug it into my laptop. So I'm gonna reach over here and I'm plugging that in. And so once that is plugged into my laptop and go to the laptop and you can see automatically, I didn't do anything but that automatically showed up. And it said, hey, on the left hand side it's seeing that I have this EOS digital, which is a Canon camera. Now, one thing to understand is yours might not automatically pop up. There's an option in light room, Classic that tells it to automatically import when an external card is attached and yours might not be set up to do that yet. So if it's not, if you don't see that automatically pop up when you put in your camera card, then just go to the library module and click import and you'll get to the same place. Okay, now let's go back to the computer screen here. On the left hand side notice there's no photos in here. You can see this, there's no photos found. The reason for that is on my cf card here, you can see that there's the descend whatever that means. And inside there there are different folders and those files are inside those different folders. So to see all this stuff we want to click on this include sub folders, click on that and it's just going to go look all the way through this and find all the folders on this um on this card. Now the thing is I just realized this isn't just one shoot, this is two photo shoots. I don't want to import both photo shoots only want to import one of these photo shoots. And so what we can do here is if you look closely you'll see that all of these have a checkbox by them. There's a little checkbox, anything that's checked is going to be imported and so what we want to do is go down to the bottom of the screen and say uncheck all. Normally I check all but I'm going to uncheck all and you'll see that now these are dimmed and that's because there's nothing to import yet. So what I'm gonna do is I'm gonna click on this image right here, that's the last image I want to import. And then I'm going to go to the beginning of this photo shoot. So let's just start, oh I think maybe right here I'm going to shift and click and so now I have selected a bunch of images and now when I just click on this check box it selects everything that I have selected, it checks all that. So now I'm only importing this section of the card. Now for you, you're probably going to import the entire card. I just wanted to show you that there is the option to read to import everything or just part of this card. So we're just gonna do part of it at the top. You'll see. Well there's some confusing Burbage up here, but let me explain sort of how this works. So remember we're talking about workflow and so this import dialog actually has arrows and things if you look closely and it is a process and so on the first panel, it's where are the files coming from? Is that an external card? Is it a hard drive? And if it is a hard drive, which folders? So on one panel is saying where these images coming from and the center panel is saying, where, which of the files do you want to import? And what do you want to do with them? So where are they coming from? What do you want to select and what you want to do with them? And then the final panel over on the other side is where do you want to put them? So where are they coming from? Which ones where do they go to? So in and what you want to do? And out the process, we can look at this screen again and you can see that on the left hand side, it's the source and notice we have an arrow here. It's saying, okay, once you've chosen this hard drive or external card, whatever, what do you want to choose? So that's the middle here. So it's where you coming from, What do you want from that? And then where do you want it to go? Over here? On the right hand side, we're going to tell it where to go and all kinds of other things. So let's just think about this center section right here, that's all we're going to think about right now. So, what we've done already, as we've said, we only want a small subset of photos. So we've chosen which photos now. We need to say what to do with those folders. So we have several different options here for uh moving these things. So we can copy as a D. N. G. We can copy, we can move, we can add. And we also have these options here. Let's first talk about what these options are. So copy, move or add. So what we're gonna do is we're going to use the teacher tron 300 to illustrate, copy, move and add. So, if you go in here, and let's just say that I have um a hard drive over here. So, here's the first little hard drive, and then I have a second hard drive over here. All right. And then up here is my catalog And that's the catalog right there. Now remember the catalog is? Um It's just pointing to some files. So inside my hard drive I have some files. So, what we'll do here is um we will get we go we have some files right here. Here's a file. Here's a file. Here's a file. All right. So, if we look at copying these files, here's what's happened catalog. The import is going to take these files and it is going to make a copy of those files and put them in a new place. So we have a copy of those files. And then what will happen is catalogue will look at these files. So this is what's happening. So there's a copy. It's going from here to here. So, you have everything is safe. Nothing has been change. You just have new files in a new location. Okay. What we can also do is instead of copying them, you can move them. If you move them it's going to come from. Oops. If you move them what is going to happen, select these again because it's just going to move them over like that. And so if you move them they're physically not gonna exist on the original place. So if you have them on one hard drive and you move them, they're no longer on that other hard drive that you actually physically move them. So normally you're copying files so that you have multiple copies. But if you're organizing things you might just want to move it and say take it from this place, put it over here. And that way my hard drive isn't having doubles of that stuff. So that is the difference. So let's take another look here. Um The other thing that we have, so let's say that we have these files back over here on this hard drive, if we add all we're doing is we're saying just look at these files and add them to the catalogs. We're not doing anything to these existing files, we're going to leave them where they are, we're not going to copy them, we're not going to move them. We're just going to tell the catalog to look at them where they are and now they're in the catalog. So that's the difference between those three things copying them. Makes a duplicate. Moving them takes it from one place to the other, adding them just as there, right there. Just look at them there and put them in the catalog. And the very, very, very fastest way to put things into the catalog is by adding them because you don't have to do any kind of movement on the hard drive. It just it's very very quick. Okay, so let's take a look at some other things we have to do here to get this stuff into the catalog. Now, one thing I didn't mention, let's go back for a second. We have this copy as D N G copy as DMG. What that does is D and G stands for digital negative. And so there are all kinds of proprietary raw files. If you want all of your raw files to be consistent, you want them all to be DMG files, some people only want to work with one kind of raw file. Then you would copy them from their camera card or your external hard drive, copy them to a new location and then convert them to a standard file format. So if you're not into specifics of raw files, don't even worry about it. Just worry about copy, move and add. Okay, let's go back to our screen here. So what we want to do here is we only have one option with an external uh card and that is to copy because um we can't move those because an external camera card, you would never take those images off the card and put them on your hard drive. Light room won't even let you do that, we can't add them because light room is smart enough to know that this is an external Cf card and it's likely to be unplugged, so it's going to say you need to copy these over so they're there all the time. Okay, so the other thing that you might want to do is you have these three options here. All photos, new photos or destination folders. Let's start with these two all photos or new photos. So notice on this card, I had two photo shoots going on. And so um what will happen is if you have like I just had a situation where you had a photo shoot and then you imported all those photos to your hard drive and then you forgot to format your card and then you went out. You shot a bunch of new things and you plugged in that card to light room. Light room can go, you know what half of this card I already have. So let's not even worry about those. That's what new photos uh option is saying. Let's just look at the new photos already know half of these are here. And so it will only take the new photos. All photos says all right, we already have those photos in, but we'll just duplicated I guess so, that's sort of those differences and I'll show you that. Um, well just import again off of this card in a second. The other thing I need to mention is over here. There's this option of eject after import and so that's a good option to have checked if you're using an external card so that once you're done, it automatically ejects the card so they don't have to go through explorer or finder and physically eject the card. So I always have that check. Okay. So we have where this is coming from, which files we want, how we want to move them. Now we need to tell light room where we want to put them and how we want to organize them and a few other things. So first, let's figure out where we want to put these. So if I click this, I'm gonna choose other destination. Already remembers that We put our files and photos when we imported the Carisa images. So if you're always going to go to the same place, you don't have to change this every time. You have to do it once. And so if you didn't do that, make sure you click other destination, you go into your hard drive. For my example is the fake hard drive and you choose your photos folder wherever you're choosing, wherever you're putting things. So we want to put this in our photos folder. Now, here's something that is important to understand. I have my photos folder, that's where I want to put all of my photos inside of that folder. I want to have more folders. I want to organize my images by maybe by date or by the model's name or by location. And so inside the photos folder, we can add more folders. So let's go and look and see how we do that. So we're going to photos right here. If we look really closely, you can see that we're going to my fake hard drive into photos. But inside of photos, what's happening? We go all the way down to the bottom and we look at this, you can see where these are going. So it's going into photos But notice it's creating this d. c. I am 100 cannon. I don't want that. Why is that happening? Well, the reason is I'm organizing it by the original folders And the original folders are dcm 100 cannon. So we don't want to use original folders. We did that last time to keep the name of Carisa. So what we can do is we can change this. So I'm going to change this into by date. Okay, so now if we look at this, what it's doing is it's going to put those photos into my photos folder Into a folder called 2021. Inside of that folder. It's gonna be a folder of the date these were taken. How does it know when the fold when this picture was taken? It knows it because your camera automatically puts metadata into every photo you take. It's called ex if data it records the time your images taken. It records all kinds of things like the aperture value, the shutter speed, the esso value and some cameras it records the Gps location, it records all kinds of stuff. And just with that information that's automatically put on your images. Light room can organize your images and help you find things. We'll see that as we go through the sorting and finding in the next segment. Okay let's keep importing. So we're gonna do this by date. And what we have here is we have our photos and it's 2021, that's when he was taken. And uh third of july okay, so we have this in the photos. This is going to ask us a few things. This is under the file handling section. The first thing it's gonna ask is do you want to build previews? I'm gonna keep this set to minimal, but you can do all kinds of things. What are previews? So when you're in the library module and you're zooming into an image or you're seeing all of those thumbnails, Those are previews. And so to save to speed things up instead of having to bring in an image and then process that image and show it to you. Light room Classic will create a small preview so that you can see things really, really quickly. You'll notice as you're working on your images. Sometimes there's a delay between your image and when you can see it, maybe the colour takes a second to display correctly or when you zoom in, it takes a couple of seconds for it to look high resolution. That's because it's going from the preview. That's really fast to the real image, which sometimes can take some time. And so what kind of previews do you want to use? Minimum previews are really, really fast But that means that you have to wait a little bit longer when you're working on the files. That's the one I use. But there's some other options here. We have embedded in sidecar and standard and 11 you can choose which one you want. I'm going to choose minimal. 121 means it's a full resolution preview. It takes a lot of space embedded in sidecar means that it takes that preview and it includes it in if you have a raw file, it includes it in there and it adds a little file on your hard drive next to the file. So that takes up hard drive space and hard drive space. And then standard previews are a little bit faster than minimal, but again take up a little bit more space, I'm gonna say minimal because I want to save my space smart previews, you can click this to build smart previews. Let me just tell you a little bit about smart previews because it's something that is really an amazing feature of Light room. Classic smart previews are fantastic for people that have uh, their files on external hard drives and they disconnect those hard drives normally. So maybe you're a photographer that has a master hard drive on a laptop computer and you store your files on external hard drive. So maybe you have a hard drive for your scenic photos and you have a hard drive for maybe your wedding clients and have a hard drive for your event photos. And you have a hard drive for your Kingston. Erez, whatever that is. Um And what a smart preview would do is it will store previews that you can actually edit on in your library. And so what you can do is you can have no hard drives connected to your library at all. And when you look in the library module you can still see all of your files. You can then go into the develop module, you can edit those files, you can edit things. And what you're doing is you're editing a smart preview. When you connect your hard drive, it automatically updates actual file. So you can't print, you can't export to the web, you can export a files on your hard drive without actually connecting, but you can't edit. It's a really, really phenomenal way to save space and to work on a system that has external hard drives connected. It does take up more hard drive space, but it's something when I was traveling all over the world, I always use smart previews so I didn't have to always plug in my external hard drive to work on my images on my laptop. So we're not gonna build smart previews in this demo because it takes up hard drive space and it takes a lot of time when the folder when the images come in. But if you're working where you're disconnecting drives a lot, this is definitely something I would check. And if you're working in light room and light room Classic. This is also a good thing to check because when you sync between the two, they're sinking the smart previews, not the actual files. I'm gonna uncheck that for now. We're going to learn more about smart previews as we go through this. I just want to make sure that you are aware of that. The other thing that is by default checked is don't import suspected duplicates. And so if light room sees that you have the same file from a card that you already have in the library, I'm going to say this is already here. It's not going to import that. If it suspects that it's a duplicate so that you don't just bloat your hard drive. If you want to blow your hard drive, going to make sure for sure for sure that image goes unchecked that box. All right. So the next thing we want to do is make a second copy. All right, This is where you back up your images automatically if you want to make sure that you don't lose your image. Is what I recommend is that you have one hard drive where you store your images and another hard drive separate hard drive that your backup folder. When you import your files, you will store all your images into your folder, has your images, and then you can automatically make a second backup copy to over your backup drive is but for just this import, we're going to do that. So I'm gonna go in here and I'm going to click make a second copy, and it's going to say, where do you want to make that second copy too? So what I'm gonna do is I'm going to click on that, go to my fake hard drive, create a new folder and this new folder is going to call uh photo backup, ideally this should be a separate hard drive, but I'm just doing this, illustrate how to do this. So it's folder backup. Okay, so now we will have two copies, one and our folders, our photos, folder and a second copy of the image in our backup folder. Again, you should have two separate hard drives of one of them dies. You have a backup so you can automate automatically back up your files as it's coming in. Other thing that you can do in the import is you can rename files. So as a default, it's just going to come in with the file name from the camera, but you can rename this. And so let's say a custom name and I'm going to rename this Theresa. And so it's going to name it Teresa one dot c r three, which is a camera raw file. Um You can change the extensions, upper, lower case or just leave them as they are. You can change however you want to do this, you can call it the shoot name. I do this a lot for clients. So um we can edit this shoot name, we can make it the shoot name, Teresa or something like that. So I'm just gonna do custom name and a sequence will name that Theresa. So that's going to rename that as we go in. The next thing we can do here is we can apply some presets during import. Okay, now, I know it seems like we're doing a ton of stuff to get these images in, but remember once we do this, once we can save the entire process of doing this as a preset. And so we only have to click one button to do all the stuff that we're doing right now. I just want you to really understand what's happening. We're going to create our very very first preset right now. So what we're gonna do is we're going to do a metadata preset. Now this metadata preset when I import images into my library, I want to make sure that those images have a copyright attached to it. So I wanted to say the photographer is Mark Wallace. The copyright is the current year. Maybe my address some basic keywords that I want every single file like Mark Wallace so I can do that. So if you'll notice here I'll zoom back in. I already have A ton of presets in here in 2019, because every year I update my preset so that the copyright is to that year I also have one because I was in Buenos Aires and lockdown inside some specific things that I wanted to do. So you can see I've been doing this for a long long long long time. So what we're going to do is we're going to go and select new, we're going to do a new metadata preset and I'm going to call this Mark's demo just so it's a new thing and that preset first you can choose to include or exclude different things. So if there's no check box so notice these have check boxes next to them, there's no check box, it's not going to be included. And so I don't want to do a copy, name or camera info. These big broad things like this can be great if you're on a job. So if you're maybe a wedding photographer or an event photographer or you have very specific clients you can create a metadata preset for those clients. So pretend you have um uh Am Co is your big client and you're shooting a bunch of stuff for them. You can create a preset specifically for them that says this is the um co company and they're this address and the job description is whatever. And any time you go out there to shoot for them you can just pick that. Maybe you have second client which is you know coffee shop one. You can choose you can make presets for clients. You can make presets for all kinds of things. We're just gonna make a preset that stores my copyright information. So let's go back here and we're gonna go down here um Two I. P. T. C. Copyright by PTC is a standard so that's what that is. And so it's a standard units, standard library of metadata. So what we're gonna do is this is copyrighted. So we're gonna say copyright a copyright 2021. Mark Wallace copyright status. It's copyrighted and the U. R. L. Is going to be my website. So www. Mark Wallace photography dot com. Okay. Now it's gonna ask me what the my creator is. So Mark Wallace I created this And my address is 123, any street in any town Arizona And 852 - four in the United States. And my number is 401231234 My email is email at gmail dot com and my website is what I had before www dot mark Wallace photography dot com. And my job title is photographer. Okay, so I've got all this information that I've put in here. I can add all kinds of other information here if I want to save this again. But that's really all I want to put for this, um, for this preset. So it's just that it's copyrighted by me on this year and here's my address. And so what we're going to do here is we're going to go up here to where the preset is and click that and say save current settings as a new preset. Make sure you save this as a new preset. And so we'll do that. And actually I said Marks demo. So I don't have to do that. So Marks demo is the preset name and then right here, create is highlighted. So I made a mistake there. You just do it once. So I'll create that punk. Now you'll see that when we go down here too, our apply during import. Right over here. The metadata, marks demo is there. So we have all these different ones. Marks demo is there Okay? You can have as many as you want, right. The other thing that we want to do is what keywords do we want to apply. This will apply these keywords to all the images that we're importing. All of these images have Teresa as a model. We have a model, we have a brunette, um, we have studio, we have lighting. You get the idea, you can put in whatever you want to do now. Um, we have everything checked. So let's review what we've done. So we have said, where are we bringing these from? It's from our external cf card. What do we want to choose? We want these specific images. What do we want to do with them? We want to copy them. Where do we want to copy them to? We want to copy them to our photos folder and we want to organize them by date. Do we want to add anything? Yes. We want to add our copyright information. We want to add these keywords. And so we're doing all of that In one fell swoop. And now all that's left to do is for me to go all the way down here to the lower right hand side and click import. And now some magic is going to happen. You'll see copy and import photos shows up up here in the left hand side, depending on the speed of your computer and cf card and your hard drive. This can take anywhere from a couple of seconds to a few minutes or it could be go get coffee or lunch. And so we're gonna let this bring these files in. Now as this is doing this, I want to talk to you about something that we're going to do next because we're not done importing. We've just got a taste for importing from a CF card. We want to continue doing some imports, but the next import we're going to do is we're going to import from the Cf card again. I want to do that to show you how light room recognizes that It already has images in the library. So we'll just show you that The other thing that I want to show you is how to start organizing the folders that are all messed up on the hard drive, how to copy those over to the new area and to organize those. And also we're going to learn that we can do this exact same thing and just a couple of clicks. So we don't have to spend all this time importing stuff because we can automate it remember, we want to automate this stuff. Okay, so let's go back over here into light room really quickly as this is continuing to import. What we can see here is we have these images coming in now notice some of them have a little ellipsis, they have a little dot, so you can see there's a little dot coming in here and so you'll see that on your images as you're importing them a lot of time. What is that? What is happening? Remember we talked about that uh that preview those preview files. So as the files are coming in, light Room is going and it's building a little thumbnail and previews and all that stuff. So as you're bringing it in, if you see those little dots, it's saying, hey, I'm working on this stuff, all of this stuff. The time it takes to do this is dependent on your computer and your hard drive. So get the fastest hard drives you possibly can. Okay, mine is finished. So if we go over here we can look and we can see all of these images are done there in. So what I want to do is I'm going to physically grab my card. So I have this card, I just took it out of the computer. I'm gonna put it back in the computer. I want to show you something that's magic. So we put it back in. When we do, we go to the computer and you'll see that look, it comes back up again. Now I have selected new photos and if I scroll through here, it automatically doesn't have the images that I already imported. It already knows that those other images on this card are imported. So it's not going to even show them to me unless I click all photos and then those will show up there great out because it's saying um you already imported these. You don't want to do that because you want to uh ignore these suspected duplicates. So that's the behavior of these all photos and new photos. We need to talk about destination folders and so we'll do that right now. But the other thing you can do over here, so I don't want to import again, We've already done that. But over on this side right here, if I say, you know what, I just want to get rid of this card, You can right click and inject eject that. So I'm going to eject this card from my computer just by right clicking. And I'm gonna cancel this import. So now I can safely remove the card from the computer without damaging it. So you don't have to leave light room to eject an external card, which is pretty cool. Okay, now we have imported images from CF card like we would in a normal photo shoot. We've sort of understood some metadata. Let's do it again. But this time let's do it much, much faster. So what we can do is I'm going to go over to the left hand side again, I'm in the library module. I'm going to click on import. We need to understand some different new things about this. So over here on the left hand side, where are we going to come from? We don't have images popping up because we didn't put in a card. So light room doesn't know where we want to go from. So I'm gonna go to my light room hard drive and I'm going to go to these random photos now because I've included sub folders. It's going to go and look at all of these folders which is uh thousands. You can see three, almost 3.5 1000 photos. So I don't want to import 3.5 1000 photos here right now while you're watching because it would take us an afternoon and nobody wants to sit through that. So I'm going to unclip include sub folders. We're going to drill down to just a few things here. So on this left hand side here we have a world tour. So I have some images from Bulgaria, some images from chile, some images from the Czech Republic and also Mongolia. And those are in specific folders. What I'd like to do is bring these over into my photos uh folder on my fake hard drive and I want to organize the images inside of these by date and I want to add some keywords so we already know what to do. I can go over here, I can check world tour now for this, I'm going to include the sub folders. So here we have all of these images. So we have Bulgaria, chile, Czech Republic in Mongolia. Now, what do we want to do? We want to copy these? So I want to copy them from this World Tour folder on my hard drive, to the new photos folder on my hard drive and then we want them to go over here to my photos hard drive. What we're gonna do, we've already selected all of this stuff. I'm not going to make a second copy. I'm not going to spend the time to make a backup copy of these images. We're not going to rename the files. I'm gonna leave those the way they are. The metadata. Sure. Let's include my metadata and add that in. Again, my metadata preset is already there. So all the stuff that we entered, it's already going to be there. What do I want to do? I want to organize these by original folders. Now if I do that and I do this all at once, notice it keeps exactly that same structure. Hm I wanted to be by the country and then also by date. So I'm gonna have to do this in a couple of different steps. I can't do them all at once. So I'm gonna go over here and instead of doing them all at once, let's just choose chili. And so if I choose chili, going to go back over to the right hand side, it's going to say what destination. So if we look at that, you can see that it's going into my photos folder. But I have it organized by original folders and so it's just going to go in and it's using the chili and chili. I don't want that. I want this to go in by date but I still wanted to say chile. How do I do that? Well it's pretty easy. So what I'm gonna do is I'm going to change this to buy date and I'm also going to put this in a sub folder and the sub folder it's going to be chile. So now look at what it's doing. It's now coming into folders are the photos folder in chile and inside of chile it's organizing it by date. So that's a nice way to organize all these different days. So instead of just two folders now, it's broken out by day and that's really gonna help me out. Okay, so the other thing I wanted to show you is this up here, destination folders. What is that? Well, if you want to see a visual visual representation of how your images are organized on your external hard drive, you can see that. So let me show you. So we have destination folders. I'm gonna click that. So right here, I'm clicking that. And what it's going to show me is how it's organized. So in this folder here are these images in this folder? Here are these images. And so it just shows you how the images are going to be organized. It also helps you organize things like this image right here on this date, it just looks like a hotel room. I don't want those gonna uncheck that. Um This down here. This is okay, me and the bike. I don't know, you might find some things that you just don't want and it's much easier to see them visually here. To select. Like I don't want this movie to come in here. Let's not do that. Um This is me at a chinese little restaurant and buffet. I don't need that. And so okay so it helps me understand how the images are going to be organized. It also helps me understand how to check and uncheck and find things really quickly before I get them into my computer so that I'm not not importing a bunch of trash. All right so the next thing we need to do is let's add some keywords so I'm gonna add chili as my keyword and everything else is pretty specific. So I'm just gonna do that okay now that we have that we can go down here and click import and that is going to start the process of importing those files. And so we've learned a couple of things. So the first thing we learned was how to import files from an external card, cf card and bring that in and copy it and uh organized that by date or by the name of the model. However you want to do that. We've also learned how to take existing files on a hard drive, bring them in to light room Classic, choose what we want to bring in, get rid of the trash and then organize it in the way we want either by date by the original folder or by a sub folder with a date underneath. We can take and point our Light room catalogue at a hard drive and have it bring in a bunch of stuff as it's copying it. It's going to be organizing it and making all pretty and putting it on our hard drive. It's really, really, really cool. Okay, let's go back over here really quickly to see exactly how this is. So when we look at these folders on the left hand side in the library module. So this is importing. It's going to import for quite a while. But we can still work in light room as this is importing won't have to wait for light room. So on the left hand side, we can start to see that things have changed a little bit. So now we have our catalogue and we have different sections. We have all photographs, every photograph that's in the catalog. We have sink photographs. We're going to talk about that in a future section. The quick collection. We're going to talk about that in a future session and then the current import that's what's happening right now. We're going to see this number grow. We're going to see this number grow because we're right now importing at the same time. So we can really quickly go and say show me everything. Show me things that are sink or show me this will change to the last import that this will change to when we're finished. So you can go quickly to a different section in your catalog underneath that. You'll also see that we now have folders that line up to the folders and our physical catalog, our physical hard drive. And so these are the folders that we created when we brought these in here. Now we can click this little uh plus sign or this disclosure triangle and we can tell this what to show us. Can say show us the folder name only. While showing the folder name only. Didn't I have this coming in by chile. I did. Why isn't it there? Because it's only showing me the folder name. So I can say show me the path from the volume so it shows the whole thing fake hard drive photos 2021. That's too much information. I can say just the folder and the path and so now we can sort of see how that is. Or we can show show folders and sub folders yes or no. There's all these different options to show sort of how this is. And so I'm just gonna say show me the folder name only and we can sort of see this how this is organized. Now. You can either use these to navigate through which is sort of clunky and it's old school or you can use something else and that is collections and we are going to show you how to use collections a little bit later on. That's normally how you would organize and find things just through the collections. Or let's take a look at some other things. So I'm going to click on this image right here and over here on the right hand side, we have information in this. So notice that we have the camera. So this was taken with a like N. M. Notice we have copyright information. The creator is in there. If we have uh see, we can change this to it. PTC extension. And so we can look and see if there are models in this or not, which there aren't. We can go in here and we can see um let's see X S X F I P T C. We can see the folder that it's in. We can see the size of the image, what kind of image when it was taken. We can see all of this kind of stuff that's in here. And look the contact information that I created is also in there. All this stuff is in this. Now. The great thing about this is now all this metadata. If I go to all photographs And remember so it's going to load in 275 files. All of that information that we entered during the import process can now be used to slice and dice our photos. And the great thing is even if we don't enter anything when we import images. Well our cameras are entering all kinds of information and so light room is going to organize your stuff whether you like it or not. And so take a look at this at the top of the library module. We can search by text. So remember I added dress and do that. There's the file that has the dress. What about chile? If I click chili it's going to look through and say um let's find all the stuff that has chili that's gonna take a little while because we're still importing. But there we go. Here's all the files that have the chili keyword as it. So I can search by that. I can search by attribute. So I can say show me all of the files that have a flag and it's only two because we've only flagged two files so far. I can say let's look at metadata and this is where it gets really fun. Do this on your Light room, classic catalog. So we can go through here and we can start filtering by many different things. So we can say I just want to see the files I took in 2013. So we can file this by date. So I click on that So we have six files or let me see this stuff I did in 2015, just gonna load in the 81 files that I did in 2015. I can Uh say, you know what, just show me Thursday, January nine. There it is, that's what I did on Thursday, January nine, this is what I did on Friday, January 16 and it will bring that stuff in. Normally it's not going to say loading because it's not going to be importing at the same time, it's much quicker than that, but there you go. So I guess on this friday I was out hanging out, I was doing a meet up. Yeah, that's what was happening. It's really cool. So you can go in and look by dates, but on each of these panels you can further you can further look at different things. And so if I say, let's not sort of, let's look at all dates. I can then say show me just the things that I shot with an M 10 or Nikon D three. Yes. So I only shot these so you can do it by camera. I can say which lens that I use if they're labeled or not. Um you can on each of these little sections here. If you click on this, you can choose any one of these things. It's all zoom out and you can see that you can choose by date, file type, flag rating, Blah, Blah, Blah Blah. Take a look at this. I mean you can say show me all the images that have an aspect ratio of x nine or that are square that have uh, that are black and white that are color that are created by me. Some, maybe it was created by one of your associates or something. If it's not copyrighted I can say show me everything that was taken in phoenix, Arizona ultimately show me things that were taken in new york city. Um, only show me things that were shot with 72 200 millimeter lens only show me things that were shot with a millimeter like a lens. You can slice and dice in any imaginable way. And so this is the, uh, the beauty of importing and doing it correctly. So as you're importing, take the time to go in and make sure that you're adding your keywords, adding your metadata, creating this metadata, presets and organizing as you bring things in. It's gonna save you a lot of headaches as your files grow and grow and grow and grow and you get to the thousands and thousands of images and you need to find that one image that you shot for. That one job for that one person. Okay. So what I'm going to do now is I am going to import about 3000 files from my uh my external hard drive here and put it into that fake hard drive folders folder. So we have a real life working environment, you can see light room, classic behaving as it really does now. It's gonna take me, I don't know, half an hour or an hour to do that. So what we're gonna do is we're gonna end this session. You probably need some coffee and a wake me up. Anyway, this has been almost an hour that we've been working on this session and then we're gonna keep working in the light room module. The next session. What we want to do is we want to learn how to use all of the data, how to sort pick winners and figure out what we're gonna do with these files, which ones get to go to the develop module and go along our process. And later in this class I'm going to show you how to create a an import precepts all of the steps that we took to import those files. It sort of took us a long time, we're going to create a preset that automates that entire process. So we can just enter a little card, click a button that says do it this way and then say go and we don't have to go through that process ever again. We can just do it one time and we're done. So all of that's coming up next. So take a coffee break and then we're gonna come back and explore more of the library module.
Class Materials
Bonus Materials with Purchase
Ratings and Reviews
Karen Sessions
Great class - excellent content, excellent presentation. Thank you Mark, through this class, I finally understand the difference between Adobe Lightroom Classic, Lightroom and how they work together. And how excellent, there is so much more available to learn - photography essentials, lighting, Adobe products.
user-d55dc6
This is an excellent class to learn about Lightroom Classic. Since it's not the same as Photoshop, I found Lightroom Classic to be confusing and difficult to intuitively figure out. Mark Wallace is an expert and exceptional teacher for the program and I learned so much today in this free class presentation that I am planning to purchase the program so I can continue to have a solid understanding of Lightroom Classic basics. Thanks, Mark, for inspiring me to get back into computer photo editing with LR Classic!