Lesson Info
16. Develop Module: Local Changes
Lessons
Class Overview
05:48 2What Is Lightroom Classic?
03:18 3Lightroom Classic vs. Lightroom vs. Photoshop
07:34 4Shortcut Keys
08:33 5An Overview of the Interface
11:48 6The Catalog System
09:34 7A Look Under the Hood
11:04 8Workflow and Presets
02:42Library Module Overview
07:44 10Library Module: Importing
50:13 11Library Module: Organizing Your Images
27:57 12Library Module: Picking Winners
20:18 13Collections and Collection Sets
23:52 14Develop Module Overview
11:14 15Develop Module: Global Changes
34:36 16Develop Module: Local Changes
42:37 17Virtual Copies
14:19 18Building A Develop Preset
14:38 19Exporting and Export Presets
32:32 20Creating a Watermark
17:53 21Creating an Import Preset
10:28 22Photoshop/Lightroom Integration
32:30 23Catalog vs Lightroom Preferences
21:35 24Managing Catalogs
30:08 25Tethered Shooting
14:37 26Publish Services
13:52 27The Map Module
12:32 28The Book Module
15:38 29The Slideshow Module
25:50 30The Print Module
20:15 31The Web Module
11:03 32Creative Cloud Integration
11:03 33Class Wrap Up
01:13Lesson Info
Develop Module: Local Changes
we are now at one of the most exciting parts of the class and that is the develop module, local adjustments. Why is that exciting? Well, finally, we're going to be able to start jumping back and forth between the different modules, the Library module and the develop module and getting into some more advanced techniques because we're finally able to put everything together. And that brings us one step closer to be able to build our own presets and do some really groovy things and it's just a lot of fun. So I have added some things in this quick collection to help us understand the different tools that we have available to us. What are those tools? Well, I've listed them out for you. We have the crop tool that you already saw a little bit of earlier. We have the spot removal tool which is one of the early heroes of Light room Classic for removing dust spots, sensor spots, spots on uh seamless paper, things like that. You can even use it for skin corrections. That's great. We have the red...
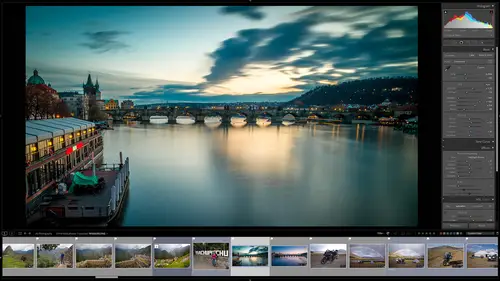
eye tool, so removing red eye from images, the gradient and radio filters allow us to do broad swaths of adjustments to images and then we can really refine those. And then we have the adjustment brush for areas that are sort of non contiguous unusual shapes. So using all of those different things together, help us edit some images. So I have added some more images over here to my quick collection to help us understand how these work. So let's start with this sort of boring lightning image. Previously I said we would eventually start using presets to adjust image images. And so I'm going to cheat on this. We haven't said how to create a preset yet, but I have made one for this image. I'm going to go to the develop module by hitting D and over on the left hand side. I have a little preset so it's right up here and it is called lightning, something click that. So what that has done is it has adjusted our colour temperature in contrast and all that stuff that we talked about earlier in the global changes. But we have a lot of local problems with this image. So first off it is crooked, so we need to fix that. We have dust sensors, spots all over the place in this image, so we need to fix that and then we have some areas in the image that are just we don't want them there with the crop, those out. So what we're going to do here is this was a starting point. I think this is a little too blue for my taste. I'm gonna take that blew out just a hair. And so now we have our global adjustments done, bum, it's fantastic. It saves us so much time. So let's start with the crop tool. Now the crop tool is right up here at the upper right hand side and it does a couple of things. If I click on that, the first thing we can do is we can change the aspect ratio of an image and so by default it's going to use the original aspect racial that you shot in your camera, whatever that might be or you can make it whatever you want a square, you can make it 8.5 by 11, 5 by 74 by three and you can enter custom aspect ratios which are what these are. So I have entered 16 by nine because they do a lot of video work And I want my crop to match my videos so we can do that. So that's what I'm gonna do. I'm gonna go and enter a custom aspect ratio. So I'm gonna enter 16 x nine just so you can follow along if you're doing this at home and okay. And now the aspect ratio will show up. I'm gonna hold that. You can also put in pixels so you could put in 1920 by 1080 or whatever the pixel aspect ratio is that you're working on. If these uh stock Aspect ratios don't work for you, I'm gonna choose this custom aspect ratio of 16 x nine. Now if you look at this you can see that this picture it's crooked. So what I could do is grab the side, you can see that are our little cursor. When we go to the side changes 22 arrows. What that means is I can click and drag and change this image so I could do that to try to get this to be straight and it be okay but there is a different way to do that. So let's say that this is really wonky. How can I get this to be a straight image? Well right here we have this angle tool so I can either move this slider to say I want the image to rotate by a specific angle, I can click on the auto button and light room Classic. We'll try to figure out what is straight for me automatically or I can use this little level tool and I think that is the best way to do it. You can click on that, go out here and do something and when you're done go back click again to put it away. Just sort of like what we did with our other tools. So I'm going to reset and click reset right here, Going to reset that crop And let's do this from the start now that you know about these things. So I'm gonna go change this to a 16x9 aspect ratio. I'm going to move this up a little bit so we get what we want out of it. I'm gonna drag the corner so I'm just getting this lightning strike to make it a little bit more dramatic. And then I am going to drag this angle and I'm going to click and drag along the ground and I'm going to say that should be level and let go and now it is level. So any straight edge will work. You can just drag this level on a straight left, uh land or vertical line, horizontal line. It doesn't matter and it will make it level. Now it's done. I'm going to say close now, we have a much better looking image. The next thing we have is we have these spots and we need to get rid of those spots. And so this next tool over here, you can see it is the spot removal tool. So I'm going to click on that with most of these tools, you have some options. And so you can see, you can change the size of this brush, you can change the feather. The feather is the transition area between the brush and the edge. So do you want to make that a soft edge or a hard edge? I'm gonna leave this a soft edge. And then the opacity. Do you want it to be transparent, totally opaque for this? We want it to be opaque. You can also use the shortcut keys, the brackets, left and right. So I can push the left bracket and that's going to make that smaller, push the right bracket to make it larger. And so that works or the scroll wheel on your mouse. I'm just scrolling up and down on my mouse wheel and that changes the brush size. So I want this brush size to be a little bit bigger than the spot and I'm just going to click once. And what light room is going to do is when you click in this area, that's what you want to heal. The second area is what you're pulling from. We're going to take from this area and put it on this area and you're going to hell that now notice over here we have a couple of different options. We have hell and clone. There's a big difference. So let me show you the difference of what those are. So when you're healing, you're clicking on an area and light room is going to try to find an area that's similar and it's going to bring over the textures of this area and it's going to preserve to the best of its ability, the color and all this stuff over here to try to just make this look as natural as possible in its environment. If you clone, it's just gonna copy what's over here and paste it over here and it can really go Wonky, let me show you what happens if I clone something. So if I choose clone, so I have chosen clone right here and let's get a big area and I'm going to click just right here. And so Lightning is automatically going to choose this area to clone from, which normally works. You can click and drag this circle to say this is where I want you to clone from. If light room gets it wrong, you can have something that looks like that where you have a clear area that shouldn't be there because it's taking this just sticking it over there. That's what clone does. Now. You can use clone for very specific things. If you have an area that you really do want to clone out, you can use that. And so if I close this you'll see I've got a circle with a weird lightning thing, I don't want that. How do I get rid of it? So what I can do is if I do make a mistake I'm gonna go back over here, click again on my spot removal tool and now when I go over here and hover over something I will get a little hand if I click on that, now I have this and it's active and I can manipulate that. Or I can just hit the delete key and poof it goes away and then get rid of this so I can click on this, hit the delete key, poof it goes away. So that's how you can undo different things. Now. What we can do here is I'm gonna go back and put this on a hell that's what I wanna do. I wanna heal all of these little dust spots. I'm just going to click on them and unless light room makes a blunder, I'm just gonna let it choose for me. If it does make a mistake I can drag the source tool around to say you know what take from here and put that here. Or if I click in the wrong area I can adjust that as well. And so what if I can't really see where the spots are on this? That happens sometimes on the lower part of the screen, make sure your toolbar is turned on again, you're gonna hit t to turn off the toolbar, t again to turn it on, make sure it's turned on. There is a part down here that says visualize spots, I'll zoom way in there and so if you turn that on it changes the look of your image, like to an X ray and you can make this less dramatic or more dramatic. And so what I'm going to do here is I'm going to move this down and you can see right away that some spots jump out. There's one right there, there's one right there and we can see much more clearly where we have issues in this image. Sometimes this helps. Sometimes it doesn't help at all. But I saw that there are some images, some spots there and there that we needed to get rid of and bam oh it's done when I'm done with that I can hit close and I have fixed that image. I'm gonna f to go to full screen and here is the image that we just fixed. If I hit why you can see before and after. It's a pretty dramatic change that we use the crop tool and the spot removal tool to fix that. Okay so let's hit G to go back to our library module and let's now go to this image right here. This is of some stairs. Let me show you how you can fix some things in this image. We're gonna do some local adjustments and some global adjustments to make this a lot more appealing. So again to go to the develop module, I'm gonna hit d first thing I want to do this is crooked, so I'm gonna go to my crop tool, click on my angle and I'm going to drag this to this punk, it fixed the angle just like that. Now the second thing I want to do is this is really really bland. So I'm going to make this much more contrast. E make my white levels white, I'm gonna make this much more vibrant. Ooh I like that, I'm gonna make it much more clarity there, take the texture up and so now we have dramatically changed that. It looks pretty cool. Um And just like that I was able to combine a local adjustment and a global adjustment to change how this looks and it was really really really fast. Okay now let's go back and go to some other uh tools here. So we have a big issue with this. We have these great workout photos and a their orange and B. We have bright red eyes because we used a ring flash to fix this. So what we want to do is get rid of those red eyes as fast as possible. So what I'm gonna do is hit d to go over into the develop module, I'm gonna zoom in on Samantha's eyeballs here, Sam Kazuki, and the next up to bat here is our red eye correction. So to fix these red eyes, all I have to do is click on this now, by the way, you can do red eye for people or petty if you have like green or weird colored eyes on an animal. And so most of the time it will work either on red eyes or pet eyes, what I need to do is I need to line up this tool as best as possible with the eyeball so I'm going to shrink that down so it's just a little bit big, just about the same size of her eyes. And click and then I'm going to click and that's it. So you can change, the pupil size, can change how dark or bright you want it. But with two clicks, I was able to fix her eyes if I go to the next image. So we have another image of Sam here. You can see that she's got crazy red ice. So let's go to the develop module, click on the red eye tool, go over here and we're just going to click and click just like that and it's done. So the red eye tool is pretty self explanatory. If you have red eyes use the red eye tool and uh, that's all there is to it. All right. So let's talk about some other tools. There are two tools that work barely similarly to each other. It's the gradient filter and the radio filter. The only real difference between the gradient filter and the radio filter are the shapes of the filters themselves. So the radio filter is built for gradients. So back in the day when you had a camera and you wanted to take a sunset picture or something in the foreground was very dark and the sky was very bright. You would drop a filter in front of your camera lens and you could rotate that filter, but it was dark on one half and clear on the other, so it would balance out the exposure. That's what a gradient filter is. And so the nice thing about the gradient filters here, enlightened classic is that they work even better than the filters in our cameras because you can change the shape of them. The radio filter is anything that sort of round or oval shaped. So let's go and look at some of those things. So the first thing we want to do is I'm going to go back to uh this image right here, this is a, just a scene in believe it's Prague and so you can see that the sky is pretty bright, foreground is sort of dark. So what I'm gonna do is I'm going to change the exposure and I'm gonna forget about the sky to begin with and just change the global uh global adjustments here, knowing that the sky is probably gonna be overexposed. So I'm gonna open up the shadows here, change this, going to take the exposure up just a little bit. I probably need to add a little texture to this and some clarity and so we're getting somewhere but you can see that the sky is a little bit too bright. I could take the highlights and try to bring those in but it looks a little bit wonky. Also maybe want to change the color of the sky. So I need to make a local adjustment because I don't want to change the highlights on the entire image. So I'm going to go over here and I have this filter right here, The graduated filter. So graduated filter. I think I said gradient filter, it's graduated filter. So I'm gonna click on that. And then what I can do is I can click and drag and what you'll see As you have three lines. So the first line here, this line right here, it's saying this is where the the filter is beginning, then it's transitioning away. This is where the filter is ending. So this is the transition area from here to here. And so I'm going to really make this very very, very pronounced. So you can see how this is transitioning away. So that's what those three lines are. So what I can do is I can click on the center line and I can rotate this around, I can click on this little dot to move it up or down. So I want to sort of get the sky here and then I can click on the lines to make the transition very abrupt or click them away. So it makes it very very soft. So I sort of want a medium gradient here and then put this about right here to try to match the skyline, something like that. Okay, so you can see that there's a problem with this though, so we have the sky and it's exaggerated um for illustrative purposes. So you can see that with the sky. Uh this filter is also impacting these buildings and the mountain and these buildings. We don't want that. This is not a straight edge. We want to be able to fix that a little bit. So what I'll do here is I'll I'll change this. So it's very contrast. E so again, I'm exaggerating, I wouldn't do this in real life. I'm exaggerating this filter just so we can see this. So how do we take this and make it from a straight edge to something that is more in line with just some of this this shape right here. What we can do is up here, we have new edits and brush. So edit is what we're in right now. It's for editing what this filter does. We can make the exposure brighter or darker. We can change the contrast, we can change the highlights and shadows and whites and all of that stuff. So a lot of the stuff that we were able to do in the global adjustments we can do with these local adjustments. It's just applying the adjustments to the area where we've applied this filter. So it's not affecting anything that's down here, it's only affecting stuff up here that's on this side of the line. Okay, so to really make sure this is exaggerated. So you can see it. I'm gonna take this way down and make it overly dark. So how do we adjust for this irregular shape? Well, next to this we have brush. So I'm gonna click on brush. And what the brush will allow me to do is now down here underneath our adjustments, we can change the size of the brush, the feather of the brush, the flow of the brush and the density of the brush. So what we're gonna do is we're gonna make this a small brush again using the brackets go left, left, left or you can use the scroll wheel. And what I will do is I'm going to start erasing. So we have brush a brush B so we can have two different sized brushes as sort of presets and then we have the erase brush. So I'm going to erase this filter from this area and you'll notice that my little icon goes on. My cursor goes to minus saying, hey, you're erasing from this area. So when I make this a little bit smaller. So now when I start painting with this brush, it's a racing what that filter did from this area. So I'm saying, hey, don't apply this to this area, going to make this a little bit larger. So I'm just brushing out anywhere that I don't want this to apply, changing the size of the brush as needed. I'm gonna do this really fast. It's not gonna be very accurate. But you can see that. I am brushing out the change that I made. There we go like that. It's just applied to the sky. Do do, do, do do. And so that's how you change the shape of that filter. So I would need to go in and do some more manual work. That's horrible. But you get the idea. So that's how that works. If I want to see where I've made a change way down here in the toolbar, I can click show selected mask overlay and that's going to turn into red. If I undo that, it goes back to what I've done. So if you're making subtle changes, so maybe this is not so crazy and you're not quite sure where you've painted, you can turn that color on and go, oh, I didn't do a very good job of that. I need to brush that back in. So instead of the erase tool over here, I'm going to get a different tool, a tool maybe. And now I am brushing in and you'll notice that my cursor change to a plus instead of minus. I'm brushing it back in. Maybe brush this in right here or brush it out using the erase tool. So you get the idea. So why didn't that brush in very much? Because I didn't have, I had too much of a feather there. So yeah, there we go. So to brush that guy right in right there, the density needs to be 100%. That's what I'm missing. Okay, so now I'm brushing in and out on different areas. Okay, we would definitely need to take a little bit more time to make this a nice perfect filter. But you get the idea, this allows us to change how this filter works. Either more or less on a certain area of an image. Let's look at a different image. So, this image here, it doesn't look like much, but it is a bridge in Prague that needs a lot of work. So again, let's go to the develop module, let's make some changes. The first thing is it's way under exposed. I'm gonna take my exposure to the right. I'm going to open up my shadows. I'm going to take the whites way up. I'm gonna make this sort of bluish, taking the color temperature down. I'm going to really push this as far as I can to make the clarity much brighter and that looks so much better. Okay, so I've already changed my global adjustments really, really quickly. I'm gonna go in here and I'm gonna make this sort of level just by dragging it by. I that's great. I'm gonna leave that. So what I can do here is with my radio filter here, I can change the sky so you can see that as I dragged that around, something is happening. So to see exactly what's happening. And I'm gonna take the exposure all the way down so you might have dragged this. So it's on the wrong side, you just drag it around till the side that you want to have the effect. Is that the right place? So I usually do something crazy, like put the exposure way down and then get it to the place that I want and then change the graduation of that and then bring this back to something that's more like I want. I can change the colour temperature there, I can do some highlight adjustments here. I can then go into the brush, I can erase the stuff that we've done over here. You get the idea, you can really, really quickly change an image using these local filters and so you're not adjusting everything. Just a certain part of the image. That's that guy. So let's talk about some portrait editing techniques with local adjustments because we also want to do some things that will help us out. I want to explain something though that you can do in the library module. That is magic. So let's say that you have a group of images, 10 or 20 or 50 or 100 images. And you want to apply the changes that you've made to one image to all the rest of the images. You don't have to go in and write down everything that you've done. You don't even have to save a preset. You can tell Light room classic to take the the uh the adjustments that you've made to one image and apply it to the other images. I want to do that so that we can do an adjustment to another portrait of Theresa. That needs some local adjustments. So I want to get that second portrait up to speed with where we already are on our first edit. So let's go back into light room. And what we'll do here is I'm choosing this first image that we've already started editing. So if we look at these side by side, you can see this image here on the right. We've done some tonal and color adjustments on the left. We've done nothing. I want to take these settings and apply them to this image. So what I can do is in the library module, in the grid view. I'm going to click on this image. This first image I'm clicking on that first. So it's very important. Which one you click on first? The one that you click on first is going to be what you come from and all the rest are gonna be going to. So you can choose many images. Just make sure that the first image you click is the one that you want to take you want to copy from and all the rest of them are what you want to paste too. So I have clicked on this first image here and then I'm just going to hit shift and click on the second image. Now, I could have shift, clicked all of these. I just want to go from this to this over in the lower right hand corner you can sink either the metadata or the settings. So think about this. If you have an image that you've added description to title to caption to all that kind of stuff and you're like oh man, this should also have been applied to these other seven or eight images. You can sync all of that metadata by selecting the first image with the stuff that you want and then selecting all the rest of the images and just saying sink and then it'll copy and paste. You can also do that with the develop settings. So let's do that. We're gonna go down here, we're not going to say sync metadata, we're gonna say sync settings, I'm gonna click on that Now. This is going to ask us some important questions, it's going to say, what do you want to sing? So sometimes you might not want to sink a graduated filter or a radio filter or local adjustment because it's going to apply it in the exact same place and if your subject is moved it might not work. And so a lot of times you don't select the local adjustments for this, I'm going to include them just so we can see also spot removals. Generally you don't sink those unless it's sensor dust because sensor dust is the same on every single image in a session. But if it spots maybe on a wall or spots, uh, skin blemishes or something like that, those aren't going to line up when you sync, so you might want to undo that the other thing that you might not want to bring across are straightening uh, images are an aspect ratio or something. So you get to choose. You get to choose if you think everything or just a few things that you've done, uh either globally or locally. And the more you do this, the more you'll go, you know what, I should not have sink that and you'll learn when it's appropriate to sink local adjustments and when it's appropriate not to. So for this, I'm gonna think just everything, and so I'm gonna check all and I'm going to say synchronize and what will happen is now this second image going to have the same adjustments as the first, so they look pretty darn close in color and all of that kind of stuff. And so we've already got a head start on this second image. So I'm gonna click on the second image and then I'm gonna get d to go into the develop module and we want to start doing some things to this. So one of the things that we will notice as we're just in color temperature is that Teresa's arms have a little bit more orange in them than the rest of her body. So I might want to change the color of her arms. So down here it's a little bit more yellowy than it is up here. So this is more of a neutral colour. This is sort of orange ish. So I just want to adjust this area right here and maybe a little bit on her arm right here. I don't want to just anything on her face. So this is a local adjustment I want to make also, I want a vignette on this, but I don't want it to be around the edges equally. I want to do it just around her face to draw us to her face. So I want to do that. So let's do that with two specific tools. The first one is this tool right here, This is a radio filter. If you hover over that, you'll see radio filter shift. M is the shortcut key for that. So what I want to do is I'm going to change this exposure to negative two, so you can really see what's happening. So we're going to exaggerate this. Okay, so I'm gonna go over here. I'm going to click and drag. And what it's doing is this is saying apply this exposure adjustment or color temperature change adjustment or whatever adjustment that you're making outside of this circle. So, if I take this above ticket below, if I change the color temperature, notice it's going outside of the circle, not inside of the circle, that's how that works. But what if we wanted to make an adjustment on the inside of the circle? Well on the right down here, there's a little button that says invert so that does exactly what you think. It puts the adjustment on the inside of the circle, not the outside of the circle. So you get to decide this thing going to happen inside this or outside of this. Also notice the transition area here that is done with this feather, so no feather. It makes it a very hard edge with a really big feather. It makes it a really soft soft transition. So I went somewhere in between. I'm not going to invert this. And the other thing you can do, you can grab these little handles here, you can pull this out, you can pull this down, can make it wider. If you grab the center, you can move this around. So it's almost like putting a spotlight on Theresa. So I'm going to make this long skinny something like that and we can also rotate this so I'm going to rotate this around something like that. I don't want this to be that dramatic. I wanted to just be maybe half a stop or something. Ish, something like that. Maybe a little bit smaller. And so we're drawing our attention to Teresa's face. I like how this looks. Okay, So now I'm going to hit close right here. I'm gonna hit close to close that tool. And so we've drawn our attention to Teresa's face, but that makes this orangish color on her arms a little bit more pronounced. We're seeing it even more. So what I'm gonna do is first going to do a global change to sort of take this temperature up just so it's a little bit more a little bit warmer. And we're seeing that we've got these weird colors in her arms. So what can we do or we can use a brush and that is right here. This little brush and we can paint on the image and we can make adjustments to the brushed areas. So to really make this stand out, I'm going to use an exposure of negative for if I brush here on her face, you'll see that where I've brushed that exposure is applied. Can change that exposure to plus or minus. I can change the color temperature of where I've brushed. I can change the texture of where I've brushed. I can do whatever I want with the sliders and it's only going to be applied to the area that I've brushed. If I want to move that I can click and drag it around just like anything else. If I can't see what the heck I've done, I can hover over that. Just let them out sit over that dot. It will show up red. Or I can go down here to the toolbar and click on show selected mask overlay and it will show me where I have painted. If I don't like it, I can click on the dot and hit delete and it will get rid of this. Now, one of the things that's important to note about all of the local adjustments, the adjustment brush and the graduated filter, those two things, you can have multiple instances and also the spot removal. So you can have one brushed area, three brushed areas, six brushed areas. And this is where the toolbar can get you in trouble. Let me show you exactly what I mean. So let's again, we're going to do a really huge underexposed brush so you can see this if I brush an area right here and I want to also maybe uh do a different area right here. I want to separate those two by clicking this right here. This says knew I want a different brush. I don't want to have the same brush so I'll click new now when I paint, I have two different areas. So the second one can maybe be an adjustment of exposure. And if I want to go and change the first one, I can click on it and maybe that one is uh not a change mint of exposure. It's a change of color temperature. And then I can get a new brush and maybe over here I paint something and that is a change to, oh, I don't know something else. I'm changing the hue of that so I can have different areas of the image where I've done specific things now. Way down here and the lower hand corner on the toolbar, there has show edit pins. You can have never selected always an auto. Sometimes I have had many people send me an email saying I have lost the ability to see what I've done. And what's happened is they've accidentally changed this to show edit pins never, and they've turned off their toolbar and they can't see where their pens are to change them. Like I can't figure out where to change this and usually what's happened is these changes aren't dramatic, like I've just done their sort of subtle and so in the image they're not sure how to change any of that. So, and so that little area of the toolbar can really mess you up. So I leave that to always, there are other tools that do the same thing. Um there are tools that you can hide the cursor. And so my sister, who is a professional photographer was going crazy because she's like, I can't see my cursor anymore, it's just evaporated. She did all kinds of stuff to her computer to try to fix it. And it turned out that accidentally she had turned off view cursor in a toolbar somewhere. So always make sure you check that toolbar first if something is wacky with your interface and you can't figure it out. Okay, back to the light room, classic um area here. So the behavior of these. Again, if you want to see where you've painted on and off, you can hover over these little pins, you can click and drag your brushed area around. You can delete them. That's what I'm going to do now and then delete these and delete that and delete that. Let's fix these areas. Let's fix the color here and here. So to do that, we're going to get a new brush, got the brush here and click new and I'm just gonna brush on Teresa's arm. I'm going to make this a smaller brush and I'm going to just sort of paint over this now. It's really, really dark because I started with its exposure to negative four. So I can always change that and bring this back to zero. I don't want to change the exposure necessarily. I want to do is I want to change the saturation so I'm going to change the saturation. Was going to bring that back a little bit, just a little bit removing some of the color. If I go too far it's too much. Then I can go in here. If I close this, then I can zoom in, go back into the brush, click on the dot and then I can go in and say, where do I need to remove some of that? It's hard for me to tell. So I'm going to click show selected mask overlay, get my erase tool, make it a little bit larger, make it a little bit more feathered and I'm gonna start painting out some of this area that I painted in accidentally. I just want to make a subtle adjustment to the color of her arm, not her hand. And okay, I'm gonna turn off show selected overlay and I will close that brush and zoom out and we can sort of see now that that has fixed this issue. If it hasn't, we need a little bit more of an adjustment, I can click on that and then you can play with it so I can take the saturation down even more. I can change the colour temperature a little bit, I can do whatever I need to do to get that to be a little bit more balanced into my liking. So I think for this example that's pretty darn good. We could get a new brush and we can go over here, we can sort of paint on this again, we don't want that exposure to be really dark, we just want maybe to take the saturation down just a little bit. We can do different things like that to just select different areas. Okay, I'm gonna close these brushes out so we have that and I think I really like how this image is looking. Um it looks really, really nice. Let's go back to some of these other areas. I'm gonna show you something with this image of Carisa, that it's really cool specific to the adjustment brush. I'm gonna get an adjustment brush. We did this stuff on her neck earlier. I'm going to get rid of that. So what I want to do is I want to change this background. It looks a little, the color looks a little bit off to me. So I want to change that. And so what I'll do here, yes, I'm going to go in and I'm going to take this effect and I'm gonna choose, you can choose any of these as a starting point, but I'm going to choose the color temperature. What I wanna do is I want to make the background a little bit more blue. In fact, I'm gonna make it actually, I'm gonna make it warmer a little bit more amber. So what I could do is go in here and start painting. And what's happening is I'm accidentally painting into Carisa. I don't want to do that. So what I can do is there's this sort of secret tool down here and it says Range Mask this right here. This Range mask. Now, the thing about the Range mask, this is what it does. The Range mask allows you to not only are you going to paint with your adjustment brush, but you can say I only want this, not only to only apply with where I'm painting, I only wanted to apply to a very specific range of colors. So if you have an area that's very well defined color and its contrasting, you can sort of paint with reckless abandon and light room is going to restrict the changes that you make to only that area that has the same color. Let me show you on this image. So we can see on this image the background color is not anywhere like her hair color or her face or her dress. It's a big contrast. So what I can do is go over here to the Range mask and say I want to apply to a color. You can also do this with a luminous by the way. But I'm going to apply this to a color. And now what is going to ask me to do is to take this little color picker and choose the color. I want to choose this color right here and you can choose multiple um colors or you can drag so you get more of a sample of that. So that's what I've done. Or I can come over here and pick these colors now when I'm painting with my adjustment brush um there we go. I'm just going to go in here and start painting. Notice that it is not affecting Carisa at all, it's just affecting that color that I selected. And you can see that because I'm going to start changing. There's a background can make it blue or whatever. So you can change a very specific part of an image, you can make it darker or brighter. It is only applying that to that range mask that I applied. It's a really, really powerful tool and it's something that really, really works well. Okay, so we have uh let's have a little refresher because we've covered a lot in the develop module. So we have the develop module that allows us to go through and make big global changes to everything in the image. Once that's done, we can go in and make changes to very, very specific areas of an image and get it refined exactly like we want. Now we need to learn about some other things that we can do in the library module. With the develop module to really maximize what we're doing. We need to learn about the presets that we've been talking about and how we apply those. We need to learn about virtual copies. We need to learn some more things, so we really take advantage of Light Room Classic and so that's what's coming next and the next few sessions.
Class Materials
Bonus Materials with Purchase
Ratings and Reviews
Karen Sessions
Great class - excellent content, excellent presentation. Thank you Mark, through this class, I finally understand the difference between Adobe Lightroom Classic, Lightroom and how they work together. And how excellent, there is so much more available to learn - photography essentials, lighting, Adobe products.
user-d55dc6
This is an excellent class to learn about Lightroom Classic. Since it's not the same as Photoshop, I found Lightroom Classic to be confusing and difficult to intuitively figure out. Mark Wallace is an expert and exceptional teacher for the program and I learned so much today in this free class presentation that I am planning to purchase the program so I can continue to have a solid understanding of Lightroom Classic basics. Thanks, Mark, for inspiring me to get back into computer photo editing with LR Classic!