Lesson Info
9. Enhancing Existing Light
Lessons
Enhancing Existing Light with In-Camera Dodge and Burn
23:15 2Portable Window Light Anywhere
26:21 3Larger Portable Window Light, Pt. 1
19:50 4Larger Portable Window Light, Pt. 2
17:29 5Direct Window Light
15:33 6Perfect In-Camera Flares with Compositing
21:35 7Convincing Environmental Backlight
32:50 8How Atmosphere Affects a Scene
06:38Enhancing Existing Light
19:08 10Enhancing Existing Light with Flare
18:08 11Backlighting as a Main Light
32:44 12Backlighting as a Main Light with Smoke
10:52 13Midday Hard Sun with Godox
32:04 14Midday Hard Sun with Profoto
11:46 15Light and Airy Afternoon Backlight
11:42 16Late Afternoon Indoor Backlight
16:16 17Shooting Golden Hour Hard Light
19:52 18Working with Artificial Flares
26:18 19Golden Hour Environment
09:49 20The End
00:37Lesson Info
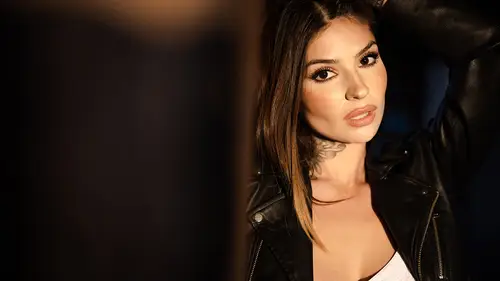
Enhancing Existing Light
this is gonna be fun, because now we're going to dive into a three light setup that's designed to simulate what the natural light in the scene would have done if it were in the perfect spot. But since it's not, we're going to help it out a bit. Let's jump in the video. So there's a couple things that I want to do in this scene that I think you're gonna be really fun. We have this old rundown train car that's just in the middle of nowhere. Uh, and what we're gonna do is I've got Kylie sitting there partly because it's like a heat box where you can warm up, probably because it's gonna be our shot. So, you know, it's kind of two birds, one stone. So one of my thoughts is the sun is already coming through, but it's not quite casting light exactly how I wanted to. So I'm going to place a strobe on that side where the sun is coming from to actually get through the windows. The next thing I wanna do is I want to actually try lighting this, Um, perhaps with a beauty like that's kind of going d...
irectly over. Not a beauty, A butterfly light going directly to the face to kind of give a little bit of dodging the face very light again. We're gonna fill up the room and kind of get this really cool ambiance. And then the last thing I want to try out is getting a little bit closer, shooting with a wider angle lens and actually filling the room with some aerosol and just seeing if it works. So we're gonna start, and we're just gonna play a little bit and get to something really fun and really cool. Let me show you all something when we come over here. I want you guys to see where Kylie is sitting right now, because the way that Kylie is sitting, you'll actually notice that the black walls of this train are acting like negative fill. So negative fill is where we put like something black on the edges of someone or around the face, and it actually removes light and it creates shadow, and that creates depth. So we're using that as this and you can see the shadows actually forming so highly. If you pull your hair back, you can actually all see how the shadows, especially if she leans forward a little bit more. The light is kind of brightest right in the center, and it falls off towards the sides where that negative light is. So the lights coming through a little bit right here and we have a position. So we get, like, negative fill on the sides. And that's why if we're going to light this shot, it's gonna need to be that butterfly light coming directly down. So we kind of retain the shadows. So I'm gonna start by placing a light to kind of mimic, son, let's start with the B 10. You'll notice the stuff is still pretty high up in the air, and that means that we're not going to, uh, but we don't really need to put a CTO on here because the sun itself is not that orange right now. I'm gonna leave it just daylight balanced. Mhm. Yeah, You always start with the top one first. That's a rule. Mhm. Hey, Kylie, can you see this flash? No. Yeah. Okay. Now do you see it? Mhm. Yep. Okay. And is it going? Is it pointing directly at you or is it kind of hitting the ground when it's aimed at you. Mm. The recipe. Is it okay? I'm gonna lower a little bit. All right. So what I'm gonna do right now is I'm gonna place a second flash now, So I've got the main flash, or at least are a group flash on that proposal beaten. And it's mimicking the sun coming directly through that window, I'm going to go with B is going to be the second flash that we're gonna set up, actually, in the back of the, uh, that little train car. Now the back door is very dark. It's going to create a bit great background, kind of well, to be used as a as a background for her head when we light it up because we're gonna basically use this as a backlight, and it's gonna really make her pop in that scene, it's gonna look really cool. So I'm gonna go ahead and place that mhm, mhm, mhm. And you have a third a one now with a without the stand, this guy's gonna go into C and let's get a grid. I got a grid. Let's get the boob. This is gonna be our life, our subject. So if we need to add in a that, uh, that kind of little butterfly light directly overhead, it's gonna be on C. We're gonna dial this down significantly just to get a little tiny bit of light right in the face if it's needed. So we have to light set up, we might use a third. Okay, so here it goes. I've got that light on the outside. I'm gonna go ahead and set up for that. First, I am going to use the nd filter again. I hold the nd filter over the camera cause it's quick, It's simple. I'm shooting on the go a lot and I'm not even using my tripod most of time. So it's easier than using, like a drop in filter and constantly taking in and out. But it's by no means the best practice. Do whatever you guys want to do. So, while they're setting up and kind of matting down the flyaways, I'm gonna take a quick shot of Kylie just looking directly in the camera so we can kind of see this is what a natural light exposure looks like. And there's absolutely nothing wrong with this natural light exposure looks beautiful. It just looks like a shot that a lot of people might do. And so what I want to do is start breaking it down into the next step. So we've set up our composition where she's framed right in between these these this door itself in addition to the doors behind and her head is directly over the background of that back door. So that creates a dark background over the back of her head, which we can then light and create a little more light behind it. So first I want to set up that main light. We already set up that light. Uh, it's set up to Group A and so I have it at 10 power. It's a full power of the 200 watt seconds. So five standard flashes or an 8200, whatever that might be for you, it's It's 200 watt seconds of power going through a zoom dish and using the nd filter. Now, I'm gonna go ahead and actually get my base exposure before we test that light. So the base exposure is going to be this, so I'm gonna go to 1 200 F 1.2 is a 100. Okay, so what this does is it creates this overall darker and more dramatic image. And I love that. And what I want to do is actually bring out the rest of her as we kind of edge things out. So we're gonna go ahead and add in first our main sunlight that's coming through, and you'll notice that now we don't even have the sun coming through the shot. We're gonna create everything on our own. So we have that light coming through. Okay, So step number one, we have that sun coming through and kind of creating the edge light on her. Step number two is going to decide if we want that a background light. And I think I do want a background light, so I'm going to turn on B. I set it down in the back of the room, and I'm gonna put it at full power. That's 75 watt seconds. Kyle, I'm gonna have to brush all your hair straight down in front of you over the chest. There you go. Perfect. Just like that. Perfect and kind of mat down the flyways on the side, and then you can let your hands at rest, because we're going to take the test shots. Perfect. Let's go ahead and look now with both flashes firing and see if we get enough power on that back light. You know, it's not been firing. It's on B. Um, Sonia, can you go grab that flash in the back of the room? Okay. Can you go set this back down this time? Go in the middle of go just where you drop your hand sanitizer and put it down in the middle of the floor and face it right towards Caylee and flip it over so it's kind of angled up. So if it helps, I might just turn a off for just a moment, mhm and then fire with Just be just to see what be looks like at full. I do need to get my nd filter back up. So it does create a nice little edge against the against the wall in the background. And I love that. And Kyle, you're gonna kill me. But half an inch this way. Right there. I see it there. Yes, Perfect. So I'm gonna go ahead and turn a back on now. And with both of these together we get this shot that's really close to finished. I just want to finish it in camera, because all I really need is a tiny kiss of light just right on the face to dodge and burn to follow the natural kind of that butterfly light that we have kind of naturally occurring because of this negative fill. So I need that to be that nice little butterfly light that comes out this way. The center of the sphere has to go directly over the bridge of her nose. So it needs to go this way a little bit right there. Okay, Now tilt the light towards her a little bit more. Not yet. Let's just get the light first. Okay? I'm gonna give you a little bit more power. Tell them more towards her. More, More, more. All the way towards your face there. And then lower the light a little bit. Lower. Lower. Lower. Lower, lower. Lower. Yeah. Yeah. I wish it were a teeny tiny bit softer of a light. You look amazing, by the way. Kyle, you look fantastic. It's just the light that I want to get nailed in. Um, it's actually good. Just bringing in a little bit more. And then it's tilted. It's going to the right a little bit. There you go. Right there. A little more back there. Right there. Okay, Kylie, sit straight. Give me your final pose in your look. Mhm. Lean a little bit of this side so I can see window on both sides. There. There it is. Let's see it. I want to pause for just a moment here because we're doing a lot of things. First, I want you to pay attention. How? At this point you watch us building this scene one light at a time, Right? When we go back to camp, we talk about composition and exposure. Modify, Add. So we start with one light, then see if you want to modify, Add another. Then we'll see. You want to modify it. So we're getting up to three lights, but we're building it one light at a time. Now I want to draw out this train car because if this is our train car right here and the cameras placed right here and we have a doorframe, I'm just going to draw kind of our door frames and are subject is placed right here. Kylie is right there. So what we essentially have here is another door frame right here and another door frame right here. And then we have these windows. Okay, So against each of these is a window here, there's a window. And on this side, there are windows as well exacerbates Texas. Now the sun is kind of back here. And so this is why the sun isn't quite it's not doing exactly what we needed to. So if I click on this first image right here, I want you guys to take a look at this because in this first image you'll see just our light being added. So what's happening is we can actually see the sunlight kind of streaking in, and it's kind of hitting these background light. So there's a light kind of coming in from this side and a light kind of coming in from this side. But we're not hitting this front area, or it actually is a little bit. This tiny little triangle right here is actually the son. This is our flash that's being added in. So what? We're doing is we're putting that flash up, like, kind of right about. Well, I think based on the positioning, forgive me if I'm okay. That's the front door. So positioning wise, it looks like our light is kind of like right here. Okay, so we have our light right here firing through, and that's creating that kind of light that goes right onto that ground right there. But we're following the existing light direction, right? So when you look at the lights, it sells you because the sunlight is coming in from that same kind of angle in the background, and we're lighting from that same side with the background to create that effect. So the sunlight is not hitting that area, but it just looks like it did from our frame. Next we go to that additional light that we added in. So this is that light that we're adding into the background now, Why do we want that? Because if the sun were a little bit more on this side, if we had a light coming in from right here, it would have lit the columns in a way that would have, like, dropped down into our subjects. So you see these columns being lit, and what ends up happening is we end up getting these. If I skip to like one of the final images, you end up getting these nice lines that, like, drop down and kind of lead right into our subject. They just beautifully framed the subject. Yet those would have existed as well if the sun were in the perfect position. So once again, this light that we're adding here in the background to kind of flash forward, it simulates, or it's close to simulating what the sunlight would have done in that scene. Then we're gonna get to that final butterfly light. We've already talked about it a little bit about how when we um So let's go look at one of the natural light images. I think I have one. So as we look at this shot right here, you'll notice that this is just natural light, right? So we don't see anything else. What we notice is that butterfly light landing on the face is coming because, like I mentioned the video, these two sides sort of flag off the light and we have light just coming in natural daylight coming in from the door directly right here in front of us so that daylight is landing right on her. So when we add light, we're gonna place that final light just right above her head, angling it down and just kind of adding to the existing light on the face. So now let's go ahead and finish this out. But I want you to see how this three light setup is all designed to simply mimic what's already there or to augment it to kind of add to the existing light or create light where it would naturally be. But maybe not in this moment, because the sun has moved and shifted a little bit. That's how we're gonna land at this very cool kind of dramatic yet natural light type image in our final shot. Okay, there we go. Now let's get our final look. Lean a little bit to your right. Just right there, right there. That's perfect. There. Mhm. Brush the hair down again. Perfect. Oh, that wind Not now. Press it down. Perfect. There we go. And now go ahead and bring the hand into it. So bring that hand up like you were before there Lean a little bit to your right there, Right there, Right there, Right there. So awesome. Now there's one other thing that I would love to do right now, which is to soften that light a little bit. But I'm just gonna leave it on there. For the time being, I'm trying to think of how we could potentially soften. It would be a little bit difficult with everyone that we have on site. So let's now dive into post. So let's go ahead and grab our exercise files actually shot a few final images in this scene. But just due to fly aways, um, and kind of the expression I like the expression best in this last shot. So we're gonna go ahead and grab that again. Looking at the raw file. It already looks really, really nice. So I wanna make sure not to over process this. So all we're gonna do is let's go ahead and start just by raising the exposure a bit, and I'm going to also add a little bit more highlights. So I'm gonna just pull the highlights up, and it's gonna do a nice job of just kind of accentuating the highlights that are on the face. We're gonna bring the whites down a bit just to kind of tone down those whites a little. And this is already looking really nice. Now I'm gonna lift some of those shadows, okay? And you can see that light that we added into the scene does a really great job of kind of augmenting that that existing light, it just kind of boost that existing natural light coming through the door frame in a way that looks really nice and saves us work in post. I'm gonna go ahead and dial in my temperature and let's just take a reading off the background wall and see if there's any of these spots. See, this looks a little on the green. That looks about right. It's gonna warm up from there, maybe drop a little bit more green into it. Some around here is good. And now let's go ahead and add our radio burn. I'm gonna go ahead. You can press shift em, pull it right up to the face. I'm also going to exaggerate this burn just a bit more and you know I might do instead, instead of exaggerating this burn too much. What I might do is add in, um, this graduated burn from the left and right. So let's go ahead. And what we can do is press em to bring up our graduate burn. So if you select so, you'll notice that I have two different presets created in the visual flow tools again. All this is is just a burn that's coming from the left, and it burns coming from the right. Um, it's just created for you, so it's kind of a little bit easier to do it. So it's one of those things I would suggest you do as well, whether or not you have the system. Just create those for yourself. It'll save you a lot of time, okay? And this is starting to look really nice. If I look at the before versus the after, it already looks solid. I don't feel like I need to do any localized dodging and burning. If I wanted to, I would need to reduce the exposure a bit in the shot before I go ahead and do that. But honestly, I kind of like the exposure where it's at. The only other thing I might do from here is just go into Photoshop and remove a couple of these like flyways and stuff. So I would just zoom in, go grab a couple of flyways, maybe remove a couple of the specks of dirt on the floor that a little bit larger and a little distracting. And that's it. So we have our final image here, and you guys already know how to do that Photoshop piece by now. So if you want to do it, go ahead and do that. You have the exercise file, but let's go ahead and jump to the next video.
Class Materials
Bonus Materials with Purchase
Ratings and Reviews
Nev Steer
Jye is an exceptional teacher and these videos really breakdown the construction of great lighting techniques. Enjoy the dry humour throughout. Well worth watching for even experienced photographers as there are lots of tips and tricks here.
a Creativelive Student
Excellent......Pye is a fantastic instructor with a slow, well explained style of teaching.
Funfotog
Kyle made Pye's work look simple. I learned a lot of new ideas and was reminded of some that I had forgotten about. I'll be reviewing 201-401 again with the practice images.