Lesson Info
11. Backlighting as a Main Light
Lessons
Enhancing Existing Light with In-Camera Dodge and Burn
23:15 2Portable Window Light Anywhere
26:21 3Larger Portable Window Light, Pt. 1
19:50 4Larger Portable Window Light, Pt. 2
17:29 5Direct Window Light
15:33 6Perfect In-Camera Flares with Compositing
21:35 7Convincing Environmental Backlight
32:50 8How Atmosphere Affects a Scene
06:38Enhancing Existing Light
19:08 10Enhancing Existing Light with Flare
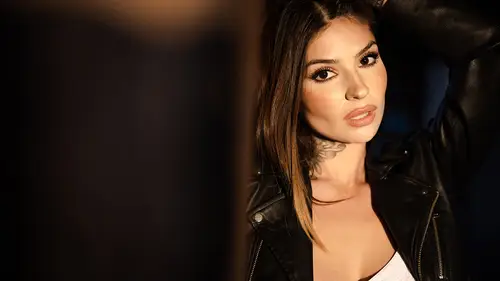
18:08 11Backlighting as a Main Light
32:44 12Backlighting as a Main Light with Smoke
10:52 13Midday Hard Sun with Godox
32:04 14Midday Hard Sun with Profoto
11:46 15Light and Airy Afternoon Backlight
11:42 16Late Afternoon Indoor Backlight
16:16 17Shooting Golden Hour Hard Light
19:52 18Working with Artificial Flares
26:18 19Golden Hour Environment
09:49 20The End
00:37Lesson Info
Backlighting as a Main Light
We don't often think of setting up a light source and using a backlight as our main light on the face. But honestly, when it comes to golden hour, this is exactly what you're getting. You're getting any time that you shoot into the sun, you're getting this backlight that's really the strongest light source in the entire scene. It's lighting forward, but you're getting a lot of Phil on the face through either the sky clouds or other objects that are in front of your subject and reflecting light back onto the person. This is the exact light pattern that we're going to recreate here, and it's one that you might first be uncomfortable with because we have to do a little bit of fine tuning and tweaking to get it to look quite right. But once it is right, you're going to create a really cool, natural styled light source that you can use anywhere, even at nighttime, in front of a garage door and create a really cool image. Let's go watch in this video. I want to do one of the technique which ...
you guys can use anywhere but really what I want to do in this scene is create a natural sort of backlight that also has a fill, as if we're getting kind of mid afternoon sun sunset, and that light is beginning to open up and create a little bit of a larger light source. And in the front side, we have Phil and we kind of shoot from the shadows just like we would during Golden hour or during any backlit kind of situation. So we're gonna leave the front side actually dark and get a little bit more comfortable shooting from the shadows while using strokes. Now, this is gonna be really simple. We're going to shoot this, actually against just the garage, because I think it's gonna look interesting as a textured background. You guys can use this technique really anywhere. I'm gonna show you how to set it up. I'm gonna do it all myself. Hopefully won't be too crazy, but let's go ahead and just set up a basic composition so we can get our stuff right. So I have shift sitting on that chair. I am going to get a exposure just for ambient light so you guys can see what this looks like. Number 12,800 s o We're a daylight white balance. Okay, so this is what, that natural kind of light coming off that, uh, lamp thing. And it looks like now we're gonna do is Nick's all that light, so we need to pull that out. So let's go ahead and adjust for Ambien exposures. Remember, the second step of camp is ambient exposure. Right? So we're gonna pull this down all the way to, like, let's go to our same settings as before and see if we can eliminate most of that background light. So at this, you'll see that we have a slight outline of the garage, but really, most everything is gone already. So 1 200 F 1.8 and 400 s. So we're pretty good right there. I'm gonna set up my primary light now, And what I've done is I have the mag box on a mag mod pro photo ring. So by the time the videos released, this should be out and available. Um, so we have that guy, we have the mag box. We have the focus diffuser on the front and a B 10 on the back. So again, not using Pro Photo. Okay, Just find a 200 or 251 seconds, Strobe, and you're good to go. This is 251 seconds. So we're gonna place this sort of behind shift because I want that light to be coming from behind. I'm just going to raise it up a little bit and we're gonna have to do a bit of tweaking with this setup, so it's not gonna come in just one shot. Alright, that light is good. Let's start right there. And this is on channel B, I think. Let's go ahead and see. We're gonna take a baseline shot. Mhm. And this is at seven power. So seven power coming off of 100 watt seconds. That's down to 1 25. That's down to It's about, like, half power on a regular stroke. Right? So right now we're putting out probably like 20 to 25 watt seconds of juice. Now what we see in the image, though, is one The shadow is very, very harsh. The highlights are also very harsh. So when I look at the highlights on the face, it looks a little crazy. I wish there was a way that I could see this like, is there like it doesn't fold the right direction for a portrait, you know, But the highlights are too much. When the sun would be down in the sky are kind of setting, not even setting. But even starting starting to set, it usually opens up against the atmosphere. Against clouds, we get a larger light source and it becomes larger and larger the more it drops. So the backlight that we get is generally going to be much more soft than this. Since I'm working by myself and I have an assistant to, like, do anything and I don't have a larger soft box. What I'm gonna do is that same technique that we did earlier, which is I'm gonna open up the light source. So again, the cheapest way to do this. You can grab a scrim if you want to, But honestly, the cheapest way to do this is just to have a white piece of fabric that you get from Joan's or any cloth store and pop it right on here. Mhm. You just general a clamps. Now, do I need to stand this crazy? No, this is a Matthew C stand. These are designed for production use. Um, I'm using it because in case there's any wind, I'm by myself and we're outside. I have it. They're not super crazy. Expensive, though, If you good item to get mhm. I'm gonna stop talking while there's a plane coming. You know, the huge mhm. Yeah. Mhm. Yeah. Okay, so let's take a quick shot and just see how that changes the shot. So immediately it does. Several things that are are working really nicely. One is that it softens up the light source dramatically. So that's great. It's worth pausing just to show these two images side by side. Now we still have a lot of work to do here, but we made a massive improvement in just diffusing that light source a little bit more. The mag box is a rather speculator soft box, because on the inside we do have silver lining. It does have that diffusion or that focus diffuser layer, but still comparing the left side of the right side. Look how harsh that light is coming through. It's just so strong. It's very speculator. It's It's just too much when we look at the right side. We still have quite a bit of work to do in terms of the background in terms of the shadow. But we have a nice light that would be more similar to kind of simulating that sunset kind of backlighting effect that we would see because the sky is kind of the entire soft box. Despite the fact that we have that little pin light in the sky of the sun that's adding a little more of a hard light, we still have that soft light coming from the rest of the sky. This does a good job of kind of open up the light source and giving us that look a little bit better. Now let's go back and let's watch and see how we build the rest of this. But the other thing that's doing that, I don't like it. It's actually reflecting directly back onto the garage and it's creating a reflection. So let's see if we can't kind of mitigate that a little bit. The way I'm going to do it is because the angle of this flashes sort of hitting this and going directly backwards, and because this is visible from that reflection. I can actually turn this to this side, so if I turn it so it's basically kind of perpendicular to that wall. So here's the wall. I'm turning it perpendicular. Now I'm going to bring the light source in a way where it's gonna flash through that going to raise up a little bit. That should be about right. Mhm. Oh, yeah, The clamp should be okay. So if we look at those two photographs, this actually did a really good job, so you'll notice the background got dramatically lighter. The highlight actually shrunk up quite a bit, too. Since we don't see as much of that cloth in the background, we do have a bit of a flare coming through. So what I'm gonna do is to take another test shot is hold my hand out just to block that flare. And let's see. Let's see if we can't kind of block it on our own. Yeah, there we go. You all probably already know what a flare does to an image, but still, it's nice to just see simply bringing my hand in to block that flare results in the shot that you see on the left here where we have a lot more contrast in the image versus the shot on the right where we have our hand removed and we have some of that light coming in. So any time you guys have a lower contrast, where it looks like the shadows are lifted, it's likely due to a flare. To be honest, I actually like the way that the shot appears on the right, a little better meaning. If I were to post process this image, it would likely end up somewhere closer to the image on the right, with a little more flat of shadows than the one on the left. But the thing is that I want to do that in post, and what I want to focus on in camera is getting as much detail as I can in addition to getting the shadows to where I want it to be. Then, if I want to do a little bit of a lift in post, I can have very specific control over that while retaining all of my detail. The problem with shooting flare in this kind of a situation, or with that lowered contrast is it is going to affect your image detail. In addition, you're not necessarily going to see that flare evenly distributed across the frame, so you can have kind of a lot of those, you know, more flare areas in a certain area, the frame versus less in other areas. And I'd rather just have control over that in post when I'm not trying to simulate like, a sun flare. So let's go back now to the video. So with that flare blocked, the background looks pretty solid. All I'm gonna do right now is bring this a little bit closer to Shiv right about there. Yeah. So remember, in terms of the size of this light source, this is filling up with light, and this is the size of our light source is a hit. Shiv. The only other thing I'm gonna do is I'm actually gonna bring this light down, and I'm going to angle it up to hit the top part of that scrim. Now, normally we light top down, right? So what am I doing right now? What I'm doing is I'm actually preventing the light from hitting the ground. I'm feathering it up and I'm utilizing this larger light source to kind of Well, it's going to create the downwards light, the top down like that I need let me show you exactly what I mean. See, this light is going to hit up here, So this is actually the light source that's gonna be created on ships face and it's gonna be coming top down, and that's also going to prevent some spill. Hopefully, it also kind of prevents a little bit spill against the background, too. But at least against the ground, in case we want to shoot the ground, it will prevent plenty of spill against that. Okay, that looks great. Let's take a no hand or no flare. So this is right about there. And when I look at my history and I look at the kind of the highlights, the highlights are getting there. I think I can power this up a little bit so long as looking at my highlight alert. I just want to make sure that nothing is blown out. So let's see here. Nothing is blown out. What I might do as well, let's just bring this forward a little bit, see if we can't get some of that flare closed off from the camera bit. We could easily just put a black reflector right here. But I don't want to use so many stands that this is, like, kind of it gets a little bit crazy. So if I were in the studio, I would just flag it off. Let's see what we can put another a clamp down there. So this whole steady the wind never works the way you want to Shiv only works against you. Mhm. Mhm. All right. Should have looked in the camera right there. Okay, let's take a look at the strength. So, in terms of the light source itself, we're looking actually really good. I can see a tiny tiny highlight just on our cheek, but it's so small that we should be okay. I'm gonna back it down just to like, like, down just a tiny bit. Let's actually look at our final power settings so I can give you guys a reading. Here. There it is. So in terms of power, it's at 679 would be half power, eight would be a quarter seven would be an 86.7, 17, 1, 16 and 1/8. So on this guy you're talking about again? That kind of like 20 to 25 watt second range. Right? So if we go Gosh, staying at the math 1. 25. 60. Yeah. So, somewhere between, like, 10 to 25 watt seconds or or maybe like 1/8 power. One quarter power on a standard flash, actually, on a standard flash should be like one quarter to one half. Okay, I want to just double check and make sure that my light is indeed coming top down. Most of it is I do have a little bit coming bottom up, so I'm gonna make one little tweak and raise this up just a bit right to there. Okay. So what do we do now about the shadows on the other side? Let me get this test shot here. Good. Much, much better. So if you see the other side of the image, the shadows are very deep now. I could do several things if I wanted to. I could have another flash on this side, but I want to show you guys how to do it without a second flash. Even though this is a you know, multiple light source kind of tutorial. This level of refinement is something I want you guys to learn, and we can do this with just a reflector. So what? We don't need additional gear. Let's not worry about that gear. But if I want to do this with a flash, what I would do is I would set up a flash and I would fire it through like say, I shoot through umbrella and keep it a very low power setting. Otherwise I would have my assistant or simply place this onto a light stand. Now we have a reflector, and now all I'm gonna do is just bring this to the other side. Yeah, to catch that light that's coming off and to fill it back into shivs face perfect. And what that does is it gives me just enough shadow detail. So when I look at this shot vs the last shot now I actually have shadow detail where it's looking like a natural fill light that's coming from the sun or the clouds or the sky. If I wanted to be a little bit brighter, all I'm gonna do is bring it a little bit closer to my subject. One great argument for using a flash is to keep the distance to your subject a little bit further, right? So this kind of keeps my composition is very, very tight when I keep it this close, but you can see that difference between here's none. Here's one step away, like kind of like maybe 3 ft, and now it's maybe ft away from her face, and you can see how much brighter that is. I want to land. It may be somewhere in between right here. So now we essentially have a too light setup. But we've only used one light source, and that's looking solid. Okay, so I'm actually ready to start shooting this. Now you'll notice that there is a little bit of a highlight up on the garage. I'm gonna try to use that as a compositional element to kind of frame the face a little bit. But if you did want to remove that, it's a little bit difficult when you're shooting into reflective objects to remove completely, there's a couple ways that you can one. We could actually shoot the image and then basically do a second shot without that flash. The only issue is a good amount of that flashes kind of landing on the background so we could do a plate shot and do that, But it's gonna be difficult in this scene. The other thing we can do is other than, of course, flagging. That light off is just bring my camera angle over a little bit. So that way I'm actually shooting her right against that highlight. So when Shiv looks up towards me, I'm gonna have her actually covering the highlight in the background. So what you can see here is from that angle, she's actually covering almost all the highlight its place behind her head. So that's kind of my suggestion is you can kind of go slightly off angle, make sure everything looks straight and shoot it that way as well. Alright, So last thing I might do for fun and just add a little bit of atmosphere in there myself. While I'm shooting, I'm gonna get the camera off the tripod, start shooting some portraits. He's gonna dissipate real quick shift. So kind of give me or angle. There you go to that looks so good. Already the first shot. Yeah, let's pause for a moment. Just to look at the evolution of this shot. So here on the left side, we're looking at that natural light shot. We just see all that nasty fluorescent light. Now all of the white balances have been synchronized between these shots. So it's the raw file on each one of them, with the white balances sync across the board. So next we have that harsh light coming through. We have this strong flare and lowered contrast to the bottom of the right as well as the top left. And we just have this crazy speculate city and just too much backlighting in this shot in the third shot. We've balanced it a lot better. So we added in the scrim, we kind of changed the direction to minimize the highlight on the back side and then going to the fourth shot. We've kind of composed and moved our subject little bit to make sure that she's overlapping, the highlight kind of leads into the face. We've also added in that Phil to get to the final image while also blocking any flare coming into the lens. So I just wanted to see that kind of step by step process that we went through to get it to this place. It's not going to take you a long time. Just remember the same rules. Start with camp. Get your composition, dial in your ambient light, go ahead and modify and add, starting with one light source building up and then finally taking your shot with photographing your subject. Okay, so let's go and watch the rest of this and then we'll dive into the post side because now that we have the lights set up, we don't need to necessarily stop shooting. We've got this great shot. Now we can move our subject in addition to the way that we're gonna shoot to get different images out of the same exact lighting setup. You saw us do the same thing not only throughout this tutorial series, but very especially in that one where we set up that big light source and we shot such a variety of images. Make sure that you're doing that. Once you have things set up, watch it from another position. Move your subject a little bit. Angle them, you can get completely different looks. Let's go back to this as you guys have seen from this angle I'm shooting with. This is kind of my primary light source and that is that back light coming through. Now that I have a back light like that, I can start using kind of special effects to add a little extra interest into it. So the first one going to use the bronze tube to pull a flare from this light into the camera and I'm going to do that is kind of a justice. So it's angled towards the light and spilling a little bit. This flare into the camera. There you go. Shift chin up a little bit right there. Bring the chin back at me a little bit right there so we can control the flair and basically add a little bit of light into it. And I want a little bit more. I'm not getting quite enough. That's a little too much. There. There we go. She had looked right in the camera, just like that soft smile. Brush the hair together. There you go. Now chin up. Bring the chin back to me. Right there. Right there. Grab focus on your eye. All this G D joystick Chin down a little bit. Perfect. Now look down in a way before we go into post. Let's just take a moment to look at the different images we created with the exact same lighting setup. So on the left side, we have our subject. Shivani. She is short lit. We've left the broad side of the face in the shadow, kind of allowing the DUI nous of the highlights and the makeup to really shine through. Next, we have our turning using that backlight as really more of a hair light and using that front side reflector as the primary light for the face. Then we've gone in and we've added the bronze tube to kind of shoot a close up where we can pull that flare into the lens. I don't know what this means, like pulling, pulling the flare into the lens. But anyway, we have a complete different look with that. Now you have all three of these as raw files. I'm gonna go ahead and press control shift are to make sure that all of them are we set out, um And then let's go ahead and actually work on one of them because we would edit all of them the same way, and I'm going to make sure that you guys Yeah, it is the raw file. So Okay, so let's actually grabbed this one because it offers us some, uh, interesting leeway to kind of play with now. Granted, I should have shot this with a better white balance setting. It shot very warm. I don't know why I was I was drunk at the time of filming this. I don't drink. It was I was drunk on love for Carlo. Right? All right. So what I'm gonna do is I just pressed W and I'm gonna get white balance on the background. We do some fun stuff with this. So first I want to lift my blacks. This is what I mean by I can add that lowered contrast kind of effect in post by either lifting blacks or lifting the curve. And it'll be uniform throughout the shot, as opposed to showing up in certain places. I'm also going to add to my shadows just a bit. I'm gonna pull on my highlights a bit up to kind of even out the highlight on the skin, but I don't want the bright parts to be so bright. So I'm going to reduce the whites over here just to kind of like even that out. So what that's doing is it's pulling down the extreme kind of whites while raising the highlights, and it kind of gives me a little more even tone. So if I just look at the before and the after on this, that's not that before this is the before, and so far we're right here. We kind of have better toning there and a more even highlight. Now I'm going to just pull down a little bit on the rest of the image to kind of bring down the exposure and to kind of bring the highlight down just a bit. So let's go ahead and add our radio filter and pressing. Shift em or using your loop deck. If you have a loop deck, I'm just gonna go ahead and select that and bring it over the face. Okay, so this is looking pretty fun and nice right now. I'm gonna go ahead and add a little bit of temperature every time I like, say, this is fun. I kind of feel like What's that one dude, the cloud painter that we all love Bob Ross. Bob Ross. So, like Bob Ross, I want to make this image a little bit more on the happy and cool side. So where normally I would kind of go a little bit more on the warm side. This time I'm going on the cool side. And actually, what I could do is select my little radio filter right here and pull the temperature down. So sort of like just a bit where outside of the face, we kind of start to pull the temperature a little bit. So the face we can still kind of leave with this subtle bit of warmth to it. But the rest of the image kind of pulls down. It looks really nice. I think it does. That's my personal taste. I mean, do you think it do you think it does, Carlo? He thinks it does, too. Don't answer that question. He likes it. He loves it. Okay, so grabbing that same brush that you guys should have either saved or if you're using the visual flow brushes, we're going to go ahead and quick dodge and burn over the entire body, and we're going to do things a little bit different this go around. So check this out. The first layer that I add for this And by the way, I'm a kind of person that likes my highlight. Like when I do short lit images like this, I kind of like the highlight place to be a little bit on the brighter side. But that's no matter, because we're actually not going to be brightening. The highlight yet we're gonna do is work with the shadows. So notice that I just did a quick dodge in and lift. I'm holding on altar ops right now, and I'm going to paint off the outsides of this roughly with a brush. I'm gonna make sure that the shadow area is all covered now. Of course, we covered the highlight area too, But watch. What we're gonna do is go to our range, master. Non ruminants. Now, we've been pulling up from the bottom side, right, which eliminates that, um, from the shadows. What I'm actually going to do now is pulled down from the highlight side. I'm going to eliminate this from the brighter highlights on the face. So the left side of the face I don't want it to be really covered much. Instead, what I want to do is lift my shadow point. So I'm gonna now I can actually pull right and left, and actually just lift the shadows on the entire image and really right at the base point is nice. I don't want to go up too high because it's going to look unnatural. Um, and too low is going to be a little too subtle. So right where the default value was was really actually quite nice. Okay, so now we have those shadows kind of lifted a bit, and what we're gonna do is go new and let's drop into the face and let's work on the face a little bit. Okay? So the first thing I've got a new brush, and I'm gonna go ahead and go right over to diminish eye bags again. Don't have the retouching brushes. Look at all the tips and tricks are getting from this. You're getting a bunch of retouching brushes for free, my friends, for free pause the video and out in or just going by my shoes either way. Just kidding. Kind of permission? Yes. Okay, So we're gonna do is just paint that in right over the bags of the eyes. And then you can again zoom out and kind of dial either to increase the effect or decrease the effect. And I'm going to kind of increase the effect. But I'm going to paint it off of the eyes and making sure I don't cover the eyes. Now watch this. Look at the bag in the eyes and then watch. Once we've done that, it just nicely lifts it out. I'm gonna do the same thing right across on this side and notice that it doesn't really affect the highlights. So I can kind of paint this on liberally, not too liberally. I mean, like, don't don't be all like I can paint this anywhere I want because it's not gonna matter. I mean, it will matter a little bit, all right, So I'm gonna go in and do Dodge whites, and I'm going to actually paint this at 100% flow right over the eyes to see if I can't lift out just a little bit of the whites and the ice. Not a lot, just a little bit, because I want this to have a kind of darker field but I do want to see a little bit more of the whites. So they did a nice job of just kind of giving the highlights a little bit of a kiss there. I'm minus Sing it out of the shadow areas because I don't want those to be really affected. Okay, What else? You want to do this again? If you don't have any of these brushes, just go ahead and dial them in while we're working. So you can just pause the video at any time and run with it. But this looks really nice. What I might do now is I shot the shadow side a little bit on the dark side, which you can notice by having There's a little bit of noise in there. So we have these noise reducing or noise reduction noise reducing noise. So anyway, I can click to the different noise reduction settings and get to a place that's nice. But I'm not losing skin detail. I probably like click up to about right here. Uh, and what that is doing is just adjusting noise reduction to 43 70 40. If I click back, it goes down. So we have three different settings in here is that you can toggle that are between settings that work nicely. So again, just dial those in if you don't have those. But we're just reducing some of the noise on the skin to kind of compensate for a little bit of a dark image that we've shot here. Now, the only other thing I might do is just do a little bit of enhancing on the eyes. So I'm gonna go enhance I detail and again just all that in. But what this is gonna do is just give the eyes a little bit more of a punch, Okay? Especially since we added a little bit of noise reduction. You can increase the effect by just clicking and dragging to the right, which I'm going to do just a little bit just to kind of get the eyes, just pop a little bit more That looks nice, Okay. And then looking at this and going to, like, say, the final image honestly, the only other thing that I'd probably do is go into Photoshop and do a little bit of skin retouch just some healing and cleaning up a little bit of the flyaways. So when we compare and I kind of tone this a little bit different than where I did when I created the kind of original images. So I'll show you the the original finished file. Okay. And to be honest, I like the toning that we did now a little better. I feel like her skin tones a little bit on the too warm and too green side over here, but all I did was just basically clean up the skin just a little bit and also just remove the blemishes from the hair. Now I feel like there's one other thing that I would like to do to this. Um, let's go ahead and just click on our image that we were working on. And I want to do one more brush kind of painting over the natural highlights that are already in the skin over here. So I'm going to do is go down to Dodge. Highlights this. Go around now again, If we painted in at full opacity, it's gonna look a little bit over the top. So what I want to do is make sure that I bring that flow down, and then we're gonna do the same thing where we kind of paint. Once shrink the brush, paint again, shrink the brush paint again, and you see how that highlight just kind of gets lifted right out of there, going to the same thing kind of down here on the jaw. Basically, I'm just trying to add a little bit those highlights into the image and just exaggerate a little bit what's already there. Okay, doing the same thing on this side. Maybe exaggerate the side of the changes a little bit. That looks really nice. It's very subtle. But if I were to delete that, you'll see the change here. It just adds some shape and dimension to the face a little bit. We're gonna go ahead and zoom out and just make sure we like it and I like it. I dig it. It looks good. So now if you wish to take this in Photoshop, reduce the flyaways, but that's really it. Let's go ahead and go on to the next video
Class Materials
Bonus Materials with Purchase
Ratings and Reviews
Nev Steer
Jye is an exceptional teacher and these videos really breakdown the construction of great lighting techniques. Enjoy the dry humour throughout. Well worth watching for even experienced photographers as there are lots of tips and tricks here.
a Creativelive Student
Excellent......Pye is a fantastic instructor with a slow, well explained style of teaching.
Funfotog
Kyle made Pye's work look simple. I learned a lot of new ideas and was reminded of some that I had forgotten about. I'll be reviewing 201-401 again with the practice images.