Lesson Info
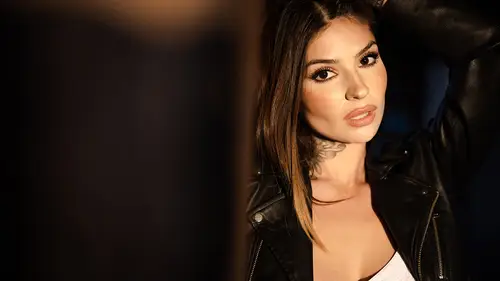
2. Portable Window Light Anywhere
Lessons
Enhancing Existing Light with In-Camera Dodge and Burn
23:15 2Portable Window Light Anywhere
26:21 3Larger Portable Window Light, Pt. 1
19:50 4Larger Portable Window Light, Pt. 2
17:29 5Direct Window Light
15:33 6Perfect In-Camera Flares with Compositing
21:35 7Convincing Environmental Backlight
32:50 8How Atmosphere Affects a Scene
06:38Enhancing Existing Light
19:08 10Enhancing Existing Light with Flare
18:08 11Backlighting as a Main Light
32:44 12Backlighting as a Main Light with Smoke
10:52 13Midday Hard Sun with Godox
32:04 14Midday Hard Sun with Profoto
11:46 15Light and Airy Afternoon Backlight
11:42 16Late Afternoon Indoor Backlight
16:16 17Shooting Golden Hour Hard Light
19:52 18Working with Artificial Flares
26:18 19Golden Hour Environment
09:49 20The End
00:37Lesson Info
Portable Window Light Anywhere
we all love window light. It's beautiful. It's soft, it looks natural. The only thing is, I don't want you to be beholden to the sun anymore. So in this video, we're going to show you how to create a window light anywhere. In fact, we're gonna be doing this at night time in the middle of a warehouse alley just to show you that you can do this anywhere, anytime. Let's dive in. Okay, So in this video, I want to teach you guys how you can create a window light anywhere with an opening technique that we talked about earlier. But this time we're going to take it a little bit more in depth. Now, we have Nick here placed against this backdrop because I thought would be fun. But the point is, you can do this anywhere. You want to create this soft, natural light source. Now, if we think of a window for just a second, a window light is soft, usually because there's already multiple levels of diffusion going on. We're not looking for that. Direct sunlight coming through the window. We're looking ...
for kind of the sky and the clouds and and the natural shadows that are coming through a window and then even through another, maybe curtain or kind of that sheer before it lands on our subject. And it's nice to be able to control that. What we're gonna do is create that here. So let's get started. What I'm first going to do is thinking of camp. I've got a composition here where basically, we can shoot Nick against the background and kind of test things out. So let's go ahead and get our baseline exposure here. So, first, Nick, I'm gonna grab that natural light shot just so we can see what everything looks like and asking. Okay, Okay. Hold still from your brother. I'm gonna have to brighten this up quite a bit now. So first step, ambient light exposure. We're gonna go ahead and mix all of the ambient light out of this image by taking it down. Let's go ahead and drop it down to 100. So let's just see. So let's go up to 200 s. So just so we don't have to use as much flash power I want to take This is so up. As far as I can go without getting much of the natural fill into the scene. So at 400 s, so I can barely see anything on him. So that's good Running at 400. I s O 102nd and F four is nice, because now I don't need to basically use as much flash power. I'm gonna use the 24 to 1 of five. I've been using very standard kind of focal length. So I want you guys to see that it's not always about the bouquet, but in this shot, I might go for something a little more soft. Once I kind of take the first image. I might switch it off to a portrait lens and give me a little bit more shallow depth so we can get more separation of the background. But let's use this for now. It looks great as is so now what I want to do is let's go ahead. And here's the fun part, Christoph, we actually have a pro photo ring for the mag mod mag box. Right? So let's grab that Provo to ring and the mag box, and let's set it up with the B one. So what we're gonna do is go ahead and lower this guy. Yeah, We don't need the jail right now. Let's go ahead and grab that. Put the ring on. Okay, So quick. Gear swap. Now, throughout the entire lighting series, you've seen us use a variety of gear. Why? Because well, we want you guys to choose the gear that works for you all. And we want you to know that each of these lighting principles and techniques works regardless of what you're using. So here we're using the B one, which is a 500 watt second light. So how could you create a similar light with different gear? Well, you take the mag ring you might take to go to x 82 hundred's, pop them in, have the soft box and you have a 400 watt second light that's almost equivalent to the 500 watt second B one. And that's exactly what we did when we started out in lighting three. So just remember, use the gear that works for you, and let's jump back in. Yeah, All right, let's go ahead and get that Mac box on there. Mhm. Perfect. And let's use the focus diffuser, because what? That's gonna do is prevent prevent some lice built. Right? So if you use a regular diffuser, we're gonna get more light spill. I want to focus it quite a bit because we need to control and kind of flag are light just a little bit. So we're not going to get it to spill all over the place. I don't want to get light onto the background, at least not a lot of light. I want the background to be kind of darker so we can get that nice kind of natural light look. Okay, why don't you grab Christoph the C stand and let's go ahead and put up a scrim so I don't want you to think of now Is this light source gives us one level of diffusion? I want to open it up now. So what we're gonna do is just You can do anything if you have a reflector. In fact, we can use a reflector for one of these levels too. So maybe right now what we'll do is use a C stand and then we'll demonstrate with The Reflector as well. But all we're gonna do is hang this guy directly in front to open up the light source. One level double. Mhm, by the way, I'm using a pro photo. Be one right now because I'm not necessarily certain how much flash power we're gonna need. We do have going for us that we can shoot a higher I. So because this is night time, but because we're diffusing this multiple times, it eats up a lot of light. So just kind of keep that in mind. When you're using this technique, we might need a bit of power. Oh, this is layered up anyone, layer. Yeah, because we're gonna kill too much light. So let's just go like this. Just crimp those on both sides. There you go. Encrypt that one. Perfect. Okay, I'm gonna go ahead and boom this up, okay? Why don't you grab the second one classic, do the bottom one, and then do the top one. I love it. Okay, so I want just enough distance where the light source will open up and kind of hit the full size of this diffusion fabric. Now, here I'm using a fabric, but you could use a variety of different diffusers here. Feel free to use a scrim. Use whatever you like. In fact, back in lighting three, we actually used a scrim to further open up the mag box like you see here. But we're gonna add another layer of diffusion. Let's go back. That should be good there. So now let's go. One more level. I think the fun to kind of demonstrate how much more soft this light is going to be than if we were to just fire this directly. Okay, let's go ahead and put that fabric on, okay? You can go all the way across to like this. Put it right here. So we get as much. Yeah. Okay. Okay. This should be interesting. Yeah. I have no idea what the hell I'm talking about. I'm just hoping that this does something. Otherwise it's gonna look like we're freaking setting up for, like, Halloween or something. That was that was a joke right there. I mean, nobody laughed, but it was a joke. Did you really know what you're doing? We're in lighting for now. I feel like people should know that that I mean, like, I know I know a little bit. Are you sure? Let's just let's just keep watching it was a joke. Yeah, we got Yes. Yeah. Okay, so that guy is on a it's currently at six power. Let's just give it a shot. It's like I know what I'm talking about. This is fantastic. It actually worked. Okay, so the only difference right now, the only thing that I want to change is I want to bring this in as close to him as possible without being in the frame. Because the closer this light source is to him, the more it's going to kind of open up. And, uh, and the larger I mean, it's very simple. The closer this is to him, the large of a light source it is. And therefore it will be softer. It will give us a better wrapping light. So all I'm gonna do is this is that six power right now I'm gonna take it up to stops, so that brings it up to eight. So if we go from 500 watt seconds down to 250 this is at 125 watt seconds of power. So, again, it's not a crazy ton, and we should be able to get a good look. Let's just go ahead and test this. Yes, I dig that. That looks freaking fantastic. There's a couple of things that I want to just now in the shot. I would like the background to be darker. Christoph, I'd like to get that large reflector, and I want to use the black side of that, reflect because we're going to create our own little flag to block light from hitting the background. So if you guys see in this shot right now, the background is just a little bit bright and I want to control that and kind of deep in it a little bit so that we get a nice, very soft kind of light. Now you could use a large soft box Kinda sorta right, because we've doubled diffused this light source. So how big of a soft box would you need? And that kind of gets expensive compared to two pieces of $10 fabric that it's not even bucks. You can get this fabric at Joann's for like, a couple bucks for the whole thing. So this is very inexpensive. All you really need is the stands to do it now of all of our setups. Thus far, you'll notice that this one is one of the more complicated ones. And this entire series is all about location lighting, right? Yet this doesn't seem super easy to do. But like I mentioned there, I want you to think for a moment about the alternatives. How much more money would you need to spend on a gigantic soft box that could do what this can do in addition to the additional stands and support and sandbags and team that you need to help you to get out to locations? Set it up. This is actually a very simple setup, and you can take this anywhere. In fact, when we get to the next video, we're going to show you an even larger version of this that we did for an actual commercial shoot with a gym and a fitness company, where it was easier for us just to simply pour over some of this fabric and do all that kind of set up than it is to set up a gigantic soft box or to just purchase that soft box that we might not ever really use again. So now let's go back. Okay. So, Christoph, what? You're gonna do is actually stand. I'm gonna angle this light out a little bit so we don't have to worry about this light source. Okay, that's going to go out that way. What you're gonna do is actually flag off these two. So you're just gonna hold this right here to block those two lights? If I had another stand, I would just use that instead of Christoph. But I don't. So with that light set up or with that flag now look at the background control that we just did. So look at this shot versus this shop. Okay? That's that's crazy. That is a ton of background control just from flagging off the light like that. So I want to go somewhere between So, Christoph, what I'm gonna have you do is actually edge towards that side. So we get a little bit of spill from that second light, go back a little bit more, take another step to that side, Christoph. And now we're kind of revealing. I like that. It's nice and it's quite a bit darker. Without going like fully graduated, we can play around a little bit of both. Okay, so the last thing that I want to do now is set up a light that's going to bring out and kind of chisel out Nick's jawline on this side. So what I'm actually going to do is use this pro photo up on this side. So we just have the A one and I have the magma cto on it right now, and I think that this is the half cto. I think it's gonna actually look really nice to have kind of like a slightly warmer tone coming in from that side. So we're just gonna aim this a little bit over. It's gonna be very subtle. We're gonna put it at probably around, Let's see, be had, Let's put it at 65 power. Let's see what that gives us. Okay, Even at five, it's still too much. So I'm gonna dial this down more so we're probably down to like I don't even know what power that is. That's, like, a couple of seconds or the power. And we get a really nice look right now with this nice soft amulet. Now that this is set up, if I want to kind of adjust, you know the light on Nick I would probably just move Nick a little bit. So I'd either move him back if I want a little bit less dramatic light or if I can move him forward if I want a bit more dramatic light. So that way you're not having to tweak your lights set up. I'm gonna do one last thing. And since I do have a little bit of extra room on the frame, I'm gonna bring this light source just a little bit closer and bring this light source a little bit closer, okay? And then let's bring that light a little bit closer, okay? Yeah. Yeah. Okay. We're a new one. Little quick thing, which is I'm gonna take this final shot right here. That looks fantastic. And now, Nicole, do you mind going and holding the two scrims like, hold them away from the fullest so we can see it before of what this would look like without those two additional lights? Yeah, maybe Chris, if you can lift them up a little bit. So there you go. Perfect. Okay. Look right into that camera. Nope. That's not what I said at all. Okay. So clearly we lose a ton of light power so you can see in this shot how much brighter that light source is without that diffusion. So let's go ahead and just stop this down by about two stops. Wrong flash and get that same shot there. Okay, so compare the difference between that versus that soft shot that we had. It's a massive difference, the same exact modifier through two additional levels of opening up. Chris, why don't you go ahead and drop one of those? Drop the first one. There you go right there. And we're gonna take this up a stop right now for to compensate for that one. Perfect. And I'm gonna take it up another stop. Let's drop the second one. Okay, So I'm hoping you guys can see the difference in softness between those different levels. Now that we have this all set up, I'm gonna Christoph to actually flag off the background and we're gonna go and shoot a sequence of images with this setup or the tilt the chin towards the light a little bit like towards this side. And then you can do whatever with the eyes like you can look. Yeah. There you go. Mhm. Awesome. Yeah, Christoph, give me more flag. So look into the camera from right there. And bring that left hand up and kind of lean on it. Maybe There you go. Right now, I think of, like, kind of leaning on the chin. Like, there you go right there And then keep going. Actually, just turn the body a little bit there. Right? There might be a little bit too much, actually. Come back a little bit. Yeah. And now bring the chin. So now I'm like, Yeah. There you go. Yeah. Yes, that's fantastic. Bring the chin over the side and I was up into the me. Dude, that's sick. Chin over the more. A little bit right there. Keep chin over this way more. There you go. Right then. As I mean, there you go. That's my look at this. Let's go into post. We're gonna work on one of these images, but it's also worth stopping just for a moment to note on kind of the adjustment of the position of the face. So, towards the end of that video, you'll hear me saying, like, Nick, move the chin to left a little bit, you know? Look in the camera. Look away. I want you guys to see I'm not really moving my position much. And, well, not really at all. And Nick is barely moving himself, but we end up with dramatically different images. So when you look at these three different images on the top left shot based on his chin position and angle, we have split lighting with him. Looking away, I like it, has a unique look to it. On this top right image. We get another split lit image where we have that line just dropping directly down the face. Now, I'm not as into this one because of how deep and dark that shadow is underneath the eye. Usually, if I'm gonna have him look into the camera with split lighting, I want to make sure it's a little more subtle. So I would have opted for this shot or again, where I'm moving his chin into position so that we get that light to fall with that Rembrandt pattern, lighting both sides of the eyes instead of leaving the top right one dark on that right side. So this is the power in simple adjustments. Once your light is already set up, But again, we're kind of reiterating this point since we've already talked about this kind of stuff throughout lighting one lighting to lighting three. I just wanted to show you guys how big of a difference it makes. And once you have your lights set up at a certain point, you really shouldn't move the lights much. You should work with yourself as well as the subject. So let's go ahead and grab one of these shots and let's take into post. Let me make sure I have the actual raw file here. So here's the raw file and you'll notice that this is completely reset out. So just make sure that you downloaded from your exercise files if you want to go through it together. Um, honestly, this is one of those perfect images that I might just take in place right into black and white, and we have a black and white kind of conversion that does a really nice job of handling everything. Um, so if you have that, go ahead and select it. If not, then let's just do it manually. So what I'm gonna do is I'm gonna go ahead and press V just to drop this into black and white. And what I also want to do is kick up the highlights a little bit and kick up the shadows while bringing the white point down and bring the shadow point down a little bit. I'm gonna press J because I don't want to clip out all my shadow detail. I just want to leave some of it a little bit darker. And what I want to do is actually pull it down more. So let's I got a little idea here. Let's go ahead and pull this down all the way to negative one exposure and let's lift the blacks a little bit. Okay? We're gonna do a similar thing that we did in the last video or in the last part of the post production section, which is I'm going to go ahead and grab my brushes and go to that same quick dodge and burn because there's something else I want to show you. That's really fun. Um, and it will make this a really cool process for you. So all we're gonna do is I'm going to paint this over his entire body. Okay? Again? Not really worrying about the background. I'm painting over everything with a mouse. The background being covered is fine because I want to show you another way of refining this mask without really refining the mask. What we're gonna do is drop into the range mask. I'm just like, luminous. Now this is essentially if you're familiar with Photoshop, this is basically blend if but brought into light room. So what that means is I can blend this dodge effect this dodge and lift. I can add it to the highlights while subtracting it from the shadows. So I'm gonna pull it off the shadows by lifting the range part of the bottom, and you're gonna see it drop away from the entire background. Okay, so right here I'm only affecting the brightest highlights, which is really just the skin tone. I'm gonna leave it around 75 I'm also gonna pull off the whitest whites. So look at his shirt. It now drops away where I'm not affecting the shirt anymore. I'm just affecting the highlights on his face. Now, if I turn this off, you'll see the effect that has isn't that crazy. So we've gone and just dodged and burned the entire thing without ever touching anything other than just like room. Now, I can also work with my smoothness to sort of exaggerate the facts or soften it up. Usually, what I end up doing is actually smoothing it a little bit. So I'll end up putting this at around and I want to do one other thing. So again, hopefully you save this brush out, I'm gonna give you guys another one. Don't say I don't love you. Okay? So look, select another brush. This time. I want to go into retouching brushes and I'm a select dodge whites once again, if you don't have visual flow retouching brushes, pause the video dial in these settings. This go around, you'll notice on the visual flow. Um, dodging and burning note right here. It says flow 20 to 40. So I'm actually gonna set this at a flow of around 30. What this will allow me to do is I'm going to show you a fun technique. Now critique Naik. Danny Diamond. They are known for This technique is actually where I learned it from their fantastic photographers. And they make some of the best retouching education in Photoshop, but I want to show you how to take their technique and bring it right to light room, because you can do it so you can do it. Read Carlo all night. No, no, not appropriate. So what we're gonna do right now is I'm gonna zoom back out to fill, and I'm gonna paint into this area, this Dodge whites. Then I'm going to shrink the brush and paint it again. Then I'm going to shrink the brush and paint it again. Now, this little shrinking and layering approach essentially creates a highlight point right in the middle. So if I were to delete this and undo it, look at this. It adds a soft little highlight right to that centerpiece. Now, I'm gonna press new. I'm gonna do the same thing on this side. I'm going to create a nice little highlight point right here on the cheek, shrink down the brush and do it again. And what we end up creating is that nice dodge and burn highlight that we would have had to go into Photoshop for But this go around, This will let me actually deepen and darken the image to kind of keep the highlight point on that side, and I'm going to actually amplify the one on this one. So I'm going to paint another one over this side, okay, while shrinking down the brush and reapplying it to get that highlight. If you want to add that highlight to the nose, I can. If I want to increase the kind of the areas of natural highlight, I would do this exact same thing. So I'm going to do it over the I I'm going to zoom in here and do it right over that kind of natural highlight. Okay, I'm gonna do it right over the whites of the eyes to get this I a little bit more lit. I'm gonna do it over the lip, shrinking the breast each time that I paint. Okay. And now, without even going into Photoshop. Look at this. If I were to turn this on and off, we have this dodge and burn effect directly from light room. Now, usually, what I would do is in certain areas like this, I feel like the cheek on the side is just a little bit hot, so I might back it off and then re apply a little bit just to get a little bit less intense. And this is looking really good. I mean, Carla, do I have your approval from this? Yeah, I'm gonna add a tiny bit of contrast, Carlo, because I think you want me to. You do love contrast, don't you? Okay. The other thing I'm gonna do is add a graduated burn. I'm gonna pull this in from left to right. And what I'm gonna do is just set this to burn exposure just to kind of pull his shoulder down just a little bit, his shoulders just a little bit on the bright side. I can quickly make quick work of that. If you want to just target the whites on that side, you're totally welcome to as well. But this is an even easier way of doing that. I'm gonna do the same thing on the right side to kind of burn from right to left. So let's check out that conversion now to what would have been a standard black and white conversion. So I'm gonna go ahead and create a virtual copy of this and reset this out. Okay. Mhm. So what we've done and when you look at these two images. It's a very subtle change here, but you'll notice that right here over the highlight and the eyes how the I just pops a little bit better in this refined version, right? We kind of have areas of the face chiseled out a little bit more. We have a little more detail and definition. We've kind of deep in the black little bit. But still, it's very close to just where the raw file came out of the camera. So that's it for this little example. You guys can do it in color and black and white. That dodging effect works regardless. Let's go to the next video.
Class Materials
Bonus Materials with Purchase
Ratings and Reviews
Nev Steer
Jye is an exceptional teacher and these videos really breakdown the construction of great lighting techniques. Enjoy the dry humour throughout. Well worth watching for even experienced photographers as there are lots of tips and tricks here.
a Creativelive Student
Excellent......Pye is a fantastic instructor with a slow, well explained style of teaching.
Funfotog
Kyle made Pye's work look simple. I learned a lot of new ideas and was reminded of some that I had forgotten about. I'll be reviewing 201-401 again with the practice images.