Lesson Info
5. Direct Window Light
Lessons
Enhancing Existing Light with In-Camera Dodge and Burn
23:15 2Portable Window Light Anywhere
26:21 3Larger Portable Window Light, Pt. 1
19:50 4Larger Portable Window Light, Pt. 2
17:29 5Direct Window Light
15:33 6Perfect In-Camera Flares with Compositing
21:35 7Convincing Environmental Backlight
32:50 8How Atmosphere Affects a Scene
06:38Enhancing Existing Light
19:08 10Enhancing Existing Light with Flare
18:08 11Backlighting as a Main Light
32:44 12Backlighting as a Main Light with Smoke
10:52 13Midday Hard Sun with Godox
32:04 14Midday Hard Sun with Profoto
11:46 15Light and Airy Afternoon Backlight
11:42 16Late Afternoon Indoor Backlight
16:16 17Shooting Golden Hour Hard Light
19:52 18Working with Artificial Flares
26:18 19Golden Hour Environment
09:49 20The End
00:37Lesson Info
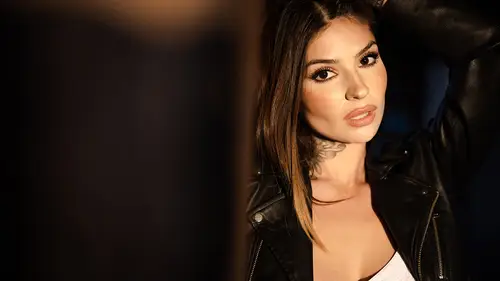
Direct Window Light
in this video, we're going to be using a gobo to simulate a light source coming through a window and creating a nice pattern on the wall that's going to add a lot of shape and dimension to the image. In fact, if we look at the shots here, we have the wall actually cleaned up right here. And this is with that nice light source that kind of comes in, and pin lights are subject while adding a nice shadow and shape onto the wall. This effect is wonderful. And it's not the first time you've seen us use a gobo back in lighting to We used to go before kind of a more dramatic effect. This go around. I want you to show you how we can do the same thing, but with an additional level of refinement to create a natural looking light source and natural looking sun rays kind of coming through an existing window. Let's dive in. So I want to do something fun. Um, we've previously kind of used a off camera flash to create a backlight effect. By the way, everybody, this is Kylie. Kylie, Say hi. So, what i...
s your instagram handle? So if they want to follow you, how would they get ahold of you? Awesome. So, Kylie, joining us on the second part of this 300 series shoot and again the focus in this course in this specific set of videos. We did Seth earlier with kind of those dramatic images. And now that we have Kylie stepping in, we want to create another series of images. This time we're going to go. I want to say for some of them, a lot of them a little bit less on the dramatic side, we're still going to use multi point lighting. We're still going to focus on refinement. We're gonna teach other techniques. So what we're doing is we previously taught you how to create sunlight or how to create Golden Hour. Basically, by putting in a flash and strobing behind a big scene. And you guys understand how to do that? This go around, I want to dive into something a little bit deeper. So what we did earlier was we placed the pro photo be 10, actually on a stand about 15 ft up in the air, through these windows. So you'll see in the video that we popped a CTO gel onto that because we want to create, like, a natural, nice warmth that's going to come to this window and you don't see the window here. But what we're gonna do is fire that light, and it's going to create, like, kind of our edging of that window, and we can make a couple tweaks and modifications as we go. What I might actually do is I might set it up with this shot will bring the light closer to this second window and fire through so that we can put the light right onto that wall right there. We have a more clean wall, but first, I just want to show you how fun and cool this image is gonna look. So let's go ahead and set up Kylie, you're gonna lean against the wall, that one. Yeah, you're good. We're gonna start back right here, and I'm just gonna set up so you guys will obviously notice there's tons of holes on this wall. Those are very easily I hate Photoshop Ping, but those are super easy to fix. And we're in a scene in a situation where we kind of just have to go with it. We got to go with it, right? Honey, you just gotta do it. Okay. So I'm gonna take a quick shot, just natural light so we can see what this looks like. What we have to do is I love that. I love the hat play, and I want you to kind of turn the chin over this way and move the elbow without towards the wall. So that way, that light comes directly through. Just like that. Just like that. It's so cute. Cute. And then bring your left elbow out just a little bit off the wall or towards the left elbow. Just bring it out. There you go. A little bit less So a little bit there. Cute. And I looked down with a kind of smile down to the ground. Okay. Super cute. Okay, so this is that baseline shop were at one 2002nd, F 1.2, and I so 200. Now, I'm gonna go ahead and just make things simple here on on me and not have to use high speed sinks. I don't have much power. I'm going to get that flash. So here's what I'm going to do, we're going to power on. Okay, so the pro photo B 10 is 250 watt seconds, right? So again, we're gonna teach everything in watt seconds. So that way you can translate it to whatever gear that you are using. We have a zoom dish on it, just to get the light to come through the window and to not spill all over the place. This is a four stop nd that's just going to go directly over the front, and that lets us bring the speed of our shutter down to 1 200. We no longer need high speed sync and cute. Let's take that shot read. So if you look at these two images, what we have on the first one is this shot. That's very kind of plane. This this shot naturally, it's cool, but this shot right next to it looks as if the sun is actually coming through and lighting Kylie with this cool hard light. Now we're building on several techniques, right? There is no such thing as a bad quality of light. It's just using that light correctly. And when we're using hard light, we need to make sure that we pose the subject for that light. So, Kylie, I'm gonna have you. Now that we have that shot, let's take a couple cool shots. So the first shot that you kind of did, your legs were a little bit open and you had kind of both hands in the pockets, and you kind of leaning up against the wall. I want to do that one again. Yes. Mhm. Cute. And then bring the chin down and towards this side right there and then right into the camera. And now look down to the ground from that side. Chin over the light, more and chin go this way Towards There you go. And then chin down, like down to the ground. Cute. Right there. And now go ahead and bring the hand up and go into the hat kind of hat play. There it is. I love that. Perfect. That is so rad. Okay, so I'm hoping you can see the difference. And now all we're gonna do is just use this light. We're gonna shoot a little bit more with it. We're gonna do a couple of the fun things and I'll talk to you guys about it as we go, but try this out for yourselves. Okay? So this was a fun and quick little set, and I want you to see now the difference here between these images, all three of them are actually processed identically. Okay? I even went and removed the whole from the wall and all of them, so you can see the difference between them because nothing has been changed from the way they're processed. And yet when you look at each of them just how dramatic a shift you have in terms of adding that nice, warm light coming through adding the shape that kind of creates that pattern and texture on the wall that leads right into our subject, we end up with something just so much better. Now, we're gonna work through one of these from start to finish, but I want to make one other note here. And that's when you look at this image right here. Um, let's actually grab this one and zoom right in. You'll notice that this is actually split lip right when we look at our lighting patterns between this shot vs the last shot. Let's see if we have the other ones selected right here. So in this shot on the left side, I angled the chin towards the light, which I like as well. And in this shot I kept the chin kind of going into the camera, which leads to that split lit look now for most of my subjects and, well, most time when I'm shooting like someone, it doesn't really matter most the time when I'm shooting. I'm not going to go with that kind of a look unless that person's look kind of matches a little bit more of an edgy vibe. Because this is a very edgy kind of light pattern for the face and Kylie's look with her ink and with the outfit that she I mean, it just has so much kind of attitude that it works so well with that split lit look. Granted, we do have a good amount of feel like coming into the face from the other side, which just from the shutter speed and the camera exposure that add a little bit of Phil. So it's not too dramatic, but I really like that look, and I also like the other look of her kind of looking into light. So let's go ahead. And I gave you guys two different exercise files from this scene. So let's go ahead and grab one of those. I'm gonna go ahead and do the one with her hand on the hat. I don't know. What does it keep doing that and zooming into don't like room? Stop making this awkward for me. I really don't like it. That's not me, Carlo. It's light room. So what I'm gonna do is if I take a white balance read off of the sunlight, you have to understand what that's gonna do, right. When we take a white balance read off of something, it's going to turn that color to be neutral. So if I press it on the shadow, it makes the shadow neutral while leaving the tone of sunlight or that warmth that we have on the gel that's coming through the window. But if I click on that part, it's going to turn the whole image blue and what we end up getting because it makes the flash light look neutral. We end up getting more of a kind of a nighttime effect. In fact, if I was to actually darken the image down like flip this in a dark mode and reduce the the white balance even further, make it a little more pink. We end up with this image that almost looks like it was shot in moonlight where we could actually create a dark mode edit of that in moonlight. But we're not gonna do that. I just want you to understand where you take that white balance off of is going to greatly affect the image that you're that you're seeing. So I want to take a white balance read off of the shadow area of the image which is going to leave us with this nice warmth. And I might tune that warm just a little bit to kind of cool it down a bit. But it gets me very close to what I want. And that's right about here and automatically. We're very close to a nice and finished image, So I'm going to do the same thing that would be done if I were to add that soft light effect into it. I'm gonna do a very similar thing. So I'm gonna go ahead and boost up my highlights. I'm going to bring down the white point a little bit, I'm gonna raise the shadows. And now I'm gonna start pulling the exposure down a little bit while also raising blacks. We want to create a nice, kind of sort of darker edit of this that's going to look really cool. Okay, Lets even cool down the temperature. Just a little bit of light. So we have a little bit of warmth coming through, but not too much. What I'm also going to do is add in profile correction without the vignette. So what that's gonna do is remove the kind of vignette in that we're getting from the lens as well as corrected. All you can do is you can go drop down here and just select. Where's the profile? Correction? Okay, right here. So under profile, and you just select profile correction and remove all the vignette. Okay, so at this point now, I'm gonna select that same brush that we did before where we're going to select that quick dodge and lift. I'm going to go ahead and paint it in all messy lack right onto her. Okay. Right under her arm. Everything. So if we look at that mask, you can see it's quite messy. Now we're going to do is go ahead and add our range mask and pull it off of the shadows a bit. Okay, So I don't want it to really affect my shadows. I just wanted to drop into the highlights, and that's great. I'm also gonna soften it up a little bit. So it has a little more smoothness in the transition and holding down alter option. We're gonna go ahead any race off of the other areas of the shot. I'm gonna turn off the auto mask on this because the the way that her body is against the wall, we're not going to auto mass is not going to do the best job of trying to, you know, trace that it's gonna miss a lot. So let's just paint this off and let's see if we can't get to them slightly more refined edge. It doesn't have to take a long time. So right here. I kind of want to paint a little bit more right here a little bit more to everything else. Looks pretty good. I might paint in here as well just to kind of remove it from the background wall and then I'll paint it back. I'll let go of auction or let go. I'll paint it back. And remember, it's not gonna affect those areas that are already deep and dark because we turned off that little option there. What did I say? Turn off that option there. No, that's not really what I meant. I meant that we we use the range mass function. Okay, so now let me zoom in real quick. I do want to see Let's see if we fill. Okay? It looks really nice. I might just exaggerate the highlights a little bit more. Yes, and I really like this look of kind of like the exaggerated highlights and kind of everything coming in, and it already looks really beautiful. Then all we're going to do to get rid of the other stuff. So, by the way, what we see on the wall right here is actually some. It looks like there's just some weird kind of color that's that's on the wall. Essentially. So if we wanted to take that off, we could. But that looks like the kind of kind of the painting, like the effect that we have on the wall, which is fine. I'm OK to leave that. And we can double check that, because when we look at the original raw, you can see that there's that light and that kind of paint on the wall right there. So now let's press control, er command e to take this into Photoshop because I'm gonna show you a very quick way to make really quick work of simple things like that in the wall. And you've probably seen this from some of the other tutorials that we've done. But let's just go grab it, Okay? So all I'm gonna do now inside of Photoshop is let's go ahead and center this up and just give us a little more real estate here with a lasso tool. So press l to select the lasso tool. And I'm just gonna use my mouse to show you that you can even do this with a mouse. Although it would be easier with a tablet. I'm going to select the area on the wall press shift, backspace to bring up my Phil. We're gonna switch this over to content aware with color adaptation turned on, and you're just going to click and just select each of these. I mean, even with a rough selection, it should do a pretty good job of, like, kind of, you know, obviously, the better your selection, the better of a job is going to do. But it's going to make quick work of these background objects and these little blemishes on the wall. Yeah, and then, as you see fit, what you can do after this is I would turn on my my spot healing tool by pressing shift J. Um, and just kind of increase the size a little bit. You'll notice that mine is an oval shape, so I kind of like this oval shape. It gives me a slightly better look to it, Um, and then I would just go and paint over some of the other spots and blemishes that are a little bit large and distracting on the wall. I kind of like the lines. I think it adds an interesting kind of geometry to it, But all these little black dots in the shadows I would just go and remove, and that's it. That's all I would do to get this image to final. Let's go ahead and just save this. And I want you to see just the before and after real quick because it's it's a very simple edit, very easy to do. So here is that raw file. This is the color grade raw file, and this is just after we've mixed and removed all those different little background nuances. You will see that in the in the versions that I edited, I went a little bit further in the edit and kind of trimmed up some of the other P. I'll just show you real quick. So in the previous version that was showing you guys, I just remove the more of the black dots, essentially from the shots. Okay, so as you look at this and you see a slightly more clean background because I removed a little bit more of those, but that's it. That's a really fun, really simple edit that you guys can get to. And let's go to the next video
Class Materials
Bonus Materials with Purchase
Ratings and Reviews
Nev Steer
Jye is an exceptional teacher and these videos really breakdown the construction of great lighting techniques. Enjoy the dry humour throughout. Well worth watching for even experienced photographers as there are lots of tips and tricks here.
a Creativelive Student
Excellent......Pye is a fantastic instructor with a slow, well explained style of teaching.
Funfotog
Kyle made Pye's work look simple. I learned a lot of new ideas and was reminded of some that I had forgotten about. I'll be reviewing 201-401 again with the practice images.