Enhancing Existing Light with In-Camera Dodge and Burn
Lesson 1 from: Lighting 401Pye Jirsa, SLR Lounge
Enhancing Existing Light with In-Camera Dodge and Burn
Lesson 1 from: Lighting 401Pye Jirsa, SLR Lounge
Lesson Info
1. Enhancing Existing Light with In-Camera Dodge and Burn
Lessons
Enhancing Existing Light with In-Camera Dodge and Burn
23:15 2Portable Window Light Anywhere
26:21 3Larger Portable Window Light, Pt. 1
19:50 4Larger Portable Window Light, Pt. 2
17:29 5Direct Window Light
15:33 6Perfect In-Camera Flares with Compositing
21:35 7Convincing Environmental Backlight
32:50 8How Atmosphere Affects a Scene
06:38Enhancing Existing Light
19:08 10Enhancing Existing Light with Flare
18:08 11Backlighting as a Main Light
32:44 12Backlighting as a Main Light with Smoke
10:52 13Midday Hard Sun with Godox
32:04 14Midday Hard Sun with Profoto
11:46 15Light and Airy Afternoon Backlight
11:42 16Late Afternoon Indoor Backlight
16:16 17Shooting Golden Hour Hard Light
19:52 18Working with Artificial Flares
26:18 19Golden Hour Environment
09:49 20The End
00:37Lesson Info
Enhancing Existing Light with In-Camera Dodge and Burn
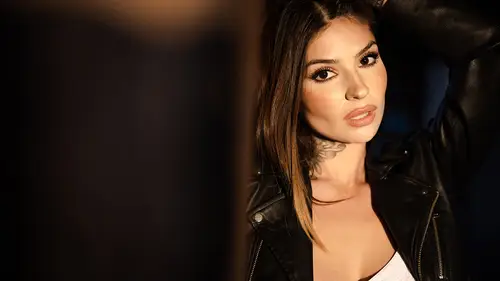
Let's kick things off with dodging and burning to help lift our subject out of our scene. You see, I love that dodging and burning effect, but usually how it's created is someone would shoot raw and they would take it in a post usually into Photoshop. And they're going to dodge and burn to kind of add their light and left their subject out. I love the look of it. It looks natural. Looks beautiful. The problem is it takes a long time. And if you're trying to create 10 images using that technique, you could be there all day. So here's what we're gonna do. I'm gonna show you guys a simple way to sort of dodge and burn in camera by adding a kiss of light to your subjects. And then I'm gonna show you how you can actually dodge and burn within light room to get to our final images that you see here. Here's what I want to do on this again. We're getting down into the nitty gritty kind of refinement of detail, and one of the things that I love to do is take those kind of underexposed shots. We...
maximized everything instagram we're shooting super shallow. And you know these images When you see them, they have this beautiful shall out of the field. The lighting looks natural. The only thing I don't like about it is having to do all of the dodging and burning in post. So what I want to do in this shot is I want to take this shot of Kylie. We're using the background window and the natural light coming through to kind of frame and create highlights and interesting elements in the background over that, What I want to do is add again that tiny, soft bit of light that just adds a little bit more highlight and shadow detail of the face. Now, Kylie okay, if I point to kind of demonstrate where the lights coming from, so if we look at this scene, we're gonna see most of our light. So kindly bring your chin a little bit of this side. Most the lights actually coming in from this side. And it makes sense because right outside of this is the overhang and most the lights on that side of it. So that's where we're gonna aim and light from is to kind of match and mirror that again. Sony is going to bring in a very, very light power, Strobe. And we're gonna bring in a super tight. Um, let's go ahead and bringing the A one, actually. And this Go around, I'm gonna try this without even any modification, because I want you to see what it's gonna look like. And they were gonna slightly modify and tweak until we get the shot that we want. Okay, so right here again, normally I would go high to low, Um, and kind of angle it quite a bit. This go around because she has her hat. We can't go too high. Otherwise we're gonna get a shadow. So let's just take the shot. And also, I want to drop the nd filter, actually. Just want to take it in my pocket. I don't crack it when I keep sitting or moving around. Um, let's go ahead and just use high speed sync on this. So my first shot and Kylie, you're gonna do that exact same pose through all of these were at 1 2000 of a second F 1.4 and ISO 100. This would be the shot that I take that I end up essentially dodging and burning. It looks fantastic. Looks gorgeous. Kyle. You have one strand of hair that's over the shoulder, but it looks amazing. Um, not the one strand of hair just in general. Uh, there's one piece, like, right here. It's okay if I move for it. Okay. Perfect. And the one on the left side, too. There you go. Fantastic. Notice one thing in the pose again. I love talking about all the other workshops that we do. And part of what we're doing in her pose right now is from the complete posing workshop where we've given her a strong stance. Legs are wide. She's kind of pulling in tight. Bring the arms across the body. Gives her a very strong and kind of dominating stance over the frame. Very cool. Okay, so you're gonna hold this exact pose, bringing the chin just a little bit over this way. We're gonna take our shot, and now we're gonna modify and add light as we go. So now that was natural light. Okay, this is at seven power. I know it's gonna be too strong, but let's just test it real quick. Okay, Flash implosion. That's a flash explosion. Do you like what I did there? Carla likes it. He loves it. So look, I want to give you all a couple quick kind of pointers when it comes to troubleshooting your remotes or using off camera flash. Now, you should remember this back from lighting to, but it's a good reminder something happened right now and what happened was obviously something happened. Obviously they know something happened. We blew the crap out of our our shop. Our our exposure is way too bright in the background, and our flash just landed are subject, and everything is white out we have. We have ghosts highly here, but you'll notice that just before this I had my shutter speed up to 1 2000 and I had my exposure dialed in. What happened was when I turned on my remote, I forgot to put it into high speed sync. Now, what the remote does is it tells the camera to bring the shutter speed back down to 1 200 of a second. Not only does that affect my ambient light, but that also is going to allow more flash to come through since the flash doesn't have to pull snow and it can fire at full power. So the first place to look when something like this happens, is H s s. I gotta turn on what you're going to see me do in just a moment, but that's one of kind of to common problems that we run into. The second problem is what happens when you take a shot and part of the frame is lit and the other part is blacked out well again from lighting to. And if any of this is unfamiliar, I would highly recommend going back to lighting to to check that out. So if that happens, what's happening is that our sync speed or our shutter speed is too high and the flash can't sink within the frame. So it ends up partially covering the frame, and then the other part of the frame ends up being black. If that happens, then that's because again we're shooting with too high of a shutter speed. We either need to turn on H S s. If the remote has it available or if it doesn't have it available, we have to bring down our shutter speed, and we need to do something like use an nd filter or whatnot. Okay, so just two quick ways to troubleshoot flash when you don't get the result that you're expecting. Now let's go back to the video So it didn't go into high speed sync. So we need to go to High Speed Sync and then take that shot again. Perfect. So I like that look. But what's happened now is we've We've done a good job with the grid and the sphere. The grid controls the light from spilling all over the place. The sphere opens it up, but what it does more than that is it's really just diffusing the light. So it's making a like, kind of bounce around, so we don't get a lot of light going back and reflective light going into the camera. I want to pause for one moment just to talk about this lighting to principal. Now we know what a grid does, right. We already understand that the grid is simply going to take the light spill from a base kind of flash head, and it's going to carry that beam forward. It's not going to allow the light to spill nearly as much. We get that when we add the sphere to it. A couple things going to happen now. What people online are talking about when they put a sphere over the grid is that it's gonna soften the light source. And that's simply not quite accurate, because remember, from lighting to we soften a light source by increasing the size. But if you look at this, the sphere itself is not that much bigger. It's barely anything larger than the grid itself. So doesn't increase the list or size a tiny bit. But really, what it's doing is it's diffusing that light. So here is the grid. We're gonna make little grid lines that look beautiful. Okay, now here is the sphere over it. You know what? I don't even I don't even need to draw. Just trace it. That looks almost worse than if I'd actually drawn it. Okay, so this is the sphere that's going over it. So what's happening is is the light is going to push forward. We are going to end up getting a little bit of more spill right. So instead of the light just kind of beaming directly out what's gonna happen is gonna kind of bounce around this thing. Okay, so it's gonna bounce around. It's going to kind of come off these walls. It's gonna go in all sorts of different directions, and we're going to get a more concentrated pattern that kind of comes forward. But some of it will like little amounts will spill out of the sides. What it will do over this light right here is create a slightly more diffused light pattern. So instead of getting that direct light coming out of the the flash, which is going to be speculator, right, it's going to come back into the camera and create more reflections. We create a light that's a little more diffused, and it's going to prevent some of those reflections from coming back. But it's still a hard light source, and I'm gonna show you by just showing you the picture over here. If I zoom in the Kylie's face, notice that the shadow edge is still very defined. It doesn't look bad. It's it's totally fine to use a hard light source in your images. But given that this course is really about creating natural looking images or adding flash in a way that simulates natural light. This isn't really that, and so we're going to take this a step further. But I wanted to spend a moment to clarify that, simply adding, this is not going to create a soft light source, because to do that, we need to dramatically increase the size of the light. What this will do, though, is prevent some of those reflections. So as we can see on Kylie's face, we're seeing a little bit of speculate highlights, but not nearly as much. If we had only just used the grid itself without the diffuser over it, hopefully that makes more sense. Let's go back to the video. Okay, this is going to dramatically diffused because we have three layers of diffusion fabric. I don't even know if we're gonna see a lot of power coming through this, But it's easy to hold close to the face, and they do make reflectors that are significantly smaller, like so 12 inch reflectors that can just be hand held. I don't think we're gonna get enough power through this, so I'm gonna have you hold it like this. But it has to be just over the flash and just close to her without getting into the frame. So let's see if we can't get in a position where we have some diffusion going on. Yeah, let's see. Do you have a napkin? So we don't have a small 12 inch reflector, But we do have paper towels. You guys know I like them A guy for everything I didn't explain, but I'm switching to that paper towel because the reflector is actually too large. It's in my frame. So look, having photography gear is a wonderful thing, But having a knowledge of photography and lighting is even better. Because in this instance, I don't have a reflector. That's the size that I need. But I do have a paper towel. So we use that you're just gonna hold this, like, right here. You can actually stand right in front of this one. So that way you can see that's blocking the entire thing. And I'll tell you to go in more or out more. Okay. Mm. Okay. It's only go in more out more right there. Okay, let's get a quick test. It actually worked. What the heck? Sometimes I surprise myself. It's like I know what I'm doing is I'm I learned a lot from my shoot. Like I did my very first shoot, like, three days ago. And you wouldn't believe how much I've learned since then. Do you believe that? No. Okay. Uh, come on. Am I in the right place right now? Okay, let's actually do the same exact pose so we can have a comparison image. Perfect. Give me a tiny bit of distance, Sonia. Like towards you're not blocking the whole thing either. Up there you go. There you go. Right there, there and kind of bring the chin this way A little bit right there. Power up. There's a tiny bit right there. That's it. Yes. So just to wrap this up, we got a really cool image of Kylie right now. The paper towel is totally work. Give a hand to Sonia. That was amazing. Okay, so now let's do a side by side of these raw files. And what you're going to see on the left side is no flash whatsoever. So this is our baseline exposure. Then we have that flash, which really in the middle. This isn't a bad shot, but this would qualify as dramatic lighting. We have a lot of flash power. We have deep, dark shadows and what we really want to obtain, especially with this kind of dodge and burn look that we're going to finish in post, is I'm just trying to add a kiss of light and some light direction to the face. And that's exactly what we get on this right side image where we don't have kind of like all this like well, deep, dark shadow on the face. We have just a little bit of highlight that follows the natural direction of light that we had on Kylie's face in the first shot. But it's not nearly as hard, nor is it as dramatic as that second shot. That's what we're going to take into post as we basically just exaggerate those highlights a little bit. So now what we're going to end up getting is a very soft and diffused light source that's going to be a little bit brighter than what you see on this right and if I show you, let's just go ahead and grab going to flip back into grid view real quick and let's grab both these so we can zoom in and just see the difference between having a paper towel over the face or over that light versus without right. So if you look at the shadow transition and obviously the light intensity is going to be far lower because by diffusing that light source we're losing a lot of that light so we could boost up the flash power to make it the same. But again, we don't want super powerful light on the face. That's not going to give us a natural look. So we leave the power where it's at and you can see. Now we get great light direction that follows the natural light. We also have these smooth shadow transitions where we have these nice little highlights. And now we have this nice image that we can take in the post with that raw file, and we're gonna do a little work on that to finish out the shot. But let's go back to the video now. So what I want to do is actually shoot through a couple more images, and just so you guys have an idea, we're at nine on our power setting on the pro photo running through a grid running through a sphere, then running through the fabric. So we're not getting you know, nine would be like 25. 30 watts of power is half power on this guy, But that's not how much power we're landing on the person on Kylie. We're getting just a tiny, tiny smidge of light. So I want you guys to remember that, because that's what creates that kind of very refined dodge and burn. Look, it's just a little bit of light that's very targeted in certain locations. Now we're going to take some fun shots for ourselves. This 30th center. There you go. Oh, I love that. Just move the feet a tiny bit this way right there and do the same pose so good. I love that. Love it. Mhm. It's like she's done this before. Perfect. I love that. That's it. Now let's go ahead and finish out the images to get to these two final looks. Okay, so what's gonna be really fun about this is I'm going to show you now how to basically enhance do you're dodging and burning and get to these final results directly inside of light room. A lot of us don't know that lightning is actually this powerful, and so this will be really fun. So grab your exercise file. It should be this shot right here. We can see a little bit that napkin kind of poking through. Now, if you guys have the visual flow presets that we that we have through visual flow, then I'm going to show you that all I would do is press w click something that's neutral to get a neutral white balance and select either soft light or flash HD. Uh, sorry Flash for the preset. So all this is using or what this is using to get that look is just that modern pack, soft light or flash, whichever one you prefer. Now, I don't want you guys to feel like, though, that we're trying to sell you something within the course of a tutorial that you guys have already bought. So what I want to do is just walk you through how we would process this kind of from the ground up to get to that same look or essentially, what that profile is doing. This profile that's built in over here. So let's go ahead. I'm going to create virtual copy. And let's just go from the ground up because I do most of my processing this way. I want you guys to see exactly how it's gonna work. So I'm gonna press W and we're gonna get a white balance real quick on the background. And what I'm gonna do this go is I'm going to add a little bit of highlights while pulling the whites down. So what I'm trying to look at is I want to lift and bring her skin tones up and out while preserving some of the bright whites that are in the scene. So if I press j, you can see that I'm kind of preserving some of those bright highlights. And what I'm going to do now is actually bring in a little bit more of the shadow. So let's bring a little more shadow. And then let's kind of darken the blacks or leave them kind of right around that negative 5 to 5 ish range and now is when I would kind of touch exposure. Okay, so I'm gonna go ahead and bring up exposure for skin tone. Now, at this point, what I like to do is drop down into my split toning, I'd like to add just a little bit of highlight toning into the shot. So I'm going to add just a little bit of warmth into my highlights. Somewhere around here, I'm gonna add just a little bit of kind of teal blue tones to the shadow. And I'm gonna go ahead and bring my my balance up towards the highlight side. If I want to add a little more, I can always increase So I might increase that to maybe 10, but right around here and then I would also tweak the tone curve a little bit. Now, all of this is built into that one profile Essentially. So I'm just gonna be adding in a little bit more of the highlights and kind of let the skin and the highlights pop a bit kind of bring my shadows into the image a little bit more, and then we'll I'm going to add some exposure just to the face in just a moment. But I want you guys to see exactly what we're gonna do. So we're gonna do now is I have this preset inside of the visual flow tools is a radial burn narrow. All this is is a preset that simply drops in a centered up radio burn. Okay, and it drops it in a negative five. So if you don't have it, just go ahead and do that. Now drop in a radial burn right in the center. This is just a quicker way of getting there. And now things are looking actually pretty good. I might add a little bit more temperature, but you'll notice that her skin just might be a little bit dark still. So watch This is gonna be really fun. Let me turn off my highlight clipping alert and the info, and I'm going to go down a quick dodge and lift. Now, once again, if you don't have the visual flow retouching brushes, pause the video and dial in these settings, we statistically tested these settings to basically boost a light source to quickly dodge a light source without affecting too much around your subject. So what I'm gonna do is at 100% flow with 100% feather and 100% density. I'm just going to start painting this in and magic will happen right before your eyes. I'm using my mouse. Guys, you don't even have to use a tablet. Nothing. I'm using my mouse. I'm just gonna paint this over roughly over the body. Now, I don't mind that it's kind of expanding beyond the edges a little bit if I press. Oh, you can kind of see it's a messy application of that brush. And that's what I kind of want, cause I want this to be quick. I want to be easy, something you just do with your mouth. So what you gonna do now is hold down, alter option, and check this out. Auto mask doesn't generally do a good job when you're applying something, but it does do a pretty great job when you're trying to remove. So what I'm gonna do is hold down or select auto mask and then I'm gonna go ahead and hold down. Alter option. Make sure you do that before you select auto mask so that you're selecting the eraser brush and you're gonna paint right along that edge and allow the feather to kind of extend right over the skin and look at how quickly. So when you get good at this, you're just gonna drag this up and down. Go right up to the hair. You don't have to be good at this. This I could I could You could be drunk and do this. Carlo, I feel like not that you drink, Carlo, but I'm just saying, like I'm literally just saying a drunk person could could paint this masking. I'm going to go right up here in between her legs and get that out as well. That sounded very bad. But, you know, I didn't mean for it to um, no, I really didn't. I'm not that guy. Uh, and then I'm gonna go ahead and shrink down the brush, and this is an important pieces to make sure that you get in between the gaps that could kind of give away that you have, you know, burned the background little bit. So I'm just gonna paint off. And that is like the sloppiest. If Kylie saw, that should be like, Oh, my gosh. Not that she has that voice, but she'd be like, Yeah, that guy's drunk while he's doing this. Okay, so that's it. It all it does is if I turn this on and off. It literally amplifies the light that's already on her. Okay, now, if it's a bit much, hold down Alton option and just drag it back. Once again, the part of the sampling process of those settings was dying into a place where you can basically add light, subtract light and have the right amount of contrast, the right amount of D saturation saturation. Everything kind of built into that preset. So that's a huge pre segment of itself. Make sure you save that out. It's incredibly useful. So now what I'm gonna do is go up to spot removal and we're just gonna go ahead and snag this little paper towel and remove. Okay, that's it. If you want to take this in Photoshop and do a little more, you're totally welcome to. But I want to show you guys how you can get that subtle, natural kind of dodge and burn, look directly mostly in camera and then do a little bit inside of just raw to get it to a finished product. So now let's go ahead and check that out against the original shot. So let's go ahead and reset this. I just want to see. I want you to see that we're not taking this too far. Like what we're really trying to do. And I might actually warm it up a tiny bit. I like that. Don't you like the warmth, Carlo? I like the warm, you know, Name, man. I mean, nah, bro. I mean an image. But that's cool. Of course. Okay, so look at this. Just inside of light room. Inside of just a standard, you can either use lighter. Morrissey are using this technique. You can get to a really beautiful and nice image, and we're not taking it that far from the original raw. So the point with that raw files get it as close as you possibly can to where you want it, and then finish the rest out in post. But you guys already know that because this is lighting for and this is lighting to a whole new level of refinement and trying to get to very specific and natural looking light. Let's go on to the next video
Class Materials
Bonus Materials with Purchase
Ratings and Reviews
Nev Steer
Jye is an exceptional teacher and these videos really breakdown the construction of great lighting techniques. Enjoy the dry humour throughout. Well worth watching for even experienced photographers as there are lots of tips and tricks here.
a Creativelive Student
Excellent......Pye is a fantastic instructor with a slow, well explained style of teaching.
Funfotog
Kyle made Pye's work look simple. I learned a lot of new ideas and was reminded of some that I had forgotten about. I'll be reviewing 201-401 again with the practice images.