Lessons
Lesson Info
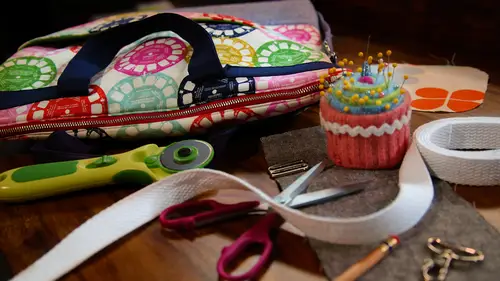
Elastic Water Bottle Pocket
So the next thing we're going to so is the water bottle pocket all right so to make the water bottle pocket we are going tio start by looking at this one and we'll pull this inside out and look at what we have here all right? So what we're going to do is make this pocket that's got in the last decade a top and then a little plea in the bottom and that will help um keep it to mention and um some space for you know, the volume of the bottle basically and you want this to be stretchy so that it can move in and out but kind of like hold it to the bag so I have my pieces cut here and um well I'm going to do is put them right sides together and I'm just going to so across the top and the bottom and then we're going to make a little channel for the elastic to draw in the top case I'm just going to so across the top and the bottom edge of a quarter inch I mean I'm going to turn this right side out it's a little different than the other pockets that we've done and this press those scenes ok, th...
en we're going to get out a piece of elastic and this is half inch wide and I'm just going to start with a piece that is, um the length of my pocket just for starters, we know that we're going to cinch it up because we actually want the elastic to end up smaller so that it gathers a little bit but we'll just start here with the with the width of this and we're going tio there's a ruler we're we're going toe edge stitch here and then we're going to stitch a channel um I am going to stitch this it's might um I'm gonna dio maybe I'll do an inch so I have enough room for the for the elastic they're going to use my cha kleiner tool since this is a darker fabric don't be easier to see the line all right so we have a line marked at one inch and I'm goingto stitch on edge stitch the top of the pocket and then so along mayor and that will make a channel for the alas okay, so we have our channel stitched here and you can see the chalk line or just sort of disappears if you if you brush it out um so that's a handy tool and now we're going to use a safety pin or if you have a bodkin you can clip that on the end of your elastic and then we'll thread that through the channel that we just made okay? So I'm going tio have that the end of my elastic is right there at the edge I'm going to stitch that end down and then we'll cinch it up a little bit and see how much um gathers we want and then we'll stitch the other end down so I'm going to attack this, um, about a half inch from the edge and by tackett, I just mean, I'm going to sew across it to keep it from moving, okay, no, we're going to pull on the other end of the elastic I gather that up, try toe kind of distribute those gathers a little bit, and then I'll put a pin here and then I'm gonna so across that edge, so I'm just going to do a quick little test here to see if that when it's extended, it still fits so you can do that with your water bottle and just check it out, all right? So I'm gonna attack that and then I'll trim off the access, okay? So we'll cut this off and you'll stretch this see, um it kind of depends on how stretching your elastic is some is really rigid and some is pretty, pretty loose like this, so I like to just start with the sides of the pocket and then just adjust it from there, ok? So now we need to finish these sides before we can attach it, so we're going tio to his exact stitch down this raw edge and folded back and then that will keep that a za nice clean edge um for our pocket so we'll do that on both sides ok, so now we have the top edge the bottom edge and asides finished and one thing that we want to do and I'll pull out my example here is keep in mind with the bag that you're attaching years too that you pay attention to where the bottom of the bag is and you want to make sure that you have room to box that corner of the bag so that it's not, um you're not running into the pocket you want to have some space here all right, so I think what I'm going to do on this one this pocket it looks like it's a little shorter than the example pocket um but that's okay, this actually that would be really great for, like, a baby bottle I don't know about uh other people but with diaper bags back when I had little kids water but picking me bottle pockets were really important to have so on dh that's something you can put in on both ends of the bag if you want, so we're gonna fold back um about a half inch and they gonna line this up at the bottom of this pocket and so what I'm going to do is just kind of start with one side and have it straddle that seem it's a little tricky because now you're rectangle doesn't look so rectangular because you have the top gathered in um so well full petty and on this side so you know you want your, um the side parallel with the seam and perpendicular with the top ege and since the top is gathered and drawn in, we're going to end up taking a little plead down here in the bottom and not give some space for the bottom of the bottle you can kind of move those gathers around if they're in your way and then you're gonna have this fullness at the bottom so wanting to do is just sort of fashion a little plead down here and then that way you'll have that fullness in your pocket and I'm just kind of eyeballing that and placing it right on that that son or seem our side seem rather centering it on the side see, all right, so we're going to take that to the machine and we're going to so at eighth of an inch down the sides and across the bottom and there's a bit of book down here, so you're going to want to take it really slow when you go over the pleat and the side seams and I'm also going to roll this up to get in the machine because there's a lot of extra fabric here to work with so if your machine was set on zig zag, make sure you get it back to the streets. Stitch. And I'm going to move my needle position over. So I can. So at that eighth of an inch. Okay, so are lining. Is shaping up with all kinds of details. So we have our tech pocket. And now we have a water bottle pocket.
Class Materials
Bonus Materials with Purchase
Ratings and Reviews
Liz Hanes
I loved this class! Betz is very relatable and she explains what she is doing and why she is doing it! I think that it's really important to know why something is done the way it is. I think anyone who is considering bag making or wants to improve their bag making skills should take this class! Thanks for offering it and thanks to Betz for teaching it
Judi Nicholes
I love this Build Your Own Tote bundle and the totes she makes. I am in the process of making them all! Her instructions are excellent and as a result, my totes have turned out great!
Christine See
Excellent course! Explains, in detail, many techniques for sewing bags. This includes different types of pockets (inside and exterior), adding hardware, etc. Very thorough explanations with up close shots of how it all goes together. A great class to learn how to make your bags look professional!