Lessons
Lesson Info
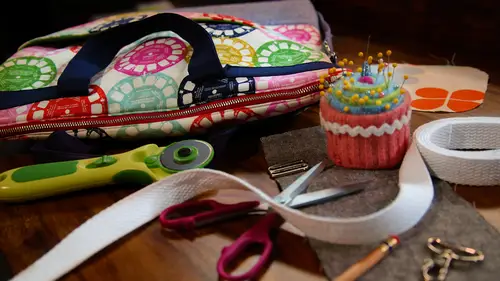
Divided Slip Pocket
For the medium sized toto, I have a couple different details inside that we are going to make one is this divided slip pocket super simple pocket it's basically like a big patch and then you converted klay stitch down the pocket to create little um, divisions are compartments for different things depending on what your needs are so you could have a skinny one for a pen or, you know, one that's big enough for your phone. It's just nice to have some little separation there to keep you organized. All right, so for that pocket, I have another lining piece here with the facing and when you're thinking about what measurement you want for this pocket, um, you want to kind of keep in mind um, when the bag is constructed, how much with you really have there? So when the bag is is sown and it's three dimensional and it's curved around, you don't really I need your pocket going all the way into the side scene because it's not really gonna work for you. So I've cut this in a little bit smaller and...
each side and I have, um, two pieces, and I've interfaced one because I want a little bit of stability, but I don't really need it to be bulletproof, so I'm just going to do, um, interfacing and one side and we're going to so all the way around except for one little portion about three inches that we're going to leave open because we're going to turn it right side out so we'll just pin this right sides together and I'm just going to make too little marks here to remind myself otherwise I'll just so all the way around and I'll forget to stop so we'll start and stop there and I'm gonna change my thread color real quick all right so now we're going to sew around the perimeter of the pocket rectangle and leaving a little gap in the bottom for turning and we're going to so at a quarter of an inch well lift the foot and pivot around the other side okay, so we have a rectangle sewn and I'm going tio trim the corners of the seam allowance off before I turn it right side out so that will just help give you sharper corners on your rectangle because we're getting rid of that extra bulk at the corners ok then we'll just reach in and turn this right side out okay so I think I have them all worked out and they were going to press this just to get it nice and crisp on the edges either you steam or I like to use water sprayed on it I feel like I can kind of finger press it a little bit before I get to the iron okay, so when you get to this bottom edge where we have the opening you're going to want oh make sure you fold in those seem allowances so that the bottom edge is just one nice straight pocket and those raj is air turned in so that will be just a quarter inch there just gonna work on that corner a little bit more okay all right so I'm going tio top stitched across the top of the pocket and then this opening that we have left from turning that will get sewn closed when we actually attach attached the pocket to the lining so I'm just going to do a quick top stitch about a quarter inch from the top and for top stitching like tio extend the's stitch size to about three usually for regulars seeming I have it at about two and a half ok so now we have our pocket and we're going to place it on our lining peace and so keep in mind here's the top of the bag this all sounds about it happened seem allowance and so we want it down a little ways from the top but not too far because you want to be able to access that easily and I'm just going to center it side to side and pin around the perimeter so I have the side with the interfacing the interfaced pocket piece on that outside and non interfaced part towards the back all right? And then when you pin along the bottom, you want to make sure that we get this opening closed when we catch that with our stitching okay, so I'm going to start up the one corner and I'm gonna back stitch, which is really important at the top of a pocket I'm going to go all the way around and then we'll talk about where we're going to make our divisions so I'm just going to stitch this and about an eighth of an inch because I want to make sure that I closed that little opening at the bottom ok? So let's talk about how we want to divide up this pocket in my example here I just have one division down the center, so I have to equal size pockets but you khun dio any any kind of configuration that you want that makes it work for you? So, um I'm gonna take my ruler and I think what I'll do for this one is do kind of ah um maybe like a pen size pocket let's just put that in there to see how much room that takes um, so you wanted to be, you know, big enough to keep the pattern from falling over, but you don't want to so tight that you never use it because you can't get the pen in there, so uh so well do that and about I want to know what that is, but I'm goingto get in line this up with a line on my ruler, so I know that it's but it's equal top to bottom, and another thing I want to point out is just the depth of this pocket. And, um, because I'm putting a pen in here, I want to make sure that this isn't too deep because you don't want to stick your your pen and there and then be like, ok, well, now it's gone for her, so we'll do this it's about, I tell you about an inch and a half and I'll just mark line to stitch on, and then maybe, um, maybe I'll just divide the rest of this in half, so I have two big pockets and then one pen pocket, so I really don't even think I need to pin anything here because the pocket is pretty secure being stitched down, so we're just going to slow down these two lines and make sure you back stitch it the top just to keep those secure. Ok, so now we have our pocket divided up into segments in our little pen pocket here and now you have another pocket option in your collection of pocket options.
Class Materials
Bonus Materials with Purchase
Ratings and Reviews
Liz Hanes
I loved this class! Betz is very relatable and she explains what she is doing and why she is doing it! I think that it's really important to know why something is done the way it is. I think anyone who is considering bag making or wants to improve their bag making skills should take this class! Thanks for offering it and thanks to Betz for teaching it
Judi Nicholes
I love this Build Your Own Tote bundle and the totes she makes. I am in the process of making them all! Her instructions are excellent and as a result, my totes have turned out great!
Christine See
Excellent course! Explains, in detail, many techniques for sewing bags. This includes different types of pockets (inside and exterior), adding hardware, etc. Very thorough explanations with up close shots of how it all goes together. A great class to learn how to make your bags look professional!