Lesson Info
8. Concealed Zipper Closure
Lessons
Lesson Info
Concealed Zipper Closure
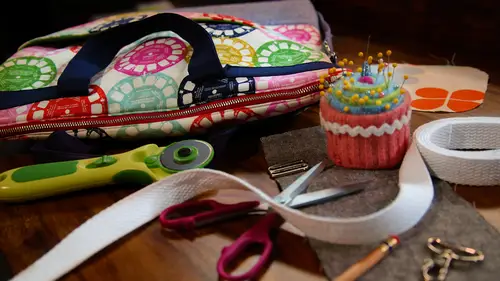
So that concealed or recessed zipper is kind of a handy the thing that you can really add toe most any tote because it's not sewn right in the top edge it's actually stone in the lining it can be added on and, um the way that this is constructed is has a little extension so you're you zipper actually extends beyond the bag and that allows you to really just unzip it completely open wide and um you can even just to use the bag like this without, um that being the zipper because it just flips down and out of the way um one detail that I want to point out when you do have a water bottle pocket I suggest um when you add your zipper that the opening of the zipper is here started your zipper and that this tag our tab rather is not, um dangling down where the water bottle pocket is. So um and the other thing is you can just unzip it a little bit and grab your water if it's at the opening so just one thing to keep in mind there. So to add that zipper details it's gonna move this aside for a mi...
nute and we're going to get out of zipper so this super is twenty inches and the top edge of my bag for point of reference is I think twenty two inches or twenty one twenty two with seem allowance maybe so as you saw from example tote since it's an inside the zipper actually starts a little bit from the end and then extends off so um but just to give you a frame of reference for the size zipper that you're going to want to use and then for the zipper tab I have this piece cut three inches by three and a half inches and what I'm going to do is, um bold in one of the ends the way that I have it pressed here and then I'm going to stick around two sides and turn it right side out and then I'm going to make the little tablet folds over the end so I just need to sew across here and here and I'm going to change my thread because I'm going to be stitching um white looks good on this um gray and white example and then also have a white super and a white ah zipper panels are not white but light colored so ok, so I'm going to sew the short end in the long end at a quarter of an inch ok then I'm gonna turn this right side out after I turned my corner basically we just want the zipper tab toe have finished edges and I pre folded the same allowance back on the one and just to give me a head start here so we'll poke out those corners sometimes when you have a zipper set completely into the top of the bag you lose some width of the bag so it's really nice to have that extra extension toe open it wide open harry and then we're just going to fold this in half and sandwich thie end of the zipper in here and since this is well a metal zipper and the zipper is going to have a mental stopper in the end I want to have this be just past that so I don't so over any metal all right? So I'm going to so basically a square I'm going to so um thie open edges and then I'm going to sew across that folder swelled they haven't be a nice little finished rectangle all right, now we have a little tab done at the end and it's a nice place just add a little pop color or a contrast fabric ok? And now we're going tio make zipper panels that go on either side and that's what actually gets sewn to the facing so I already have them cut here and I did not interface the's because of the way that they're folded there's a lot of bulk there and not not unnecessary bullet but their stability so what I have here is a rectangle that I've pressed in the ends a quarter inch and then double folded into the center so we'll do that with this piece so folding in those edges will just make sure that everything's all enclosed because um it will be exposed on the ends of the zipper because the zipper extends past it and then you fold the right edge into the centre crease all right and then fold it in half okay so one of the considerations that you have when you're um deciding on your super panels is the depth of your bag so I'm working on the largest bag I have here and I want to make sure that um the's panels are not um too narrow or too wide so you want them to be sort of like uh in relation tio groups the depth of the bag so this is what I mean so that, um depth of this particular bag is just about six inches and um so when the bag is up I mean obviously the top edge can come together like this but with the zipper panel I wanted you know, keep some of the whip because this is a big bag would be great for the beach I want to really have you know, that's you know comparable comparable type of with at the top so that's why my panels are the size that they are if this was a narrower bag I would make these panels much smaller tio sort of keep the same proportion all right? So I know what we're going to dio is let's just show you on the sample so what we're going to do is um set the and of the zipper that's got the zipper head just down a little bit from the edge and we're going to fold in the zipper tape um and enclosed that in our panel and then like I showed you before this is going to extend past at the end so we'll get those lined up so we have our panel's laid out here with the openings toward the zipper tape and then I'm going to slide this down and fold the zipper tape in and sandwich that in there and you want about an eighth of an inch of those upper tape um showing so you don't want this so close to the teeth that it causes a problem and makes it hard to um zip and unzip so we'll put a pin there and then we'll just lay this in okay so that looks pretty secure and then you just want to make sure that this is a line the same way so we'll just bend that little and down and you know make sure you're ends are lined up here ran to sandwich in between ok, we look like we're all lined up here okay? So I'm going to put the zipper foot on the machine and then sich down groups these off they creep off a little bit maybe just slide this a teeny bit that's the thing about sewing and pending things shift even when you feel like you have them lined up perfectly and like I always say it's in the lining no one's going to see do our best all right? I don't know if that helped I think it's better no ok, I'm going to sew this really close like eighth of an inch from the edge and indonesia music per foot and moved my needle position over actually gonna unzip the zipper a little bit just to get started here you know this is an excellent example of of things shifting so you know, we started off with the same at the beginning and then this actually got longer as I sewed so I'm not exactly sure why that happened but it is fabric and things stretching give so I am goingto do one thing here and that is really just my pinning here and then I'm going to sew a lot of times I'm lazy and I don't want to use the other side of the zipper foot so um I am going to sew in the same direction because by so down this way and it stretches a little bit this way and then I so back that way then it's really going to get shifty so I am gonna just do a quick a repin on this end and hopefully whatever shifting happened on the first side will happen on the other side part of this might be because I didn't interface the's panels I think if I had interfaced then they might be a little more, um more stable and less likely to give so we'll try this and see if this helps ok, so since I'm sewing on the other side of the zipper, I'm going to move my needle to the other side in the zipper foot okay? So just because I knew that first side had a little pull in it, I kind of gave a little I put a little tension on the other side just so they would come out more equal and it just looks like it needs a little press it's slightly ripley but overall not too bad and I think it's just a good example to know that um unexpected things happen things shift and it's just kind of the nature of fabric and sewing, so we'll just give this a quick iron and then we'll be able tio attach it to the lining hey, you're also going to want to so we need to top stitch across the's ends because right now they're open and you can switch back to your regular foot you don't need the zipper foot for that, all right? Okay last step in this all right, so we need tio get our lining over here all right? So we talked about not wanting this and done by the water bottle pocket we want the top end of the zipper so we're going to unzip this so we have a lot of room to work with here and we're going toa center this on here and so actually I could leave it zipped for now I guess it's that backed up and be easier to handle ok, so we're going to send on this but you want to keep in mind that this already is missing a half inch from its um seem allowance so we'll just full that in on this side and we also have a seam allowance up here and we want to have a little room underneath for our pocket and that tab so I'm going to kind of split the difference here and we'll just top stitch this to the facing actually I am going to get out my ruler all the lines on this printer messing with my eyes they were going slightly uphill so we're about an inch and a half down from the edge okay? So we're just gonna top stitch that edge at eighth of an inch, okay? And then we need tio do the same on the other side it's going to be kind of tricky to show you um what I'll do is on this and I'll start with our distance from the edge here so this is two inches from the side scene like that and it measured one and a half inches down from the top edge. It's no one half there we go. Okay, so if you were adding this zipper to aligning that did not have a water bottle pocket in the corner, this would be easier to maneuver because you wouldn't have the seam already sown. So you'd be working with flat pieces. So I've made a little more complicated by having that pocket in here, but, um, it's totally doable and not every bag you're going to make is necessarily going to have both. All right, so quick before I so this I'm going to zip this just to make sure everything is lining up, and it looks like it isthe all right, okay, so I'm just going to so that and then we will have our zippered top complete. All right? And there we have it, the concealed zipper closure that is the finishing touch to your lining. So I hope you enjoyed learning this assortment of features. We've had pockets and zippers, elastic, all kinds of things. Velcro. Um, so these are all great things to practice and add two different bags and different combinations and just totally customize your bag for you and your, uh, the way that you organize yourself, so I hope you enjoy the class.
Class Materials
Bonus Materials with Purchase
Ratings and Reviews
Liz Hanes
I loved this class! Betz is very relatable and she explains what she is doing and why she is doing it! I think that it's really important to know why something is done the way it is. I think anyone who is considering bag making or wants to improve their bag making skills should take this class! Thanks for offering it and thanks to Betz for teaching it
Judi Nicholes
I love this Build Your Own Tote bundle and the totes she makes. I am in the process of making them all! Her instructions are excellent and as a result, my totes have turned out great!
Christine See
Excellent course! Explains, in detail, many techniques for sewing bags. This includes different types of pockets (inside and exterior), adding hardware, etc. Very thorough explanations with up close shots of how it all goes together. A great class to learn how to make your bags look professional!