Lessons
Lesson Info
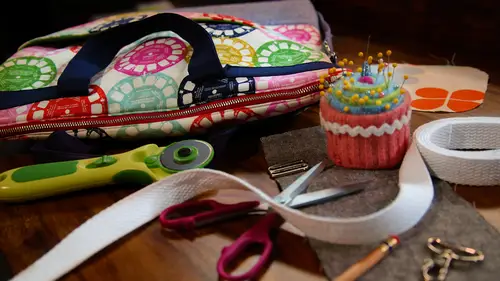
Zippered Divider
Ok, so the next pocket we're going to dio is a really awesome pocket, and, um, I think it doesn't get used enough, but I'm sure you've seen it and in bags that you own and that is this divider divided, zippered pocket and it's great, because it really does both things. It divides your bag basically in half, and it also is pockets and you put stuff in there. So it's it's a pretty handy handy feature and it's a little more challenging, not super hard, but it has some extra steps, so we're just going to bring it down one thing at a time, and it will be pretty cool. Nice addition to your bag. Okay, so we have another lining piece here that we're going to work with his air base, and then I have my pieces cut for that divider pocket, and if you look at the pocket pieces, you'll see the even though the pocket I showed you in the bag goes side seemed to side team, you can see that this is shorter than that, and that is because the side seams in this bottom gets sewn together and it's actually,...
this is actually the width of your bag, so, um it will come together and you'll see what I mean but it's it's a tiny bit of a mind bender so um so this will be just, you know, fitting right inside there. So the first thing we're going to do, though, is talk about our zipper, all right? So I have a fourteen inch zipper and I wanted to be twelve inches for the top of this pocket, so I want to show you a little trick for shortening a zipper because I think that happens a lot. You you go to the store and they're out of the zipper you want or you just want you want to use what you have and it's it's not quite right, so a z mentioned before the zipper measurement fourteen goes from this up ed to the little metal band at the end, so the easiest way to shorten this is to actually shorten it from this end, so what I'm going to do is I wanted to be two inches shorter, so I'm gonna measure two inches down in my ruler and make a mark here, and then I'm gonna unzip it past that point, and then I'm going to so at this point where we marked, so I'm basically kind of creating another zipper stop, but with thread, so you're just gonna want to take a couple stitches through there and it doesn't have to be perfect this is going to be all hidden away, so if you get hung up on the teeth or whatever, don't worry about that too much and then I'll just not that off and then I'm going to cut off it also back up that up to the top and then I'm going to cut off the excess in the threat on give myself about a half inch and since this is a nylon zuber aiken just cut through that and it is you saw it didn't really have any any problems with the scissors cutting through it. If it was a metal zipper, he wouldn't want to do that that's that's a whole different animal. All right, I'm going to trim this to be about a half inch past that little stopper. All right? So back to our example here we have a little zipper tab at the end, each end of the zipper and that's going to help us so that into the pocket and give us a little a little breathing room at the end. So I have two pieces cut here and these are one inch by two and a half inches on day we're going to double full dozen, kind of like we did on the key fob like this and it's fine if it's just finger pressed in and they were gonna put that on the end of our zipper and that just kind of finishes that edge and also as we so the sides of the pocket um that and can be free of the pocket and be finished and it just it just makes less book in the end I'm gonna pin that on there and do the same but this line of these air wider then my zipper tape but I just do that just to be sure that we confirm that down all right? So I'm going to take this to the machine and I'm going to so just like an eighth of an inch from the edge and, um taking care not to so over that metal part and then that'll just secure this on each end now if that stopped gets in your way, you can use your zipper foot, but I'm just going to be really careful and steer clear of it and hopefully that'll work actually I'm gonna turn this down a tiny bit more because I told you that if you had sloppy stitching and we get covered up and when it's not getting covered up so trim that down a little more the hide my sloppy stitching ok, so now we have the end sewn on our zipper and as you can see there much wider than the end of the zipper but I always like to have a little play in there depending on um depending on the zipper not all zippers or the same with so now this's going to be enclosed in a seam so we can confirm those ends ofthe ok ok, so the first thing we're going to do here actually will move the lining out of the way so we can just work on our pocket pieces and not I have too many things going on all right, so this is going to be the outside of the lining pocket and then this gray fabric is going to be inside when you open the zebra so what we're going to do first is we're going to put our super face down so it's like right sides together and you want to make sure that you have about a half an inch on either side so you know when you shorten your zipper you you know, you just want to make sure that you have a little room here because this is going to be this seem allowance on this pocket when we so it so you're going to center that there and because we're going to have several layers happening here um I'm going toe machine based this first, so it takes a few steps, but it actually we'll make it better in the end because it won't be sliding all over the place and you're going to need your zipper foot on here again and depending on your machine you're going to need to change your I'm going to need to change my a needle position because of this particular foot. Okay, now this part is called making the zippered sandwich so again, this is face down on the right side of the outer part of the pocket. This is kind of like making a zippered pouch that's attached inside of a bag when we're going to take the lining, the pocket lining and sandwich that in between so what's going to happen is, well, so here and then when this gets turned right side out, that'll be the inside, and this will be the outside. All right? So basically, just layering this on and then sewing what? We just saw it again. Um, I just find that it's, um, less likely to slide all around and get messed up if you do it in two steps like that. Now, if you find that when you get to where the zipper head is and you don't feel like you have enough room to stitch around it, you can always reach under and unzip the zipper or you can stop stitching and see if I can do it from here and way start your stitching again, but I'm just going to ends up that to about here and then so to that point and move it back okay, so now I'm I'm add the zipper head against I'm gonna put the needle down just to kind of keep my spot lift up the foot and pulled the zipper back to the end and then keep going ok so now we have that zone and we're going to press press that seems so that both of those edges air out of the way all right? So we'll press from both sides okay? And then we need to repeat that on the other side so I'm taking the right side of the zipper and putting it face down onto the um outer separate pocket and again it based that on and then sandwiches and then we put that on the lining usually I'll turn over this way running out of pins I always do this I need to pin cushions one by my pinning area and went by the machine all right then well so that on then our zipper will be installed. All right, let's give that senior press ok we have one last step on the super before we can so the pocket to the bag and it's just it's not one hundred percent necessary but it makes for a really clean finish and that is just a top stitch on this edge on either side and that will keep any of the fabric from sort of like getting in the way and potentially caught in the zipper from either side and I'm going to see if I can do this with my regular foot and not the zipper foot because they find that there's a lot more control with that so if there's enough room in here for the foot I'm going to just use the regular one and then I need to move that middle position and I'm going to stitch just about an eighth of an inch away from that edge okay, so I have the zipper sewn into our divided pocket and now what we need to do is attach it to the sides and the bottom of the lining but before we do that I want to machine based the layers of this pocket together a cz we've seen from machine basting the zipper it's just a good idea to kind of keep all our little parts together because this last part is a little tricky and it's just going to help us toe have everything lined up and sort of acting is one unit as much as possible so you can see that some of my lining and outer fabric are have shifted a tiny little bit not a big deal he of a pretty big seem allowance to deal with so that will those discrepancies will sort of disappear once they get sewn into the scene but for now I'm just going to stitch this um around the sides here um just to kind of keep them from moving around too much okay, so we'll just do a quick buzz around this ads in the machine and then we'll attach it to the rest of the lining all right now this would be much more manageable ok, so this is the part where we we are going to attach it to the side seams and the bottom and so it's going to start getting a little dimensional here because we have to pull in um from the two different two different parts so we're gonna pin the side seam or what will become the side scene because basically the side seam of the lining is what sort of closing the edge the end of that pocket okay? And then we're going to bring this bottom edge up and pin that along the side too they are not going to the side but pin it to the bottom edge of the pocket and you're going to get this little this little point over here but that is the dimension of the side and you'll see that when I put the other part of the lining on ok, so now you can see the divide of pocket is pinned all the way around to the one side of the lining and now I'm gonna put the other side on which theoretically I suppose you could upended at the same time, but it's it's you kind of need to see what you're doing so um and if you actually want to take an extra step, you could machine based this and then pin this other layer on, but let's, just say me it's in here now, and we'll just re penn what we've done here. So again, you want to make sure that you've got a quarter to a half inch space here because when you so the side scene you want to sow past this end of the zipper and the zipper tab, you don't want to so over that, and we're gonna match our scene for the facing, and I'm actually going to take my pan and make a little mark on here, just to remind myself of where not too so, and then I'll pin across the bottom and again, this is goingto this's the box corner that makes the dimension of the bag so that'll kind of pop out like that, and then we'll pin up this other side, okay, so now we're going tio so down our sides and then across the bottom and up the other side, and then after that, well, so cross, um, the's little flanges, they're sticking out, and that will box the corner of the bag and it's, a little bookie there's a lot happening here, and so it might not be perfectly smooth, especially on your first try. Or your second or third time but that will be down into the corners of the bag and when it's all put together even if it's got a couple little you know lumpy parts it'll be fine so all right so we're going to go so these side seems and you can look in there it's getting there it's almost a pocket all right and this is going to be a half inch seam allowance and then I'm just keeping in mind uh where my zipper tabs are so that I can make sure I don't so over those I'm gonna kind of fooled the's corners out of the way and stitch down into the corner as far as I can and then instead of pivoting I'm just going to take this out and then that way I can flip those out of the way and so across the bottom okay? And then the last thing we're going to d'oh um pretty much have it all sewn except for boxing these corners so we have these weird little holes left on we're going to so across that and it might be best to sort of so come to the same allowance instead of straight across because we have a lot of both going on down here so we'll go do that and then we will have our pocket done I'm just going to kind of flatten that out and as you can see it's not like the tightest corner ever, there's a lot of things coming together, but it'll look more clean from the inside, and I'm gonna pop this table off of my machine because as your bag gets bigger, is your, you know, progressing along and there's more bulks of maneuver. Sometimes it's just easier to get that out of the way, and you could just take your seam ripper if there's a little talk or something caught from the layers when you were sewing, um, the side and then the corner, you can just pop those out and flatten a little wrinkle out. All right, so now we have this sewn together, and it does not look super attractive from the side, but that will not be seen. We'll get this all trimmed up and pressed so that it lays a nice and flat when the bag is assembled. But I want you to see that. Basically, we have the whole lining assembled now with the divider pocket right in the middle and unzips and it's a great place for storage.
Class Materials
Bonus Materials with Purchase
Ratings and Reviews
Liz Hanes
I loved this class! Betz is very relatable and she explains what she is doing and why she is doing it! I think that it's really important to know why something is done the way it is. I think anyone who is considering bag making or wants to improve their bag making skills should take this class! Thanks for offering it and thanks to Betz for teaching it
Judi Nicholes
I love this Build Your Own Tote bundle and the totes she makes. I am in the process of making them all! Her instructions are excellent and as a result, my totes have turned out great!
Christine See
Excellent course! Explains, in detail, many techniques for sewing bags. This includes different types of pockets (inside and exterior), adding hardware, etc. Very thorough explanations with up close shots of how it all goes together. A great class to learn how to make your bags look professional!