Lesson Info
13. Replace Tool
Summary (Generated from Transcript)
The lesson is about the new Replace Tool in Photoshop and Bridge 2023, which uses artificial intelligence to make retouching easier. The instructor demonstrates how to use the tool and provides tips for getting the best results. Additionally, the instructor briefly introduces the Contextual Task Bar, a new feature that suggests actions based on the current tool and image state.
Q&A:
- What is the new tool called?
The new tool is called the Remove Tool.
- How can you work on an empty layer while using the retouching tools?
You can create a brand-new layer, but you need to turn on the "Sample All Layers" checkbox in the Options Bar to ensure adjustment tools work effectively.
- How does the Replace Tool interpret objects in the image?
The Replace Tool uses artificial intelligence to interpret objects in the image, allowing it to automatically rebuild and retouch the areas you paint over.
- Can the Replace Tool handle complex areas?
Yes, the Replace Tool can handle complex areas, but it may require multiple passes or dividing the area into smaller pieces for better results.
- What is the additional feature mentioned in the lesson?
The additional feature is the Contextual Task Bar, which suggests actions based on the current tool and image state, providing convenient options for editing and adjusting images.
Lessons
Introduction
05:37 2Redesigned Adobe Bridge
12:11 3Camera Raw Masking
14:25 4Masked Curves
05:12 5Adaptive Presets in Camera Raw
07:49 6Content Aware Remove
07:58 7Denoise
05:16 8Improved Object Selection Tool
05:45Lesson Info
Replace Tool
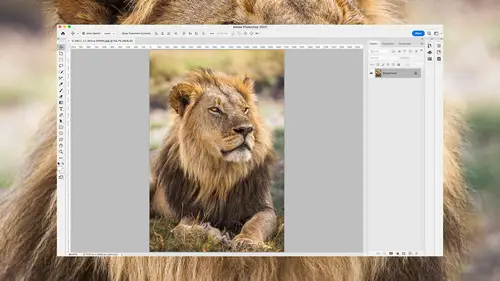
The day I was gonna turn in this project, the Up to Speed videos, Adobe dropped a new version, and they put in a major new feature. So let's take a look at the new Replace Tool. It uses artificial intelligence to make retouching much easier. And if I remember, at the end, I might throw in a little bonus as well. Let's take a look. All right, I'm going over to my tools on the left side of my screen, and here's kind of the standard slot for retouching tools. I'm gonna click and hold down there. And I have the normal Spot Healing Brush, the Healing Brush in there, but right here is the new tool. It is known as the Remove Tool. I'm gonna choose that. And just like with other retouching tools, you have a brush size to select. And then if you like to work on an empty layer, which I do, so I don't permanently make a change to my original picture, you can create a brand-new layer. But as with all other retouching tools, with default settings, adjustment tools don't work well in empty layers, b...
ecause they only look at that individual layer and it ignore the rest of the document. That is, unless you come up here to the Options Bar and turn on this checkbox called Sample All Layers. So let's turn that on. Now let's take a look at what this tool can do for us. I'm gonna zoom up, and what I'd like to do is clean up this photo. There is some stuff in the window here that I'd rather not see, so I'm just gonna take this brush and paint over these bags that are hanging here, that I'd rather not have. And I just need to make sure I cover the entirety of it. Now, notice the bags are overlapping the woman's arm. When I let go, notice it nicely built her arm, and that's because it's using artificial intelligence and it can interpret what these things are. Let's say I would like it as if her shirt was not as long, so that it didn't extend below the table. Well, I can just come in here and paint like this, and of course, it'll do fine. I mean, right there, it might mess up, and if so, all you do is go over it a second time. There's a little plastic bag shoved into a little edge here. So I wonder if this tool is gonna be able to figure out that there should be a diagonal line there and a vertical? Yeah, it does just fine. What if I could do something more complex, like, what's in here? Do this entire big area right up through here. It's not bad. Now, there are some areas it might've messed up on, like the tip of a few of these, and I could paint on it again to try to clean it up, but overall, it does pretty good. There are some broken parts in the shutters, so I could paint there. And come over here, there's a part little broken, get it to fix it. Let's come over here where we have this little wire, or cord, or whatever it is, and I'd like to get rid of it. So I'll get a brush a little bit skinnier, 'cause I don't need it to work on too large of an area. And I'm gonna start painting right about here, and I'm just gonna go over this entire little cord that's here. And as I come over, it does really well with straight lines, like that edge right there, and with anything that has a structure. So if there's a regular spacing of things, it'll usually do a pretty good job. But it will mess up on occasion, like here, where we have some broken areas, but just painting over it a second time is usually all that's needed to fix those kinds of problems. In fact, I can come down here to this bicycle, and you notice there's a bin on the front of it. Well, think of how hard it would be to retouch out the plastic bag that is sitting inside. Well, I'm gonna come in here and paint over it. And because there's regular structure to that bin, it's probably not gonna do terrible. And if it does, I just need to give it a second choice here, eh, a little second chance, I should say, and it will likely clean things up rather nicely, each time I go over it, it will try to spend a little more time figuring it out. But that's pretty close to usable for that area. And so we can come up here, and here's another cord, just paint over it. And let's see what we get. And sure, there's a few areas that might be a little bit messed up, but just a simple paint, a second pass there, and it works fine. Here, we have a bunch of wires. What if I wanna get rid of just one of the wires within the grouping? Well, let's try it. I'll go all the way from this wire over here and just paint over it and follow it on its path. And let's see what it does where it overlaps all these objects, 'cause that would be not a fun retouching job to do manually. And I'll just go all the way over to here and let go. And when it looks at the image, sure, it does mess up a few areas, but if I want it to reconnect areas, why not just paint like this to tell it where it might've messed up? And it can likely more kind of intelligently look at that area and figure out that something should be there. And on occasion, it just completely won't figure it out, but it's rare. So we can reconstruct any area that it seems to have messed up. Now, like here's one area where I kinda doubt it because there's a little too much complexity there for it to figure out. Maybe if I were to get this side first, and then try that, so it has a better idea. But no, it looks like that's an area I'd have to do manually. Ah, what about this upper edge though? That doesn't quite have the right shape, and painting over it a second time seems to fix it. So anyway, it is a matter of giving it a first choice, or first chance, I should say, and then coming back and touching up any areas where it's messed up on, and on occasion, you will need to do some manual retouching. But let's switch to a different image. In this image, I have this sun that's in there. And I shot it at f/22, so it's got the sun flare going on, but I don't want this flarey stuff in here, I only want the star-shaped stuff. Well, that was something that was hard to get rid of in the past. Sure, the areas where it doesn't touch anything, like right here, wouldn't be hard to get rid of, but when you end up getting one of these little round areas that I wanna get rid of and it's touching something I wanna keep, then that was difficult, because with the other tools we would use, it wasn't usually able to rotate and scale and just create brand-new content, but this one can. And so if I come in here and I concentrate on the ones that are touching something else, like right here where I wanna keep the part where it's touching, you can see how good of a job it does. Now, in the past, what I'd have to do with an image like this one is I would need to copy from another area, like up here, and then there was a thing called Clone Source that would allow me to rotate, and I could rotate that piece to a different angle. But it was very time consuming and I did not enjoy having to do it. This makes it so quick and easy, it's almost child's play here. Now, there are a few times it'll mess up. Let's see if I can get it to, over here, since it's a big area. No, it actually did fine. But if it did when it was a large area, usually just break it down into smaller pieces and it'll do a better job, or once it's done, just go over in the area a second time to give it a fresh attempt at it and it will often do a much better job on the second try. So anyway, you can see how quickly it is to clean those up. Now, there are some things it'll mess up on, like over here, do you see these really fine lines? Any time there are supremely thin lines, and here I have, like if I zoom up, there are some sensor dust specs up here. If I wanna get rid of 'em, I find it has a tendency of thickening really thin lines. And in that case, it kinda made them broken. I can just try it again, and it doesn't seem to be doing a good job. So in that particular case, I might wanna just get a smaller brush, so I don't tell it to work on such a large area, and then give it a try. Seems to work, how about here? Yep, that works fine, but what about this guy? Let's see if that's gonna end up thickening the line like I expect it to. Yeah, it just makes it look not quite right in its thickness. And so that is something it has a tendency to occasionally do. And in those cases, I either need to manually do it or try painting across it multiple times. Now, let's see how good it does with an image like this one, where I might wanna get rid of some of these, but if you look at what's behind it, how complex the material is, well, I'm just gonna come in here, and do my little painting. And I can try to get a larger area if I want to, like that. And I can't really tell where it happened. And if I could, painting over it a second time would usually clear it up. It is smart enough to add the little fur around the edge of objects, such as his legs. And in here it looks a little bit soft, and if so I'm gonna just paint over it again and see if it's able to come up with a material that might be more appropriate. And on occasion, you just can't get it to, but right there, I saw it suddenly pop in with some detail. Let's see here if it might be able to reconstruct the little top of his, bottom of, top of the bottom of his foot. (laughing) Ah, not bad. And just a few other areas. Let's try going all the way over here, and see if it can figure out something this large to get rid of. And I'm doing this all in a single paint stroke, going all the way up here. And keep going there. Okay, how's it gonna do there? Not good at all. But I'll choose Undo, but the same area probably is gonna do darn good if I do it in separate pieces. Do this as one piece, so it can see enough of the surroundings to know what it's supposed to look like. Do this in a separate stroke, do this in another one. So as long as you do it in smaller and smaller pieces, then you can get a sense for exactly how large of an area it can tackle at once. So it's not that it can't handle this, it's just that it needs it to be divided up into manageable pieces where it can see enough of the surroundings left over to try to calculate what should be there. And so with a few paint strokes, I can get rid of that stuff. So in this case, there is a little bit here where it seems to be getting, how would I say? It likes to develop patterns where it thinks it finds one, like the pattern of the weave of fabric. And I think that's what's happening in here right now. And so it could be that when I'm done, I need to copy from an area over here or another photo I took a few seconds before or after this and copy a little portion and put it in there to smooth it out. But that seems to be one of the times it has difficulty is when there's any chance that there could be a pattern, it will try to tend towards creating pattern. When working on larger areas, there is a choice up here at the top called Remove After Each Stroke, and you might wanna turn that off, because if that's turned off, then you can sit here and paint, let's say I use a really thin brush and I paint through this area, I can let go and it didn't do any work yet. I can paint across another area, let go. And yet another. This is useful when something is broken up into multiple pieces. If this was a chain-link fence or something else that is broken into something other than a solid chunk, you could do something like that. Then you can either hit this checkbox that's up here or press the return key on your keyboard to have it then work in that area. Just now know that from now on, if I paint and I let go and I expect it to change, it won't until I press return. So we can go in there and do complex things, pressing return each time we're done with our painting, or just turn that on, and then it's going to be replacing it each time you make a paint stroke. All right, then let's look at one bonus feature that they added on the same day they added this feature, not related, but it's a tiny change, so I'm gonna bring it up here. If you go to the window menu, there's a new choice, it's called Contextual Task Bar. And it's actually turned on by default when you first install the newer version, so you'd probably see it to begin with, I just didn't wanna have you be distracted by it. And what this does is it looks at whatever it is you're doing, what tool are you in and what's the state of your image, like which layer is active and such, and it just suggests different things you might want to do. So in this case, there's a choice called Select Subject, and if I click on it, it will attempt to isolate the subject of this photograph. Then considering that I have a selection active, it is now offering me choices that are related to selections. Like down here, I can add a layer mask to the active layer. If I click here, it'll bring up the Adjustments panel, I can invert the selection, that type of stuff. And if I were to switch to a different tool, you're gonna find that the options found within the bar are gonna end up changing. So in this case, if I choose the Text Tool and I click within my image. Let me get rid of that selection first. Now you notice right where I typed in the text, up here, it's given me options for the typeface and the size. And you can click, if there's a number, click on the icon next to it and just drag. That's one nice way of changing that number. And this will move along with wherever I have this text. So if I reposition the text, let go, it's moved along with it. Or if you would rather have it stay in one position on your screen, there's a little dropdown here, you can hide the bar, you can always get it back by going to the window menu where I first got it. You can reset its position if you've moved it manually, 'cause you can move it manually with the bar on the left, or you can pin the bar's position so it stays in the same spot all the time. So if you like to always have it at the bottom center of your screen or something like that, you could lock it into position. But that is the new Contextual Bar. And it's up to you if you wanna use it or not. It's nice in some ways, but in other ways, I'm not used to things covering up my image and moving around on my screen. I'm used to the interface being in fixed position, and therefore, I know exactly where everything is. But this being so close to what you're doing, you might like it. So if you don't, just tell it to hide the bar.
Class Materials
CLASS MATERIALS
Ratings and Reviews
Vincent Zuck
Thank you Ben! This course was very helpful. I definitely learned how to better use some of the new tools in PS, and I now have a firmer understanding of how they work and how to use them. The course is clearly presented and Ben gives a lot of examples on screen. He shows real time editing examples on several rather difficult scenarios, and talks us through his thought process as he does the editing. If one way doesn't work he explains his thoughts on what to try next and does it on screen. This was very helpful. Nicely done! I highly recommend this course!
Ann Wooledge
I love your classes Ben. I don't think anyone explains things any better than you do. However, I worked with updated PS 2023 and PS 2024 and I can find NO cylindrical wrap tool. This would be a great tool for me as I work a lot with product images that require changing the labels. Help!
user-9c856e
I think this class is one we all need! All of the new features are explained clearly and demonstrated. I have been using some of these features already but after taking this class I understand the way to use them to get the best results. Highly recommend it.