Lesson Info
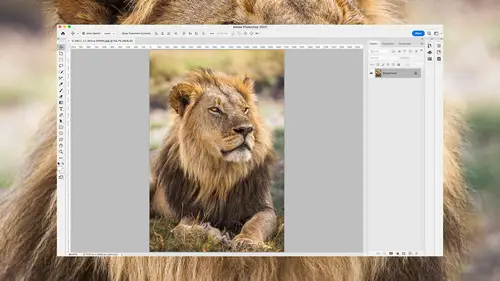
4. Masked Curves
Summary (Generated from Transcript)
The topic of the lesson is using the Curves adjustment in Camera Raw as a masked adjustment to target specific areas of a photo for brightness and color correction.
Q&A:
What is the new feature available in Camera Raw for masked adjustments?
The new feature is the ability to use the Curves adjustment as part of a masked adjustment in Camera Raw.
How do you create a mask for a specific area in Camera Raw?
To create a mask, you can use the people mask tool and select the area you want to isolate.
How do you use the Curves adjustment to correct brightness and color in a specific area?
By clicking on the specific area in the image, a dot is added to the curve, allowing you to adjust the brightness. You can also use the different types of curves to adjust the color.
How do you ensure that the adjustment only affects the desired area?
By clicking on an area you don't want to change, you can lock in the brightness or color, and then make adjustments only in the targeted area.
How can you preview the before and after of the adjustment?
You can toggle the visibility of the adjustment layer by clicking on the eyeball icon, allowing you to see the difference in the targeted area.
What can you do if the adjustment affects other parts of the image that you don't want to change?
You can use the brush tool with the subtract option and a high feathering value to remove the adjustment from the unwanted areas.
Lessons
Introduction
05:37 2Redesigned Adobe Bridge
12:11 3Camera Raw Masking
14:25 4Masked Curves
05:12 5Adaptive Presets in Camera Raw
07:49 6Content Aware Remove
07:58 7Denoise
05:16 8Improved Object Selection Tool
05:45Lesson Info
Masked Curves
There's a new adjustment available when you're in Camera Raw and you used a masked adjustment, and that is Curves. Curves is an adjustment that I use all the time in Photoshop, but when I do, I usually apply it to an isolated area. And up until now, when you used it in Camera Raw, it applied to the entire picture. Well now we can apply it to a masked adjustment. Let's see how it works. I'm gonna come in here and create a people mask, and I'm gonna tell it to isolate my wife's facial skin, and hit Create. I'm then gonna turn off the overlay, and what I'd like to do to my wife's face is I'd like to get rid of the shiny spot that's on her forehead. I'll type command plus to zoom up a bit. That shiny spot, I would like it instead to look more like these areas of her skin that don't have the sheen. To do so, it would be difficult with most of these sliders, but we now have a new choice. That new choice is down here called Curves. Now we're not gonna be able to get in depth with Curves, beca...
use I could literally do an all day class on how to use Curves. But I'll give you a slight overview. First off, there are four kinds of Curves. There's this one, which affects only the brightness of your picture. Then there's this one, which allows you to add more red light to the image, or if you push it down, you can use less red light, and then you get the opposite of red, which is cyan. If you go to the second one, you can move the curve up to add more green light to the image, or if you move it down, you remove green light, and that gives you its opposite, which is magenta. And then finally, this one allows you to move this up, and make the image look more blue by adding more blue light. If you move it down, you remove blue light, and that makes things look yellow. So let's think of what I wanna do. Well also on the right side, there's a little icon here. If you click on it, then you can move on top of your image. Let me turn off that overlay, and I'm gonna click right on my wife's forehead. When I do, watch what happens in Curves. Click, it just added a dot to my curve. That's gonna lock in the brightness of that particular area. And then the curve in general is just a diagonal line that's describing how much light is being used to create the various shades that make up my image. For dark shades, we use next to no light, and as this gets higher and higher, it's describing brighter and brighter shades of gray. And up here in the corner is usually where white is represented, and I'm gonna grab that dot and just pull it straight down. As I pull it straight down, it's like having a dimmer switch, where we can reduce the amount of light being used where we used to have white. So this area on my wife's forehead is close to white. I'm just gonna grab right here and pull straight down. As I do, watch my wife's forehead. Do you see that bright area getting darker? The problem is, as I bring it down and it gets darker, it's getting kind of grayish. It doesn't look like it's really the color of her skin. Well, that's when I wanna switch to these others. And if I go over here to blue, reducing the amount of blue is gonna make it look more yellow. So I grab that little symbol. I come over here and first, I click on what I don't want to change. I don't wanna change the brightness of her forehead. That locks in the brightness over here in Curves, and then I can go up here just to the brightest area, pull this down, and if you watch the brightest area of her forehead, I see it becoming more yellowish. But I think it might not just need yellow, it also needs either a little red, but red will already be maxed out in that area, or a little less green 'cause the opposite of green is magenta. But anytime I do this, I always click on an area I don't wanna change, otherwise the entirety of this curve changes, and so the entirety of the image gets less, in this case, green. I only want it to happen to the bright areas. So that's why I locked in that. Okay, I'm gonna dial that down right to about there. And now if you look at the bright spot, it's really not there. If you wanna see before and after, I'll go over here to the eyeball for this adjustment. I'll click on it, and then let go. And I can see the bright spot going away, but I don't like what it's doing to the rest of her face. So I can just come in here and choose subtract with a brush, and I'll bring my feathering way up, and I'm just gonna remove it off the rest of her face. I'm just gonna come in here and say, bring that back. It's only up on that forehead where I need it. So now if I come over here, click before, after, you see the shiny spot on her forehead going away. But you really can't get comfortable with Curves just from a couple minute talk. You need to get in depth with Curves. But the main thing is this gives you a lot more power beforehand. If I was gonna apply a curve, it would apply to the entirety of the image, but in the newer versions of Adobe Camera Raw, we can do it as part of a mask adjustment.
Class Materials
CLASS MATERIALS
Ratings and Reviews
Vincent Zuck
Thank you Ben! This course was very helpful. I definitely learned how to better use some of the new tools in PS, and I now have a firmer understanding of how they work and how to use them. The course is clearly presented and Ben gives a lot of examples on screen. He shows real time editing examples on several rather difficult scenarios, and talks us through his thought process as he does the editing. If one way doesn't work he explains his thoughts on what to try next and does it on screen. This was very helpful. Nicely done! I highly recommend this course!
Ann Wooledge
I love your classes Ben. I don't think anyone explains things any better than you do. However, I worked with updated PS 2023 and PS 2024 and I can find NO cylindrical wrap tool. This would be a great tool for me as I work a lot with product images that require changing the labels. Help!
user-9c856e
I think this class is one we all need! All of the new features are explained clearly and demonstrated. I have been using some of these features already but after taking this class I understand the way to use them to get the best results. Highly recommend it.