Lesson Info
3. Camera Raw Masking
Summary (Generated from Transcript)
The lesson is about the new masking features in Camera Raw 2023, including the addition of artificial-intelligence-based masks like background, sky, subject, objects, and people. The instructor demonstrates how to use these masks to make adjustments to specific areas of an image, such as changing the saturation and contrast of the sky, isolating and adjusting the bus, building, and clothing in a photo, and enhancing the details and colors of objects and clothing in a portrait.
Q&A:
What new masking features have been added to Camera Raw in 2023?
The new masking features include artificial-intelligence-based masks like background, sky, subject, objects, and people.
How do you select and adjust the sky in an image using the new masking features?
Click on the sky button in the Masks panel and use the sliders to adjust the saturation and contrast of the sky.
How do you isolate and adjust specific areas of an image, such as a bus or a building?
Use the plus sign in the Masks panel to add a new mask and choose "select subject" or "select objects" to automatically select the desired area. Then, use the subtract option and a brush to remove unwanted parts from the mask.
How do you use the new people mask to isolate and adjust clothing in a portrait?
Choose the people mask and select the specific area of the person you want to adjust, such as clothing. Use the sliders to make adjustments to the selected area.
How can you preview the effects of the masks?
Click on the eyeball icon to temporarily disable or enable the masks. Click and hold the eyeball icon to preview the effects for a few seconds before enabling it again.
Lessons
Introduction
05:37 2Redesigned Adobe Bridge
12:11 3Camera Raw Masking
14:25 4Masked Curves
05:12 5Adaptive Presets in Camera Raw
07:49 6Content Aware Remove
07:58 7Denoise
05:16 8Improved Object Selection Tool
05:45Lesson Info
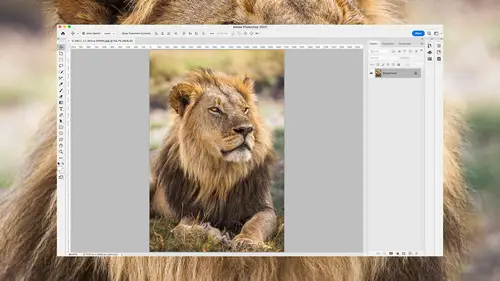
Camera Raw Masking
The masking features in Camera Raw have received an upgrade, both in the type of things that we can mask and in the accessories, like little menu items. So let's dive in and take a look at what's new. So we have icons in the far right of my screen, and one of them is the masking icon. I've just clicked on it. And the main thing is they've added a lot of new features related to artificial-intelligence-based masks. Those are ones that are called background, sky, subject, objects, and now people. There are no people in this shot, though, so it's not going to be usable until we switch to another one. So let's see what we can do with those. I'm gonna first select my sky. I'll click the sky button here, and that'll bring up the Masks panel. And look at this red overlay that is only gonna be there until I move one of my adjustment sliders. It's only when the sliders are at default settings that it shows that overlay. So what I'd like to do to my sky is make it slightly less colorful. I'll do ...
that break bringing down the saturation. And I think I wanna also reduce the contrast just a little bit. So there we've done our sky. Now let's try to adjust other areas. I'd like to adjust the bus that's there. To do so, I'm gonna come up to this plus sign, click on it, and I'm gonna see if it can find the subject of the photo, which I consider to be the bus. I'll choose select subject, and it gave me the majority of the bus. But I didn't really want the shadow that's underneath, and even if I did, it didn't seem to give me all the shadow. Let's skip this part right over in here. So let's modify this. Well, whenever you're working with a mask, you always have the choice of adding to the mask, or taking away from the mask. I'm gonna take away from the mask by choosing subtract, and when I do, it'll ask me which tool would I like to use to remove from it. I'm gonna use my brush. And with my brush, I'm just gonna come down here and paint over the area that I did not wanna work on. So we remove it from the mask. And I'll get rid of the shadow that's underneath the middle of the bus as well. And I'll say something like that's good enough. Then I can adjust that area. I'll come down here. And what I'd like to do in this case is I wanna make the dark portion of the image brighter. So I'm gonna bring up the shadows to bring out more detail on the bus. I think the highlights are just a little bit too bright, so I'll bring that down just a little. And then if I really want to control the difference between bright and dark things, that's contrast. I might bring it down as well. And the bus looks to be just a little bit too colorful, so I might bring down my saturation until I think it looks a little bit more natural. All right, then let's see if we can isolate the building. Well if I come up here and tell it I want to create a new mask, let's look at the options we have. Well, one of the options in here is to select objects. Let's see if we can use it to select the building. I'm going to paint, starting right about here, and I'm just gonna give it an idea of where the boundaries are of the object I'm looking to select, or isolate, I should say, and do something about like that. And then just so it knows I also want the middle, I'll paint like this, let go, and let's see what it considers to be the object that's there. Well, it did do not a bad job of isolating things, but it didn't get everything I wanted. Now, I could come up here and say I want to add. And I could try to select an object once again, and just select this thing over here separately, and see if we can add it. But if you noticed, object doesn't always work. So I'm gonna get rid of this mask 'cause I think there's a better way I could do this. I'm just gonna choose delete mask three. And there's a choice in here called background. And background usually delivers the exact opposite of the choice called subject. And since the subject gave me the bus, this should give me everything except for the bus. Let's try it. Then I think I'm going to subtract from that, and I'm gonna subtract the sky. That is gonna give me at least the top portion of the building. And then, once more, I'm gonna subtract. This time I'll use a brush. And I'm just gonna get a big brush, and down here at the bottom, I'll manually paint to get rid of the area I didn't want. Right about like that. Whenever you're taking away like that, you can always hold on the Option key, Alt in Windows, and you're going to be able to paint to add back. Option gives you the option of what you were doing. So if you were taking away with this, when you hold that down, you'll be able to bring back areas you've already taken away. All right, now that I have the building highlighted, what I'm gonna do here is just enhance it. I think I'm gonna bring up my clarity a little bit to get some of the detail to come out. Maybe a little texture as well. And I'd like to see more shadow detail, so I'm gonna bring up my shadow slider. But it doesn't really matter what I need to do here. We're just experimenting with these masks to learn the new features. And one of those was to select objects. And so let's move on to a different image where we might be able to use that and also the other feature we haven't used yet, which is people. In this image, I have my wife Karen. And down here it's recognized that there's a person. If I hover over this, and it's gonna show me what it thinks is the person. And if I click on it, it's then gonna let me either isolate the entire person, or just an isolated area, like her clothing, her hair, lips, irises, the eyes' sclera. I can't say it. That means the whites of the eyes. Her eyebrows, body skin, and facial skin. We've got all sorts of choices there. What I would like to do in this particular case is I wanna work on her clothing. So I'm gonna choose clothes, and I'll hit the Create button. By the way, if you turn on more than one of these, like let's say I chose clothing, I chose body skin, and facial skin. Then, down here, you have an option. If you leave this option turned off, you're gonna get a single mask that includes all of those areas that you turned on with the checkboxes. If you turn this on, though, you're gonna get three separate masks so that you could adjust these three areas individually. And just so you know, that's there. I just wanna work on the clothing, though, so I'm gonna choose that and hit Create. Now, what I'd like to do is actually work on her shirt. And that means I don't want her pants in there. So I'm gonna subtract, and I'm gonna use a brush to do so. And I'm just gonna come down here, get a smaller brush, and paint where I don't want to work. So I don't want to work on her pants. I wanna work on her shirt. Get rid of her camera in there too. There we go. Now, her shirt, if I remember, had a little hint of color in it. And I think it was actually a black shirt on that day. It's hard to see right now, though, because of the red overlay. I can turn off the red overlay by just turning off this checkbox up here, and it'll automatically go away the moment I move one of these sliders. But there's also a keyboard shortcut for that checkbox. It's the letter Y. Y will toggle the checkbox for the overlay on and off. If you forget what the keyboard shortcut is, just hover over the checkbox and pause for a moment, and it'll tell you right there in the tool tip that if you end up hitting Y, you're going to toggle the overlay. So I'm gonna hit Y, just so I can see what my wife's shirt looks like. It does to me look a little bit blue. I think it was really black. So I'm gonna go down here and adjust the temperature, shift it away from blue, and therefore I'm gonna notice a little less of that. And I'm also gonna bring my saturation down, so if there is any hint of color in there, it's not very prominent. Well, at this point, I'd actually like to work on my wife's pants. And let's see how I could do that. Well, we have some new features, if we come up here to the mask. You see this little three dots. When I click there, they've added some choices in this menu. One of them is to duplicate the mask that I have. If I duplicate it, I believe it's gonna retain the adjustments that I applied and apply the exact same set of adjustments on top of what's already there. So when I choose duplicate, her shirt's gonna look less colorful and less blue again. And so you can see saturation and temperature are still in there. Well, up here at the top, there's a little U-turn symbol. That allows you to reset all these sliders to their defaults, and therefore I'm not gonna be applying anything yet to that duplicate. Now, the red overlay turns back on because remember, anytime these sliders are zeroed out to their default settings, then that turns on automatically. And that's simply because, in this menu, this choice is turned on. If you want to, you could turn that off, and then you could use the letter Y to manually turn that overlay on and off, instead of having it happen automatically. Now, I wanted to get, not her shirt, but her pants selected in this particular one. So here's what I'm gonna do. I'm just gonna come in here. We already have the base of this mask as being her clothing. And then up here, I took away from the mask using my brush, and I painted across her pants. Well, I'm just gonna go to the this little side menu, and I'm gonna choose invert. That means act as if I painted in the exact opposite area. So when I choose invert, now we have the bottom isolated instead, and then I can adjust it. And let's say with it, I would actually like to make it more colorful, 'cause I want you to really be able to tell that there was color in there. And I might also want to bring up my shadows to bring out more detail. Now, I noticed the overlay turning on. I can again type the letter Y, or click it manually. 'Cause once you've used the keyboard shortcut to manually toggle it, it sends you into manual mode, where you won't see the word auto to the right anymore. Now, if I hover over this mask, I can see, and I noticed that in there, I can see her camera has some cover on it. So I'm gonna subtract from this with a brush and just come over here and get rid of it off that area. Now, let's say I wanna work on the lantern that's next to her. Well, I go over here to the plus sign, and in this case I probably wanna say I wanna select an object. And I'm gonna get this top lantern. So I'm just gonna kind of go around it like this. And it doesn't hurt to go in the middle. And it'll usually do a pretty good job when it is a blatantly obvious object like that. And maybe I bring up the shadows in order to make it so it's easier to see the detail that's there. And I want to make the detail pop out a bit, so I might adjust clarity, or bring up texture a little bit. Now, if you wanna be able to see before and after with your masks, you have some eyeball icons. There's one up here, and if you click on that, you're gonna see it with none of the masks supplied. Then when you let go, it's gonna turn them back on so you can see what you've done with your masks. If you come down to one of the other masks down below, you can also go to the eyeball. It works a little differently there in that you have a little more functionality. If you just click for a millisecond and let go, then you're gonna disable that mask, and it'll stay disabled. Even if you leave this image and go to another and come back a month later, the mask will still be there, but it will be disabled. Then to turn it back on, just click the eyeball again. That is a momentary, very quick click. If, on the other hand, what you want to do is to just preview what this is doing for a few seconds, then click and hold. And as long as you are holding for more than about a quarter of a second, then when you let go, it's going to turn it back on. It's only if you click and let go instantaneously that you really disable it. If you click and hold, then it's going to be only disabled for the length of time your mouse is held down. It takes a little practice to get the hang of that, though. Then there are other things we can do. We can navigate our masks using the keyboard. Right now you can see that I'm working on this mask because it's highlighted in blue, and more specifically I'm working on this component of the mask, because it's highlighted in blue. Well, watch what happens when I use my keyboard. In order to navigate, you're gonna have to hold on the Option key, that is Alt in Windows, and then use the arrow keys on your keyboard. Now, watch what happens when I use the down arrow key and then the up arrow key. Down and up. I can switch between those two different sections. If I keep going down, it's gonna switch to my next mask. Keep going down, my next mask, next mask. But once it switches to another mask, it stops thinking about the individual components that are in here that make up that mask. Instead, you'd switch between the mask as a whole. Well, there's a way to navigate into it. If, when I'm using the Option key, instead of using the up and down arrow keys, I use the right arrow key, right means go inward a level. So now I'm gonna be working on one of those inner components, and I could switch between those. If I no longer wanna work on the inner component, I use the left arrow. And now I'm out of it. And if you do left arrow even again, it's gonna make it so none of your masks are highlighted. So just remember, hold down the Option key, Alt in Windows, up and down arrow keys to switch between your masks, and if you want to get to the individual components they're made out of, then use the right arrow key to get it to that little indented part, and then you can use down to go them. And when you wanna get out of there, use the left arrow key, and now you're back working on the mask as a whole.
Class Materials
CLASS MATERIALS
Ratings and Reviews
Vincent Zuck
Thank you Ben! This course was very helpful. I definitely learned how to better use some of the new tools in PS, and I now have a firmer understanding of how they work and how to use them. The course is clearly presented and Ben gives a lot of examples on screen. He shows real time editing examples on several rather difficult scenarios, and talks us through his thought process as he does the editing. If one way doesn't work he explains his thoughts on what to try next and does it on screen. This was very helpful. Nicely done! I highly recommend this course!
Ann Wooledge
I love your classes Ben. I don't think anyone explains things any better than you do. However, I worked with updated PS 2023 and PS 2024 and I can find NO cylindrical wrap tool. This would be a great tool for me as I work a lot with product images that require changing the labels. Help!
user-9c856e
I think this class is one we all need! All of the new features are explained clearly and demonstrated. I have been using some of these features already but after taking this class I understand the way to use them to get the best results. Highly recommend it.