Lesson Info
10. Cylindrical Warping
Summary (Generated from Transcript)
In this lesson, the instructor teaches how to use the new cylindrical warping feature in Photoshop to bend an image onto a cylindrical shape, such as wrapping a graphic around a cup. The process involves converting the layer to a smart filter, selecting the warp option under the transform menu, and adjusting various control points to fine-tune the warp. The instructor also explains how to use blending modes to make the warped image look like it's printed on the object. The benefit of using smart filters is that the warp can be easily modified later if needed.
Q&A:
What is the purpose of converting the layer to a smart filter before applying the warp?
Converting the layer to a smart filter makes the warp non-permanent and allows for easy modifications later.
Where can the warp option be found in Photoshop?
The warp option can be found under the edit menu in the transform section.
How can the desired type of warping be selected?
The desired type of warping, such as cylindrical warping, can be selected from the options bar that appears when the warp tool is selected.
What is the purpose of each control point in the warp grid?
- The upper right control point determines the position of the upper right corner of the warped image.
- The lower left control point determines how far down the warp extends at the lower left edge.
- The top control point adjusts the perspective of the warp.
- The bottom control point adjusts the curvature at the bottom of the object being wrapped.
- The middle control point stretches the graphics further around the object.
How can the blended look of the warped image be achieved?
By adjusting the blending mode in the layers panel, such as setting it to multiply mode, the warped image can look like it's printed on the object.
How can the warp be modified after it has been applied?
By selecting the smart object layer and going to the edit menu, choosing transform and then warp, the warp can be modified again.
Lessons
Introduction
05:37 2Redesigned Adobe Bridge
12:11 3Camera Raw Masking
14:25 4Masked Curves
05:12 5Adaptive Presets in Camera Raw
07:49 6Content Aware Remove
07:58 7Denoise
05:16 8Improved Object Selection Tool
05:45Lesson Info
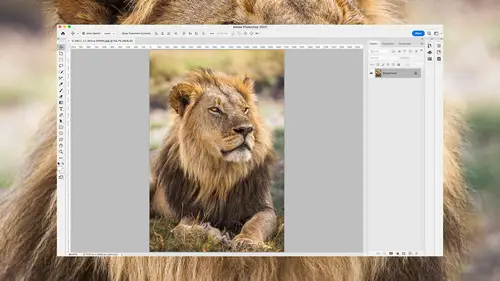
Cylindrical Warping
There's a new type of warping available in Photoshop that will allow you to bend an image onto a cylindrical shape. Let's take a look at how it works. Here I have two layers On the bottom, we have a cup. On top, I have a graphic I'd like to wrap around the cup and I'm gonna do first go to the filter menu and choose convert for smart filters. That will make it so any warping I apply to this layer is not permanent. I can always go back and change the warp. Then I'm gonna go to the edit menu. I'm gonna choose transform, and that's where I find warp. Now I have a grid on top of my image and up here in my options bar I can choose which type of warping I'd like to apply. And the type that's new is at the bottom, it's called cylinder. When I choose it, you're gonna see it bend the image but I really need to fine tune it to get it to match what I'm attempting to bend this around. First, grab the upper right dot. If you grab that and move it, you're just gonna control where does the upper right...
corner end up and I'm gonna decide it goes there. Then grab the lower left and that's gonna determine how far down does this extend but only look at the very lower left of that edge. Don't be concerned with the top or the bottom edge quite yet. Then next, go to the top dot, the one that's in the middle. That's gonna allow you to bend this overall to control kind of the perspective. What angle are you viewing the object from? Just try to get that to match the top edge of the object you're attempting to wrap around. Then grab the bottom dot, and when you move the bottom dot the top one should stay stationary, so you can move this up and down to now get the curvature at the bottom of the mug to match. Finally, there is a middle dot. The middle dot will allow you to take the graphics itself and stretch it further around that mug. If I drag this to the right, it's gonna look as if it's going around the edges a lot more or I can bring it back to the middle to minimize that. Then I'm gonna go to my layers panel, and over here we have our blending mode. If I wanna make it look as if this is truly printed on the mug, I'd probably set it to multiply mode and then I can fine tune any of these settings I'd like, grabbing this top edge. Just know that the top edge when you adjust it will also move the bottom, and so once you move that top edge to get it just right, then you probably need to return to the bottom if you adjusted it previously. When you're done, you can press return or enter or come up here to the top of your screen and hit the checkbox. And because we converted this to a smart object before we ended up doing any warping, I can also go back to the edit menu, choose transform, and choose warp once again. IT'll act as if I never left and therefore I can come in here and fine tune this in case I really need to make some changes. Maybe a client came in and asked me to fine tune a particular aspect of it. Well then, it's not permanent.
Class Materials
CLASS MATERIALS
Ratings and Reviews
Vincent Zuck
Thank you Ben! This course was very helpful. I definitely learned how to better use some of the new tools in PS, and I now have a firmer understanding of how they work and how to use them. The course is clearly presented and Ben gives a lot of examples on screen. He shows real time editing examples on several rather difficult scenarios, and talks us through his thought process as he does the editing. If one way doesn't work he explains his thoughts on what to try next and does it on screen. This was very helpful. Nicely done! I highly recommend this course!
Ann Wooledge
I love your classes Ben. I don't think anyone explains things any better than you do. However, I worked with updated PS 2023 and PS 2024 and I can find NO cylindrical wrap tool. This would be a great tool for me as I work a lot with product images that require changing the labels. Help!
user-9c856e
I think this class is one we all need! All of the new features are explained clearly and demonstrated. I have been using some of these features already but after taking this class I understand the way to use them to get the best results. Highly recommend it.