Lesson Info
7. Denoise
Summary (Generated from Transcript)
The lesson discusses the new denoise feature in Adobe Photoshop and Bridge 2023 that uses artificial intelligence to remove noise while retaining detail in images. The instructor demonstrates how to use the denoise option in Camera Raw, explains the difference between manual noise reduction and the new denoise feature, and provides step-by-step instructions on how to apply denoise to an image. The lesson also covers the limitations of the denoise feature and the creation of a secondary DNG file.
Q&A:
What is the purpose of the denoise feature in Photoshop and Bridge 2023?
The denoise feature is used to remove noise from images while preserving detail.
How does the denoise feature differ from manual noise reduction?
The denoise feature uses artificial intelligence to remove noise, while manual noise reduction reduces noise but also decreases detail in the image.
Can the denoise feature be applied to JPEG or TIF files?
No, the denoise feature only works with RAW files.
Are there any limitations to using the denoise feature?
The denoise feature only works with full resolution RAW files and does not support smaller size RAW files or images created by merging multiple shots.
What is the process of applying denoise to an image?
In Camera Raw, select the denoise option, adjust the amount slider to achieve the desired smoothness, click enhance, and wait for the creation of a secondary DNG file.
How can the difference between the original image and the denoised image be compared?
By zooming in on both images and clicking between them, the difference in detail and noise reduction can be observed.
Lessons
Introduction
05:37 2Redesigned Adobe Bridge
12:11 3Camera Raw Masking
14:25 4Masked Curves
05:12 5Adaptive Presets in Camera Raw
07:49 6Content Aware Remove
07:58 7Denoise
05:16 8Improved Object Selection Tool
05:45Lesson Info
Denoise
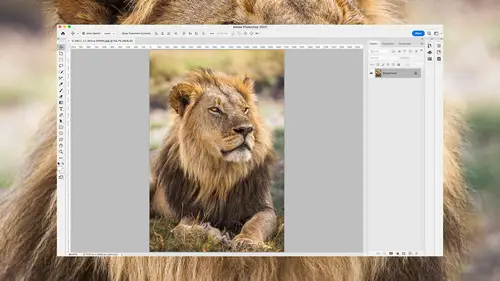
Adobe has added a denoise button in Camera Raw that ends up using artificial intelligence to try to remove noise while retaining a lot more detail. So let's see how it works. So this image is extremely noisy because it was shot with an older camera at ISO 10,000. And so I would like to reduce the noise. Well, it used to be just go over here on the right side of your screen, and there's this area called detail, which there still is. And right here is an area called noise reduction. But you notice that the tools that we've had before are now labeled manual noise reduction. And so let's see the difference between manual noise reduction and the new choice up here called de-noise. So first I'm gonna try to do noise reduction on this image. I'm gonna do that by bringing up the luminance slider, and I'm gonna see if I can make it so the noise is not objectionable. It's at a level that I think is acceptable. Let's say about there. But then there's a slider here called detail, and I usually cra...
nk it up, and then I have to bring it down a little bit just to make sure it doesn't disable the noise reduction maybe somewhere in that area. Well, now when I did that, this ended up reducing the amount of detail in my image by quite a bit. I can find out by coming over here to the choice called detail and turning off this little eyeball. I'm just gonna click there, and you can see the amount of noise that was there. Let go, you can see how I've done noise reduction, but look at the detail reduction that has happened as a result. Look at this area here, the areas out here, and if you compare before and after, you can see that a lot of that detail is gone. So here, let's try the new method. I'm gonna choose the choice called denoise. Now when you do, it's gonna create a secondary file. So you're gonna have both the original RAW file and a brand new file that's in DNG file format. And so let's click it. But this won't work on JPEG files or TIF file. It only works with RAW files. It must be a full resolution RAW file. Some cameras can shoot smaller size RAW files, and other ones can take more than one shot, combine them together to create a larger RAW file. Those kinds of images this won't work with. In here, it shows me a small portion of the image, and I have an amount slider and I can move it down or move it up, and I'm gonna move it until I think the image is looking relatively smooth. Let's say somewhere in that area. Now, if you can't tell which area you're looking at here, you can click this little magnifying glass in the corner. It'll zoom out so you can see the entire image, and then you can click somewhere else, like let's say right here, and it'll zoom up on just that particular area. It only shows you a small area because it wants to make this slider be interactive where it updates the screen right away, and it couldn't do that if it was showing you the entirety of the picture. It would just take too much processing power to update it in real time. And so I'm gonna say maybe about there is what I'd like to use. Then I'm just gonna hit enhance, and that's when it's gonna create a second file that's in DNG file format. In the lower left, you'll find a progress bar, and this text, this says one remaining will go away when that progress bar finishes and we'll end up with a secondary file. So now if I come over here and click this icon, that's gonna allow me to see my thumbnails. I'm gonna have here the original image that is the original RAW file. You can tell that by looking at the top of my screen, and I see the file extension is what I started with, which is ARW. And then if I click on the other one, you're gonna see that it's now a DNG file. This DNG file will be a larger file size than the other one, but now we're going to have much better detail. So let's make sure our original image still has the noise reduction that I applied manually. And when you switch to the other one, you'll see that it zeroed out the manual noise reduction, but it was nice enough to copy over all the adjustment settings to that image with the exception of noise reduction. Well, let's zoom up on these two images. I'm just gonna type command plus until we get up to 100%. In the lower left it tells me the percentage. And then I'll do the same thing to the other one. And then we can click between the two. I'm just gonna click between this one and this one. This is the one using what is now known as manual noise reduction. And I'll click on the other one. This is the new artificial intelligence based one. Now I pushed this up to an extremely high setting. I think it was in the 90s. Most of the time I have it down more like in the 50s for more normal images. But take a look in an area like the area on the right. Before anytime we did a lot of noise reduction, we also wiped away a lot of the detail. But afterwards, it's a crazy amount of detail we can end up with.
Class Materials
CLASS MATERIALS
Ratings and Reviews
Vincent Zuck
Thank you Ben! This course was very helpful. I definitely learned how to better use some of the new tools in PS, and I now have a firmer understanding of how they work and how to use them. The course is clearly presented and Ben gives a lot of examples on screen. He shows real time editing examples on several rather difficult scenarios, and talks us through his thought process as he does the editing. If one way doesn't work he explains his thoughts on what to try next and does it on screen. This was very helpful. Nicely done! I highly recommend this course!
Ann Wooledge
I love your classes Ben. I don't think anyone explains things any better than you do. However, I worked with updated PS 2023 and PS 2024 and I can find NO cylindrical wrap tool. This would be a great tool for me as I work a lot with product images that require changing the labels. Help!
user-9c856e
I think this class is one we all need! All of the new features are explained clearly and demonstrated. I have been using some of these features already but after taking this class I understand the way to use them to get the best results. Highly recommend it.