On Location Shoot: Create a Dramatic Portrait with Strobes
Lesson 23 from: Strobe Lighting on LocationJoel Grimes
On Location Shoot: Create a Dramatic Portrait with Strobes
Lesson 23 from: Strobe Lighting on LocationJoel Grimes
Lesson Info
23. On Location Shoot: Create a Dramatic Portrait with Strobes
Lessons
Class Introduction
06:48 2Develop your Artistic Vision
20:22 3Learn Strobe Basics
19:21 4Which Strobe Is Best For You?
17:36 5Strobe Questions Answered
15:33 6Balance Strobes with Ambient Light
14:27 7The Sunny 16 Rule
16:12 8Choose the Right Modifier for Strobes
28:02On Location Shoot: Overpower Sunlight with Strobes
24:01 10Create Shallow Depth of Field Using Strobes Outdoors
23:49 11On Location Shoot: Portrait in the Shade with ND Filter
21:19 12On Location Shoot: Portrait with Sun on the Shoulder with ND Filter
17:48 13On Location Shoot: Portrait Using Strobes & Wide Angle Lens
14:41 14Shoot: Use Strobes with Props
17:07 15Shoot: Shooting into Sun with Strobes
22:27 16Shoot: Increase Strobe Power while Shooting in Sunlight
10:46 17Understand 32 Bit Depth
20:03 18HDR Bit Depth with Strobes
16:36 19How to Use the CamRanger for HDR Portraits
33:35 20On Location Shoot: Setting Up the Lights in Boxing Gym
13:55 21On Location Shoot: 3 Light Edge Portrait with Strobes
21:45 22On Location Shoot: Portrait Using Top Light with Strobes
18:10 23On Location Shoot: Create a Dramatic Portrait with Strobes
19:26 24Strobes & Textured Background for Character Portraits
09:44 25Shoot: Set-up the Gear for Portrait
16:07 26Shoot: One Strobe Portrait with Gray Backdrop
26:30 27Shoot: One Strobe Portrait with Textured Background
13:32 28Shoot: Using HDR for One Strobe Portrait
08:55 29Setting up Post Production Workflow
16:02 30Photoshop® Workflow: HDR Boxing Gym Portrait Shoot
14:35 31Photoshop® Workflow: HDR Portrait with Stitching
37:51Lesson Info
On Location Shoot: Create a Dramatic Portrait with Strobes
So we moved all the way around the side where he's got, there's a punching bag. There's one on the wall and there's one that he's hanging on. Now our bonus video is when I scrap the whole thing and throw him against a wall and use one light and you'll see how I did that in the bonus video if you purchase, okay? A little teaser there. But again, I think our biggest problem with Rod is his eyes are just like every shot it was like, a little bit of a challenge there. And that's what I was kind of working with trying to get my angle. But you'll see me fiddle with him. And the final shot of that, too, hopefully we'll show you. But looking, I think he looks great looking down, kind of relaxed, right? So let's look at this one, and then we'll again show you kinda how I'm working. All right, so Rod, let's get you positioned. Okay, so, again, as relaxed kind of stare me down. Okay. Okay? Got the sweat going. Okay, so I've got two edge lights. Well this one's kind of not quite positioned cor...
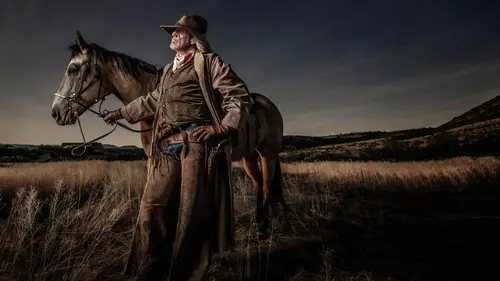
rectly. So let's spin it just a little bit and then let's start our exposures. So we're gonna go, here we go. Let's get in position. This is a little bit wider lens. I am set right now at about 28 mm, okay? On your right hand let's see what we can do. There you go let's try that. Okay, now just shift your whole body that way a little bit on that whole thing. So just I don't want that going outta the back of your head. Right there, okay? Now turn your head straight at me, straight on right there, okay? So this is kind of a wide look here. Let's just see what we got. All right, that's looking pretty good. Now my background. What we can do is if we take and run my shutter to a little longer but we're gonna get this fluorescent funky look, so let's see what happens here. I wanna get a little bit of that writing on the wall is what I'm looking for, okay? So that might be about right. Now if I do my HDR it kinda brings the detail in the black. So that wall's black and sort of a a very weathered white logo, which is kinda cool, right? So let's just, let me just walk this camera towards you just a little bit more. So you got a little bit more of that wide feel, which is ideal. Now I'm at 24 mm, my favorite focal length for a portrait. Okay, so let's try another one, here we go. I'm gonna have to look at my that's too long of exposure. So let's go back to about 1/25 of a second. And I can let my HDR kind of pick up the detail. All right, so that hand is blocking that light a little bit. So let's just look, see right here, let's just shift it, shift this light. Let's get this bucket out of here. All right so we got our six pack, we got your hand, we're in there straight. I want your body, no straight at me. Let's try it straight at me, yeah. Okay. Into the lens or? Into the lens. Stare me down. Yes, yes, yes. Okay, I'll probably unpower this a little bit, the overhead light. And it's barely on. It's like at almost its lowest setting, which is I want drama. This is my zone 3, drama in there, okay? And we're at ISO, well that's my problem, 400. So let's go back down. Okay, so because of the, because the CamRanger leaves it at the last ISO that it takes then I keep thinking my camera's set at and it's not. So that's why I just went through that little... Let's go back to 160 'cause that's where our baseline was right? So we're gonna be dark all the way around now. So let's go back up, let's go back up to about 2 and then we'll go back up to 6 on each one of the lights here. Woops. Okay let's try that. So I have a little more control on my overhead. Okay, there we go. That's pretty dark drama. Yes. So I'm gonna up power number two. So let's up power number two. Give me a little more punch on that and up power number three. Okay here we go. Okay. So, probably went too far on our middle zone. Not enough, it's just too lit. So let's go back down back down to 2.0. Now drop your chin down just a little bit right there. Okay. There we go. Lighting looks perfect. Okay? A little hot on that arm there, but that's why HDR's gonna fix that wrap on his left hand. So I just gotta make sure everything looks good in the background. We have this thing in the background. Is there any way you could shift just a fraction more that way? Whole body? Yeah, whole body. And then maybe, you can move that wherever is comfortable you know? Right about there? Yeah. Okay. Now bring it straight back. Yes. That helps a little bit. Separates that back bag from the back of your head a little bit. Didn't do a lot. Could you go even further? To the? Yeah. Okay, so that means I gotta spin this in like this. Wanna take the bag off? No no no I like it back there, just that... Yeah, there we go. There we go. So now I have the door, the logo, one of the element in the background. Looks pretty clean, everything's there, ready, here we go, just fire one off. So now we're getting ready for our sequence of the HDR, okay? I got a little bit of my light in there, but that's fine I can fix that. And then let's down power this one. That's a little too bright now. Woop, that was all sequences down. Okay, so that's a third down on the back right light, just to make sure that matches a little bit. Okay, still too bright. Go down another, there we go. Okay. It's pretty drama. Okay, so we're building contrast and all that. All right, here we go. We're now gonna do our HDR series, ready? Okay so we got a baseline, 160 ISO. So let's go over to HDR. We have to go back to ISO as my bracketing variable. Three shots. And we want one stop increments. And we're ready to go. Ready, so I'm gonna have you stare down. Ready? Count to three. One, two, three, first one, second one, third one. There we go. Let's take a look at our sequence. Okay, so that's the over. Probably need to drop your chin a little more. A little more? Yeah, a little more. All right. Here we go. Glistener looks great. Ready, counting, one, two, three. First one, second one, third one. I know it's hard to stay still. Yeah it is. It's probably cause you're kinda on the ropes, you're swinging. Okay, so let's take a look again. We got our middle one, and we've got looks pretty good. We've got everything covered there. All right, so let's just, I'm gonna just really... Pretty wide lens so I think I wanna lower this just a little bit. Just a little bit so I'm looking up, which is what I wanna do on athletes anyways, just to change that perspective just slightly because I feel like your stomach is too small and your head's too big. So by lowering it down it kinda gets that plane a little bit tighter. Here we go, ready, stare down. First one, second one, third one. And let me take a look at the sequence here, see if I got what I want, okay? That's a little better. I still think head down a little more. A little more? Yeah. Here we go, ready? Maybe that's too much. You can, right there. Ready? Here comes the first one, second one, third one. Six pack looks amazing. Kinda feel like I'm looking in the mirror. (laughing) Who was laughing back there? Looking pretty good, Joel. Yeah, okay, so... Oh go here. So here's my middle one. Oh that looks killer. So now it feels, it feels more balanced. Your head's not too big. Because that wide-angle lens it's gonna happen where if I get too high your head looks too big. All right, so the six pack looks great, background. So this'll pull in more detail of the background. There was a little bit of movement, no I don't know if there movement. Let's do another one just to make sure, ready? Okay, everything looks good. This is my shot right here, ready? Here we go, count to three, stay still. One, two, three. First one, second one, third one. Okay? And I think in the settings I can maybe speed that clicking up a little bit. And these lights will recycle. But I find that's not bad. Okay, that looks good. Let's do one more chin down just a little bit more. Right there. Ready? Hold still. Here comes the first one. One, two, three. Don't move, don't move, here we go. Stare down. Second one. Here comes the third one. All right this is my shot right here. Yeah. Now do one thing. Just bring this arm out a little bit. Just a tad. Just like... Yeah, that'll make it a little bit bigger, like that. Chin down, chin down right there, ready? This is it. I said the last one was it, but this is really it. Okay? Here we go, one, two, three. Don't move, don't move, don't move, don't move. Second one. Here comes the third one. That's it. That is great. Okay. We're gonna work these up in Photoshop this afternoon in two sessions. So we got our after lunch session, which is the portraits on gray and on that wall, the steel wall, and then we're gonna go in and I'll show you how to process these and make them look like, I guess the Joel Grimes look whatever I do. So question? When I've done HDR with landscapes I always get a lot of noise in the highlights like in the clouds and you seem to have them very clean files here, so is that because you do it in Photoshop rather than Photomatix? I would say the number one problem is that, yeah, you're Photoshop's gonna give you a super clean file. You should not have noise in your highlights. Noise usually shows up in the shadows 'cause you're pulling something out, you know there's no bit depth. If you get noise in the highlights, is when you're talking about a landscape is it an exposure that the clouds are moving? Would you say that? Yeah they probably were actually. And that's probably because, I know exactly why, is because you're doing different time exposures, and Photoshop, or Photomatix doesn't like that movement. And it's overlying, I used to get some funky things going on in Photomatix with my moving clouds. Okay. So if you bracket your ISO you won't have that problem. Sweet. All these things that we're seeing and doing here, you've got cameras behind you filming you, you've got this big audience watching you, and you're solving stuff as you're going. Day-to-day life, you're out there shooting you don't necessarily have a bunch of cameras filming you making a movie about it. Does that affect how able you are to be focused on what you're doing? Or are what we're seeing you do right now is normally how you're working when you're out there anyway? That's a good question. I always say that when I have the cameras and everything's going I typically don't work as smoothly. 'Cause you're thinking, 'cause you're on the clock, right? 'Cause you know, you don't want to sit there and go, hmmm, for 15 seconds and say nothing, right? Like, sometimes I just sit there and look at the thing and go what am I doing wrong or what can I do better? But when the camera's are rolling you feel like the pressure is even on to make a decision right away. And so yeah, it does affect you. Last year when I did a bunch of tutorials we did a whole thing, month shooting, 13 models for MZed. Similar kind of things. You know, we had a lot of shallow depth of field. And my goal was, and my boys actually filmed it. I have two boys that do video. Three actually, we had three of the boys there. Cliff you were there, too. My goal was to grab the model, go out on a dock, and just start shooting and not have it scripted to where the cameras and the filming interrupted my process. So you know the horse, the guy, the cowboy with the horse? That was the same thing. I just said, I'm gonna grab this guy, grab the horse, and I'm just gonna start shooting. You guys film me. And that was a little bit easier for me. But yeah, you're right, it does... It's almost like, a client gives you a little pressure, too, because you're trying to, in a way you're trying to perform 'cause they're watching ever move you make. But it does affect you. So how do I solve that? Well, I'm a teacher, I'm trying to teach things. But here's the good news. The good news is you see me make mistakes and you see me fumble, and I think that's what gives you a little bit of hope, is that I just don't have every decision made ahead of time and go in there and it's all smooth. We could probably film something to make me look like I'm really better than I am. (laughing) But you see the real me, but it's a little bit of a pressure with the cameras. And a second part to that, shooting a hired model versus character like him who's not a model, and do you feel any difference around, do you let them influence that? I mean, hired models they're on your clock. Whereas if you find an interesting character like him, you're like hey can we photograph you for a while? You're taking up his time. Do you feel pressured at all in your mind by I don't want to take too much of this guy's time? Or has that not crossed your... No but I can tell you this. He.. All my models I don't want to beat 'em up. I try to move quickly. But when you get a good model oh my goodness, it just makes life so much easier. And he's not a model but he's a real boxer, he's a real subject. But when I do events or I do live shootings, like even Creative Live, I said when I said I need good models because it makes me look better. Right? He had that little bit deer in a headlight look, which I just, now I'm looking at the images I can see that I could have probably had him squint a little bit, you know, kind of like grit his teeth, squint. It would have probably made him look a little bit better. I don't think I felt like I didn't quite get that. But when he looked down it was great, I mean he didn't have that problem. But good models or good subjects make you look so much better. So here's a little tip and Cliff and I have talked about this a lot that when it comes time to building a portfolio or a body of work or a series of images, and you go out and you start recruiting you can't always get the best models right away, right? The best subjects. You gotta get some images under your belt before you can go out and recruit good models. But the better models you get, and sometimes I pay them a couple hundred dollars, I say find someone, I'd go hey I'd like to do a test shoot, and they go, I don't do test shoots, I don't do trade outs. And you go, well what about $200? Will you come out for two hours, $200? Sure. Well, that $200 is really well spent money. 'Cause you can spend, on just a good night of drinking $200 right? (laughing) I'm not in the bars, but I'm saying, but throw some money at some models to get the good models and it's gonna make your portfolio look so much better. Recruit good models. Or whatever it is. So I photographed the Navajo for two years in the field. I had to recruit, recruit, recruit. You go down to Mexico recruiting subjects. It could be just a simple, very little bit, could be $5 to someone like that. It could be a lot of money. I used to trade out food, flour, sodas, bananas, I had all sorts of things I traded with the Navajo trying to get them in front of my lens. So, good models make you look a lot better. All right, Joel, one final question on the lighting again in this environment of the boxing gym. What did you have to consider with regard to the different, the mixed light in the ambient space and the different kinds of light that may have been in there? So as you start dragging your shutter, that's the old term, drag, your shutters get longer, the influence of the overhead lights start to show up. They are not daylight color balanced, typically. Right, so you had some windows we had some daylight coming through, but when that Tungsten or fluorescent light starts to creep in it's gonna make a color shift. Since I'm color blind I'm gonna have a little bit of an issue with that not seeing it probably right away. I don't see green. So fluorescents usually put out a green. Now I can take that out in Photoshop a little bit if I make it into a black and white. But you have to watch those overhead lights or any influence. I've had where I'm strobing, but I have walls that are not pure white. And I'm bouncing light off those walls, that's gonna change my color temperature. So you gotta put that in consideration as you go and mix those lights. So you watch, I said I took my shutter speed down to like 1/20 of a second and it just had a little too much ambient, or you know the existing light coming in. And I had to push my shutter speed back up and shorten it to cut it out. Great. So in that scenario what I might do, and I've done this, is I take one head and I just throw it into the ceiling a daylight source, and hopefully it bounces back down daylight overall the whole thing.
Class Materials
Free Download
Bonus Materials with Purchase
Ratings and Reviews
Christopher Langford
I love Joel, even though I'm not a big fan of his style. He's a great teacher, really down to earth, and best of all, humble. He's a true professional and knows the business. Even if you're a seasoned photographer, I believe you will pick up some great tips throughout this course. What I enjoyed most from this course was learning Joel's thought processes and how he takes on challenges.
Gilbert Wu
I did enjoy the class despite not being used to the American product placement culture. The British say “the proof is in the pudding”, Joel’s pictures are fantastic and create drama. He has the eye. I like his very down to earth approach which is far better than many youtube photographic charlatans. Apart from the techniques he shared, one very important thing I learned from this class is “Be an artist and not a technician”. If you want to learn from people who can take better pictures and more confident and experienced in his/her work than you, Joel is one of those people.
Dana Niemeier
After seeing Joel at Shutterfest 2016, I am a fan. He is intense, but that is inspiring. I especially like the segment using ND filters as I live in Florida where bright sun can be an issue! His teaching method sets the student at ease. You see him make mistakes and then figure them out! Makes us believe there is HOPE for us in the learning process! I also bought his commercial photography class as an add on. Great to see him work and think on his feet. Thanks CreativeLive for giving artists this platform that reaches out to artists around the globe.