Lesson Info
29. Setting up Post Production Workflow
Lessons
Class Introduction
06:48 2Develop your Artistic Vision
20:22 3Learn Strobe Basics
19:21 4Which Strobe Is Best For You?
17:36 5Strobe Questions Answered
15:33 6Balance Strobes with Ambient Light
14:27 7The Sunny 16 Rule
16:12 8Choose the Right Modifier for Strobes
28:02On Location Shoot: Overpower Sunlight with Strobes
24:01 10Create Shallow Depth of Field Using Strobes Outdoors
23:49 11On Location Shoot: Portrait in the Shade with ND Filter
21:19 12On Location Shoot: Portrait with Sun on the Shoulder with ND Filter
17:48 13On Location Shoot: Portrait Using Strobes & Wide Angle Lens
14:41 14Shoot: Use Strobes with Props
17:07 15Shoot: Shooting into Sun with Strobes
22:27 16Shoot: Increase Strobe Power while Shooting in Sunlight
10:46 17Understand 32 Bit Depth
20:03 18HDR Bit Depth with Strobes
16:36 19How to Use the CamRanger for HDR Portraits
33:35 20On Location Shoot: Setting Up the Lights in Boxing Gym
13:55 21On Location Shoot: 3 Light Edge Portrait with Strobes
21:45 22On Location Shoot: Portrait Using Top Light with Strobes
18:10 23On Location Shoot: Create a Dramatic Portrait with Strobes
19:26 24Strobes & Textured Background for Character Portraits
09:44 25Shoot: Set-up the Gear for Portrait
16:07 26Shoot: One Strobe Portrait with Gray Backdrop
26:30 27Shoot: One Strobe Portrait with Textured Background
13:32 28Shoot: Using HDR for One Strobe Portrait
08:55 29Setting up Post Production Workflow
16:02 30Photoshop® Workflow: HDR Boxing Gym Portrait Shoot
14:35 31Photoshop® Workflow: HDR Portrait with Stitching
37:51Lesson Info
Setting up Post Production Workflow
Photoshop is such a big program that's often overwhelming to the point where people go, "I just can't handle it, I can't, you know, it's too much." Don't be intimidated because you only have to know Photoshop to the point where you can get to where you can fulfill your vision as an artist. That it. You don't need to know every button in Photoshop. And so, as I said yesterday, that the world is not looking for creative geniuses in Photoshop; they're looking for creative, or you know, not creative geniuses, but brilliant geniuses that know technical things about Photoshop. We want a creative force, that's what the lower world is looking for; someone who's an artist. So, I'm gonna go and apply my artistic vision to this image. We're gonna go and show you how I would do that. And so, I'm gonna go and walk this through, and I'm gonna take as little, I can't take two hours, right? So, I have to kind of walk us through. I'm gonna explain as I go. Hopefully, I'm not gonna loose anyone. The cha...
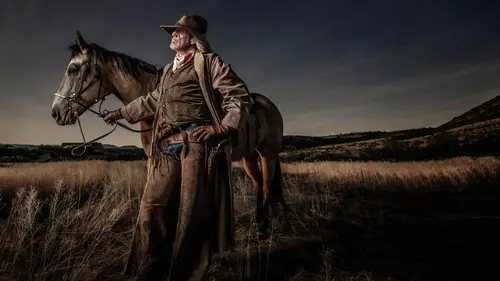
llenge of being an instructor in Photoshop is you don't know your audience, because they have all different levels. And so, it doesn't take long to get up to speed with Photoshop. Cliff, how long have you been doing Photoshop? About two years. Two years, yeah, a little over two years, and he's already better than me. Okay? So, you gotta put the time in. And I've been doing it for a while, I still am leaning things, I still love to learn things. And it's pretty exciting. So we have our three exposures of Rod. These are the raw exposures, raw images coming out of Photoshop. And I can't see this monarch over here in the studio, but it's probably a little lighter than what I've got. But any rate, here we're gonna do. We're gonna pick all three, and we're gonna take this-- Okay, let me explain, there's two ways. Where's my camera? Two ways that I know of in Photoshop to create and HDR. Two ways. The old way, which is, was pretty darn good, is you go to Tools, Photoshop, Merge to HDR Pro. And what that'll do is that'll give you a bunch of dialogue boxes, you walk them through, and you will end up with a 32-bit TIFF, or PSD. PSD or TIFF. Photoshop came out with a new way to create an HDR that gives you a DNG file. And what is that? Well it's a digital negative so to speak. It's a DNG, it's universal. And what it is is, it's basically a raw image. There's no processed crunching of information in it necessarily; it's like you would almost capture in camera. Right? Coming right out of the camera. What's the advantage of that? Well, if I go and stitch an image then I can stitch DNGs. So, remember I told you my goal is to get like a 130 megapixel captures with a portrait, snap, snap, snap, snap. To do 60 by 90 inch prints. When I go do my stitch, I'm actually ending up with 30 megapixel DNG just like I captured out of a camera. It's not a TIFF or a PSD. So, that's like a raw image. No crunching. No, you know, application. So I can go back into raw and work with a raw image, not a PSD or TIFF. It's not bad having a PSD or TIFF, but it's better to have a DNG to work from into raw, in the raw converter, or in Lightroom. So we're in good times, this happened about a year ago that Adobe announced this, and I jumped right on board. Now, the only challenge of this is when you go and process, it allows you to process in 32 bit but you save it as a 16 bit DNG. But I've already got my tones where I want them, so it's not really a big deal but I wish they would save it as a 32 bit DNG, but that's happening. Maybe they said, down the road. So I'm gonna grab all three images, and I am going to go-- I got two options, I can go up the little teeny iris up here it says "open in raw camera," or command R goes straight to raw. Command R goes straight to raw. There it goes. It just-- It's like delayed action here, sorry about that. And then I'm gonna go command A is select all, or you can just use your shift key to select them. And then I'm going to go-- I've two options: The little film strip up here has a pull down, merge to HDR. Or, I can just right-click which is to hold the control down and just go merge to HDR. So that's two options there. So, typically if you right-click anything, you'll figure where in the heck-- You know it's supposed to be where you find what to do. So here we have-- It says HDR merge preview, and I've got my overlay down here checked which shows where there's been some movement. So we had a little bit of movement on his thumb, and a little bit of movement on it looks like his little logo there. Okay? Photoshop I have an option, it says align image. Right here. And I don't want auto-tone, I can do that. Auto-tone, woo. That's gonna like do-- I don't want that. I want mood, so I'm gonna create depth. So if you do that, that's fine because it's just moving your sliders for you. And I don't want my sliders moved yet. But anyways, so the deghost is the movement down here. I can change that to yellow, or whatever color I want, and I am colorblind so it's a color wheel. So I don't know what color I've chosen there, but it's on the blue spectrum somewhere. But that tells me where the movement is if I wanna know. So, I have it on low. So the higher you go, the more it's gonna crunch, and the longer it's gonna take to crunch it and figure it all out. But in this case, I don't think I need more than low. I usually keep it at low. Now, you can test it yourself and say, "you know what? I always got to do it on medium, or whatever is the next one." Yeah. So let's go over here and hit merge. So that's gonna take-- Okay, it's gonna ask me where do I wanna put it. So I wanna put it over here, and we just call this Rod. It says HDR on the end. I'm in Rod's images. Hit save. Now it's gonna crunch it all. And over here on the left, you see a little bar, it's telling you that it's still crunching but it gives you a preview. And it's still spinning like it's gonna, you know, do its thing. So let's do some retrieving here a little bit. We're gonna pull exposure just a little bit. Shadows over to the left. Highlights down to the right, sorry. Get my rights and lefts right. Highlights down. I'm gonna look right in here, that's important. Maybe a little hot spot on his head. So I'm gonna pull my highlights down. Now, I'm gonna build a lot of contrast in this image. But I don't really wanna do it in raw. I'm gonna do it later in part of my-- The Joel Grimes grungy look. So we're gonna pick the-- We're gonna take the clarity over to the right. Now, here is one thing that I've learned: Anything you do in raw is gonna look cleaner and smoother than if you do it later in Photoshop, or if you go back to raw converter later. Cause I'm working on a DNG image, and I'm gonna push my clarity over to the right. And I don't wanna go too far because it gets really gritty, right? So you just kinda gotta figure out from experience that that's probably about where I wanna go. Now, there's a lot of options in here that I can do. I can sharpen it. On occasion, I will go up to maybe 50 amount of sharpening, unless I'm doing a really hight contrast look. I don't work with curves. We're gonna work on a gray scale in a minute. You can create some, you know, fix some distortion. All this stuff. But that's not really important to me right now. I wanna get my base image right right. I don't have any highlights that are really blown out. I can dodge and burn, a little bit. Let's say that chest is a little bit of a problem there, I can go and feather that. I hit the mask. Shows me where that picked up. So let's take it off. Maybe the top of his forehead a little bit here. Things like that I can dodge and burn. Do it in Photoshop, or sorry, do it in raw converter, now is better doing it than doing it later. So, but I got a pretty good base image here. Let me go back to my basic sliders here, and maybe what I do is bring up this exposure a little bit because I'm gonna darken it later. And I still have good detail everywhere I want. Okay? We're gonna say "done". It does not take you to Photoshop folks. So don't panic. It now creates a DNG right there in that folder. So, there's my DNG. Sometimes it doesn't preview-- The preview doesn't catch up, or whatever. But we're double-click on here again, or go command R, takes me back to raw. It's gonna repeat; it's gonna take me there. But now I'm on 16 bit, before I was 32 bit. So you wanna make those sliders and adjustments in the initial steps, not now, cause now you're 16 bit. And we are going to go to Photoshop. So, if you look down here. Let's go back there. I have to always says this, unfortunately. I'm gonna click on this little blue line that says Adobe, you know, that's got a little blue line here. When you buy and purchase Photoshop, it defaults to SRGB, 8 bit. Those are the two worst options that you could pick in Photoshop. And so, why does Adobe do that? I would love to find the person that makes that decision. (laughter) And I would, you know, buy him a cup of coffee and give him my peace of mind. Because I talked to so many people working in Photoshop, they never knew that that's what it defaulted to. So you are now going from 32 bit to 8 bit. (buzzer sounding) Not a good option. So you want at least 16 bit, and you want a color space at that's at least Adobe. Now if you wanna go to ProPhoto, that's probably gonna be a bigger pallette. But most of the things we have today are not capable of working, or reaching that color space. So most people that are really smart in Photoshop will tell ya, "at least stick with Adobe 1998." And down here at the very bottom, I have a little check mark that says, "open in Photoshop as a smart object." See that little word, smart? That doesn't mean you have to be smart. (laughter) That means that it's gonna be smart for you. And what that does, is that gives me the ability to open this. If I don't wanna open a smart, I hold the shift key down. Or if I don't have it clicked and I wanna open in smart object, hold the shift key down. But basically what happens is, it now brings it over to Photoshop as a smart object. And what does that do? Let's see, it's gonna hopefully open up here in a minute. Come one, baby. Where we at? Where's my Photoshop? Its' out there somewhere in space. Come one. It's opening up. It's a big file. It's a Cannon 5D SR, 50 megapixels. Sorry Nikon. I just had to throw that in there. There's processing. So what that tells you is that I need a new computer. So could you talk to my wife? (laughter) I sure can. I've always gotta run it by the person who holds the money in the relationship. So if you look over here, you see a little teeny icon at the bottom of my thumbnail. That tells me I have a smart object. Now, I can create a smart object. Where's that at? Convert to a smart object. But I'm already in a smart object. Now you could have a smart object within a smart object. That's a dream within a dream. You're getting into inception. And I do that on occasion, if I'm in 32 bit, I go from 32 bit the other old way. I can literally go and make a 32 bit into a smart object within a smart object, convert it to 16 bit, apply all the 16 bit options, and then go back to 32 bit and make an adjustment, like maybe cover it to black and white. So that's a really cool way to doing things. But, right now this tells me that I'm still tied to raw. It's tied to momma; the umbilical chord is still connected to momma. All the life, the nutrients, everything is going to the baby. Over here, this is my baby. Sorry Rod. He's probably listening. And so I can go back non-destructively and change something. But I'm gonna do something in a minute here that I've been doing for many years that gives me-- I'm gonna make a duplicate of this smart object, and I'm going to create a duplicate that's separate from this duplicate; so it's independent, so it's not just command J, which is duplicate. I'm gonna go make a-- Where is it here? Covert to smart. No, no, no, hold on a second. I gotta right-click. See, I need my glasses. Did you have a question? Yeah, I did. I was just wondering is there a reason that you're using Bridge in camera raw instead of Lightroom? Or is that just a preference? Yes. Yes. Because I don't know Lightroom. (laugher) You know, it's really one of those things that I really haven't had time. People sat down with me, and I know I've been in there, and I've played around a little bit. The biggest problem for me with Lightroom is that I've had this fear of where are my images. Does that make sense? Yes. So Julianne Cass sat me down and she said, "Joel." And she showed me how to do that. And you actually don't use Lightroom library as a structure, you can just say, "here's my folder, go to Lightroom." I haven't done that yet. Now, the same engine that runs Lightroom runs Bridge. You don't gain anything in Lightroom in terms of basic conversions. Lightroom has more options, it catalogs it, it does some great things, but you're not gonna gain anything by, in terms of ultimate quality. It just gives more options. So I'm teaching in Bridge.
Class Materials
Free Download
Bonus Materials with Purchase
Ratings and Reviews
Christopher Langford
I love Joel, even though I'm not a big fan of his style. He's a great teacher, really down to earth, and best of all, humble. He's a true professional and knows the business. Even if you're a seasoned photographer, I believe you will pick up some great tips throughout this course. What I enjoyed most from this course was learning Joel's thought processes and how he takes on challenges.
Gilbert Wu
I did enjoy the class despite not being used to the American product placement culture. The British say “the proof is in the pudding”, Joel’s pictures are fantastic and create drama. He has the eye. I like his very down to earth approach which is far better than many youtube photographic charlatans. Apart from the techniques he shared, one very important thing I learned from this class is “Be an artist and not a technician”. If you want to learn from people who can take better pictures and more confident and experienced in his/her work than you, Joel is one of those people.
Dana Niemeier
After seeing Joel at Shutterfest 2016, I am a fan. He is intense, but that is inspiring. I especially like the segment using ND filters as I live in Florida where bright sun can be an issue! His teaching method sets the student at ease. You see him make mistakes and then figure them out! Makes us believe there is HOPE for us in the learning process! I also bought his commercial photography class as an add on. Great to see him work and think on his feet. Thanks CreativeLive for giving artists this platform that reaches out to artists around the globe.