Lessons
Class Introduction
06:48 2Develop your Artistic Vision
20:22 3Learn Strobe Basics
19:21 4Which Strobe Is Best For You?
17:36 5Strobe Questions Answered
15:33 6Balance Strobes with Ambient Light
14:27 7The Sunny 16 Rule
16:12 8Choose the Right Modifier for Strobes
28:02On Location Shoot: Overpower Sunlight with Strobes
24:01 10Create Shallow Depth of Field Using Strobes Outdoors
23:49 11On Location Shoot: Portrait in the Shade with ND Filter
21:19 12On Location Shoot: Portrait with Sun on the Shoulder with ND Filter
17:48 13On Location Shoot: Portrait Using Strobes & Wide Angle Lens
14:41 14Shoot: Use Strobes with Props
17:07 15Shoot: Shooting into Sun with Strobes
22:27 16Shoot: Increase Strobe Power while Shooting in Sunlight
10:46 17Understand 32 Bit Depth
20:03 18HDR Bit Depth with Strobes
16:36 19How to Use the CamRanger for HDR Portraits
33:35 20On Location Shoot: Setting Up the Lights in Boxing Gym
13:55 21On Location Shoot: 3 Light Edge Portrait with Strobes
21:45 22On Location Shoot: Portrait Using Top Light with Strobes
18:10 23On Location Shoot: Create a Dramatic Portrait with Strobes
19:26 24Strobes & Textured Background for Character Portraits
09:44 25Shoot: Set-up the Gear for Portrait
16:07 26Shoot: One Strobe Portrait with Gray Backdrop
26:30 27Shoot: One Strobe Portrait with Textured Background
13:32 28Shoot: Using HDR for One Strobe Portrait
08:55 29Setting up Post Production Workflow
16:02 30Photoshop® Workflow: HDR Boxing Gym Portrait Shoot
14:35 31Photoshop® Workflow: HDR Portrait with Stitching
37:51Lesson Info
Learn Strobe Basics
I remember, I was at in junior college, so I took, so I spent a semester or two at junior college, Pima Community College in Tucson, before I went on to the university level, and I remember assisting this guy. Photographer. And, I didn't have any experience with strobes. And I remember, asking him for a book, like a book on lighting, I said, do you have a book on lighting I could borrow and I can read? And he said, hold on a second, let me get it for you. And he walked back into a room, he came back with a Vogue magazine and threw it at me. And I was like, are you serious? He goes, yeah, there's your manual. Now, at the time, I didn't get it. I was like, I want the book. Step One, put the light here, do that, right. And so, and for a number of years, I struggled trying to learn how to use strobe lighting. And it was a mystery. I think I have a title now called, Taking the Mystery Out of Lighting. It was a mystery. Why, when you look at, behind the scenes, a photographer, and they're us...
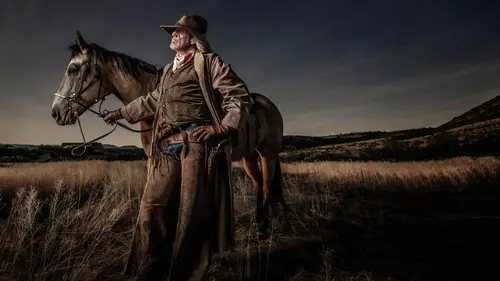
ing an octobox, and it's eight feet from the subject, and it's a five-foot octobox, and you go, oh! So you go out and buy a five-foot octobox, and you put it eight feet from your subject, and your image sucks. Why? Why, what are they doing right? What are you doing wrong? You've got the exact same modifier, the exact same distance, and it's not working. So there's a mystery to it. And so I would look at books, and usually, books had, there's two approaches. One is, they give you a lot of technical information. And your head starts to spin. The other is, they'll show you a picture, like a schematic, of the, here's the picture, but here's the schematic, where the light was, right. And so, but nobody ever, out of all the books I looked at, nobody ever explained the lighting in a way that fit my brain. Which is, what does my intuition tell me I'm doing right. How do I follow my intuition to get what I want. And so, so we're gonna, I'm gonna try and do that, I'm gonna try and get, at least a basic foundation of lighting out of the way, so that you can say okay, I've got the tools. And I always say, I never use a flash meter, because a flash meter doesn't give me what I want it to give me. It is a tool, and there's a point, there's a place for it, I always say, it's in a drawer. Or on Ebay. Get rid of it. I haven't used a flash meter in a photo shoot in 30 years. So when I first started out, my studio handed me a flash meter, oh, I thought that was it. Get my flash meter. And then, and so, there are people that use a flash meter, and they have a purpose for it, and that's fine. I'm not gonna try and slam that, because I get emails all the time. Joel, I have a flash meter. You suck. You're off-base. But, I have a question for you. When it comes to a flash meter, I say a technical instrument can never make a creative decision, that's reserved for the human mind. So a flash meter, if you point it towards your light source, that gives you one reading, or if you point it towards your subject, that gives you a different reading. It's got a dome, point it towards your light source, point it towards your subject. Which is the correct way? So when I started out with learning and teaching, learning how to strobe, I asked a question. Do I point my flash meter toward my subject, or toward the light source? Well half the photographers told me to point it towards the light source, half told me to point it toward the subject. Which is the correct way? Well, the problem is, is that, a flash meter never tells you where to put the light. It never tells you what modifier to put on. Aren't those two really big important things? All the flash meter does, is tell you the value of light, striking that dome. That's it. It doesn't, if you get an f/11. reading on your flash meter, does that, is that what you set your camera too? No. Because you have an edge light, or you have an overhead light, my overhead light, I want about two stops, I wanna do my edgy portrait, we're gonna show you how to do that, I want that about, maybe a stop or two below what would be considered normal. My edge lights, I want maybe a stop over, what would be considered normal. So I could do that, I could say, 11.4, and I'm gonna put out f/16.4, in my backgrounds. And you could do that, you could calculate all that. But I have a much easier way to do it. You snap a picture, look at the monitor. Oh, my light's too bright. Oh, it's too dark. I need to raise my light. The shadows are too long. Gotten shorten the shadows. Gotta fill underneath the chin. Do you see where I'm going here? So what happens is, we try to solve lighting, through a technical process, and we get bogged down. Some of you might be really engineer-minded. And that's fine, but when I teach photography or I teach Photoshop, and I'll guarantee you, someone's gonna email in, Joel Grimes's Photoshop is a train wreck. Happened last time. Cause some people know Photoshop so well, they know every button and everything to do, every shortcut, whatever, and I get up here, and you get people that, you know, that are artists, get up here and they do the Photoshop, and it's a train wreck according to their standards. But I have a question. I had this guy come up to me after an event, and he wanted to make sure that I knew that I was doing all my Photoshop wrong, and he had about 20 people around me, he kept going at me, kept going at me. You're this, and you're doing that wrong, and I said, I want you to do me a favor. I want you to go to Adobe's website, I want you to go to Photoshop, and I want you to go and look under their featured artists. You're not there. (laughter) And I go, you know why they're not there? I've never done this by the way. Is because, nobody cares about technicians. We all care about artists. Says featured artists. Does that make sense? So be an artist. Create images that are art. So with lighting we have to work at the angle of being the creative part of lighting. What's the goal, what's the end result you want? And what does your vision as an artist say? Then you go and you shape light, to match what you are as an artist. And so, does that make sense? So, we don't care about technicians. Unless you're writing a technical manual. You might get hired. We want artists. So think about when it comes to lighting, that I'm gonna give you a bunch of technical information, we're gonna have some technical information here, but remember, we have to frame it within the context, that you're an artist, and with your vision, your intuition is gonna drive you down a path, that's the most important thing. So, it can be overwhelming with all these different things that we have to do, but really, the manual, is, not a textbook. It's life. It's other images you can look at, that get inspired by, that's really the manual. And so that's what I really wanna do, is try and inspire you. So let's look at strobes in this way. When you have a continuous light, we got continuous light coming in here, we used to call them hot lights, cause they were hot, and you start to sweat, and that was the old way of doing things, now we have these LED lights, and different lights that are not, we call hot in temperature. The temperature is probably warming up a little bit in this room, but we say continuous light. So we have a continuous light source, this is artificial continuous light. We have the available light that we have that's all around us, coming in the windows, if we had the windows open, things like that. But a strobe has a flash duration. So, back in the, when I say the 60's, the 60's probably were the first time strobes really came in and hit the market. And, part of that, if you remember, the 40's and 50's, photographers used hot lights, or continuous lights, to do all their photography. And, in those days, they didn't have soft boxes, they had, I would say, maybe in the 60's, umbrellas were used, umbrellas were introduced. Wasn't really until the 80's that soft boxes were introduced. Now I remember making my own soft box, before, I think it was, I can't remember the first manufacturer that made soft boxes, but, really, what the hot light or the movie industry drove it, but the continuous lights, they used flats. So if they didn't have, they had a source, or they'd have a flat, they would throw light into and bounce back. And so, that was sort of the way, and then you know that look of the 40's and 50's, the Hollywood look, is kind of edgy, right. It's a little bit edgier, because they usually just took lights and just, they're rounded sources, that just, you know, hot lights, and that was kind of edgy. But the good Hollywood lighting experts, used a lot of flats. And we still use flats today, but, when strobes came along, it was a flat, a quick duration of light that comes out. It's a strobe, it's a pulse of light, boom. We're gonna talk about that in a minute. This changed a lot, and so, the reason why it changed a lot, is because now you have two variables that have to be considered in your calculation. So with a hot light, you've got your aperture, we say two variables, aperture, ISO, yes, the sensitivity of film, or now digital, but your time. Your time, and your aperture, were all tied into one. Strobe, now you have, it's like splitting one section over here, which is a flash, a quick duration, and the time, okay. Now you got two variables. Now this can be confusing, but also it becomes a huge plus down the road, because now I can separate my subject from my background, or the ambient. So now the ability to separate the two. So, if you have a big hot light outdoors, you gotta have 1,000, if not 10, watt hotlight to overpower the sun. That's like a generator on a semi. To give you enough light, unless it's just really really close to you but, it's a lot of light to overpower the sun. But with a strobe, you now have a time duration, that can help you, aid you, in overpowering the sun. So all of a sudden strobes opened up this new realm, of creative options for photographers, that we didn't have before. And so you have to understand, that how strobes work, and to get this concept in your head as you move forward. It's not complicated, but, most strobes are going to fall where, somewhere around a 1/300th of a second, to up to 1/12,000's of a second, flash duration. That's really fast. And so, you have to understand that concept, all right. So let's go to, that most powerpacks when I started out in the 80's, they were all capacitor driven. Big capacitors that current went into, stored the capacitors, and then all of a sudden you said, let's go, click the button, and boom. It sent out the strobe, the juice into the head, and it would put a big strobe light out. And so, back when we started out, power packs, you had banks, right, and it was a little dangerous because, you had a big old cord like this, that you stuck in there, and when I first started out in Hollywood, assisting, they said, never change from A bank to B bank, unless you take your head and turn to one side. Because it'll shoot an arc of spark into the ceiling, and it happened to me once. And if I hadn't done that I wouldn't be here today, meaning that it was pretty dangerous. But you had big banks with capacitors, and you'd go from Bank A, you could put two heads together, to, it was crazy. Now, it's really simple. We have a dial, we just dial our power up and power down, usually it's a mono head now, not too many packs on the floor, they're still out there, but those are capacitor driven, meaning that it was just a stored amount of energy that was released, and so, the flash duration usually was determined by, how much power you put out. So the more power generally, the slower the flash duration. The shorter the power. Still that kind of that, is today. There's another technology that came along, that was IGBT, and I don't even know what that means, but it's a thyristor, thyristor driven. Thyristor is really probably just the term, it's like a little light switch, inside, that's designed in the strobe, so, that there's a way to turn off that arc of light in the middle of its bell curve, they call it a bell curve. I'm gonna show you that in a minute. But, thyristor technology is typically in your speed lights. So your Canon, Nikon, or whatever brand you have, speedlights, that's generally thyristor driven, or this, ability to take and cut the flash duration in the middle of its output. And the reason why they do that, that was automatic. The Vivitar 283, was the first auto-flash unit, and I was working and going through college, and I was selling these at the counter, I was working a little, kind of like a Wal-Mart, but it was, we sold them. And I would say, this is thyristor-driven flash. Didn't know what that meant, but it sounded good. And, and then later I understood what that meant. But the point is, is that was back in the late 70's, or mid-70's, I was, in '77 maybe, I was selling those, so, that was a new technology that came along. And so, that's important because, we're gonna talk a little bit about that, so we have capacitor-driven, and thyristor-driven type technology, and, this image here, by the way, is, well I'm gonna talk about this a little later but, this is, we're gonna do this technique for you guys, this is strobed outdoors, and it was, I say, full sunlight. It's sunny out, but we're kind of underneath some canopy of trees, but it's like 4:00 in the afternoon, during, wasn't summer months, but pretty close to summer, so the sun was up pretty high, and I'm shooting with an Nd Filter, and I'm getting a shallow depth of field, strobed outdoors. We're gonna show you how to do that later. But anyways, I just wanna show you, that image is done, with that technique. So let's go to a graph. Every instructor has to have a graph of some sort. And so, over here, on Figure 3, I pulled this right off a photography buff's website, he explains all this beautifully on his site, but basically, the strobe goes off, right, and then it peaks its power, and it tapers off. That's a typical capacitor-driven type graph. Over here you have the middle one, you have, where it's, you can see where it's been shaved, cut down. Cut, as it's coming down, and losing power. And so that shortens the, they call it T-Time, T1-Time, whatever, again, I don't even care about all that stuff. The point is, it's shortening my flash duration. So, number three, or Figure 5, the third one over here, that's really short, that's how you get 1/10,000ths of a second, is it just starts to peak up, and boom. You flip a switch, automatically flips a switch, says, enough, and it shaves off the rest of the bell curve, and you get a really short flash duration. So that's how you get a really short flash duration. So, we're gonna talk about, that a little bit, and then there's, some new technologies that are coming out today, so you know the flashes that do the pulsating, you know for high-speed syncing, we'll talk a little bit about that, coming up, but there's also a new technology that's coming out, where companies created a flash, that puts out a bell curve that's longer than your flash sync. So now, it goes, pop, and it stays open, and you can now shoot at 1/8,000ths of a second, and then it stays open as your camera goes across the, you know the shutter goes across the slit of your sensor, it's a little teeny slit, and it stays open the whole time. So now, you can go and exceed your flash duration, or sync on your camera. That's only one company that does that right now, we'll talk a little bit about that in a minute.
Class Materials
Free Download
Bonus Materials with Purchase
Ratings and Reviews
Christopher Langford
I love Joel, even though I'm not a big fan of his style. He's a great teacher, really down to earth, and best of all, humble. He's a true professional and knows the business. Even if you're a seasoned photographer, I believe you will pick up some great tips throughout this course. What I enjoyed most from this course was learning Joel's thought processes and how he takes on challenges.
Gilbert Wu
I did enjoy the class despite not being used to the American product placement culture. The British say “the proof is in the pudding”, Joel’s pictures are fantastic and create drama. He has the eye. I like his very down to earth approach which is far better than many youtube photographic charlatans. Apart from the techniques he shared, one very important thing I learned from this class is “Be an artist and not a technician”. If you want to learn from people who can take better pictures and more confident and experienced in his/her work than you, Joel is one of those people.
Dana Niemeier
After seeing Joel at Shutterfest 2016, I am a fan. He is intense, but that is inspiring. I especially like the segment using ND filters as I live in Florida where bright sun can be an issue! His teaching method sets the student at ease. You see him make mistakes and then figure them out! Makes us believe there is HOPE for us in the learning process! I also bought his commercial photography class as an add on. Great to see him work and think on his feet. Thanks CreativeLive for giving artists this platform that reaches out to artists around the globe.