Lessons
Chapter 1 Introduction
01:26 2Why Just One On-Camera Flash
04:22 35 Reasons to Use Flash
10:37 4Common Flash Myths
06:51 5What Makes Flash Challenging?
04:56 6Chapter 2 Introduction
01:36 7Flash-Strobe vs. Ambient-Constant Light
08:19 8Flash vs. Ambient Light Exposure
03:07Flash vs. Ambient Demo
06:42 10Flash and Ambient Balancing for Natural Effect
07:11 11Flash and Ambient Balancing for Dramatic Effect
04:19 12Flash and Ambient Balancing for Creative Effect
07:10 13Understanding Flash Duration
08:37 14Chapter 3 Introduction
01:34 155 Common Key Light Patterns
08:38 165 Common Key Light Patterns w/ Diffusion & Fill
07:42 175 Common Secondary Light Patterns
08:28 183 Primary Subject Patterns
05:27 19Light Qualities
09:56 20The Inverse Square Law
07:50 21Inverse Square Law in Practice
08:21 22Corrective White Balance
10:02 23Creative White Balance
05:47 24Chapter 4 Introduction
01:58 25On Board vs. Hot Shoe Flash
05:57 26Full Feature vs. Manual Flashes
08:59 27TTL vs. Manual Control
08:12 28TTL vs. Manual Recycle Times
04:43 29Flash Power & Zoom
09:18 30HHS vs. ND Filters
12:29 31FCS vs. RCS
07:11 32Chapter 5 Introduction
01:38 334 Tips When You Must Use Direct Flash
06:00 34Bare Bulbing Done Right
11:42 35Grid Snoot + Direct Flash
06:43 36Mini Beauty + Direct Flash
06:08 37Ring + Direct Flash
07:52 38Understanding Modifiers
09:24 39Direct Flash + Shutter Flash
09:07 40Chapter 6 Introduction
01:55 41Ambient vs. Direct Flash vs. Bounce Flash
14:27 42Silver Bounce
14:27 43More Light Silver
11:02 44Soft White Bounce
15:41 45Overhead Bounce
11:39 46Overhead Bounce + Fill
09:42 47Event Bounce
12:42 48Chapter 7 Introduction
01:38 49Natural vs. Dramatic Light
17:43 50Filling and Refining Existing Light
08:44 51Coloring Light for Corrective Effect
13:33 52Coloring Light for Creative Effect
10:27 53Chapter 8 Introduction
00:43 54Case Study 1 - Dramatic Sunset
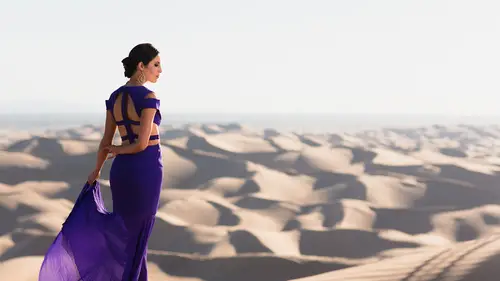
09:45 55Case Study 2 - Desert Sunset
10:04 56Case Study 3 - Sinister Headshot
09:40 57Case Study 4 - Family Portrait
08:21 58Case Study 5 - Athlete Portraits
11:19 59Case Study 6 - Working Angles
07:22 60Case Study 7 - Drag + Composite
08:09 61Case Study 8 - Less is More
07:16 62The Good Karma Jar
01:41 63Favorite Feature Flashes
05:52 64Favorite Manual Flashes
21:35 65Favorite On Camera Flash Modifiers
21:21Lesson Info
Event Bounce
What's up business catches this video is all about event mounts I think I'll talk normally from here on out now if you are a event photographer wedding vote journalist of some sort, then bounce flash is going to be one of your primary tools when you're working in journalistic environments like the one you see here which happens to be at an event and we do a lot of events sorry house we had a wedding, which is a type event but let's talk to this now I want to talk to the tips first cause we're going to basically cover in the different types of gear that we would use for this and you guys going to see the gear list of, you know, the different options and items that you'd have and kind of our preferences will come through naturally as we go through the tips so let's start with the first tip and the first tip is that your best bounce is gonna actually come not from the ceiling, not from behind you, not from anywhere of in the walls, okay, the walls to the left and the right of you. So basi...
cally all we do is we take this flashlight pointed to the side okay, now if you'd like, if you want just a little more angle like the light coming down a little bit, then you point this side and slightly up but this is your first and best option for bounce and then simply all you going to do is point your subject and take a shot you get this beautiful little bounce light fantastic and it's gonna give you direction a light is gonna look great awesome but oftentimes you don't have a left or right side wall to bounce off or what if the left and the right walls they're not neutral colored what if they're dark brown what if they're red what if they're yellow what if they're some color that you cannot use to bounce you're kind of out of luck in that situation sort of well that's when basically we're going to turn to the ceiling so sealing bounces tip number two timbuktu is stealing mount's but it does require a phil and we talked about this earlier and we showed you earlier when we took that shot of jeremiah we use that overhead phil we had no filling his eyes his eyes were base steed dark okay they're becoming what we call a raccoon eyes they don't look good unless you're looking for that scary dramatic look been fine but typically at a wedding nobody wants to look scary dramatic it's just not a thing so what kind of phil are we talking about? Well my favorite is just to grab a farm dog okay you grabbed the phone long and you put it on the flash and you shake it all about I'm just kidding just put on your bus you don't need to shake it all about not necessary ok, so what this is going to do is once this is on the flash head I can now bounce off the ceiling and what's gonna happen is light's gonna come out of this it's going to refract around the circle and it's going to have light pushed around in all directions okay, so is going to push some light forward some of the right sum back and then most of life is still going to go to the ceiling so I can still get a ceiling bounce but this little don't was going to give me phil forwards and all around which will give me much better eyes at a say situation like this so that's great this is fantastic aiken bounce up and now use that what if the ceiling is superb vaulted or what if by chance you're working outdoors well domes like the phone dung and they make cheaper does he talk about all the different brands of domes you could get? I prefer this guy because it's portable compact it has good light transmission and ah well it's nice it's just nice that has a nice river field too it feels fantastic okay but it does come with a dome every single dome every single yet don't comes with a cap I should say look captain, you put on the very top that seals it up basically and instead of letting most light travel up through it pushes the light out forward. The only problem is that is that there's not much difference mean that versus direct flash so if you have a vaulted ceiling or what if you're in rooms that are kind of like pitch black and that's the environment that I want to show you here this is one of those worst case type scenarios what do you do in a worst case type scenario? Worst case scenario is rooms like this where the left wall the right wall, the ceiling and everything around you is all black I don't know why everything was black I think it was because it's like an amphitheater zone like that is a theater is not designed for weddings so everything is black already there's nothing to bounce off or what if you're outdoors at night time and there's nothing to bounce off well you're kind of stuck with a couple options you could direct flash and direct does work and if you keep those rules that we talked about earlier if you want to look natural you expose the background bright brightly now if it's dark keep the shutter speed low one thirtieth of a second go with a low aperture f to f two point eight sixteen hundred thirty two hundred and flash lightly you'll still get decent quality images you do the exact same thing with a dome on you cap it so that the like it's pushed forward but it's gonna look similar to direct flash so how do we get quality lighting in those type of situations in these worst case situations? Oh, by the way just to demonstrate the kind of like quality I was getting I took a shot with the dome okay, now this couple don't do this by the way on just all of your wedding shoots my clients they and our clients at linenger's photography they pay a lot of money to have a shoot their weddings anytime we use anything for educational purposes if we're doing things like that, we have them sign and be aware of it so that you know we're not doing things like just to mess around so what I did right here is while they're getting ready for the shot I took a quick shot with just my dome and I bounced off the ceiling in the think this is to the left where you can see is a tiny bit of light night bounced hard this is like one over one flash power we get a tiny bit of light coming back here and then everybody else you just see like this the room life you don't see anything there's nothing on that side it looks terrible part of the room group is like slightly that I I would venture to guess that their on ly lip because a little bit of the film flash and this pushed forward and that was it okay, the rest is like dawn it's in the black space, this shot looks terrible. So what do we do in these situations? B y o b doesn't sound for bring your own barbecue? I'm making it bring your own bounce, bring your amounts of these kind of situations. So what do you do? Okay, so when working in outside or dark venues or menus with colored walls, bring your own bounce, this is a bounce, right? This is the f stop flash disk. While I love this little modifier, I don't necessarily liketo walk around receptions and ceremonies like this, it's just a little bit too big it's a little bit too in your face for me, okay? But what I don't mind doing is I don't mind holding this and just kind of keeping it near me in my pocket or whatever and bouncing off of it. So what I'll do is I'll just angle my flash like this, and when I take a shot, if the group is standing right there, let's see you guys in the group I'm going to do is point out the group, I'm going to bring my flash right here and his balance right off this guy so now I get this beautiful diffused bounce light off of a little reflector that I'm holding my hand you could do the exact same thing this is what I talked about earlier with this little guy what does this guy that inter fit you could hold it off the side do the exact same thing get a nice little bounce off this guy granted the stopper flash disk is going to push back a little bit more light because it's a white over silver okay this is just a white which is transparent which is going to let a lot of that light through but either way when you're working in dark environments usually your exposure is set with a high I s so so this will still work totally fine but this is what I mean for this balance now using this I'm going around and getting shots like this so whenever we're doing this small groups this is like a journalistic shot they're just in the moment doing their thing. So what is the setting for this bottom middle shot? Well I'm on the twenty four seventy I'm at thirty five millimeters at one one sixty of the second two point eight, sixteen hundred and this is the f cyber flash this bounce at tl which again none of you used t t l don't do it I'm at one sixteenth toe one thirty second power okay and it pushes back enough light to light them up and looks fantastic looks like looks like they pose for this shot right? And it looks like we have studio lighting but it's not just on here and bounced off of that sniper flash disk, but what if I'm working with larger groups this group, this group? Well, in those kind of cases I like to have my assistant carry around just a wide over silver and when I'm doing big group shots if and figure out if it's appropriate for that senior and you know, if I'm doing a high end celebrity wedding, I probably just stick with these small items. But if this is a wedding where people don't mind if it's all about the photos, they love this, I'll have my reflector just my assistant just bring around these foldable westcott reflectors and when I'm ready to take a shot, she or he just simply hold that the reflectors and I bounce off it and get beautiful lighting on these groups and this is just simple bounce flash so very easy, very simple techniques that yield beautiful, beautiful lighting for larger groups and they work in any situation. So remember when you're in a bind there's no wall to bounce off there's no ceiling you're outdoors that dark it's, bad colored walls whatever it is b y o b bring your own bounce if you want to go incognito just use smaller ones that you can hand hold yourself you want to get the best light possible use a full reflector and just usually I'll have my assistant tuck them away so that was pulled him up took him away when we're not shooting we only bring him out for a shot and in between shots I'm not having her hold out the whole time if it's a small in between like journalistic moment I'm using my small guys and I'm doing it myself when it's the large group shot and everybody's ready imposed and ready for the shots I have her hold that by the way what are the camera settings for these? Let me just go over this okay? This is the top middle of top right? So we're at the twenty four seventy again this is around thirty millimeters in focal length one sixth of a second f four sixteen hundred were bouncing at around one quarter toe one sixteenth power depending again on the group's sizing and the distance so if the group size is pretty large on my assistant standing for the back and I'm around one quarter power if the crew a smaller my sentences look closer to me and about one eight two one sixteen power one thing I wanted to mention as well this bottom left shot why did I put an x mark on that guy be careful of reflective surfaces in your backgrounds, ok, but when you have an actual glass or mirror surface, if you're holding up a reflector, you can see right there when you bounce off of it. It's going brighten up and it's going to show in the window, so it seems that happens. Basically, we just turned the group and you just fired an angle where you're not going to get the reflection of yourself firing off the reflector in the shot itself. Okay, so just remember to watch out for those reflective surfaces, so now we kind of covered it all. And by the way, if you're at an event and let's say you forgot, didn't your reflectors? I don't know why I don't know how, I don't know why let's just say you forgot your reflectors. You have no hand held reflectors, you have no large fiveone reflectors well, knowing what we know about light modification now, what could you possibly use if somebody said I got to stop doing that lame pause? That children's video pause, but if you're thinking a white shirt or a white napkin or something that you could possibly bounce off, you're absolutely right, and in fact we now have a standard where in the studio anytime we go to a shoot, we wear white shirts and black ties why? Because often times if I'm in a pinch and I need to get a shot, I'm gonna grab my third shooter or my lighting assistant I'm gonna sit him right next to me on the dance floor and I'll pop a shot right off in a shirt just like this we'll fire right into a shirt firing against whatever subject I haven't I get a beautiful bounce off fisher so it creates a very simple bounce anytime you need it so we just wear white because does actually come in handy at times where you might not have and we always have our gear with us but at times it's just I've got to get a moment it's happening right now and I can't have anybody go running or have something right I wanted to look, you know, kind of intrusive I just want to fire a shot I'll grab my third shooter slash assistant to stand next to bounce off his shirt. You can use any of these in any situation and that's why there's rarely ever a situation where you need to use direct flash unless for some reason none of these techniques have worked and none of them are possible in your current situation then possibly direct flash but rumor the techniques that we did teach you on direct flash as well all right we're doing this video has head on to the next one now
Class Materials
Bonus Materials with Purchase
Ratings and Reviews
Sid
The best class for understanding light and lighting there is bar none. Pye is an excellent teacher and the quality of the material provides for a rich and very informative experience. Pye breaks down the fundamentals in easy to digest packets and then elaborates as needed. If there is one class that you watch this is it! Worth purchasing and saving for future use. I would also HIGHLY recommend downloading the saving the PDF of slides that accompany the videos. Again, and can't say it enough, this is THE BEST video to lighting on Creative Live. A must watch for the novice and the expert.
Petra
Great course, I highly recommend it if you want to become a more confident flash user. Pye is a wonderful instructor and just such a nice guy, it's a pleasure to listen to him
Simon Metselaar
This is the best thing that happened to me since I've been into photography. What a lifesaver. Unfortunately I already payed for some courses that are not Pye, but Pye just nails it. Amazing, and kind of a life hack. Thanks again :)