Lessons
Chapter 1 Introduction
01:26 2Why Just One On-Camera Flash
04:22 35 Reasons to Use Flash
10:37 4Common Flash Myths
06:51 5What Makes Flash Challenging?
04:56 6Chapter 2 Introduction
01:36 7Flash-Strobe vs. Ambient-Constant Light
08:19 8Flash vs. Ambient Light Exposure
03:07Flash vs. Ambient Demo
06:42 10Flash and Ambient Balancing for Natural Effect
07:11 11Flash and Ambient Balancing for Dramatic Effect
04:19 12Flash and Ambient Balancing for Creative Effect
07:10 13Understanding Flash Duration
08:37 14Chapter 3 Introduction
01:34 155 Common Key Light Patterns
08:38 165 Common Key Light Patterns w/ Diffusion & Fill
07:42 175 Common Secondary Light Patterns
08:28 183 Primary Subject Patterns
05:27 19Light Qualities
09:56 20The Inverse Square Law
07:50 21Inverse Square Law in Practice
08:21 22Corrective White Balance
10:02 23Creative White Balance
05:47 24Chapter 4 Introduction
01:58 25On Board vs. Hot Shoe Flash
05:57 26Full Feature vs. Manual Flashes
08:59 27TTL vs. Manual Control
08:12 28TTL vs. Manual Recycle Times
04:43 29Flash Power & Zoom
09:18 30HHS vs. ND Filters
12:29 31FCS vs. RCS
07:11 32Chapter 5 Introduction
01:38 334 Tips When You Must Use Direct Flash
06:00 34Bare Bulbing Done Right
11:42 35Grid Snoot + Direct Flash
06:43 36Mini Beauty + Direct Flash
06:08 37Ring + Direct Flash
07:52 38Understanding Modifiers
09:24 39Direct Flash + Shutter Flash
09:07 40Chapter 6 Introduction
01:55 41Ambient vs. Direct Flash vs. Bounce Flash
14:27 42Silver Bounce
14:27 43More Light Silver
11:02 44Soft White Bounce
15:41 45Overhead Bounce
11:39 46Overhead Bounce + Fill
09:42 47Event Bounce
12:42 48Chapter 7 Introduction
01:38 49Natural vs. Dramatic Light
17:43 50Filling and Refining Existing Light
08:44 51Coloring Light for Corrective Effect
13:33 52Coloring Light for Creative Effect
10:27 53Chapter 8 Introduction
00:43 54Case Study 1 - Dramatic Sunset
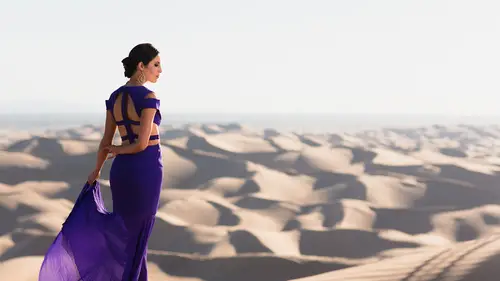
09:45 55Case Study 2 - Desert Sunset
10:04 56Case Study 3 - Sinister Headshot
09:40 57Case Study 4 - Family Portrait
08:21 58Case Study 5 - Athlete Portraits
11:19 59Case Study 6 - Working Angles
07:22 60Case Study 7 - Drag + Composite
08:09 61Case Study 8 - Less is More
07:16 62The Good Karma Jar
01:41 63Favorite Feature Flashes
05:52 64Favorite Manual Flashes
21:35 65Favorite On Camera Flash Modifiers
21:21Lesson Info
Ambient vs. Direct Flash vs. Bounce Flash
Ambient versus direct flash versus bounce flash now this is the first of several videos we're going to show you different balanced techniques to take this on camera flash and basically turn it into studio quality light and you're going to find that it's so incredibly simple in fact it's so simple that that's why we say really there is no need there's absolutely no need to use direct flash unless you're doing it for stylistic purposes, which is what we did in chapter five temper if I was all about stylistic use of direct flash and modification and we learned so much in that usage and in the modification of that light now we're going to take those same principles and we're gonna turn in the bounce flash and we're gonna learn even more so what we're gonna do all we're going to basically is balance off of something we're just going to turn the flash now so it's no longer being directed at our subject and we're gonna bounce off different modifiers around us and this is what this chapter's f...
ocused on is what these modifiers are going to do starting from the top with a v flat. Now in this video we're going to be using what we refer to as a v flat what does a b flat? I have a lovely little piece of paper to demonstrate because an actual b flat is actually quite large, avi flattest, typically around eight feet tall by around four to five feet wide, and so I really can't hold it up with one hand like I could this piece paper it's just a large piece of foam generally it's going to be white it's a neutral colored surface. If you get it from a camera store, it'll have white and will have black, which is fantastic. That has dual purposes, actually, which we'll talk about it a bit. What you do is you take that large piece of foam and you cut it right down the center, and then you tape it together on both sides, and that way you can fold it open and shut and it's going to be able to well, when your story in a way, you just close it up and when you're using it on, set it, simply open it and place it down, and it makes a v hence it's called a b flat b flat is simply like basically a portable wall that can go anywhere with you that could give you ah large bounce a large place to turn a modifier to turn a light into a larger lie. Okay, so if you don't have a neutral colored wall in your studio let's say you were going to do you're like, oh my walls they're all black or in the place that I work I don't have anything like that that's what you get a b flat for because you can take these anywhere if you want to make it be flat yourself well, generally you do have to do a little bit of work regardless, but the cheapest b flat you can get is simply by going I don't need this paper anymore get out of here paper you can go to home depot, pick up a piece of foam insulation it's like ten bucks for a large a foot tall by like four or five feet wide piece of phone it's going to be white basically on both sides and you simply cut that tape it up in the center and you have a v flat if you want kind of a more robust b flat that has black on one side and white on the other side, which is great for what we call flagging light flagging means that you're blocking light in certain situations on we'll get more into that unlike, say, lighting to one in lighting three oh one but if you want one of those it's like twenty thirty bucks to get a large piece of this foam core from a camera shop, so either option you know, thirty bucks I would honestly just go with the camera store one because you have white on one side blacks on the other side is a little more useful overall once you get it, simply create the cut down the middle with a blade taping on both sides makes you don't take it too tight, otherwise it'll only fold one way, then you have a b flat, so let's, take a look at the shots and what the v flat's going to do here. So this first shot, now we are shooting on the fighting mark three again, this time with a twenty four seventy on here and once again, don't get caught up in the gear, use a similar lands you this anybody you've got and you're gonna get a are not even a silver lined the symbol, similar focal length of lens and any camera body and you're gonna get a very similar shot okay don't get caught up in the gear so top left shot this is the twenty four, seventy were at seventy millimeters approximately, and we're at one one hundredth of a second to wait. And so thirty, two hundred, what are we exposing for? We're exposing for the ambient light in the studio, which since we're using the video lights it's not a very good quality light it's yellow it's that kind of dingy it just doesn't look that great now granted if your ambient light is this beautiful light coming from window lighting and so forth that's great use that light to your heart's content and wonderful it's a great quality like but the problem is that a lot of times you don't have that kind of light or you're shooting at times a day where it's dark so knowing these techniques are actually fantastic is you can create this light anywhere you want regardless of how bright or dark anyplace is so this shot's not that great we're losing a lot of detail a lot of color a lot of everything because we're so thirty two hundred by the way all these shots every shot that we show you guys when we show you side by sides they are basically straight out of camera done that way so nothing has been modified and any shots or if we show you something that's been modified if we show you some things in processed it's in process the same way on all three shots okay so nothing here is done in any form of trickery photoshopping like grooming anything like that okay so first shot kind of dingy yellow doesn't look that great second shot we go to direct flash how do we do this? Well same camera set up we went toe one two hundred a second at two point eight and four hundred we go direct flash at tl because we're doing direct bearable flash and you know, great we're not really set for this type of like quality we showed you direct flash done right is when you're setting up for that type of a look based on the style of image that you're shooting, we're not here where I mean he's not dressed and this isn't the type of shoot where we want to use direct flash so it doesn't look good then we go into all the other shots we bust out the v flat here's the first shot with the v flat now this is straight out of camera right here so at one eighteenth of a second f two point eight and eight hundred now depending again on the distance between your working okay, so the distance between the b flat and the model you're going change your power sayings from basically from here on out anytime or bouncing I prefer to be using manual okay any time I'm bouncing anytime using this kind of modification I'm always using man, but if you want to use tl fine do it not gonna tell you what to do just use many but I gave you that option here so if you want you can use detail but if you start to run into issue just remember switch over to manual and I'd recommend switching over anyway because it'll give you more consistent results so on manual, we're going to be roughly around one eighth toe one sixteenth power and again, this depends on how much light you're sending into this v flat and the distance of that b flat to the model, so if it looks a little bit dark powered up a little bit if you don't know where your light is going, okay, like let's, say, for example, this is the one of my favorite techniques if I'm bouncing off of this side and roughly, I think it's in the right positions and everything, I don't really know if I got it right until actually fire the shot and my shutter speed really slow right now only speed that up and when I do fire the shot that's that's when I know where the light went, so how can I see where the light's going before I even take a shot? Well, on every camera there's going to be a little test flash button right here, which will make the camera or make the flash basically flicker like this. So what I can do is I can use this, turn it on and basically adjust the position of this to get it to hit my modifier and the bounce into the model, and I can actually see it on the model when I do the tests. So it's the best way especially when you're working in it doesn't work as well when you're in super bright environment outside because it's difficult to see that little flash test it's not that powerful but it's powerful enough if you're shooting close but inside you can see it perfectly and you can use this essentially as a modeling light to get that light perfect on your subject before you shoot so I would use that light press that little button to get your little flash test and you're good to go so with that at around one eight two one sixteen power based on my distance we take our first shot and this is that shot and compare this to both of these we have soft, beautiful light rimmer think about what you're like modifiers doing right avi flat a large white object what is that doing well I'm bouncing into that and it's just basically taking my light source and it's opening up it's creating a bigger light source and it's white so it's going to be defused versus speculum so what comes back a soft light that's defused okay and that's what we have here look at that softness of the shadow rap like where it wraps from bright area to darker area over the forehead what am I doing with my model? I'm having him tilt his nose, tilt his chin into the light source so that we were short lighting him okay, beautiful rap, beautiful light all over him in his face. And this right here, this first top shot is kind of more rembrandt lighting. We have a little bit of a highlight underneath I but it's kind of in between rembrandt and split it's not one hundred percent split lip because we have some light on the other side of his face is not quite rembrandt, because we don't have that full kind of highlight underneath the guy, but it's it's pretty closely in between those two, but it looks great, by the way. Then we go down into the process, but I want to show you what these look like when they're processed. This was straight from the camera when I process this because we're we don't necessarily have as much control over bounce as they would like if we set up a two three light off camera light system and, like, gritted and flagged everything, which we'll get into enlighten to one and three oh one. Well, we need to do a little post to kind of refine where the light's hitting so basically, all I'm doing is we're burning down, some of these edges were burning down, the edges were kind of deepening, it were darkening and just a little bit all that's done in leg room. It's, simple graduated filters and radio filters just kind of burned down the edges and pull attention into him. It kind of make a deep and dark once we haven't applied to one, we just simply copy and paste it across that entire set. And this is where it comes down to. Why do we shoot manual, flash and manual everything else on your camera? Because we want that consistent results with that consistent result, we take one finished image, and we paste the same develop settings across everything. And we're done it's simple, it's. Easy. But with each one of these, I just have him moving his face into a different position here is looking over and down to the right here, he's looking into the camera a bit more he's, turning the body little bit. We did a nice sequence of shots, brandon in this, and we kind of have these beautiful dramatic portrait with just a simple v flat. So, what are the primary tips in this section? Well, number one, you need to bounce off of a neutral color surface. Okay, number two, remember that the brighter the color of the surface, the more light that's going to come back, so a bright white is goingto give you more light back than, say, a more grayish toned all right remember also that if you're bouncing off a colored service you will get colored light back if you're bounces red yeah you're gonna get red light back okay it's not gonna look good all right number three rumor that again when it comes to your modifier silver is speculator and matt is diffused what's interesting is is that the phone call that we get from the camera shop features a white mat versus the foam insulation that we get from home depot has a piece of plastic over the white so it creates a little more of a speculator light because it's white but it's reflective white so remember that's going to make a small difference in whether the lights a little bit more diffused or little more speculator okay number four it further the distance the less light and remember that inverse square law states that it's more light loss than you think it isthe at double the distance you're at one quarter the power just rumor that number in your head ok number five use your aperture for the deputy field so how do we approach a scene like this? Well first I always decide what might happen to be just based on my depth of field in my composition for this shot I went to f two point eight so for the actual set up for these shots were at one eighth of a second two point eight and eight hundred next I choose a shutter speed based for ambient light up two one, two hundred seconds that's where my sink's been cut off his right for this scene I don't really want any ambient light but one eighth of a second half to eight hundred I'm not really getting much at all ambient light if I do want to create a mixture of ambient and flash what I could do is just slow down the shutter speed a little and then I get a mixture of those two this actually works incredibly well if you are say shooting with window light but you need a little bit of a flash to give you a little boost now you use your flash but let's say the window light and the flash they're both fifty five hundred kelvin right? They're both the same color temperature if I want a little more fill light on the face I can use the ambient light by simply slowing down the shutter speed it's a really fantastic trick that works very well okay so shutter speed based on what you want that and you like to look like up to one, two hundred a second and then simply we decide on eso based on number one image quality that we desire from our shop we know based on whatever camera that you're using, you'll know what that cut off is whether you know it might be so for her where you get decently usable shots maybe on your camera you have a hundred on a five day mark three or full frame camera oftentimes eso sixteen hundred thirty two hundred sixty four hundred is totally usable I based off of image quality and number two is how fast do I need my flash to recycle okay so I base it off of flash power if I'm shooting portrait and I'm shooting a lot of different looks and we're shooting quick one two one two and were shooting fast to get all the different expressions that we want I want to run into flash power that number one my batteries can recycle in time and number two that my flash doesn't basically overheat after say fifty, sixty shots or whatever so I leave the eyes on this around a hundred okay that means that I can run at one eight two one sixteen flash power and have totally enough light toe light my subject and get enough light in the scene so that's my decision process when I go into a shot like this again starting with aperture for composition and depth of field and then going to shutter speed for ambient light and then going toe so to decide okay what flash power versus image quality balanced I want tohave all right so that's it for this video and hopefully you all saw how basic and simple it was turning an on camera flash into a lie large studio quality light to get these beautiful, dramatic portrait's let's, go ahead and move on to the next video. No!
Class Materials
Bonus Materials with Purchase
Ratings and Reviews
Sid
The best class for understanding light and lighting there is bar none. Pye is an excellent teacher and the quality of the material provides for a rich and very informative experience. Pye breaks down the fundamentals in easy to digest packets and then elaborates as needed. If there is one class that you watch this is it! Worth purchasing and saving for future use. I would also HIGHLY recommend downloading the saving the PDF of slides that accompany the videos. Again, and can't say it enough, this is THE BEST video to lighting on Creative Live. A must watch for the novice and the expert.
Petra
Great course, I highly recommend it if you want to become a more confident flash user. Pye is a wonderful instructor and just such a nice guy, it's a pleasure to listen to him
Simon Metselaar
This is the best thing that happened to me since I've been into photography. What a lifesaver. Unfortunately I already payed for some courses that are not Pye, but Pye just nails it. Amazing, and kind of a life hack. Thanks again :)