Lessons
Chapter 1 Introduction
01:26 2Why Just One On-Camera Flash
04:22 35 Reasons to Use Flash
10:37 4Common Flash Myths
06:51 5What Makes Flash Challenging?
04:56 6Chapter 2 Introduction
01:36 7Flash-Strobe vs. Ambient-Constant Light
08:19 8Flash vs. Ambient Light Exposure
03:07Flash vs. Ambient Demo
06:42 10Flash and Ambient Balancing for Natural Effect
07:11 11Flash and Ambient Balancing for Dramatic Effect
04:19 12Flash and Ambient Balancing for Creative Effect
07:10 13Understanding Flash Duration
08:37 14Chapter 3 Introduction
01:34 155 Common Key Light Patterns
08:38 165 Common Key Light Patterns w/ Diffusion & Fill
07:42 175 Common Secondary Light Patterns
08:28 183 Primary Subject Patterns
05:27 19Light Qualities
09:56 20The Inverse Square Law
07:50 21Inverse Square Law in Practice
08:21 22Corrective White Balance
10:02 23Creative White Balance
05:47 24Chapter 4 Introduction
01:58 25On Board vs. Hot Shoe Flash
05:57 26Full Feature vs. Manual Flashes
08:59 27TTL vs. Manual Control
08:12 28TTL vs. Manual Recycle Times
04:43 29Flash Power & Zoom
09:18 30HHS vs. ND Filters
12:29 31FCS vs. RCS
07:11 32Chapter 5 Introduction
01:38 334 Tips When You Must Use Direct Flash
06:00 34Bare Bulbing Done Right
11:42 35Grid Snoot + Direct Flash
06:43 36Mini Beauty + Direct Flash
06:08 37Ring + Direct Flash
07:52 38Understanding Modifiers
09:24 39Direct Flash + Shutter Flash
09:07 40Chapter 6 Introduction
01:55 41Ambient vs. Direct Flash vs. Bounce Flash
14:27 42Silver Bounce
14:27 43More Light Silver
11:02 44Soft White Bounce
15:41 45Overhead Bounce
11:39 46Overhead Bounce + Fill
09:42 47Event Bounce
12:42 48Chapter 7 Introduction
01:38 49Natural vs. Dramatic Light
17:43 50Filling and Refining Existing Light
08:44 51Coloring Light for Corrective Effect
13:33 52Coloring Light for Creative Effect
10:27 53Chapter 8 Introduction
00:43 54Case Study 1 - Dramatic Sunset
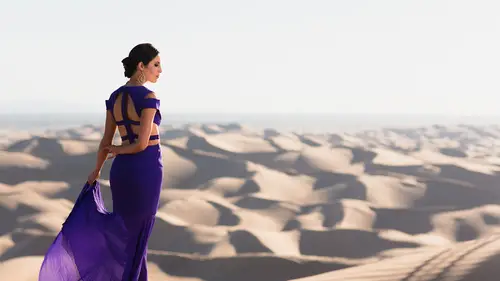
09:45 55Case Study 2 - Desert Sunset
10:04 56Case Study 3 - Sinister Headshot
09:40 57Case Study 4 - Family Portrait
08:21 58Case Study 5 - Athlete Portraits
11:19 59Case Study 6 - Working Angles
07:22 60Case Study 7 - Drag + Composite
08:09 61Case Study 8 - Less is More
07:16 62The Good Karma Jar
01:41 63Favorite Feature Flashes
05:52 64Favorite Manual Flashes
21:35 65Favorite On Camera Flash Modifiers
21:21Lesson Info
Case Study 7 - Drag + Composite
case study number seven are shuttered drag plus composite company seal. This is gonna be an awesome twirl because what we gotta focus on a bunch of we're kind of putting a lot of things together in this, and part of it is compositing we're not gonna go too deep into We're gonna explain in very simple way, and we're gonna come out with full composite tutorials and Photoshopped later on. So you guys understand exactly how these things were done. But for those who have a little bit of Photoshopped experience, you'll know exactly what we're talking about. It will be make total sense. We'll talk about the shot, though, And the approach of the shot Now we have Matt and Laura were set up for this nighttime shot and this is a classic. Linenger's a shot where we slow down the shutter, we get the cars driving by and we get this motion, this beautiful shot and everything, but oh, crap. We have no cars. Yeah, it is past rush hour. We're shooting like around seven PM ish right as the sun is setting...
and there's really not a lot of cars in downtown. And while generally we would shoot this all in one shot to get this all in one photograph. You actually need cars traveling on both sides of the street at the same time. They don't know Slattery moving quick, but there needs to be cars there. We didn't have that. So we have these kind of sparks cars coming a little on the left side than a little bit on the right side. Now, we could sit there and wait for that perfect kind of left and right cars to come, but that might take or 30 minutes to do that. And we know how to composite and with a correctly done composite, it takes maybe all of five minutes to put this together in photo shop and have a final image that perfect. So what does that require? Well, it needs a few different things. Okay, So Step one is to basically get our what re refer to re refer to I can't even talk right now. It's because we're too videos away from the completion of this entire workshop. So Stember One, we take our plate photograph. Now the plate is basically the shot that we're going to well based. The entire image on. Okay, so we put the camera on a tripod, we take the plate shot. That's the base for the entire photograph. And that's the photo after. Used to kind of blend everything in two. Sometimes your plate can include the subjects. Sometimes it doesn't include the subjects in this one I thought would be great to include them because we'll keep it very simple. And I just want to add to additional shots on top of that, and we're done. So how do we shoot this plate shot? Well, we're using a tripod. And my favorite budget tripod is a me photo Globetrotters 200 bucks. You could even get the smaller ones. The road trips which even less expensive. But the Globetrotter, if you have a full frame DSLR like a larger one like, say, a canon or Nikon and you have a, uh not the mere list was meals. One you can use a smaller tripod, but I'm talking about mirrored DSLR set up there a little bit heavier, the Globetrotters just going a little bit better. Um, but my favorite is the me photo girl Globetrotter Carbon fiber. And that's the guy that I like to use because he's my favorite. He's super light, just as good of weight and supporting everything as the standard Globetrotter. But it's a little bit lighter travel, but of course it is a little more expensive. It's 300 bucks. But we found that the meat photo try ponds. They are the best bang for the buck. Okay, so, yes, you can spend. There's a lot of really great tripod makers out there, like, three legged thing. Really? Right stuff, But, you know, spending like 1000 or 1200 bucks. And given that we don't necessarily take care of our equipment the way that we should, it gets expensive very quickly. If you have to buy $1000 tripods, these are fantastic value for the quality that you're getting. So let's move up. We're using a Westcott were using to Westcott 40 inches, just the white over silver in this case. Okay, so, 71 we shoot for the couple, we pose them right in front right here. And this is our plate were using a faster shutter speed so that basically we don't get any motion blur in them. OK, so for a faster shutter speed we're using either. Ah, higher I s o or were opening up the after to allow more light in. Either way, let's look at the settings for this first shot. The play down here, We're on the 24 millimeter lens. This is the 24 70. I think we use actually a 24 1.4 prime in this one. But either way, whether using 24 70 anything in millimeters is gonna look identical of this at 1/ of a second and F four and I so 800. Okay, so we're at one time of a second at one side of a second with flash. If you take a few shots that generally, it's quick enough that you're not gonna get motion in the couple years. Tell them hold perfectly still and they can hold it for 1/10 of a second. It's very simple to get that shot. And maybe you want one. Take two or three just to make sure that their their tax sharp. But we're f four and I saw 100 are flash is set, Teoh. Let's see. 1/4 to 1/8 Power ish. Okay. Why? Over silver bounce, all right, and then the balance is coming from camera, right? You can see based on the shadows, and it's kind of coming Just held up a little bit. So it's coming top down and getting a really nice, beautiful light on them. It looks fantastic. Their skin looks great. It's a nice soft and diffused light because we're using the white side and it's a large reflector, so it looks great. Beautiful. We have that shot now. We need to get the other shots to basically blend. We need to get the cars going along the left side of the street and then the car is going along the right side of ST. So what do we do? We slow down the shutter. We slow down the shutter to, let's see, two seconds. We went from 1/10 of a second or two seconds where f four, and we bring the ISO down three stops. So we go from ice 0 804 to 201 100. And what were essentially trying to do is balance out the exposures between these three shots. If we can get it right on and basically your you might need to do a little math in your head, or you can just get the exposures close and you can fix it in in light room. But ideally, you want to get these exposures right on. So that way, when you get it in the light room, all you do is you apply the same process across all three of them, and you take it in the photo shop to do with some basic masking. If the exposures are a little bit off, it's OK, because when you're in light room, you can balance out the exposures basically by brightening one darkening another and so forth, but really try to get it as close as possible. If the exposure there significantly off, then it will ruin your composite or it's gonna ruin the quality of your composite. Okay, so when the cars go by on the left side of ST, we shoot for those. I don't need a couple in the shot here because I already have my play image with a couple. When the cars go along the right side of the street, we shoot for that and we're done. We have all three of our shots now combining them is as simple as taking all three of these files. We apply our developed settings across all three. Balance the exposure inside of leg room if we need to. And we take all three of these into Photoshopped inside a photo shop, I apply a basic mask. The plate goes right on the bottom. I put these two on top players. I do a basic mask where I just show this part of this image the right part of this image and the rest is all the plate, and it looks like it's one seamless shot. That whole process takes all of five minutes if it's shot correctly and we'll have full tutorials on compositing. But it's kind of a separate, you know, tutorial from where we're at right now. But what we've done is combined a lighting 11 technique with compositing to come with a really fantastic shot. This looks like off camera flash based on the car lights behind them. It looks like she has a little bit of a hair light are seen in our background. Looks fantastic because we're doing a little bit of a shutter drag. So we pick up this blue and the lighting from the buildings, and everything looks fantastic in this photo, yet its basic on camera flash. It's done with very minimal photo shop, and we're getting everything, almost everything in camera, except for just the overall masking. The very end. Could you do this in real life? Absolutely. But you need the cars to be on both sides of ST. You've been traveling a little bit quicker because generally, when I try and do this all in one shot, I don't like the shutter speed to go below 1/2 to 1 second. That means the car's gonna be moving a little bit quicker if they're stuck in traffic again. Your best bet is to shoot the couple separate and then do the left and the right and then combine all three of them. So hopefully enjoy this case study. Let's head on to our final video next
Class Materials
Bonus Materials with Purchase
Ratings and Reviews
Sid
The best class for understanding light and lighting there is bar none. Pye is an excellent teacher and the quality of the material provides for a rich and very informative experience. Pye breaks down the fundamentals in easy to digest packets and then elaborates as needed. If there is one class that you watch this is it! Worth purchasing and saving for future use. I would also HIGHLY recommend downloading the saving the PDF of slides that accompany the videos. Again, and can't say it enough, this is THE BEST video to lighting on Creative Live. A must watch for the novice and the expert.
Petra
Great course, I highly recommend it if you want to become a more confident flash user. Pye is a wonderful instructor and just such a nice guy, it's a pleasure to listen to him
Simon Metselaar
This is the best thing that happened to me since I've been into photography. What a lifesaver. Unfortunately I already payed for some courses that are not Pye, but Pye just nails it. Amazing, and kind of a life hack. Thanks again :)