Small Changes That Make a Big Difference
Lesson 7 from: Up to Speed with Lightroom ClassicBen Willmore
Small Changes That Make a Big Difference
Lesson 7 from: Up to Speed with Lightroom ClassicBen Willmore
Lesson Info
7. Small Changes That Make a Big Difference
Lessons
Lesson Info
Small Changes That Make a Big Difference
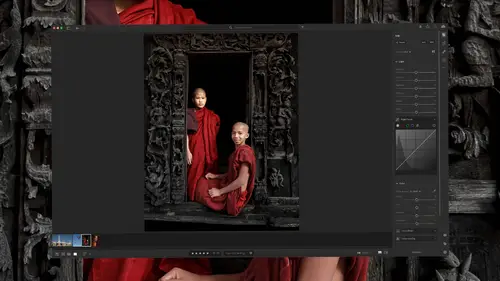
Adobe has made a bunch of small changes to Lightroom Classic, but they're not things that are necessarily easy to discover. So to make sure you didn't miss anything, let's dive in and take a look at what they've changed in areas that you might have to search for to find but they can make a big difference in how you work with Lightroom. Whenever you go to the map module, or the web module in Lightroom Classic they have now updated the web browser that is used internally to generate what you see on the screen. So you might see that being a little bit different. If you use a Wacom graphics tablet, you're gonna find that it is more responsive when working in the newer versions of Lightroom Classic. Then they have new file format support. So if you have any images that are in these three file formats, you can now import them and view them within Lightroom Classic. Now these file formats are not common but they are designed to eventually replace the file formats that are most common today an...
d that would be jpeg and ping. Those two file formats are not as efficient as they could be in these more modern versions of similar file formats can produce much smaller files at the same quality level and often offer a lot more features like transparency and possibly more than one image contained within a single file, that type of stuff. Now you might be wondering though, why are they offering this support? Because currently you cannot save images in these file formats from either Photoshop or Lightroom Classic but you can save them from Adobe Camera Raw. So if you have Photoshop and you open an image through Adobe Camera Raw, now there is a little share icon in the upper right of the camera raw screen and if you click on it you get to this screen that I have a screenshot of here. And if you look down where you have the file format, you're gonna find some of these file formats are now supported with Adobe Camera Raw and so, Adobe wanted to add some support. So if you happen to save an image out from this screen that you would be able to work with it in Lightroom and I'm sure they'll add more support for these particular file formats in both Photoshop and Lightroom in the future. There is a new preference if you go into the external editing section of Lightroom Classics preferences, and that is if you have more than one version of Photoshop installed you can have more than one because you could have an old version of Photoshop where let's say the 3D features are still fully functioning before they started to remove them and maybe at certain plugins were available in an old version that are no longer supported in a new version. Or maybe you want to use the beta version of Photoshop 'cause it has some features that are not found in the main version. Well now you can specify which version you would like to use here when you're opening an image. Now if you work on an Apple machine, Macintosh, then if it's a newer M one or M two chip inside your machine, you're gonna find that scrolling through thumbnails is much faster because they've updated that to use native code for that particular type of chip. Then they've changed the way the panels look in Lightroom when you're in the developed module, it used to be to the the left of the name of each one of the adjustment panels that are there. You would have something that looked almost like a light switch to turn that section off or on. You can still get to those old light switches if you hold down the option key a Mac or Alt on Windows then the new eyeball icon will disappear and will be replaced with the light switch. But what these eyeball icons do is they are bright if that section of adjustments has been changed so they're no longer at default settings and therefore, they're contributing to the final look of your image. Whereas if a section has an eyeball icon that is darker, it means you haven't moved any of the sliders that are found in that section. Therefore, if you want to find out why your image looks a particular way, you only need to look at the sections that have bright eyeballs because you know those are the only sections where you've actually made a change. If you look at the icons that are found above all those panels where you can make adjustments, then there'll also be a little dot below each tool that has been used. And in this case you can see that only the far left icon has a dot below it. That means I have not performed any cropping on this image and I've not done any retouching, I've not done any masking or anything like that because there would be a small dot below each of those tools if I'd used them. Now with those little dots, you might find on occasion that the one underneath the retouching icon and the one underneath the masking icon might turn red and that means you've done something to your image where one of your masks or your retouching might need to be updated to look its best. And so if you ever see a red dot below one of those two tools, then go into that particular tool and it'll usually be an AI based mask or other feature that needs to recalculate based on the changed version of your picture. Then we now have a new choice. If you select more than one image in Lightroom then you can go to the photo menu and choose edit in which is where you usually go to send an image to Photoshop. But we have a new choice and that's called Open as Smart Object in Layers in Photoshop. And in the past we had the choice of open as a smart object but if we had more than one image selected when we chose that, we would just get more than one file open in Photoshop as separate documents. With this new choice, we can now have it stack more than one image on top of each other as layers in a single Photoshop document. That can be very useful if you want to stack multiple images and apply different raw settings to them and make other kinds of changes that can utilize smart objects. Now we have a new choice when we're making presets. If your preset supports it after applying an adjustment preset within the developed module on the left side of your screen just above that section of presets, you're gonna find an amount slider. And that amount slider does not range from zero to 100%. If you look at it right now, you notice it's right in the middle and it's at a hundred. Well, that's because it goes between zero and 200%, and therefore, you can kind of push a preset beyond what it might have originally been designed to be used at. Now in order to get that preset slider to show up, whoever creates the preset when they're making the preset by clicking the plus sign that you see on my screen just to the right of the word presets, one of the options you're gonna get is down at the bottom and it just says support amount slider. If they've turned that off, then the amount slider won't be usable. And so, only those presets that have that turned on are going to allow you to use the slider. There are new adaptive presets and I believe I mentioned those a little bit earlier but I just wanna bring 'em up separately here because it's easy to kind of skip over them and that is any preset that you see in the presets list that has the word adaptive at the beginning of it, those are going to isolate areas within your picture using the new artificial intelligence based masking. So they're gonna be able to isolate things like the sky or the foreground. Also, if it's one that has to do with portraits, it might isolate the hair, the eyes, the skin separately, so therefore it can apply smoothing to skin and sharpening the eyes, that type of thing. In previous versions of Lightroom Classic, if you ever used and one of the artificial intelligence based masks and then you copied and pasted your development settings to another picture and or you synced them to another picture or there's a button called previous when you switch between images, if you did any of those things that would transfer your adjustment and masking from one image to another, it used to be that it wouldn't automatically update those masks and therefore if you use something like a Select Sky adjustment, then it you'd have have to manually update it but now in the new version it will automatically update when you use those features. Now, there is a way to force update them just in case they don't because on occasion they might get confused and not quite work right, and that is on a Mac you do Command + Option + U. On Windows, that's Control + Alt + U. Also, when you're in the masking panel, there's a new option and that is if you go to any one of the masks in that panel and you go to the right of the mask there's usually three little dots and if you click on the three little dots, you end up getting a menu. And one of the new choices in here is called duplicate and invert mask. That can be nice where let's say you made a mask that isolated your sky. You tweak the sky and now you want to adjust everything else. Everything except for that sky. Well choosing duplicate an invert mask would suddenly isolate the opposite area and so it can be useful for a lot of things. Before it was much more difficult to do things like inverting a mask, but they've added those choices now within the menu There's a new crop overlay. Anytime you're in the crop tool, you can go to the tools menu at the top of your screen and there's a choice in there called crop guide overlay and you're gonna find all sorts of choices in there so that whenever you use the crop tool you'll get a different visual appearance for the cropping guides that are on your screen. The new choice that's in there is called fifths and that's when the divides your image up into five regions, both horizontally and vertically. And it can be useful when you're working on architectural images because the one that is more of thirds like the rule of thirds ones, sometimes they're just not enough guidelines in there to make sure that you're really getting there on the verticals of the building just right. There's a preview file that's inside the same folder as your Lightroom catalog file and that file gives larger and larger as you import more and more images into Lightroom. Well, Adobe's now added a feature where it automatically behind the scenes starts discarding previews for images that you have not looked at in eons, and they're just trying to make it so your Lightroom catalog folder does not become too bloated and unfortunately, they don't give you a lot of detail as to exactly what is considered to be an obsolete preview but it is something that'll start happening and therefore, your previews file might end up becoming much smaller. Then whenever you're viewing an image in the library module or the developed module and you have it where it's filling a good portion of your screen in the library module, you can do that by pressing the space bar and whenever you're in that view, it's what's known as loop view. It used to be that if you were to control what type of overlay you had by going up to the view menu and choosing loop overlay or choosing view options, that whatever choices you set up would be consistent when you switch between the library and the develop module. Well now they've made 'em so those settings are independent between those two modules because it might be when you're in the library module, you don't wanna see a bunch of clutter on top of your images, but when you're in the developed module, you want to be able to see things like overlays of what lens you were using or other information. Well, now you have that control because the settings are separate for the library and the developed module. If you go into your preferences in the general section, there are some new choices in there where in order to access them you have to hold down the Option key in a Mac that's Alt if you're in Windows. And if you hold on that key, you are going to find the setting on the right of this screenshot will appear. If you don't have the option key held down then you'll only see one button in that section. But holding down Option and clicking that reset all preferences and relaunch is what you can do any time you find Lightroom Classic is acting oddly, there's just something where it doesn't seem to be working right and you wanna see if it happens to be that the preferences file got corrupt. And it happens on occasion, but that is a new option. It used to be that you'd have to relaunch Lightroom and hold down some weird keys in order to do this. Then they've made changes in the masking panel that I didn't cover earlier so I want to cover them now. The smaller stuff. You can now hold down the Command key on Mac, which would be Control on Windows and click on one of the choices in the masking panel for an existing mask, and if you do, it's gonna de-select that particular mask and therefore the adjustment sliders on the right side of your screen for the mask will no longer affect the area you were previously working on. And instead, you're gonna be pre-loading an adjustment for the next mask you're going to produce. So if you want to say that you're done working on one mask and you wanna preload some settings for a new mask, hold down the Command key, Control on Windows and just click on the name of the mask that you're done working with. Then you shouldn't have anything selected within the mask panel and you can pre-load your settings. If you hold on the option key, which is alt windows and use the arrow keys in your keyboard you can now cycle through the different masks that are in the mask panel to quickly navigate between them. Also, when you get to the bottom of the list it'll just loop around if you press the keyboard shortcut again and bring you to the top mask. When you hover over a mask on the right side you should find an eyeball icon. If you click on that eyeball icon, you're going to disable the mask, if I remember correctly. If you just click and let go very quickly, you're gonna disable that mask. Whereas if you click and hold your mouse, then you're only gonna temporarily disable it for the length of time you have your mouse held down. When you release it, it should become enabled once again. So a quick click will disable it long term where you'd have to click it a second time to reenable it or you can click and hold. Now, when you adjust the adjustment sliders you're gonna find they're a bit smoother in their performance. If you use a Wacom tablet and most Wacom tablets pretty much have two surfaces you can use the tip that you usually use for painting and then if you flip it around, it's supposed to act like an eraser. Well, it used to be the Lightroom would ignore that. You flip it around and now it's actually gonna erase if you use the backside of the pen. There's also improved support for pressure sensitivity. It used to be that your results wouldn't look smooth, they'd look kind of blotchy, and they've fixed that. They've also made it so any small quick touches to the tablet are going to be recognized now whereas before, they were often ignored. If you ever select more than one image, let's say you select 500 images, and you make a change to metadata. Metadata would be things like the rating for an image, the label for an image, or you put in a caption or some other text on the right side of the library module in Lightroom. It's now much faster. Also when you go into the map module and if you try to move around and zoom in, it's going to be much more responsive as well. And when you go to the print module the preview that you see for the image should be of higher quality. When you shoot tethered, tethered is when you would hook your camera to your computer using a USB cable and then when you capture an image, it would automatically be imported into Lightroom. Well, when you go in there and you start that process it usually brings up this screen and at the bottom we now have a new choice called disable auto advance. What does that do? Well, let's say you are taking pictures, you're at the camera and someone else is at the computer looking at the images like let's say a client right after you're capturing them. And it might be that they're adjusting them in real time, maybe they're adjusting white balance, sharpening and other things. But in the past, if the photographer took another photograph Lightroom would automatically switch to the newest picture that was captured, and so suddenly if somebody was working on the previous image, they wouldn't be looking at it anymore. Well, now you have the choice down there to disable auto advance and therefore, you'd have to manually use the arrow keys in your keyboard or click on the various thumbnails down in the film strip to switch between images and it would no longer automatically switch as another image is captured. Therefore, if you want to be adjusting your images you can finish one off and then switch to the next. I find it useful to hold on the Command key, Control on Windows and use the right arrow key to switch between images. Therefore, if you're in a tool like the crop tool you can still do that and it'll ignore the arrow keys. When it comes to cropping it will only switch between images. That's if you're holding on the Command key and using the arrows. You can now swap what you see on the right and the left side of the developed module or other areas. You do that in your preferences in a section called interface and there you have the choice to do it only in the developed module. Therefore, if you're left-handed you might want to have your developed sliders on the left side of your screen or you can do it to all of them, and that's a new option. Now, if you ever have the filter bar active you can get to the filter bar by typing Command F, Control F on Windows or it's usually right above the thumbnail images in the library module unless you've hidden it. Now, if you want to add a brand new column to the right or left of an existing one, you can click on the little column menu that's on the right edge and there you're gonna find new choices for adding columns to the left or right of the column you're clicking on. And if you look at the film strip that's usually at the bottom edge of your screen which is a nice way to switch between images when you're in the developed module, print module, or other areas. Well, it used to be that we couldn't really filter what was found down there to limit the number of images we're viewing, but now we can. And when you go to the filter bar at the bottom of your screen, on the right side is the new option for filter and it doesn't have as many options as you would have in the normal filter bar that I showed you a few moments ago that is above the thumbnails in the library module. But what you can do there is choose presets. Those would be presets that you created from the other filter bar the one I was showing you a few moments ago and you do it right from that new popup menu. So there you have it. Those are all the small changes that I can think of that Adobe has recently made in Lightroom Classic.
Class Materials
CLASS MATERIALS
Ratings and Reviews
a Creativelive Student
Excellent coverage of all the updates in Lightroom. Ben Wilmore is an amazing instructor.
Petra
What a great class, thank you Ben!!
Eric Baim
Concise, clear, and invaluable. Great information not just on the new features but when and how to use them, and their strengths and weaknesses.