Lesson Info
4. Masked Curves Adjustments
Lessons
Lesson Info
Masked Curves Adjustments
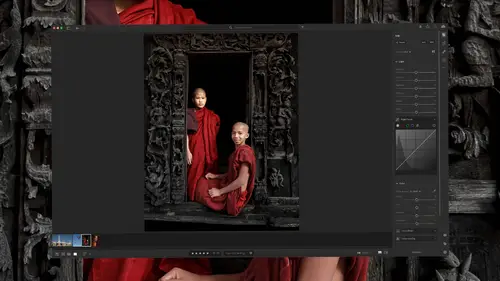
There's a new type of an adjustment you can apply through a masked adjustment, and that is you can use curves. Curves is what I consider to be the most powerful adjustment in all of Photoshop. There's so much you can do with it, it's crazy. But it's only useful when you can apply it to an isolated area, and you couldn't do that before in Lightroom, but now you can. Let's see what you can do with curves masked adjustments. Here goes. So in here, let's say I wanna isolate the person on the right's clothing. Well, we can do that with our masked adjustments. Here I am in the masking tool and here's person number two. If I hover over it, I click there, and I wanna get the clothing. There we go. Hit create mask. Then I would like to shift the amount of red light that is in that clothing because I want the person on the right's clothing to look a little bit more colorful and more like the person on the left. I'll turn off the show overlay check box here so you can compare the two, and you can...
see that this doesn't have as much color. So I'm gonna use curves. That would be one method for doing it. And in curves there's this little kinda donut symbol, and if you click on it, that means if I click on my image, measure the amount of red, green, or blue that's in that area, and then allow me to drag up to increase it or down to decrease it. Or you can work on this white dot, which means only adjust the brightness. Well, in this case I want to adjust the amount of red light that's in there. So I'm choosing red. I got that little donut thing turned on. So now when I click over here, I can just click on my image, and I'm just gonna drag straight up to add more red light, and I can add a ridiculous amount, or I can take it out, and it'll look different colors. But in this case, I'm just gonna push that up a bit. I can fine tune the other colors if I'd like. It might be that I want to go to green and see what happens if I might end up reducing green or increasing green a little bit to shift the color just a little bit further. It all depends how comfortable you are with curves. I've used curves for 30 years, so I'm used to it. So let's show you a few of the things we might be able to do with curves. Well, here I want to adjust the amount of contrast that is in this wall, and unfortunately the contrast slider in Lightroom only considers things based on 50% gray. What that means is if you increase contrast it says let's brighten areas that are brighter than 50% gray and let's equally darken areas that are darker than 50% gray. But the separation point between what is brightened and what is darkened is 50%, which isn't always useful. So what I'm gonna do in this case is let's create a new mask and let's tell it to work on the background. Hopefully that gets what we want, and I think it did. Then let's go over here and use curves. In this case I don't necessarily wanna shift the color of the background. That means I don't wanna play with this blue, green, and red. Instead, I only wanna play with the white dot. That means only adjust brightness. Then I'm gonna turn this little guy on by clicking on it, and I'd like to see my image instead of this purple overlay. So I'm either gonna turn off that overlay checkbox or type the letter O to turn it off. Then I can come in here and dial in exactly what I'd like to work on. I wanna work on two general things. I'm gonna come in here and click on the brightest area, like right here, click, and that's gonna add a dot to my curve. And maybe I add the dot just so I don't accidentally change things that are that brightness. Then I'm gonna come down here to a dark area, and I'm gonna then push straight up or straight down to decide exactly how bright I want it to be. But then, let's say I think the highlights should be a slightly different color, but not the dark parts. Well, that's when I would switch to one of these. Now, here you might see red, green, and blue, but there's also an opposite of each of those colors, and the opposites are cyan, magenta, and yellow. And what that means is decreasing one of these colors would send you towards the opposite. And it'll show you that if you click on each one. If you click on red, you notice up here it looks more reddish, and down here it's the opposite of reddish, which is cyan. You go to green and up here you see green, so if you increase the amount of green light that's what you get, but the opposite is magenta. And then you go to blue, and you can see it's blue and yellow. So what I'd like to do in this case is make only the highlights of the background become more yellow, and not these dark areas. So I work over here on blue, 'cause that's where I can see the yellow color. I'm gonna click on the dark portion of my image, the area that I actually do not want to change. Therefore I lock in its current brightness. By adding a little dot there it's not gonna move. Then I come over here to my highlights, and I click, and I'm gonna drag down a little bit. Down means bringing it a little bit closer to yellow, but don't move it too far. You can make a huge change by moving it a big distance. Most of the time it's a very subtle change, and it might only take the littlest bit of the movement of your wrist. Now let's make another adjustment. Let's come up here and let's select people. And what I'd like to do is, the kid on the right side, he's got a shiny spot on his face, up on his forehead. I wanna reduce it. So I'm gonna select people. I'll go for person number two, and I'm gonna say give me the facial skin. I'll choose create mask. And now let's figure out how we could do this in curves. Well, what we would need to do is reduce the amount of light in the brightest portion, and there's a few ways of doing that. If we work on this little white dot, that means only brightness, we could come over here and grab the adjustment symbol, come over here, click on his forehead, to say do not change this, meaning lock in the brightness of that area. We might even come over here to a dark area and click to lock that in as well. Then the upper right is where the brightest areas are. That's actually where white is, and I could try to bring that straight down. When I do, watch the highlight on his skin, I'll zoom up, so you might be able to see it a little better, and just keep an eye on this area. And let's see what happens when I start to pull this down. Do you see that highlight mellowing out? But the problem is it mellows out and it looks like it's either becoming gray or maybe a little bit greenish. So it's not really the color that I want. So if I wanna shift the color, what I could do instead is go over here to red, green, and blue, and adjust them individually. What I might do is, I think that I want more yellow, or I should say less blue in there, because the opposite of blue light is yellow. So here I'm gonna work on this. Again, I got this little hand, or hand... this little icon active. I'm gonna click on what I don't want to change, this medium tone and this dark tone, and then I'm gonna grab the upper right dot. That means the absolute brightest information, and I'm gonna pull it down. Watch the bright part of his skin. You see it becoming darker and more yellowish. I might need to do the same thing over here. This is green, and the opposite of green would be magenta. I might need a little bit more magenta in there. Once again, I would click on what I don't wanna change, his forehead and the dark part of his skin. Then I can grab that upper right dot and just start pulling it down. And there I start seeing a little bit more of that color appearing. I can also come in here to white, just like we did before, and bring it down a little bit. And now I think I'm getting an okay looking result on his forehead, but I might not like it on his cheeks. Well, that's when you come up here and you have the choice of adding or subtracting, or if you hold on the option key Alt in Windows, you can intersect. I'm gonna choose intersect, and I'm gonna intersect it with a brush. That means I'm now gonna paint in where am I going to limit this. So I'm gonna limit it to just right there where I didn't like that bright spot. And if you wanna see before and after, I'm just gonna click on this little eyeball here. There's before, you see the bright spot. There's after, without. And that's the kind of an adjustment that can be relatively difficult if you don't have access to curves. I could do an entire multi-day class on how to use curves. So here you're not gonna get like an in-depth exploration of it. I just wanna let you know, if you know anything about using curves, we can now apply it through a masked adjustment in Lightroom Classic.
Class Materials
CLASS MATERIALS
Ratings and Reviews
a Creativelive Student
Excellent coverage of all the updates in Lightroom. Ben Wilmore is an amazing instructor.
Petra
What a great class, thank you Ben!!
Eric Baim
Concise, clear, and invaluable. Great information not just on the new features but when and how to use them, and their strengths and weaknesses.