Creating and Applying Adaptive Presets
Lesson 3 from: Up to Speed with Lightroom ClassicBen Willmore
Creating and Applying Adaptive Presets
Lesson 3 from: Up to Speed with Lightroom ClassicBen Willmore
Lesson Info
3. Creating and Applying Adaptive Presets
Lessons
Lesson Info
Creating and Applying Adaptive Presets
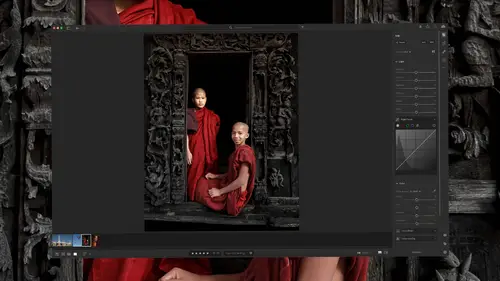
Now that Lightroom Classic has artificial intelligence based masking tools, we can utilize those when we create and apply presets and therefore presets can suddenly isolate areas like a sky, skin, teeth, the whites of somebody's eyes or many other areas. Let's see which presets that come with Lightroom utilize that feature and how we can create our own. Here I am in Lightroom's developed module. I'm gonna go to the left side of my screen which is where I can find my presets list. And within the presets I have a bunch of sets of presets that I've created myself. But then if I continue scrolling down, you're gonna find a section of presets here that have the word "adaptive" before them. Anytime you see adaptive, it means that it's using artificial intelligence based masks. And here's one called portrait. If you just hover over one of these it will take it a moment but then it'll preview it on your image and you can see that the detail on your skin's been exaggerated. That's not a pleasan...
t thing to do to somebody. But if I go one up there to polish portrait, you can see the face change quite quickly. And when you're doing this, it's usually isolating many different areas within the image. So don't just look at the skin. You can, when you go up to glamour portrait, notice that the eyes, the lips and other areas change. Just look at the lips and you'll see that in the glamour portrait they become more red. And we can come down here and just whiten teeth if that's all we need to do or any of these others bringing out the texture and the hair. And I'm gonna click on one of these. And if I do something like whiten teeth, I can come down on top of that and texture the hair as long as they don't use the same artificial intelligence based mask. Instead, it's masking a different area. I can still do that. So in this case, I don't think it's gonna be able to enhance clothes very much cause there's not very much to be seen there, but it might be able to find some. If we switch to a different image and we come down to this area called adaptive sky, you're gonna find a bunch of presets that will work only on the sky. A lot of these will be overdue things like blue drama and dark drama, but there can be some others that can be interesting like this one, storm clouds, doesn't look bad. And we also have sun and sunset if we have an image that that would be appropriate for. I also have an area here called adaptive subject, and with that I can hover over at each of these areas and I can see the subject of my photograph changing. I think I like this one called cool soft. After applying a preset, you can go to the right side of your screen and click on your mask icon, and there you will find what that preset did to your image. And here you can see it did a select subject and then you can inspect what it did to the image. It ended up shifting the temperature in this case towards blue, and it ended up making the image look soft by reducing both texture and clarity. If you want to create your own adaptive presets all you need to do is, here, I'll delete my mask to start from scratch. Let's say I want to start off by adjusting the sky. And whenever I work on a sky, let's say that I like to bring up clarity a little bit to bring out the detail in the sky, maybe since in the majority of my images, the main subject matter in the image, I usually end up bringing down the highlights on it and I want to compensate by bringing them up on the sky. And therefore, if the image as a whole has its highlights setting turned down, and that's really common for what I do, then this will compensate for it to kind of counteract what might be applied to the main image. Also, skies are where you often see noise and that's because there's not usually all that much detail, at least in a blue sky. And the sharpening that is applied by default settings ends up exaggerating any noise that's there. So what I might do here is take the texture slider and reduce it a bit. That's gonna soften that a little. And also I'm gonna take the choice called sharpness and I'm gonna bring it down. And I think the default that's being applied to the whole image is negative, or is positive 25. So setting this to negative 25 should counteract that but we should double check first. I'm gonna scroll down here and these are the settings that are being applied to the image as a whole. If I come down here to detail, I can see that, yes, the default setting for sharpening is 25, and now, by having this mask with a sharpness setting of negative 25, that will perfectly counteract what's being applied to the whole image so the sky ends up having no sharpening whatsoever. Now that I have the settings I'd like to apply to skies. I might come over here to the left side of my screen, go to my presets and just hit the plus sign. I'm gonna tell it to create a preset and I'll end up putting this one in user presets and I'm just gonna call it "Ben's Standard Sky Adjustment." You might put the word adaptive at the front so you know that it ends up using those kinds of masks if you'd like. And what I'm gonna do down here is I don't need it to apply all these things to the image so I'm gonna choose check none. Then over here on the right side, I see the choice of mask and I've named mine just mask one. You can double click on these to change their names. And so you could have done that and if so this would have a more meaningful name, but I'm just gonna turn that on. So the only thing I'm saving is that particular masked adjustment. Then down here at the bottom, I have a choice of support amount slider, and if I have that turned on, then after applying this preset, this slider over here on the left side will be available and I can dial in either at a stronger strength or mellow it out. So I'm gonna end up choosing create and let's see if this works. I'm just gonna take this mask and throw it away by choosing delete all masks. And then, then I'll come over here to my user presets. These are sorted alphabetically, and I think I might have called that "Ben's Standard Sky Adjustment." If so, this is the one, and if I click on it, it's gonna apply it and you can see the mask appear over here in my mask panel. Finally, I can go to the left side of my screen and there we have a mount slider and I can increase the effect or decrease it or if I decide I like it just as it is, double click on the slider, should reset it to 100% right in the middle. Finally, if I wanna make changes, let's say I want to come up here and change the name of this so it does have a useful name. I'll just call this "Ben's Standard Sky." Click okay, and I could come over here and tweak any of these settings. Maybe I like to lower the contrast just a tiny amount. Then if I wanna update my preset over here on the right, all I do is hover over it without clicking. I right click, and there's a choice right there called update with current settings. This pops up again and I'm just gonna use the same settings I used before, click on update, and now if I ever apply this preset to an image in the future, it will have the more meaningful name and the upgraded adjustment.
Class Materials
CLASS MATERIALS
Ratings and Reviews
a Creativelive Student
Excellent coverage of all the updates in Lightroom. Ben Wilmore is an amazing instructor.
Petra
What a great class, thank you Ben!!
Eric Baim
Concise, clear, and invaluable. Great information not just on the new features but when and how to use them, and their strengths and weaknesses.