Lesson Info
12. Dynamic Range
Lessons
Class Overview
05:08 2Getting a Grasp
03:55 3Pop Quiz!
03:57 4Quality of Light
20:41 5The Effective Size of Light
35:07 6Creating Contrast with the Position of Light
24:51 7Controlling Shadows (1+1=2)
06:29 8The Inverse Square Law
22:04Angle of Incidence and Reflection
13:24 10Specular Highlights
26:26 11Parabolic Shapes
18:22 12Dynamic Range
08:54 13Creatively Correct Exposure
12:03 14Metering Is Not An Exact Science
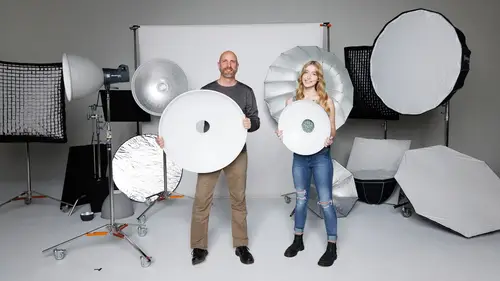
32:21 15Flags and Reflectors
32:05 16Let’s take another look at modifiers
11:12 17Reshoot Challenge
46:44 18Mark’s Favorite Modifiers
40:32 19Pop Quiz Review
14:23 20Class Wrap-up
03:34Lesson Info
Dynamic Range
it's time to talk about dynamic range and dynamic range according to science is the difference between the smallest and the largest amount of gray that a system can represent. Also the difference between the lightest highlight and the D max maximum density in the system. What does that mean? Well the difference really what that means is it's the difference in the darkest and the brightest point in an image. And so um and how much you can sort of show in your image. And so you have like this is completely black and this is completely white. And under these lighting conditions you can see the black and the medium gray and the white. It works just fine. So this is the range that we can show but that's not how life works. And so in the real world you have really really bright things like the sun or light coming in streaming through a window from the sun. Or maybe you have bright headlights and then you have maybe a dimly lit room or something like that. And so in photography a lot of times...
we struggle to show all of those different levels of light. And so I've got some charts here. Let me just show you these. And so our eyes can see about 24 stops of light. So from the blackest black if you go twice as bright that's one stop twice as bright again, that's another stop. Twice as bright again. That's another stop. So we can do that 24 times so we can see a lot so our eyes are really good. So at night we can see inside the restaurant, we can see outside and see the bright sun and all the scene going on there. We can see in the nooks and crannies. We're gonna be just fine. But cameras not so much so a medium format camera and even modern cameras now. So a lot of the modern mirror, less cameras, They can see about stops of light. And so they cannot see as much as our human I can. So you've probably noticed this in your photography. You can see a scene just fine with your eye. But when you take a photo, something is either washed out or something is underexposed in that scene. That's because of the dynamic range, how much we can show from the darkest to the brightest in an image just isn't broad enough. And even if you go one more, So this is sort of old school. So the DSLR cameras, the cameras that we started out in digital photography, they could really only see about five stops of dynamic range. And so you can only see this small source from dark to light. And so cameras now are sort of in between that uh, those points. And so what that means is we can always make a photo of the scene that we see because the dynamic range is too great. And the less expensive your camera, the smaller the sensor, the smaller the dynamic range, You've probably noticed this on your nice camera, you can take a photo of something that looks wonderful and on your inexpensive point and shoot camera, you just can't capture the same scene or maybe on your phone. It's the opposite, something like that. So to make this all makes sense, we're gonna do a couple things gonna slide that other way. We're gonna go over here to my doodle zone and I want to show you a really bad drawing of a beach. We're gonna talk about dynamic range and how this works and then we'll apply that to studio lighting. So let's just say here we are at the beach and we have a very, very bright sun right here, this is the bright sun and let's say we have um we have Quinn here standing on the beach with flowing hair and a big smile, She loves the beach. Okay, so we have all of this light coming from the sun, it's very, very bright. And so if I have, if this is me there, I am and here's my camera on a tripod and I'm trying to take a photo, what's going to happen is all this light coming in from behind. It's going to be much brighter behind Quinn than in front of Queen. So if I take a photo of this, What I'm going to get is a silhouette because they can't capture the dynamic range is too bright because this is probably, I don't know, 10 times as bright as this. So this is really bright, this is really dark. So this is not going to work out. So what we need to do, if we look at that sort of on a chart, we can see like the brightest point is over here and the darkest point is over here and our camera can capture just a slice of that. So we have a choice. When we look at this dynamic range, we can say, okay, we can capture the sun so we can capture this section. But everything else is dark, which is Quinn or we can capture Quinn which is really dark, but all of this stuff is going to be totally overexposed. And what we need to do is we need to be able to compress these points from the brightest to the darkest point, we need to compress those two things. And so to do that, we can use the miracle of flash photography. So all we have to do is put a flash right here. So this is a little flash. So what we're doing is we're taking this level of darkness and we're bringing it up so that it matches this level of brightness. So we're going to say, Okay, this right here is let's say a make up a fake scale, this is bright on a scale of 1 to 10 at 10 and without a flash, this is at two. So what we're doing is we're adding light to bring this up to a brightness of 10. So these equal each other and we get a nice exposure. So we're taking the dark part part or brightening it up so that this and this equal each other and we get a nice exposure. So let's look at that in real life. We're gonna go over here. Quinn is coming out and I have a fake son that I have set up. This is a four is a 300. It's a really bright um for now light. And so what we're gonna do, this is not a flash, this is just a constant light. So what I'm gonna do is I'm gonna turn this on. It's just gonna get a little bit brighter and a little bit brighter and that's very, very bright. So that's the sun. All right. So, what I'm gonna do, So, we've already figured out the metering on this. I don't have a flash on right now. There's no flash. In fact, I'll take off my remote control. And so what we're gonna do is I'm going to take a photo F eight on 60th of a second and then this is going to come up there. It is okay, we can see in this image exactly what I showed you on the beach. We have the bright fake son right here, we can sort of see the outline of Quinn's shoulder there because the sun the fake sun is hitting that, but she's totally dark, totally underexposed. And so when we think about that again, if we had a fake scale this light back here that's coming this way, this is the brightness of like 10 and this is the brightness of zero. So what we need to do is we need to throw in some light here so that the light here is raised up to the level of the light coming in and if we look at our dynamic range scale, this is really dark, it's so dark, it can't show up, it's not within the scale, we have to bring enough light so that we compress these levels so that this is as bright as this and everything works. So when I put my flash on my camera it's good, make sure that works. I'm going to meet her this and remember when I shot this this light here without the flash, I shot it at F eight, which means this light needs to be bright enough to meet her at F eight. So I'm going to meet her that m at F seven m that one more time. F eight m F eight. So we set that up in advance this meters at F eight. So now watch what happens, we will take a photo and Quentin is perfect bam, Now take a look all of a sudden Quinn appears there she is and so notice the exposure on the light is the same, we just added light to Quinn to balance those two things out. So we fixed our dynamic range. So we said, alright, this dark area here is outside of the range of what our camera can see, Our camera can see the bright and a little bit under. So we need to do is you need to take this dark area and brighten it, brighten it, brighten it. So it's inside the dynamic range of our camera and then everything is gonna work out. All right, thank you Quinn. That is dynamic range. And so next we're gonna do some more with modifiers and we're gonna look at well, creatively correct exposure and all kinds of things. And so let's keep going.
Class Materials
Bonus Materials with Purchase
Ratings and Reviews
user-a07413
Wow, Impressive with lots of information on light modifiers. Lots of variations of use and the bonus material. Mark is very good as a teacher. Glad I purchased the subscription plan so I can see the other Mark Wallace classes. Now to go to work and use the information.
Paul
I've heard much of this before, but this class really does a good job explaining and demonstrating the principles and techniques it covers. Mark is certainly quite knowledgeable, and he makes the material accessible and easy to grasp. It does cover quite a lot of ground, and while others may go into more detail, I think this class is great for building a good foundation.
Mario Furtado
Mark and his crew did an excellent job in this class. Now I am eager to see Go-To Lighting Setups and Studio Lighting Essentials. Congratulations.
Student Work
Related Classes
Lighting