Lesson Info
17. Reshoot Challenge
Lessons
Class Overview
05:08 2Getting a Grasp
03:55 3Pop Quiz!
03:57 4Quality of Light
20:41 5The Effective Size of Light
35:07 6Creating Contrast with the Position of Light
24:51 7Controlling Shadows (1+1=2)
06:29 8The Inverse Square Law
22:04Angle of Incidence and Reflection
13:24 10Specular Highlights
26:26 11Parabolic Shapes
18:22 12Dynamic Range
08:54 13Creatively Correct Exposure
12:03 14Metering Is Not An Exact Science
32:21 15Flags and Reflectors
32:05 16Let’s take another look at modifiers
11:12 17Reshoot Challenge
46:44 18Mark’s Favorite Modifiers
40:32 19Pop Quiz Review
14:23 20Class Wrap-up
03:34Lesson Info
Reshoot Challenge
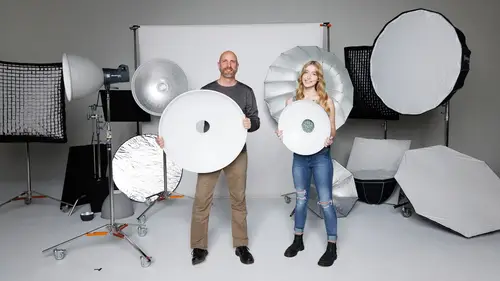
we're going to revisit some of my classic images so that we can deconstruct them and try to redo maybe one or two of the images. These are the sample files that you have on the class page. The same files that you can use for your homework for your pop quiz. We're gonna pull from those photos and I just want to take a look at maybe um one or two of these and we're gonna try to redo them here. So there's something that's really important to note and that is in the reshoot challenge. This has not been rehearsed, I want to make it clear we have not rehearsed this at all. Um And so what I did do is I looked at images that I thought I could reconstruct here in the studio and we did make sure that we had some light modifiers that would allow me to do most of these. And so what I want to do is just take a look at some of these images to see what we might be able to reconstruct here in the studio. Well, I don't have this awesome silver screen here. And so all of the screen images that you see h...
ere, we can't do that. So those are all out. Um Also I think some of these are just a little bit too simple for us to reconstruct. In fact this one here. Uh I would love to re shoot this except I think I'm gonna save it because I'm we're gonna do the next session which is on my favorite light modifiers. And this happened to be using one of my favorite light modifiers? Which is a beauty dish? So, I think we'll try to shoot that one a little bit later. Um This guy right here is something that we did in my studio lighting essentials class, the original 1 10 or 15 years ago and it requires some special modifiers that we don't have specifically some aluminum foil and a lot of space that we just don't have here. So we're going to eliminate that. So just by the process of elimination, I think what I'm looking for here are some images that are maybe one that is a hard light image and one that's a soft light image. And so let's look for those. We're gonna revisit these images a little bit later on the pop quiz to see how well you did, but that's sort of this one's cool. Um That's very soft. I sort of like that just going through uh I think I think actually Yeah, yeah, yeah, yeah. I think okay thinking out loud, I think this image here would be perfect because what we get in this image is it's a hard light image and a lot of times when we're looking at images specifically of hard light people think they're not beautiful because it shows all the different, you know, all the skin defects, all that kind of stuff, but I think we can create some really beautiful hardline images? Um Quinn. Uh do you have, Do you have a black top that you can? All right. Go run put that on. Um So Alright, excellent. So Quinn will put on a black. Is it a turtleneck? Okay, so it'll be it'll be some kind of black top. I think this one is a turtleneck. Uh Okay, so we have that. And so that's our hard light. Uh This is Quinn. We shot that just a couple of weeks ago actually, it's soft light, but we're gonna be doing that in my favorite light modifiers. Sydney. So many great people. I like this one Like this one. Okay, so this is great because it's similar to the superhero when we did accept the light modifiers are different. This is these highlights here. I believe I shot those with soft light. Yeah. So here, on the shoulders here, I think these were shot with soft lights. And the other thing that's interesting about this is the way it's lit. It's not obvious um how this is lit. And so, I think this is a great candidate. So, let's do that. Let's do these are next to each other. How nice. Let's do these two images. One that is really contrasting black and white and one that sort of soft, beautiful light. And I hope when Quinn comes back, maybe she has a white top. Something like that. All right. She's coming. Um Great. Alright, Quinn come on out? Um We're gonna do this black and white. So, I don't know did you see this? This shot? We're doing okay. Excellent. So that was a fast change. That was pretty good. All right. So, what we're gonna do is we have to figure out, let me look at this light on this image. So, one of the things that we want to do is we want to learn how to deconstruct from an inspirational photo and take that and use it to create our own piece of work. And so that's what we're gonna do. So, I'm gonna try to show you how to look at an image. Try to deconstruct the light that was used in the image and then put it together the best of your ability. So, if I look at this, let's look for some clues. So, number one, we're looking for the cats. Lights in the eyes will tell us a lot. So, we have two tiny dots in her eye here. We can see this is sidelights. We're looking at the direction of light. The quality of light. The speculum highlights all of those things. So we know this is a hard light modifier of some sort and I honestly don't remember how I shot this, but it's something that's really controlled. You can see that the light is sort of falling on her top here, but not a lot. Nothing's falling on the background. Nothing's falling on the opposite side of it. So this is something that's really, really constrained. So we know we need some kind of hard light reflector and we need something maybe some flags or something to control that light. And then we have something that is coming behind her. So that's back light because nothing is hitting the background. So we have two lights going on here, one from the side and one looks like it's hitting her from the back of the head. So I think I shot this a long time ago in Colombia. And so I think I used one of the craziest light modifiers of all, a bear head. Okay, so I think I know I think I know the direction that we need to go. So um Step one is we gotta figure out where we're gonna put you. So we were going to shoot on white. So I know you think I'm crazy because we're shooting on white, but we're going to make sure we constrain the light in such a way that the light never gets to this background and so it should be completely black. We've already done that a few times in this class. So to do that, I'm going to keep you quite a distance away. So let's keep you about right there. Maybe even a step further. Yeah, there we go. Um So now we have lots of room to make sure light doesn't spill here. We're still gonna have issues um We have white on the floor. So we have to make sure that we don't get white falling on the floor. Yeah, we have to really control this light. All right. So, what I'm gonna do, we have some hard light modifiers. We could just use this guy. The problem with this guy is the light goes so far, it's so broad. I need to control it more than that. So, I'm gonna take this guy off. We're not going to use that. What do I have this guy? Okay, let's try. It's silver. I think I have the white one somewhere. We have a white wine here. It is. Okay, they're okay. So, we're gonna use the white one, not the silver one. And the reason for that is the silver one. When we uh if you go back to the session where we're throwing stuff on the background to look and see what looks like. Remember that silver one had bands of light? It wasn't a smooth transition. And so I don't want to accidentally get some weird banding um on Quinn's face. And so this one is coated in white still should be pretty directional, but still hard. So, let's try, let's try it. This might be too big. The effective size of this light might be too big because if we look at our sample photos. So, let's look at the sample photo really fast, notice that that light is just falling pretty much on her face, not on her shoulder, not on her shirt, not on her hair, it's so tight. And my fear is with this light, it's gonna be it's gonna be too big unless we get really, really far away. And if we get really really far away, uh this light might be where matt is, so we might not be able to see it and it might be so broad that it starts falling on the background. So, I think I'm gonna come this way. Is that cool, man? Can you see it this way? And just to sort of see how how much of a spread this modifier gives us. I'm gonna put that there and then I guess I should have got my light cables out here. So, let's get an extension cord here. Did you? All right. So, we have this lack of planning here in my part. Sorry. All right. Here we go. So, we're gonna see what we get here. See if we can control the light from the side. That's step one. All right. This is why you rehearse stuff because if you don't you're not ready. All right. Light on she Who? So to see the light. We don't even have to take pictures. We can just turn on our modeling light. And can we kill the light in the studio. Let's do that. Excellent. Alright, so now we can look and see what's going on with this light. This is really really cool because you can see that the light on the background. We're not really getting a lot of light there, we are getting light on the floor here. It's bouncing on the floor. This light on the floor is bouncing on this background, it might not fall into black, which that's okay. Um I think maybe because the inverse square law, this light on the background here might be totally black. The problem is from head all the way almost to toe. We have light on Quinn and that is not good. So if I want to make the light harder, I can go farther away. But by doing that I'm lighting up more and more stuff. I can come closer that refines the light. But the problem is look straight forward please. Yeah, the problem is so much light is bouncing off of this, It's coming in. We might have to put up a big giant flag behind here to control that. Let's just see where we're going with this. I think I have a better solution for this. I think I have a much better solution than the way we're going. But let's just try this flag out. We could, I guess use subtraction panel as well, but really all I care about is making sure that nothing is bouncing back into Quinn's face. So that's the equivalent of a subtraction panel. Okay, now, let me just go over and I'll take a look still looks a little a little like a lot too much light. Move this forward and to the side, I'm just looking at the light just looking to see what we're getting. We're seeing a lot of light falling on her forehead, which I don't like if I go back, Okay, I'm gonna just meet her this and take a photo. And then what we're going to do is we're going to see how it looks because it might look exactly the way we want. It might be a little bit too much. But based on my experience, this is too much. I'm gonna start my tether to capture really fast, so I've got that going, okay, so let me go down to the very, very end here. All right, so, what I'm gonna do here is I'm going to meet her the light. I'm entering it to the light itself. That's F 18. That's so much light. Let me take that down. I wanted to be about F out of F eight F nine, I think I'll take F nine. Okay, we can put the lights back on in the studio if we need those. And then let me go back here and because I'm tethering, I've lost my sample photo. Sorry about that. So, we'll do this. I've tangled up my cable. Okay, let me try this out. So F nine. I saw 100 look straight at me and I have to turn on my remote control. Um one more time. Here we go. Just look into the camera. I think that our light is just spilling all over the place and this is not what we want. Let's try it again. Okay, it's close, It's close, it's close but notice this isn't exactly what we want, our background is gray, it should be totally black were overexposed here. Um let me let me just creatively correct this just a bit. I'm gonna go to F 11 just to see if I can get a little less light and we're really close here right off the bat. So that's pretty cool. I think what I'm gonna do here is I know I have a develop preset um that I used to use a long time ago and I think it's called crushed black and white. I think that's what it was called. So let me take just one shot and see if this is like a really contrasting black and white because it might be. So let's let this next one come in. Oh that's too much. It's too much. Oh man, I did too much. Let's see if we have this, nope, nope. All right, so I don't have a black and white preset that I love. Let's see if we have black, black and white punch. Let's use that. It's close enough close enough we can use that. Um I don't love that. I don't love that at all. I think there's just too much light zipping around. In fact. I don't even like this black and white conversion. So I'm going to go in here and I'm gonna take this back to uh there there we go, Gillian black and white. I like that, that one is better. So Gillian black and white is the preset that I should be using, I don't even know where I found that Julian black and white. There we go. Okay. The problem with naming all your presets after the models, you can never remember which preset. Go to what that is pretty cool. I'm liking what we're getting there, it's similar to the sample shot that we had. So what I want to do now is I want to uh look at that silhouette that we had. So there was there was some light coming from behind, so I want to add that and then um and then I want to change this key light, this main light that we have with something else to see if we can even get closer to the original shot. So I think what we're gonna do is gonna do something crazy. So we did this sort of before, I'm gonna take this light modifier off and set it down on the weight and then there's a light modifier we haven't even talked about yet and it's called a bare bulb and so sometimes you can do some really cool things with just the bare bulb because it's a point source of light light is very predictable. And so for things like silhouettes or things where you're not actually seeing the source of the light. This is a pretty good solution. So I'm gonna try that and so what I'll do is I'm going to try to hide the light, this is a pretty big light, but I'm gonna try to hide the light behind Quinn, see if I can hide it from the camera. Let me get one of these chords here, get that out, plug in my light and we just need a kiss of light here, we don't need a bunch of light and then um matt, I think if you can, I'm gonna ask you to come and be an assistant just for a second, so come, run on now. Run on out. So matt Madrid doing all the cameras. So what I'd like you to do matt is I'm going to tell you to to raise or lower that light or go forward or go back. So actually I think so step out just for a second map. I think we just got totally lucky so I don't think I even needed. So what's the, what's the value on the back of that camera? What's the yeah, the number 3.4, take it down to one. So we're taking the value, the output of the flash down because I don't want to I don't want to get too much light. So nice move there man. Oh look what we just got. Alright man, we're done or done so that is pretty darn close to what we started with. So the model that we shot with earlier, she did not have long hair, so maybe you could put your hair behind your head. There you go like that, yep, let's just see how we go there. Power we and now look what we're getting on this shot. So that oh look at what happened by moving her hair, it changed the entire look of that image changed everything because we have too much light coming from our key light and so what I'm gonna do is I'm gonna take this key light, take it down, it's too much light, let's try that, see what we get. That's pretty cool. But notice the thing I don't like about this if we had a turtleneck, I think we would have been pretty darn close to the original image because on the right hand side there's no light. Um we do have that, that silhouette behind the background is black, we just have a lot of light falling on Quinn's collarbone. So I want to try something really quickly, I'm gonna try something different to see even without a turtleneck if we can get close to that original image. So we have a thing called a Snoot around here. Uh matt's got it, we put it back there with the grid. Yeah perfect, so this is there's a snoop, let me see if I can show you this grid, see that grid, it restricts the light and then our snoot and we have I have a grid. I have pineapple. Alright, sorry, I had to do it. So, apple grid. So there we go. We have a snoot. And do you know what I'm talking about now, can you hold that? Thank you. Quinn doesn't know what I'm saying. She doesn't know pineapple pin pineapple. Do you just It's not uh it's not uh entertained by it. Okay, here we go. Let's stick this on their lock that in. Can we kill all the lights in the studio just for a second. Okay. And then I'm gonna kill the light on the bare bulb, and now we're gonna look and see see how we can really, really tell the light where to go. So Quinn looks straightforward so I can put that light right on her face and it is locked in. I can even maybe put it a little bit forward of her face. So, let's try that. You can put the lights back on if you need those. And then I'm going to meet her. Turn on the light meter in meter. The light That says 3 6. So, I think that my meter is lying to me. I'm gonna meet her. I'm gonna shoot this. I'm gonna shoot this at eight. See what we get. Oh no, it was not lying to me. All right, let's try where the meter says. Okay, so let's take a look at this and it's totally changed. Why is that? Well, I think because we went from 11 Down to eight, why are we getting stuff on the background? Is there a flash that's firing that I don't know about it might be a reflection. There's some weird thing happening here because when we change that snoot, ha ha, there's light coming out of the side of this newt. I think let me turn this light off When you're in doubt. Turn off lights one at a time and see if things change. So, what's happened is When we went from 11 to 4, there is enough light bouncing off the floor and around to illuminate the background. That's what happened. So we would go back up to 11. What we should see is just the silhouette, which is correct. And so what I need to do is I need to get the key light and increase the power. So it meters at F11. That's what happened as we just opened up too much. Okay, that's gonna be punchy. See if we can get this guy at 11, seven and a lot of light at says 11, Let's see if we can get that at 11. Bowie, that's 11. And now look what we have. We have a shot that's so similar. So, can you move your hair just a little bit off your eyes? Yeah, so there you go. Now look straight at me straight down. There you go. Perfect, perfect. Okay, I think that's pretty darn close to our original image. So if I was going to play with this a little bit more, maybe what I would do is I would change a little bit of the styling. I get a turtleneck to really match that if I really wanted, I'd shoot a little bit wider, then I was shooting before to put her a little bit more centered in the frame, something like that. And then we could play, um, maybe would play with some different hairstyles, some other things, I don't think the background light went off on that one. Try that. Yeah, that we didn't get our silhouette. There it goes. Think I shot too fast. There we go. Now. We have a silhouette. We have the sidelight, we have the black and white. I think that is a successful recreation of an image. That is cool. Yeah. And even in the speculum highlights, they're, they're pretty darn close. So if we had another minutes or an hour to just really dial this in, I'm sure nobody wants to sit here watching me do that. We could, I know get this to be exactly what my original image with is one of the things though, to note when you're working with inspirational images. Models are different. They're the shapes of their faces are different. You're never, ever ever going to get your image to look exactly like your inspirational image. You might get really close, but rarely do two different people look the same, even under the same lighting conditions. Um so use it for inspiration. Don't copy other people, let them inspire, you don't copy them get to the point where you have something that looks creative and then just go crazy. Alright let's try another thing so quick. I didn't show you we have another image that we selected and it is this image right here. So do you have a top that maybe you could do this looks like okay so run and go change into that and we're gonna try to recreate this image. So let me talk about this image that I just selected and let's figure out the modifiers that we need and figure out how many lights that we need. So the thing about this image, I shot this a couple years ago in Argentina and Buenos Aires and I do remember a couple of things. The first is the kicker lights that we have. Those are similar to what we did for the superhero. But I know that those were shot with soft boxes so you can see the transition on the skin here is a soft transition from the back to the front. It's not abrupt and so I know I need to have two kicker lights but I knew I need to have some kind of soft box attached to them to soften the light and you can also see that the kicker light is hitting her on the face and that's a sort of a soft transition um there and it's also overexposed. So that's interesting. The other thing that's interesting about this is the direction of light. And so when you look at this you're probably thinking well she's illuminated from above and because she's got some shadows on her chin. But the truth is this is a uh an image that was illuminated from below. We know it was illuminated from below because you can see the shadows on her collarbone or on the tops of her collarbones, not the bottoms. And notice that there's no shadow underneath her chin. There's a shadow on the top of her lip, there's a shadow on the top of her eyebrow. There's shadows up here on the brow of her head. So the light is coming from below. The key light is coming from below. And then we have a fill light from above. And I know this is also true because look at the catch lights. So the catch lights are normally what we've seen. This entire workshop catch lights uh partially hidden by the top eyelid at the top of the eye. These are to the middle and below. So this is a shot that is from below, not above, but we do have light from above. So that's probably a really soft, very subtle Phil from above. Something just to sort of add a little kick but not enough to eliminate the shadows from below. And so we have 12 lights, three lights 1/4 light from above. And then also you can see there's sort of this vignette on this background here. And so probably I used some kind of a hard light modifier with the grid. So I think even maybe that's newt, we could put it far enough back to sort of add maybe a grid there. It might be too hard of a transition for that, but we can play with it and see how that works. But for sure we have 1234 and maybe five lights in this setup. Okay. So what we're gonna do now is I'm going to get to work and so what I'll do is I'm going to strike all the stuff that we don't need and try to set up a few things that we do need. And I'm going to ask matt, if you can help me with just a couple things. The biggest concern I have is the cables back there. I don't have, I need Uh two more extension cords to come out. So I've got my kicker lights, but I need two more. Those are all scrambled up back there. Yeah, and so we're gonna do sort of this. The other thing I know that we used was a chair. So I think we're gonna see if we can find a stool for Quinn because this is not gonna really work standing up. So do this. Okay, so one of the things that we can do when we're using kicker lights is you want your kicker lights to be the same, I want them to be the same size, the same distance, the same power, generally speaking. And so I have, I know I want these to be softer lights. So what I'm gonna do if I'm gonna choose, I'm gonna choose to kicker or to uh soft boxes that are the same size and so um, I'm gonna run off screen really fast because our cameraman is doing cables. Yeah. And okay, I have to soft boxes. It's going over the okay, so excellent. It's upside down, upside down Sierra back there. You can't hear she's telling me it's upside down. Everybody needs a good producer to keep them in line. Sierra is great to take down. What are you doing? Everybody needs a voice in the background going, you're doing it wrong? Uh No. Yeah. Wouldn't that be horrible if that actually was the thing somebody yelled at you every time you can do better. You're not good enough. That would be horrible. Okay, put these guys on here, come on, go on there. All right. I set up. Good. So, these guys, you might be wondering why I did not flag these guys. Uh put a grid on these guys. Well, usually for my kicker lights when I have soft light like this, I just don't, everything seems to work out just fine when they're just sort of like this because the lights so soft, usually they're not so bright. Um so I think we'll be fine. The other thing, Quinn, you do have a stool, Can you come out with the stool? Quinn is the master of quick changes. She's like choon back to the green room, tune back. Okay, what I'd like you to do is sit right there on that, that spot. We're, in fact, we're gonna bring it forward just a little bit more right there. Okay, so see how our model, see how she's sitting. So what I want you to do is maybe, yeah, like that. And so you're gonna have your shoulders this way and your head towards me, yep, just sort of like that, That's what we're gonna try to do. That's another great thing to do when you're working with models is it's totally fine to bring inspirational images in or sketches or doodles or anything to show the model. Here's how I would like you to sit and it's really fantastic for, well for any level of photographer, but specifically for beginning photographers are beginning models maybe have an ipad or something with a bunch of poses on there because sometimes you just get stuck. Like, I, I don't know what to do. So it's always better to say do that. And so the models like, I can do that, I can see that, that's great. And so instead of me trying to describe, look this way, go this way do that? I can just say see that, that's what I want you to do. So now we have our two kicker lights sort of set up. Let me make sure this one is low enough, it's as low as it goes. Okay, great. Um, I am going to turn these guys on. These guys are on that is fantastic. And I'm gonna set them both to the same power level and so on the scale on the back of these flashes, I'm just gonna set them to the same number. So they're both at two. And the other thing I'm gonna do is I'm gonna stand behind Quinn and put my arms out to see if these are about the same distance away and they are and that means that they should by default be about the same power level when I meet her them and so you want them to be equal distance and at the same power level to start with, that will help you out. Um, the other thing we can do is, I just want to see what's going on. So we're gonna kill all the lights in the studio and with the modeling lights, modeling lights are great because they can definitely help you just sort of see where the light is falling, where it's spilling if it's on the ground, modeling lights are wonderful things, they're never going to really show you um, they're never going to show you what the exposure is. They're not really good at that. They are good at just looking to see. Is it hitting the model? Is it not hitting the model? Is it spilling too far on the front of the model's face? So I'm coming around this way on the other side, and when I look on the other side, I can see that Quinn is mostly in the dark. So the lights falling where I want it to fall, it's falling on shoulders, it's falling on hair, it's not falling on the background. So that is, that's groovy. Okay, so let's turn the lights back on. And now, what I need to do is I needed to set up my key and my feel like now, because this image is illuminated from below. I want my um I want my image to be from below and I don't know why, but my, here we go, my lightroom. Just okay, like that. All right, So I want my, my light to come from bologna to be sort of large. And so I have some soft boxes, some square soft boxes. So I accidentally hit them back here. So, I get this guy back here, it's getting a little tight in here. This guy, uh okay, we're gonna use this for our key lights and our key light needs to be down low. Can I take this grid off? We don't need the grid. Thank you, matt. And one of the things I normally do for something like this is I'll just take the light off the stand and stick it on a box or something down low. But I happen to have I know I have I have this crazy ah That's got it. I got this crazy attachment here and it's just it's a mathews. I don't even know what it's called extension arm, but you can Well, you'll see. So what I can do so I can attach it to my stand. Yeah. And it basically lets me put this light low low down. So now you can attach this down here. Mhm. That and move it up. Yeah. Okay. Yeah, we've got that. That's great. Put that right there. Okay, So now I can shoot over this. That's pretty cool. Um So, I just want to see if that's gonna be Yeah, it's about where I want it and plug it in and there we go. I can plug it in and I'm glad this has a remote control. So I can at least control the light. All right. So, because I want to control this light independent of those lights, What I'm gonna do is I'm gonna set this light to group one. I should have done this before I put it on there, do that. Okay, So this is gonna be set to group one. Great. All right. And then the lights behind. I'm gonna put these on group two. So, I'll go in here to this group two. All right, Perfect. Perfect. Group two. All right, so, I can control these independent of that. That's all going to work. Great. And can I move this soft box a little bit? There we go. Great. So, I have the light below and then I can put a light above if I need to do that. But first, let's get this going. I'll get the modeling light on and let's kill all the lights in the studio. And then Quinn turn your head towards me and this is looking very similar to what I wanted it to look like. So, let's start metering the light. We want this to meet her. I'm guessing around f. 11. So, let's see that's a four. So, let me turn that up a lot. Oh, that might be too much. It's F 20 way too much. We're way too much. Okay, F nine a little bit closer. F 10. I'm gonna go up just a little bit more. That's F 11. Okay, now, I'm gonna meet her what we're getting behind And behind. We're getting F2, so F two is just barely gonna be a kiss of light. So, let's just see what we get F with this shot. Let me make sure my my laptop is ready to go and it's all good. Okay, let's see what we get. So Quinn look right at my camera here. Mhm. Beautiful. Hold that right there. Turn your head a little bit more toward me. Yeah. And chin down just a bit. Okay. That is why I gotta change my import free set. That was not good. All right. And now let's try again. Boom. Okay, we're getting similar light, similar light. Look at those catch lights underneath her eyes. Very very similar. The light behind her needs to be illuminated just a bit. So look a little bit more toward me. Excellence. I like that right there. So, what I'm gonna do is I'm gonna I'm getting a little bit of a glare from this soft box over here. I'm gonna move it back then. I'm going to increase the power on these kickers a little bit. So we get a little bit more kick seasoning to taste. That's what this is called. Seasoning to taste. All right, look right at me. Excellent. All right, those kickers will need to be a little bit more. In fact, a lot more. We're just not getting the highlights on the shoulders that I want. So, I'm gonna take that those are in group two. Right? Group two. All right, Group one. Group two. And uh okay, so, I didn't have my There we go. All right. So, because I turn my lights on after I turned on my remote, they're not registering I've got to do it manually. one of those weird things with this remote. There he goes. Yeah, there we go. Look at those. Look at those shoulder highlights that we're getting there. That is so much closer. I really like that. I think I need to get in tighter to Quinn. It's like that look right at me beautiful, That is beautiful. I love that. We're getting the light on the collarbone, we're getting the light on the shoulders. I think the up light is just a little too much. So I'm gonna dial down my aperture just a little bit, look right at me. I love this, look okay, yeah, that's more subtle. That's more subtle. So I do still have this this over here. I need to flag that or something. Perhaps a grid would get rid of that or even a fancy crop would get rid of that. So if I go into lightroom here, blue could do something like this, something like this. We have that. Then I would go in and I would do all my tunnel changes. I know that the other one was a lot more blue in the shadows. So it was a lot of stuff that we did uh in post production. Um and the only other thing that we're missing from this is that gradient on the background, but I think I like this as is I don't think it needs it, but we took a photo, we deconstructed it used it for inspiration and came up with this. All right, so let's turn back on our lights. The thing about doing this exercise that I just did where you take a photo and try to deconstruct and get to a place again. It's about being inspired by something using that as a starting point and then making something that's all your own. And so for this shot that we just did, I think we got pretty darn close to the image that we started with. But I saw that. Well, for my taste, we didn't need anything else. Why at it? We don't need it there. And so that's why I said, okay, close enough, we stopped but we got all the essential things. The direction of light was right, the quality of light was right, the kickers were right, like all this stuff that we needed to do was fantastic. And we got a great image in the end, Well done. Okay, now it's time to have some fun. And what we're gonna do is we are going to play with some of my favorite light modifiers. And so instead of using everything in our toolbox, we're only gonna use I think one or two things and one of them is uh well you'll see it's crazy awesome. Alright, we're gonna do that when we come back
Class Materials
Bonus Materials with Purchase
Ratings and Reviews
user-a07413
Wow, Impressive with lots of information on light modifiers. Lots of variations of use and the bonus material. Mark is very good as a teacher. Glad I purchased the subscription plan so I can see the other Mark Wallace classes. Now to go to work and use the information.
Paul
I've heard much of this before, but this class really does a good job explaining and demonstrating the principles and techniques it covers. Mark is certainly quite knowledgeable, and he makes the material accessible and easy to grasp. It does cover quite a lot of ground, and while others may go into more detail, I think this class is great for building a good foundation.
Mario Furtado
Mark and his crew did an excellent job in this class. Now I am eager to see Go-To Lighting Setups and Studio Lighting Essentials. Congratulations.
Student Work
Related Classes
Lighting