Lesson Info
11. Parabolic Shapes
Lessons
Class Overview
05:08 2Getting a Grasp
03:55 3Pop Quiz!
03:57 4Quality of Light
20:41 5The Effective Size of Light
35:07 6Creating Contrast with the Position of Light
24:51 7Controlling Shadows (1+1=2)
06:29 8The Inverse Square Law
22:04Angle of Incidence and Reflection
13:24 10Specular Highlights
26:26 11Parabolic Shapes
18:22 12Dynamic Range
08:54 13Creatively Correct Exposure
12:03 14Metering Is Not An Exact Science
32:21 15Flags and Reflectors
32:05 16Let’s take another look at modifiers
11:12 17Reshoot Challenge
46:44 18Mark’s Favorite Modifiers
40:32 19Pop Quiz Review
14:23 20Class Wrap-up
03:34Lesson Info
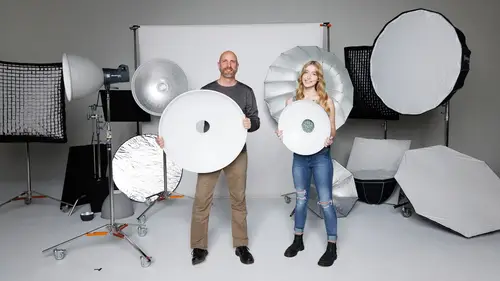
Parabolic Shapes
we'll speculate highlights are really fun and now we sort of understand how are different light shapers change those speculate highlights. So we'll just continue the journey and talk about parabolic modifiers, parabolic modifiers are well they look sort of like this guy here, they have this really distinctive shape and this is a parabola. And so if you took basic math, you know all about these shapes. But to help us out, I have a little chart here in my power point and this is a parabola. It's this sort of an umbrella a shape. It's a very specific shape. But what it does, if we look at this chart, you can see that there's this point. F. That F point stands for focus point. So if you have a light at that point then all of the light that comes from that that point source of light, it's going to hit the parabola at certain points and because of the angle of incidence and the angle of reflection, all of that light is going to come straight out of that modifier. So let's take another look a...
t this parabolic shape we have right here. So if we had the light at the exact correct point, then all of the light would bounce around and come straight out from this. And what that does is it creates a very, very directional light, but not only is it directional because it's scooping all the light up and sending it right down the barrel of the gun is getting as much power as possible to the subject and so you're really going to gain efficiency from the from the light, whatever your source of light is, which means if you have a parabolic reflector or modifier, if you're shooting with a light source that is less powerful, you can still get a lot of punch out of it. And so these tools are used um to A get all the light going in one direction and B. That's done usually to throw light a long distance or to create some kind of form. Or you're saying I want really directional light or just to get the max out of whatever gear you have. So let me show you something else here. So I have created this little chart here. This is what parabolic modifier looks like when that light is at the right point inside of the light modifier. So it's all focused, the lights bouncing out at a very precise angle and then everything is coming straight out. That's the most efficient. If the light is not at the exact point of focus, you get something like this. So you still get a lot of light coming out but it's not coming straight out, it's coming out at sort of diffused angles. And so what happens is on some parabolic modifiers, you can focus the light, you can move that light in and out of that modifier to either get really directional light or you can sort of scatter the light. And so you've probably seen this tons of brands of modifiers and a lot of those will say this is parabolic and the reason they're saying that is because parabolic is a special shape. It uses light in a special way. So what we wanna do is I want to give you a demonstration of some different modifiers and their shape and how they throw light. So we're not just gonna do parabolic stuff, we're going to do well all kinds of shapes and sizes. So you can start to see how light is directional or non directional or diffused or not. And so we're gonna do sort of this versus that um kind of a thing. And to help me out matt is gonna be the assistant. So we instead of him running a camera, he's gonna help me because we've got a lot of things. So we're gonna do is we're gonna start with just a wide angle reflector on our Ellen chrome, I'm gonna turn on the modeling light and so you can see what this is doing. We're gonna kill all the lights boom. And here you go. So that is just a wide angle reflector. This is what comes on a normal Ellen Chrome LC 500 and it's used for just illuminating broad spaces or throwing light into an umbrella, something like that. But you can see it just lights up a lot of space. So what I'm gonna do next. So we turn the lights back on here is I'm going to take this. So just so you can see this. This is what this looks like. Is this little light modifier here? That's what we had. I'm gonna give this to you, matt. Thank you. Are you gonna do? Now is I'm gonna take this? This is a small beauty dish. So, this is about, I don't know, a foot, something like that. So, we're gonna take this guy and we're gonna put this on our light. Let's see what this does. All right, so, Sierra, we're gonna kill the light. Wham. You can see that. This really gives us a large source of light. It's very broad. That's why we like a beauty dish because it creates a larger effective size. You can also see, we sort of have a hot spot in the center there and then we have this sort of feathered light on the outside, so you can sort of see how this feathers in and out. And we get a really broad beam of light, which is great if you're doing beauty shots. Okay, now, what we're gonna do if I can have some light again, we are going to change out this, somebody should sort of show you the sizes of these. So they're pretty similar in size. So, this beauty dishes a little bit larger. We're gonna try this silver parabolic and see how that throws light. Here we go. All right, back into the darkness. Boom. Now, you can see that this is really throwing light very directionally straight out. And because this has different mirrored sort of silver, reflected surfaces, you can see that there's sort of bands of light in this modifier, so it looks like fish scales there. What I'm gonna do is I'm gonna roll this out so you can sort of see what this looks like straight on. So you can see it's a big white circle there, like if I go closer, you can see we've got just a perfect circle of light. That's what this guy does. So what I'm gonna do is now that you've seen, sort of how this looks. Look closely at these different bands of light, see how that those bands of light are there. Let me show you why that is doing that. So, we're gonna turn the lights back on and then matt, if you will bring them. Yeah, let's get that guy, that guy. Next. Okay, so if you look on the inside of this, you can see that there's little rings on the inside, so that's what's causing those rings of light to appear in on our background, there is how these are shaped. And so if we just had uh maybe we'll do another one with the white to show you that. But that all of this, this shape and reflective surfaces are going to change how the light is coming out. Alright, so I'm gonna put this over here. So what we're gonna do? Thank you. And can you get that square soft box ready for a second. In fact, let's start with a square soft box, just so we can see how this changes. Um I'm gonna do just show the sizes of these guys. So these are pretty similar in size. So the square soft box is getting onto these, the square soft boxes a little well, pretty similar in size, Pretty similar in size. Okay, so let's see how the square soft box throws light versus this parabolic soft box and see if there's a change in those different things. So, give you these guys. So first up is the square soft box Obama, we'll go over here. All right, Sierra, You can kill our lights. All right. Oh, nice and soft, nice and soft. You can see that. Just you've got this, you can see the inverse square law right here. How cool is that? You can see it just sort of falling off really rapidly. But we just have nice soft light that just goes everywhere. So try to keep track of where this light is falling down here on the ground. It's almost straight down almost. And now let's compare that to our parabolic modifier. So take that out. Give you this stick this guy on, Do you? Okay, let's take a look at that, bam. And that also is very very soft and white. Why is that? Well, remember when we talked we'll put the lights back on. Remember we talked about the inverse square law and diffusion and a point source of light. So for this parabolic to really work, we need to take off this diffusion panel because if all the light is going forward and then it hits diffusion well, we lose all the directional uh features of our parabolic shape. It goes bridge and just goes everywhere. So let's do this. Let's turn the lights off again and I'm gonna take this off. Okay, thank you. Yeah. Okay. Okay, so now it's still still not going straight forward, but guess what? On the inside we still have a diffusion panel, but it is a little bit harder light so you can see the light is is not as soft on the transition areas. So let's take off the next diffusion panel do that really fast. Yeah, getting blinded here. It's awesome. I'll give you that. And now you can start seeing the qualities of that parabolic there were Now it's all going forward. So when you stick a diffusion panel in there where you're losing sort of, that that really hard directional light. Okay, let's turn the lights back on just for a second. So what I want to do, because I want to sort of explain a couple of things. So this is parabolic, which means it's going to take that light and really push it forward. And when we have our two different diffusion panels in here, the benefit of having this as a parabolic shape. Is that you're going to get more directional light coming through those diffusion panels, which means you get more uh your gas mileage goes up, you get more power per watt second, I guess coming straight out. So it increases the efficiency of your light modifier. So if you're thinking well why would I have a parabolic thing if it's just gonna scatter anyway, that's why you're gonna get more punch out of that. Okay, so let's talk about umbrellas. So we're gonna start with a small silver umbrella, you see that's very shallow there, it's got a silver surface on the inside. I need the normal reflector there. So we're gonna put this normal reflector on the light. Mhm. Great. And now what I'm gonna do, I'm going to take this umbrella, we're gonna stick it on there Bama. So sarah, if you can kill the lights one more time. So one of the things that you want to do with your umbrella is put it close enough where the entire thing is illuminated. Um and not so far that the light is spilling off the size. So for this one it works pretty darn good as is outside the box. So what we're gonna do now is see how this light falls on the back and you can see it goes everywhere bam, just nice soft light because the umbrella is a little bit smaller. If I was over here and I was the subject. It's gonna be a little bit speculate, it's gonna be a little bit harder than if we had a large umbrella. So let's put on a large umbrella really fast. Here we go. In fact, let's hang on to that map for a second. So we can show the difference in size. You can see that this you're not even close to in the same size, much much larger and it's much deeper. This guy right here, much deeper. So it's more of a parabolic shape. So, let's see what happens with this big guy here. If I cannot do this, blame myself. There we go. All right, so, uh thank you. We'll put that there. Ah Yeah, so, it's hard to see actually in the video, but this is more directional, definitely more directional than that small umbrella that we had. You can see it's a little bit more like, well, a lot more light right here, I think for this, we might have to just not sure if we can show it to you in the video. I'll move it a little bit more this way and you can see that there's more of a hot spot in the center and more of a transition to the outside. I can move this in and out to change how that focuses. So, if I put this back on the background, I need wireless lights, that'd be great. If I do this, I'll try to focus this in and out. I push it forward. you can see how that becomes more focused. They push it back. Can see how it becomes wider. Here we go. Thank you. Yeah, so I think you can see the differences between those two, I hope. Um Yeah, my back is turned to the screen so I can't see. But that is the difference between the deep umbrella and a small umbrella. Let's try a couple other things. So Sierra, if you can give us a little bit of light. This, by the way, is one of my favorite light modifiers ever. It's just wonderful to use. We're gonna play with it a little bit later. Um When we talk about my favorite light modifiers. So this is one of them. All right, I'll give you that. Okay, so let's do some other soft boxes here. I have tangled up my cable. All right, I'm gonna give you this matt and I will take this. Okay, so now what we have, so we have this very large row deluxe soft box. It's all lower this just a little bit and it's it's pretty circular. Um Also this is a fantastic, fantastic modifier for just soft beauty light. Especially if you're shooting like portraits or something where you need more light on an entire surface, like head to toe. This thing is gonna work. Great. Have to turn on the light for this to work. Okay, so Sierra, let's get some darkness here And then we can sort of see again just really, really broad light. But notice this is almost a 90° spread. So from the front of the soft box all the way down here to the ground, it's just going Almost straight out 90°. It's really, really soft light right here. So it just wraps around the subject. See if I can show you it illuminates almost the entire background there. So that's a eight ft 9 ft background with one light. We have even illumination on the entire background. It's really wonderful. So let's take a look and see what happens when we use even a larger modifier. So I'll turn this off. I'll give you this matt. This guy is big. It's very big and this is as low as I can get it on this light stand. So it won't be an apples to apples comparison, but will be pretty close. Okay, and lights please And notice this. Remember we had that 90° spread. This one. You can see that the angle here Is not quite 90°. This guy this angle right here, it's not quite 90° anymore. So we're getting more light output. If I move this may be like this, probably see that a little bit better. Look at the shape of the light on the floor, see how you can see that sort of a more of a round shape instead of a square shape. If I point this to the background, you can see that we have even illumination, but there's a little bit more of a hot spot in this. So it's not, again, it's more directional than just that square soft box. And with this, let's get some lights for a second here with this guy. You can change how things look by removing this front diffusion panel, there's another diffusion panel inside, so we can change the quality of the light of this guy by changing the internal uh diffusion panels or not. It's really, really cool. Okay, so I think those are all of our comparisons, is that right? Yeah, I think that's cool. Okay, so we have uh we've looked at that one of the ways to see that a little bit more clearly, obviously is going to be for us to uh shoot. And so I'm gonna save that for a little bit later today, because we're gonna be doing some photo challenges and some more comprehensive lighting setups and I really want you to take away sort of what the shape of the modifier does to the spread of the light. And then as we start shooting and swapping things in and out, you'll be able to go, oh yeah, now I understand what that's doing and what that's doing, because I saw a little bit earlier. Okay, next up, next up what we want to do, as we want to talk about dynamic range and how that affects our metering and how we can sort of intermix light with ambient light and other light modifiers and things. And so we're gonna head there next.
Class Materials
Bonus Materials with Purchase
Ratings and Reviews
user-a07413
Wow, Impressive with lots of information on light modifiers. Lots of variations of use and the bonus material. Mark is very good as a teacher. Glad I purchased the subscription plan so I can see the other Mark Wallace classes. Now to go to work and use the information.
Paul
I've heard much of this before, but this class really does a good job explaining and demonstrating the principles and techniques it covers. Mark is certainly quite knowledgeable, and he makes the material accessible and easy to grasp. It does cover quite a lot of ground, and while others may go into more detail, I think this class is great for building a good foundation.
Mario Furtado
Mark and his crew did an excellent job in this class. Now I am eager to see Go-To Lighting Setups and Studio Lighting Essentials. Congratulations.
Student Work
Related Classes
Lighting