Lesson Info
5. The Effective Size of Light
Lessons
Class Overview
05:08 2Getting a Grasp
03:55 3Pop Quiz!
03:57 4Quality of Light
20:41 5The Effective Size of Light
35:07 6Creating Contrast with the Position of Light
24:51 7Controlling Shadows (1+1=2)
06:29 8The Inverse Square Law
22:04Angle of Incidence and Reflection
13:24 10Specular Highlights
26:26 11Parabolic Shapes
18:22 12Dynamic Range
08:54 13Creatively Correct Exposure
12:03 14Metering Is Not An Exact Science
32:21 15Flags and Reflectors
32:05 16Let’s take another look at modifiers
11:12 17Reshoot Challenge
46:44 18Mark’s Favorite Modifiers
40:32 19Pop Quiz Review
14:23 20Class Wrap-up
03:34Lesson Info
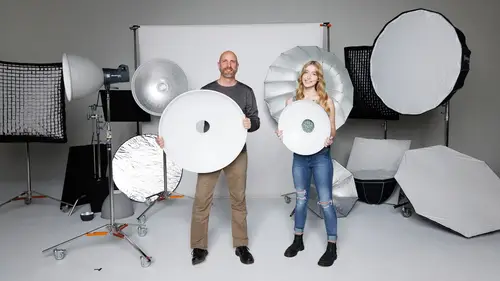
The Effective Size of Light
we're going to talk about the effective size of light. You may have noticed that our light modifiers are all different sizes and so if we look at the modifiers we have right now, they're all the same size. So I've got, this is a sort of a beauty dish here. And so uh we have Quinn, she's got one in her hands, so we have the same size light and then we have to um octo boxes here. And so I've got one that's the same size as that. Except they're not the same size. I step back. So step forward, Quinn look at that. These are not even remotely the same size. This is much much smaller and the same is true of this. Look when we move it back next to this, it is much smaller. But what happens is there's a thing called the effective size of light. So quick, I'll take this and you can just hang out on your stool for just a second and then what have I done? I have too many things actually. Quinn, can you take this with you? There you go. Thank you. Um effective size of life. So what does that mean? ...
Well, we've sort of just demonstrated it and that is that the size of our light changes based on the distance of our light from our subject. So let me give you a better example of what I'm talking about. So we have these two light modifiers and right here, this guy looks much smaller than this guy over here, but as this small light modifier comes closer and closer, it gets about right there. The effective size of this light is about the same as this light is just much closer. So what's happening when I'm gonna give you this again our mat? Um So what's happening is that a light that's really, really far away? Let's talk about the sun. Well, that is a point source of light. It's really, really small, looks like a tiny dot in the sky. Which is weird because we know that the sun is gigantic, but the effective size of the sun is very small because of the distance. Now, if we took the sun that tiny little dot in the sky and were able to bring it closer and closer and closer and closer and closer to the world, it would look gigantic because it is and it would change the quality of the light. So what happens is you have a light that's very small or big, It doesn't matter Far far far away, it becomes effectively small and the light from that light modifier or light becomes very hard. But as that light gets closer and closer to our subject, what's happening is the light is wrapping its arms around the subject and it is killing all the shadows that happened to be around that subject and it creates soft light And so we're going to be playing with this and doing some different things with larger and softer light modifiers to show you that just because you have a large light modifier doesn't necessarily mean you have soft light and the same is true. Just because you have a small light modifier doesn't mean you get hard light, you can get it really, really close to create soft light so the size of the light modifier matters, but the distance also matters. So Quinn come on out, then we're going to start playing with a couple of things here, by the way, this is live and we have not rehearsed this, It's gonna be fun. So I want to show you a couple things. So if so queen bee, right, maybe right here, what we're gonna do here is I'm gonna plug this light in and I'd like you to start looking at the shadows behind Quinn. The shadows that are cast by this light. So I will turn this guy on. We're going to make sure our There it is. Okay, we're gonna kill all the lights here in the studio. And so what I wanted you to do is look at the lights that are behind Quinn, I mean the shadows that are behind Quinn and maybe I'm blocking this other camera over here. So I'll move that as well. There we go. Okay, so if we look at these shadows that are behind Quinn right over here, look how they're sort of really, really, really soft, really soft shadows. Okay, now, watch those shadows as they move farther and farther and farther away from Quinn. See how those shadows are changing. They're getting harder and harder as my light moves farther and farther away and as I move closer and closer, look at those shadows, see how they're just dissolving away. The closer I get, I'm gonna try not to bump into you, Quinn, but they're dissolving away when I'm really, really close. So let's look at the other camera angle really quickly. So see I'm really, really close right here, really close and we're gonna go to the other camera angle, see those shadows almost non existent. So we're gonna go back to this side shot here and now as I move away, look at the shadows behind Quinn. The quality of light is changing based on the distance of our light from our subject is really, really cool. Now this has some implications to how we shoot with light. I love just going back and forth and seeing how that shadow grows and shrinks. So one of the things that's happening here and the reason this happens, So we're gonna go back here to camera one, let's throw back on the lights in the studio just for a second. Okay, so what's happening here? So Quinn, come right right about here. Um I'm gonna move you over just about like this. There we go. So what's happening here? Is this light when it's really, really close to a subject? What happens is and maybe we can get a straight on shot so you can see straight onto There we go like that, That's perfect. Okay, so what's happening here is the light around Quinn. So this is wrapping around Quinn. So if we had something right here, that light was casting a shadow, the light that's wrapping around her is gonna be spilling into those shadows and killing those shadows. And so we're effectively getting softer light. So this is wrapping around on both sides, so on this side and on this side. But as we move this back, so we move this way back away from our subject. Okay, so that's moved back away from our subject. There we go. Yeah, so now the light can't wrap around to fill in the shadows. What's happening is as it's getting farther and farther away, that light is being blocked by Quinn and we get more and more shadows. And so the thing is, the farther the light is away, the harder the light is, the closer the light is, the softer it is because it wraps around the subject effectively kills all those shadows and the transitions. And so you can't have hard light. Okay, Quinn, let's have you come over here maybe stand about right here, we're gonna try to prove this out So we have a big light modifier. I'm going to turn this guy on actually it was on, I just turned it off. Way to go Wallace. Uh huh. When does the coffee show up? Okay, so I'm gonna turn this back on. There you go. I'll turn on the light, modify our a modeling light. Okay, so we have that. Let me get this cable here. That's here we go. Now. We're ready now. We're cooking with gas. So we're gonna do is we're gonna do close and far with both. A large modifier and a small modifier. And let's just see what happens to the quality of light. So for both of these, I'm gonna try to keep the light. The head of the light. So the center of this about right at Quinn's face level. Face level. Yeah, face level. Um Okay, so the first thing I'm gonna do is meter this light. I also need to make sure my camera is on there. It is. Everything is good. Okay, so let's meet her this light. I want this to meet her about. It doesn't really matter. F. eight, something like that. So, that's 3 6. Somebody increase the power of this light, something like that. Let's see if we can get that up to around f. eight. That's F. nine. Close enough. We'll take it. So, we're gonna try to be consistent. F. nine. The hallway. So, what I'm going to do now is I'm going to Shoot This F. nine. All right, 2, 2, 2, and we're gonna look at gonna have to move this back just a little bit actually gonna move it very, very close. I'm so close to the side. It's almost touching Queen, let's do that. That's really, really get this in close. Why not? Why not? That's f. 14. Okay, we'll take that f. 14 so Let me adjust my camera at 14. Perfect. Okay, are you ready? Quinn? Quinn has been ready all day, so now I'm gonna take this photo F 14 and look at the light on Quinn's face. It's beautiful. So we have really sidelight that's going to create lots of contrast. But what I want you to do here is I want you to look at the shadows underneath her chin. See we have almost no shadows at all. It's just this really, really, really soft directional light. Now, what will happen if we take this exact same light? The exact same thing? And I'm gonna move it as far back as I can and still sort of be in the shot, increase the power considerably because it's way far away. So now we are about oh, let's see 12, 15 ft, it's about 15 ft away, something like that. Let's see what that does to the quality of life. I'm gonna meet her this we're at max power here. So, let's see what we get out of that where you're at F nine. That's pretty cool. So F nine. That's what we're gonna shoot Do Do Do Do F nine. All right, Quinn look right at me beautiful, and I'm taking a shot. Okay, now this is different in so many different ways. Okay, so first of all look at the shadows underneath her chin, so they're still really, really soft, but now they're more pronounced. You can actually see this shadow here, whereas before it was a little bit moody. In fact, I will put these side by side and we can start seeing a couple things. I notice the light on the background, so Quinn didn't move at all. She's been in the same exact place this entire time, are a couple things to notice in these shots on the left hand side, notice that the background is really dark. In fact on the right hand side over here, it's black, whereas on the right hand side, the background is almost white, which is weird because on the shot on the left, the light was really, really close to the background and on the right hand side the light was really far away from the background. So that's sort of counterintuitive, We're gonna talk about that. That's something called the inverse square law and we're going to explain that. In fact, I accidentally just did the demo for ever square lot, but that's sort of that what's going on. What we're looking though at is the quality of light, hard or soft. So when we look at this light right here on this image, notice how soft it is. We can't really see any of the shadows, we can see shadows over here because the light was to the side, but if it was straight on, we wouldn't see any of those at all. Whereas here we can start to see the shadows. Look at this. This is a tale tale sign. Look at the shadow around her nose, see how hard that light is. That's just by moving the light farther away from the subject. In fact, what I'm gonna do is I think to make this a little bit more pronounced. Let's re shoot this first image. So I'm gonna move this really, really close. But this time what I'm gonna do is I'm gonna keep the light more on axis. In other words, I'm not going to put it to the side as much because I think that might be a little confusing to do that. So, let's do this one more time this time we're gonna keep the light sort of at the same position. I'm gonna go over here, meter that it's F 22. That's way too much light. Let's take that down by about half. Here we go. I really want you to see the difference between the hard and soft light. All right, so that is 63 getting close. There we go. That should be good. Mm hmm. Okay. F 10. We did have three people that are supposed to be here today, but unfortunately they had some sicknesses and so they were not able to join us and so we wish them well, there are two people recovering from Covid. They were supposed to be here today. So we're really sad for them but we're going to stand and make it through this. Okay, perfect. F 10. Okay, look at this light. Look at this light. So look at the light under her chin. C This is really soft. It is directional but it's just soft, beautiful light. Look at the light on her nose, this nose right here, this nose right here and look at how that shadow transition is. And now let's do that same thing again, once again with the light as far away as we can get it just to contrast. Okay, I think that's good. A blank. Okay, so that should be let's see what we get. F eight. OK. F eight is good. Mhm. Once again. Quinn, Perfect. All right. Ah this is much better. Demo much better. It's more pronounced. Okay, so now look at the lights under her chin right here, it's going to take a second to pop in and look at the light on the background. It's more pronounced as opposed to the shot. We did Just before we put those two side by side. You can see that this light on the right. It's a little bit harder than the light on the left. Let's try a different thing. I'm gonna leave these up for just a second. So you can sort of compare between these two shots. What I want to do next is I want to use a small light modifier and we're gonna see if we can get hard light and soft light using that as well. So we happen to have one. It's the one we were using earlier and turn this guy off. Okay, great. It's going to get rid of it. Goodbye light. You've been good to us now it is a very, very small light and it's the same exact shape. It's the same top box, it's just much much smaller. And let's see what that does. Okay, so first we're gonna do the light from the distance. Same distances before same power, same light. Here we go. Okay, let me meet her this light. See how we're doing, How you doing? Okay, lame o 6.3. Okay, let's take that photo. Small light at a distance click. Ok. Now look at this when we come back here, we have large light at a distance and small light at a distance, notice these shadows. So small light, look at the shadow in the background much much harder than the shadow from the larger light source. Look at the shadow right here under your chin so if we zoom out, you can see this is a much more pronounced shadow under her chin. It looks like a triangle as opposed to this one right here. So it's still a little bit harder but it's a little bit less pronounced. So the smaller the light is at the same distance, the harder the light is. But can we get soft light with this small light really close, I'm sure we can. So let's do it. Put that down a little bit so we don't blind you. Okay? I'm gonna get it as close as I possibly can. Here we go. That's me for this. Let's meet her this. Ooh. Too much light. All right, Here we go. Yeah, it should be about right, yep. F Nine. Perfect, perfect shot and look right at me. Excellent, Beautiful. Okay, this shot is coming in. There we go, notice again we have different contrasts. The background is a little bit darker but the transitions of the shadows on her face are much softer. It's really crazy. So, let's take a look at this series of photos right here we have large light modifier at a distance. Small light modifier at a distance. Small. Uh yeah, large. Close and far. Small. Close and far. And notice the ones that are close, the background is darker. The ones that are far the background is lighter. Take a look at the shadows behind. The ones that are close to shadows behind don't really exist. They're really soft. The ones that are far away, we have very pronounced shadows way behind because our light is becoming harder. And so this is a really big thing to wrap your head around. So as we're shooting more and more throughout the day, I'm gonna be pointing this out when we start to shoot And if I'm shooting with Quinn, let's say, and I start to see that I'm having issues with the shadows back here. Or more importantly, let's say we're shooting with a group of people and we start seeing some weird shadows here. The the impulse is to start adding more and more lights to get rid of those shadows. But what you'll start to see is more and more shadows and it's gonna start looking really wonky. And so the better thing to do is instead of adding more and more lights is to go bigger and bigger and bigger. So if you want really soft, wrap around beautiful light in your portraits, you need really, really large light modifiers. In fact, we're going to shoot with Quinn with a light that is so big that we're gonna shoot inside the light, It's huge. We have to have a little crane to move it around. It's gonna be really cool. There's another thing I want to talk to you about and that is the difference between a point source of light and diffused light. This is sort of a fun topic for me sort of geeky. But let me show you what I'm talking about. So what we're looking at right here, this is diffused light and uh what that means is that light is coming from a point source of light, which I'll show you and it hits this diffusion material. And what happens as soon as light hits that material, it scatters its diffused, it starts flying everywhere. And what that does for us is it helps us to fill in shadows and create soft light. So instead of light being really, really directional and causing a shadow to be cast, light is scattering everywhere, bouncing around off the floor, off the ceiling, off the wall, What happens to be around and if there would normally be a shadow there now there's not because light is bouncing into that thing, it's diffused light, That's why soft light modifiers tend to have diffusion panels or multiple diffusion panels. For that very reason we want the light to be bouncing everywhere so that it wraps around our subject, hugs them and kills all the shadows. So if we have a point source of light, let me show you this really quickly. We have something totally different. So this is a point source of light. Turn this off so you can sort of see it a little bit better. Quinn could you hold this for me? There you go. What's for your weight? And so this will be close enough, Matt thinks so, yeah, so this is a point source of light, It is this one little dot of light. You can sort of see right there, the sun is a point source of light. An old incandescent light bulb, any kind of round, small thing is a point source of light. And so what's happening is the light travels in a really predictable way. It comes from this point source of light and it goes straight out and it goes out and it grows like a big sphere, like a big ball. And so what that means is that from a point source of light, we don't have light bouncing around and filling in shadows and all that kind of stuff. That's why this light tends to be much harder because nothing is filling in those shadows. That's why there's no transition area in the shadows because the light is hitting straight on, it's just going bam, whereas diffused light is hitting from the side around the back underneath and it's filling and it's killing those shadows, a point source of light doesn't do that. When we talk about some of the light principles and laws specifically the inverse square law and things like that, those are all based on point sources of light. And so I'll give you a little exception and we're doing those demos to say, here's the math, here's the philosopher, here's the uh, the laws of physics that makes this work. But when we start sticking soft boxes and stuff on, it's not gonna work exactly that way because it's based on a point source of light versus diffused light. So it might be confusing when we start doing things like, hey, this isn't working the math isn't working exactly as you said, that's because a lot of those things will be having diffusion. So the other thing with a point source of light that is cool, um stay right there, I'm gonna be right back. And that is that you can have things like this. And what that does is when you put this on your light like this, you still have that point source of light being very directional. All this is doing all this big thing is doing in a beauty dish or whatever is all the light that's coming out from the side that would not normally make it to the subject. It's being caught in this and reflected back. And so it's softening that point source of light. So now you are going to have some things wrapping around and killing the shadows and coming in from the side. It's just not as much as it would be if you had a diffusion panel on the front. So this is hard light that's soft, if that makes sense. So we have a harder light source that's larger and so it softens the shadows and so you have very directional light that's softened just a bit. So let me show you exactly what I mean. I know we're getting into the weeds here a little bit on this stuff, but that's where I live. I love that kind of stuff. So what we're gonna do is, um we're going to shoot with this beauty dish and we're going to contrast that with a really large beauty dish. So I'm giving you a heads up. There's that giant white beauty dish over there that I'm gonna need from you in a second. So this is very hard light. So what we're gonna do here, I'm gonna take this off, I'm gonna blind you for a second. Quinn, so I'm sorry. Uh So let's just kill all the lights in the studio just for a second And let's see if we can see this with camera two and you can see there that this light is so directional. Look at the shadow behind Quinn. It is just bam there is nothing filling in any of that stuff when I put this over that. So see if I can do this in the dark, can I do it in a dark? Yeah, I did it in the dark. Okay, so now it's hard to see on the video but that's just slightly softer light. It's a little bit more directional is a little bit softer. So what I'm gonna do is really going to take some really nasty portraits with zero light modifier and then we're gonna add some light modifiers to see how this effective size changes things. So could you hold that for me? Alright, we're gonna meet her this and this is, you know, try anything in your studio. This is gonna be much better if you try this in your studio and see it with your own eyes versus seeing it on a computer screen or however you're watching this. So, um wham o that is F 12. We're gonna go down to F11 received. We can do that. Left 11 here. Area F 11. Alright, So, we're gonna start comparing and contrasting this stuff and looking at them in ways that are really nit picky. So here we go. I'm gonna try to keep this consistent. So, F 11 looking right at Quinn. I'm gonna try to get the background shadow as well colic. Okay, let's look at photo # one with no light modifier whatsoever. Here it comes. Here he comes. Is it going to come into my computer? No, it's not. Why is that? Let me try one more time. I think my computer has had a hiccup and let's see if that is going to be better. There we go. Okay. All right, look at this photo, a couple of things to notice, first of all. Look at the shadow underneath Quinn's chin. Very, very hard shadow. Look at this dot in her eye. We're gonna talk about that a little bit more and more depth a little bit later. Notice the size of that and the location of that. Look at this shadow over here. What's going on there. We've got a shadow. A transition area and even a larger transition area. That's wonky. That's because of that glass dome, that's over our point source of light. It's causing that to happen. So, what we're gonna do now is we're going to throw on this beauty dish and let's see how that changes things. So all this is going to be doing is it's just gonna be catching a little bit more of the light that would be flying off into space and reflecting that towards Quinn. It should be, yep. F 14. So we're getting more light. Okay, or in the same exact place. Perfect. This new photo is going to come in here. It is okay. It's notice a couple of things. Look at this dot in Quinn's eyeball, it has changed shape. So this is the first shot, little dot second dot larger. So this thing has changed. Look at the shadows around Quinn's nose. See how we have sort of a transition area. We'll go to this other one. Look at that. No transition area. Just bam. Oh, so side by side, let's look at these two. Side by side. This both of these are hard light. The second one is just a little bit softer, hard light. You can see also the shadows by her hair. See how we have sort of soft shadows here. This is a soft shadow. We look over here, it's all just punched in the face, hard light. Now, what we're gonna do is I'm going to grab yet another hard light modifier. This is this giant one. So let's turn on the lights just so we can see what I'm doing here for a second and what we're gonna try to do is not drop that. All right, that comes off. I'll put this on the ground. Five bucks if I kick that later. Okay, I'm gonna put this giant reflector on here. Here we go. Great and good. Yeah. Okay, good. Alright, that's a much larger. This is a much larger beauty dish. Let's meet her. This light power. It makes a click. Can you hear that bam? It's like a bell. That's really cool. So that's F 14. I love lights that make a noise. So let's kill the lights in the studio just so we can see sort of what this looks like. Maybe if I step to the side, don't you see it with the other camera and sort of see this is still hard light, but again, it's light. That is a little bit less hard than before. So we're gonna take this photo. So I'm going to shoot the lights in the way so I have to move just a hair moving. My camera's gonna change things just a bit. But let's take a look at this polje now again, look at a couple of things, the shape of the circle in her eyes has changed just a little bit. The shadow around her nose changed just a little bit, whoops. The shadow on the background has changed just a little bit. So notice the shadow in the background, much larger transition area than this shadow in this shadow. Those are all starting to change now. The thing with this is now knowing that this hard light is a little bit softer hard light and we know that we have a point source of light. In other words, that light that's right in the middle, that dot right there. We can do some things to take that to our advantage. So Quinn, we're gonna try to do a little bit of a beauty shot with this hard light just to show you that hard light can be wonderful. So what I would like you to do is look straight into this light. Yeah, now I'm gonna move this around until I get it to where I think it looks pretty good. Let's see if we can get something that looks beautiful with hard light source. I'm gonna come around here. So chin down just a little bit. There you go. Beautiful looking right at me. Capote ah that's cool. Okay, so when you look at this, we can see we have that hard shadow underneath her chin. But we've got this beautiful light on her face right here. Notice how we see the details in her cheekbone. Yeah, this is going to pop in here and saying There we go. Um you can see these shadows just very, very subtle shadows here. You can see how it accentuates your jawline. You can see how it makes your lips look really awesome with this shadow underneath almost like a drawing a cartoon kind of drawing from Liechtenstein, something like that. So the issue with this is this hard shadow underneath her chin. If there was a way that we could soften this just a bit, but keep the rest of the hardness of this, wouldn't that be wonderful? We would get this really beautiful light. The other thing that's beautiful about this, look at this right here. So this line in her hair that is coming from that hard light, we're gonna talk about what that's called, it's called a speculum highlight. We've got another one here. Another one here, you can see on the front of all of her curls. So what we're doing with this soft, hard light is we're uh taking all the details in her face and her hair and we're accentuating those and we can start mixing other modifiers to then soften the effects of some of the other shadows and things that we're getting. And so and also noticed when I moved the light from one side to the other, you can see it's much more flattering the one on the right instead of the one on the left and we're gonna talk about that, the direction of light and all of those things. So let's turn the lights back on. So the thing that we need to figure out next is exactly what I just talked about and that is how does it matter where we put the light up down to the side, close far away. Um So we have the effective size and we understand that closer is going to be softer. Farther way is gonna be harder. Changing the size of our modifier is going to change either softer or harder light. But the other thing that we need to do hand in hand with that is the position of our light because the position of her light, it's going to change the shadows, that's going to change the form, it's going to change the contrast and all kinds of things. So we need to start moving forward with peeling the onions so hard and soft light. We've got that we figured that out effective size of light. Okay now that we've connected those dots now we need to start looking at changing the position of light and using those first two things to build on that. And the more we dive into this the more you're gonna see exactly how to use your light modifiers.
Class Materials
Bonus Materials with Purchase
Ratings and Reviews
user-a07413
Wow, Impressive with lots of information on light modifiers. Lots of variations of use and the bonus material. Mark is very good as a teacher. Glad I purchased the subscription plan so I can see the other Mark Wallace classes. Now to go to work and use the information.
Paul
I've heard much of this before, but this class really does a good job explaining and demonstrating the principles and techniques it covers. Mark is certainly quite knowledgeable, and he makes the material accessible and easy to grasp. It does cover quite a lot of ground, and while others may go into more detail, I think this class is great for building a good foundation.
Mario Furtado
Mark and his crew did an excellent job in this class. Now I am eager to see Go-To Lighting Setups and Studio Lighting Essentials. Congratulations.
Student Work
Related Classes
Lighting