Remove Artifacts, Enlarge & Restore Images
Lesson 5 from: Photoshop AI: Getting Started with Neural FiltersBen Willmore
Remove Artifacts, Enlarge & Restore Images
Lesson 5 from: Photoshop AI: Getting Started with Neural FiltersBen Willmore
Lesson Info
5. Remove Artifacts, Enlarge & Restore Images
Lessons
Lesson Info
Remove Artifacts, Enlarge & Restore Images
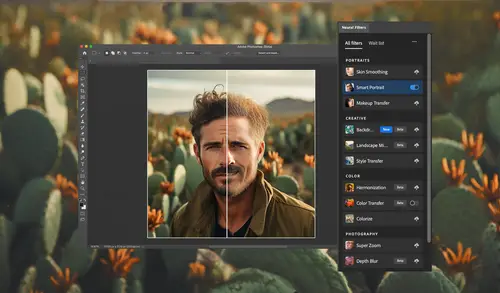
(upbeat music) Photoshop offers a series of Neural Filters that are designed for removing artifacts, scratches, faded appearance of images, and also for scaling up an image to make it much larger while retaining the sharpness that was in the original. So let's take a look at how those work. Whoever saved this image after scanning it used really bad settings when saving. If you zoom up close, it was saved as a JPEG file. And when you save as a JPEG, it asks you what kind of quality you would like, and the lower the quality is, the smaller the file size will be. And I can see that this image is divided up into a bunch of large squares. They'll look like they contain blurry information. Those are JPEG compression artifacts, and it really doesn't help the look of the image at all. Well, let's see if we can reduce or eliminate those artifacts. To do so, choose Filter, Neural Filters and there's a couple different places in here that will allow for JPEG artifact removal, but there is one t...
hat's dedicated to that task. It's down here near the bottom and it's called JPEG Artifacts Removal. I'm going to simply turn that on and then all you need to do is here choose the strength. If the JPEG artifacts are not too strong within the image, you could attempt to set it to low, but in this particular case, when I do, the image feels just blurry in general, and I can still get a slight sense for those big squares that used to be there. Then if I set it to medium, it will be a little bit more aggressive and I notice a little bit more details potentially in the face, a little less of the blocky look. Finally, I'm gonna bring it to high because in this particular image that was just so obvious that I think it might need it. And now let's see the difference. I'm gonna click on the preview icon down here so we can see what it looked like originally and what it looks like afterwards. And right now we're zoomed up to 400% view. And so if it looks jaggy still, that's just because we're zoomed in so far. So let's zoom out on the image until we're at 100% view. And now what I show you before and after, you'll see that that end result is much better. Let's switch to this image and this one needs a little restoration. So let's go to our Neural Filters and you're gonna find at the bottom of the list is a choice called photo restoration. And when I turn that on, it's going to start working on the image, watch the face, and you'll notice that we're gonna get additional contrast and detail appearing not just in the face but in the whole image. Now we can control this because we have a choice of photo enhancement and enhanced face. If I turn down the enhanced face, I could turn it all the way down so it doesn't attempt to add details and contrast to the face. Then we could experiment with just the photo enhancement choice. I'll bring it all the way down. And now with both of those down, we should be looking at the original photograph. So now I can decide exactly how much contrast and other enhancement I'd like to have done to the photo as a whole. Maybe until its outfit starts looking like it has sufficient contrast. I'll come then down to enhanced face. And this time I can concentrate just on the face and decide how much can it handle. And if you crank it up too high, it can look artificially sharp in one area where it doesn't match the rest of the image. So I'm gonna back off on that a little bit, but I would like a good amount of enhancement on the face. So I'm thinking somewhere right around 70%. Then we also have a choice called scratch reduction. And scratch reduction will attempt not to do too much to the face because if it didn't do that, then you might think that these wrinkles on the forehead are really scratches, but instead it'll hopefully concentrate on what's outside of the face. And I'll bring up my scratch reduction and let's see if you can clean up a lot of that background. Then I can come down to adjustments and if the image is overly noisy, I could attempt to apply some noise reduction. If the noise that I see within the image is really specs of color, then I could bring up color noise reduction instead. But on a black and white photograph, that won't be the case. If the image has been scanned out of a publication like a newspaper, magazine or brochure, then it could have an appearance of little dots that is made out of called a half tone. And if so, this half tone artifact reduction could attempt to reduce or eliminate that appearance. And then if it was saved as a low quality JPEG image, then you could bring up the bottom slider to attempt to reduce that as well. Well then usually you can apply more than one Neural Filter to an image, but what you'll find in this case is that some of the Neural Filters are actually grayed out. Do you notice this one here called colorize and another one called harmonization? Their little switches here look a little darker than the others, and that means they're disabled. And if I attempt to turn it on, it simply won't work. Well, that's because this is a black and white picture. And if I look up here at the name of the file, it tells me it's in gray scale mode. You can't add color when you're in gray scale mode. So I'm gonna have to click OK to deliver this end result, and then I'm gonna have to convert it to color before I come back in and use the colorize filter. So let's click OK. Then all I'm gonna do is come over here and change the mode to RGB and I can choose to flatten or no, it all depends if you need that original image. I'd usually choose don't flatten because then I can always mask this result and get back some of the original if need be. Like in this particular case, if you look at his outfit, notice the buttons on his shirt are missing and his little watch chain right here is missing. So those are areas I might want to mask to get the detail back, but let's just head back up here to Neural Filters. And let's turn on the choice color colorized. Now that we're in RGB mode, it's able to do so. I don't know that I'm all that happy with the results, but I'll still click OK. And as long as we have it on a new layer, I could always add a layer mask. And one trick when adding a layer mask is to hold on the Option key, Alt Windows, that automatically makes the mask black to begin with. And then I'll paint with white and maybe just put in the color on his face. And then let's bring back his buttons in his, I think he had a pocket watch. So all I'm gonna do is go to the layer that's underneath. That is the layer that we did the photo restoration on. I'm gonna add a layer mask there. And then I'm gonna paint with black right where his outfit is here. And by doing so, we'll bring back the original version where I can see both his pocket watch chain and those buttons coming down. Then let's switch to a different image. This image is low resolution, and this is what often happens is people end up sending me images to be used for a particular purpose and they're just not large enough for whatever it is I need to work with. And so if you would like to enlarge a picture, let's look at a few different methods of doing so. The first thing I'm gonna do in this case is more of a traditional method. I'm gonna duplicate this image just so we have two versions and I'm just gonna call this image size because that's what I'm gonna use to resize it. So I now have a second version of the image. I'm gonna come here to image size and let's make this as a percentage, let's say 400 times larger. That means four times the width, four times the height, and we'll click OK. When I do that, if you look at the result, you'll find that it looks blurry. It just doesn't look all that detailed. It doesn't generally look usable. This is 100% view of the picture. Let's see if there's any way we could have gotten a higher quality result. Well, what I'm gonna do is just go to our original version of the image, which hasn't been scaled yet. And instead of using the standard choice of image size, I'm gonna go to the Filter menu and choose Neural Filters. And in Neural Filters there is a choice called super zoom and super zoom will allow me to scale up the image. To do so, you just hit this little plus sign. Right now it says 1X, which means the original size. And if I click that, now I'm going for twice the width. Now we're gonna go for three times. I'll click it one more time and we'll be at 4X the original size. Now here you want see a preview. This is just going to be where you can look at the original picture, which you can see look pretty jaggy and bad. In order to see the result, you need to look at the big picture over here. And we were originally viewing this at 100% view right when we went into the filter. But now if you look at the name of the file, we're only viewing it at 25%. So I can type Command plus multiple times until that goes up to 100%. And now I can look at what we ended up with. It's not the best version we could have of the image 'cause we started with such a small version. But let's compare this to what image size would've done. And before we do, let's fine tune some settings over here. There's a choice called enhance image details. And what that does is if you turn it off, you're just gonna see big pixels as if you zoomed up on your image. When you turn on enhanced image details is when it does its work to try to take the jaggyness that you'd usually end up with and smooth it out and create a semi usable image. If it was a JPEG file to begin with, turn on remove JPEG artifacts and it will likely clean up the look around the edges of areas. But this image, it wasn't heavily JPEG and therefore this isn't necessarily gonna help. If anything, it made the image look noisy. So I'll turn it off because I think I prefer the other version of it. And then here we have a choice called noise reduction. If the image is rather noisy, you could bring that up and you can also sharpen the image. But sharpening I find usually if anything I put at a relatively low setting. Then I'm gonna click OK. And filters are not able to change the size of a document and therefore it looks as if I just cropped in on the image. All I need to do afterwards is go to the image menu and there's a choice called reveal all because the picture is now four times the size of the document it is contained within. If I choose reveal all, I'll be able to see all that I have. So now let's take this version of the image and compare it to what we would get if we used image size instead. I'll go over here to the file that we originally scaled up with image size and let's try to look at the same general area. In fact, why don't I copy this version of the image. I'll just do a select all and copy with my keyboard shortcuts, and then I'll come here and choose Paste. And now we have on top the version that was scaled with image size. I'll turn off its eyeball. Here's the version that was done with the Neural Filter. So Image Size, Neural Filter, Image Size, Neural Filter. And we can even mix these two together if I wanted to add a mask to one. But in this particular case, we scaled up an image to four times its original size, and that's quite a large amount, especially when you're starting with an image that I believe was only about 800 pixels in the widest dimension. So once again, scaling up with image size versus the Neural Filter, it depends on the image as to how good it will be, but it is often a much better choice than the standard of image size.
Class Materials
CLASS MATERIALS
Ratings and Reviews
Chris Evans
Introducing the brand new Neural Filters and the how to get the best out of them. Ben does this with his usual ease. The examples he uses are clear and precise and the extra tips he throws in are worth the price of admission alone! Brilliant class!!!
Audrey Agin
Oh Ben you are wonderful. I will have to watch this again. Parts are Medium to Advanced and that is what I am needing. These lessons showed so many different situations that a person may come across in their photography or restoring old photos. You also showed some work arounds! Most other teachers may mention something that the topic can also be applied to, but do not show how to do it. That is so frustrating! They stop short of giving a full lesson. You go deep into your lessons, I can always find info to help me out! Thank you!
Aston Moss
Great step by step instruction with some excellent ideas as to how to enhance and completely create images.