Lessons
Day 1
1Backing Up Your Life
22:35 2File Organization
30:59 3Building Your Preview in Lightroom
29:24 4Library Module: Nuts & Bolts
32:10 5Sorting & Selecting Images
30:58 6Keywording
26:39 7Exporting Your Collection
29:47Manageable Organization
28:58 9Importing iPhone Photos
29:17 10Critiquing Your Own Work
34:10 11Storytelling with Images
16:55 12Image Quality
28:21 13Develop Module Basics
28:30 14Develop Module Controls
24:59 15Installing Presets
29:55 16Saving Styles to Presets
38:02 17Making Every Image Better
24:29 18Correction & Calibration
24:14 19Heal & Clone Brush
31:12 20Videos in Lightroom
32:13 21Adjusting Video
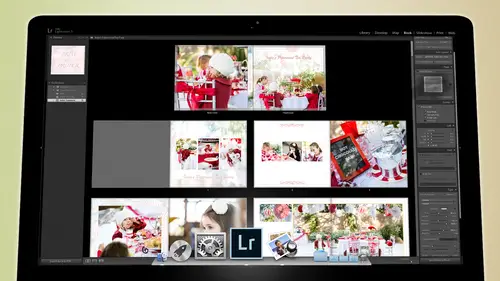
23:22 22Creating a Collection of Videos
18:06 23Intro to Print & Book Module
18:25 24Organizing Your Story
39:35 25Framework of Building Your Book
39:13 26Stylizing a Photo Book
27:52 27Power of Page Arrangements
31:02 28Making Simple Slideshows with Video
30:11 29Mobile & Publish Services
16:11 30Creating Catalogs for the Web
28:24 31Printing Your Images
21:35 32Printing for Scrapbooking
26:53 33Final Q&A
25:33Day 2
Day 3
Lesson Info
Creating a Collection of Videos
We have now selected video we played video, we've cut video we've adjusted video and we've even adjusted video inside the develop module by making a copy of the j pay or making a jpeg of it and then sending it over to the develop module working on it there that's where you can get do a little bit more to it but then remember, you have to come and copy that information over to the video side so you take from the j peg and put it onto the video once you've done that, then what you need to do is start creating a collection of the things that you've worked on the things that you know are because right now I've got a bunch of videos here that I want to use so these were a bunch of videos that I know are going to be in there somehow and so I want to go in and take this video here because I have already finished it and I know it's what I want and I'm actually going to take this one and shift click over this one because remember, there are a bunch of stuff on this one I'm going to synchronize ...
the settings and this time I'm going to check all because everything in this one we'll probably work on this because the same day it's the same circumstance everything's the same, so I'm going to synchronize and now I can look at this file and just make sure that looks pretty good. The only thing that I'm gonna have to do on this one is just brighten it up a little bit because it was a little too dark and always bring those blacks down a little bit once anytime you exposed brightly expose something, you gotta bring the blacks down to kind of ricin back up those those blacks, otherwise they'll they'll get too thin um, and then and then I'm gonna toggle between the two just to make sure that I don't have see it see how that one's a little less saturated and this one's more saturated, so I'm going to take the saturation hit the option key to get that saturation, take the saturation down one one click that way, they look a little bit more alike, just double checking as I go. So then I'm gonna highlight these two and I'm going to go in and create a new collection and we're going to call it final video files. These are the ones we're going to use, I'm going to set it as the target collection and hit create and now I'll have to do is hit the bee key, which will put it in the tire of b is stands for boy that's great, I'm going to put it in the target collection, so I had b and that c I added those two dots on it, and now your final video files are in here, and you're just going to start collecting stuff for those. So now I'm going to go down here to these video files and I'm going teo high and you, khun remember, you're in the grid so you can highlight nothing really changed on all these videos so I can highlight an entire section videos I'm gonna highlight all of those videos right there, and I'm going to, um, I'm going to go in and maybe bring up the exposure one little bit, and then I'm going to add a little contrast to it and bring the blacks down just a little bit and warm it up just a little and I know this based on what I was doing to trade jin's shot before kind of what I could do with it and what would work if I need to test it and look at it and see if I did the right thing, then hit the space bar to get it toe open up and make sure that it looks good, so just make sure and then if I think, oh, it needs a little something, I'm gonna go back to the grid before I make the adjustment. And you can change the size of these grids if you need to, but the reason you go back to the grid is so that you don't have to synchronise because it's synchronizing right now, if you're in the grid, but if you're here it's on ly doing it to this file, not to all of these now you can turn on the auto sync here, and then it will start doing it to all of those, okay, but you got to just make sure that either you're in the grid and you're synchronizing in the grid or if you're here, you've got to make sure that your auto sync is on. So then you khun you, khun b working on it, take the black down a little bit more um and we're gonna hit the option key and bring saturation actually things saturation. Khun, stay where it wass and here we go. This is one of the reasons that video and photography or so different if you're taking photographs, you're looking at moments of time, and so the fact that we've frozen them in this state, we would never accept that photo, but because it's a video that we've frozen them in the flux of time, this kind of slowed us down I mean, is everybody looks bad if you freeze them. Mid sentence or whatever they always have the weird look on their face or something like that and so it's important to recognize the difference between video and photo in video were trying to pay attention to what people look like over a period of time in photo we're just worried about this absolute moment so now we've got those all set up we've already selected this one that we want remember that there's one mohr that we need to select and that's the reason it's not here is because I'm inside of a collection and that video that I wanted that I that that extra um virtual copy that I wanted is actually here with all of his photos sitting next to this one so it's right there so I'm gonna have to shift click to this one and synchronize those settings to get all the information over to that one because it's the same photo are the same video but as different settings on it and then I'll go on grab that um that version of it and drag that video file into the final videos and I also ought to drag it into the trade and collections so see now it's there because I just didn't have it in there so with all of these so I'm not sure exactly what he does in this but I chose it for a reason so let's see I love you mom I love that got to keep that so we're going to grab that and drag it into the final video files we're gonna play this one and I've cut some of these so if you open this up you can see that I've cut on lee this portion of the whole thing so we'll see what he says here I think he's just playing around yeah he's just playing which is fine I think that's a useful piece um so we'll grab that one and put it in the final video files so we're collecting all of our video files for use later now I'm going to give you a little teaser but we are going tio because it's such a long thing too it's so much longer event to dio actually you know what let's just do right now watch this, okay? So I'm this is by no means of finished video because we haven't collected all of our video but uh probably most people have played with slideshow module if you haven't played with the slideshow module yet it's where originally it was meant to show videos I mean to show photos one after the other and kind of fade between the photos and then you could you know you look at your photos into music things like that and so originally this is what your video would look here your slide show would look like, so if I go teo um, so here's, the new year day party, and if I want to create a video or ah, a slide show of these, I would simply do this. I would go in and collect the the images that I want, so let's, say, three star images, so there's, all the slide show images that I want that tells the story, there are seventy three of those photos I could then pare that down a little bit, but we'll just start to slide, show on and see how it goes from there. So I'm going to highlight all those photos, and I'm going to go into the slide show module, which is right here click on slide show and in the slide show, I again have presets, so I khun whatever I do over on this right hand side here to change the way the slide show's gonna work, I can come over here to the left side and I can make it into a pre set, so all I have to do is click on that, and all of my settings have been set, so once I've set my settings for it, then I can come down and do a little tweaking to them, and the tweaking that I would do would be like, you know, whether or not there's a a border around them and whether there's some texts somewhere whether I showed the star ratings to each picture you know all that kind of stuff but I'm gonna make a really nice, clean slideshow and at the bottom you have the option to put some audio in there and we're going to select music and I'm going to go and select some music from triple scoop music and if you don't know triple scoop music is triple scoop provides um it provides licensed music from independent artists for people like me so that I have license to use music rather than stealing it. So I'm going to go to, uh, my license music here and I'm going to search for there we go and so this is an artist called mindy gledhill uh, who I think is amazing and we're going to do this one, okay, so we've chosen a song called trouble no more from mindy gledhill and we can choose you know how how long we want the slides to play and for us we're going to choose like a three second slide and we're going to do fades in between the slides of maybe say a second and we can put them in a random order, but we'll keep him in the same war and we hit play and it's right now it's just building the previews and here we go this's the way we're going to show the pictures to friends and family and things like that on dh when I when I do a photo project for someone I always put a slide show together so that music helps to tell the story and this is this way wait wait okay, so that's a slide show right now? What if I wanted to add video to a slide show video for two a slide shows a very interesting animal because now you're doing slot of photos and you're doing video but it's very simple to do uh back in the grid module we would choose a siri's of photographs so let's go back to trey gin here and let's let's look for some photos and we're just going to sort by attribute we're going to grab say let's just grab these photos here this one's supposed to be black and white, we just changed it s o we're goingto going to quickly change that um we're going to look for there we go to star and above. So we've got a bunch of to start above photos going to highlight all of those and I'm just going to make a collection out of these so I'ma hit plus created collection and I'm gonna put this inside of that video segment that we're working on it include the selected photos and I'm gonna call this slide with video and then I'm going to hit create and now their slides with video and there's fifty two images that's that's a good collection probably maybe a few that we don't necessarily need but we can go through and work on those but what I want to show you right now um and I'm gonna kind of change this up a little bit I'm gonna I'm gonna delete a good portion of these just so that we don't uh so we don't waste a lot of time looking at I want you to see the videos and stuff so let's uh just highlight some of these and that go on sam just selecting images that I think I can remove without losing the content and obviously will work more on this later but now that we've got our photos and we've got some video here so we got some video that's going on we can then highlight all of these and put them into the slide show but what we kind of want to do is we wantto um we want to take some of the video and make sure it's interspersed so you see how this is interspersed in this video so I'm goingto click on this one let's see let's get rid of this one here okay? And this one yeah yeah absolutely so if I want teo let's make this one black and white um let's get out of this one here uh let's do this one and we're gonna turn this into black and white so I just hit the wiki which turns it to black and white and then of course you'd probably want to reconfigure it a little bit to make it a little more contrast so let's just pump the contrast up on that just a little bit and now let's just highlight all of these and go back to the slide show module and I want teo wherever you're wherever your cursor is so if I put my cursor here it's going to start playing from there um now I don't know that trouble no maura's ah is the perfect song for this, but I'm going to show you what this looks like if you have video and, uh slides in it so you have stills and you have video and there's a little thing here that's really important um and that is see that video to music balance if you do all the way to music it's going to make sure that none of the video the audio comes through on the video so then it's it's very much a slide show, so we're going to try it with just the music and we're gonna have a play, so in this case we're goingto take the slides down a little bit more maybe two seconds of peace and we're gonna take the fades down a little bit there a little too long okay, so I'm gonna hit play and now it's going to prepare? No way, no way, but that was a good example of a comparison. So if you can show, you know, the tears and the laughter all at the same time, I think that's really useful and so that's that's one way of dealing with the the the imagery. So you've got imagery, you've got video, but the music kind of ties it all together. Now you notice we didn't put any audio into it? Eso let's, try that again, but this time let's put some audio into it, so we're gonna go again to the video audio balance and we're going to take the video down a bit. So now instead of the music it's goingto be more video, but what happens to us when there's no video and that's the that's, the interesting thing? And so we're going to hit play again. Wait so that's pretty impressive tio what it's called ducking and so as soon as it hits a place where there's some kind of audio to be had, it takes the music and ducks it under the audio so that you can hear the audio from the video soon is the audio from the video ends comes back up, and it removes this audio, and it fades into the music again. And so if you wanted to create a slide show of of of full of photos and video, and then cross them back and forth, that's a really easy way to do it. And the and the whole thing could be done all inside of light room with video and photos all put together.
Class Materials
bonus material with purchase
Free Bonus Material
Ratings and Reviews
Steve61861
I have spent a small fortune buying classes from Creative Live, and I have learned a great deal from many terrific instructors. This class ranks as the #1 best class I have purchased from Creative Live. It was done in 2014, and the changes and improvements in Lightroom since then are far too numerous to count. However, I just watched the entire class again (August, 2018) and I realized that the class is as valuable today as it was when I originally purchased it. The title says it is for Scrapbookers, but it could have been Lightroom for Everyone. Jared covers every part of Lightroom as it existed in 2014, not just Library and Develop! He has a marvelous teaching style that motivates and inspires one to grab a camera and go take great images. Yes, it is dated. Yes, it is a long course - but only because it thoroughly covers a vast amount of information about Lightroom. And, yes, it still has real value in 2018, and I plan to rewatch it once a year now for the motivation it provides and the incentive to bring myself up-to-date on ALL of Lightroom's latest and most valuable features in all modules. Thanks CL for bringing Jared Platt to us, and please bring more of his great classes soon.
a Creativelive Student
Good class. Jared is an excellent instructor and provided good information. I was more interested in Lightroom than scrapbooking and I think the mix was about right for me. While I found the focus on Trajen interesting and heartwarming ... I found that too much information was shared and too much time was spent on his story. It was distracting for me and I think would be hard to listen to over and over again if I were to buy this course. I think that some of the material was rushed because of the time spent covering this and other unrelated topics. I prefer a more focused approach. I was more comfortable when he was showing photos of his kids as examples the first day. However, I enjoyed the class and learned a lot. Thanks!!
cricutDIVA
Thank you soooo much Jared. I am an avid scrapbooker and still an amateur photographer, but you have given me so much helpful information that my pictures are looking really amazing now. I often share on Facebook and the compliments I have been getting since I started applying what I learned from you are astounding. I have never received so many compliments on my photos. Prayers and positive vibes for Trajan and his family and friends!!!