Lessons
Day 1
1Backing Up Your Life
22:35 2File Organization
30:59 3Building Your Preview in Lightroom
29:24 4Library Module: Nuts & Bolts
32:10 5Sorting & Selecting Images
30:58 6Keywording
26:39 7Exporting Your Collection
29:47Manageable Organization
28:58 9Importing iPhone Photos
29:17 10Critiquing Your Own Work
34:10 11Storytelling with Images
16:55 12Image Quality
28:21 13Develop Module Basics
28:30 14Develop Module Controls
24:59 15Installing Presets
29:55 16Saving Styles to Presets
38:02 17Making Every Image Better
24:29 18Correction & Calibration
24:14 19Heal & Clone Brush
31:12 20Videos in Lightroom
32:13 21Adjusting Video
23:22 22Creating a Collection of Videos
18:06 23Intro to Print & Book Module
18:25 24Organizing Your Story
39:35 25Framework of Building Your Book
39:13 26Stylizing a Photo Book
27:52 27Power of Page Arrangements
31:02 28Making Simple Slideshows with Video
30:11 29Mobile & Publish Services
16:11 30Creating Catalogs for the Web
28:24 31Printing Your Images
21:35 32Printing for Scrapbooking
26:53 33Final Q&A
25:33Day 2
Day 3
Lesson Info
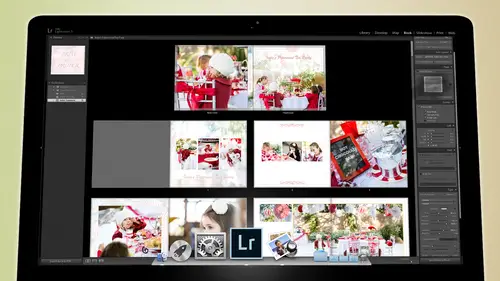
Building Your Preview in Lightroom
So then I go toe light room and inside of light room I'm going to then import them into the card arming into the int'l light room itself so the card gets copied to the hard drive once they're in position on the hard drive then we import them into light room on the way we do that is by going to our import button right down at the bottom left hand corner so we're in the library module and we go to the import button click on import and then we simply go find that folder wherever that folder is so in our case it's in the photos full of the drive and inside of the photos dr there is a family photos folder open that up and scanned down to find our last folder that we just made click on it and you can see those of the two photos that we brought in from our camera or from some event and now we have to decide what to do with them you could copy them is deon geez you could copy them you could move them or you can add them so over on the left hand side is where we get the images over on the top a...
rea in the middle is what we do to the images like whether we cop amore ad notice that when we add them it says that we are adding photos without moving them so all it's doing is looking at him. Just like when. When you make the card catalogue in the library, you put the books on the shelf and you put the cards in the catalog. You don't move the books, the books stay where they are. And the card catalogue tells you where they are on the shelf. That's. Exactly what add does it knows where the photos are on the shelf and it's not going to move them so that it can go get them when it needs them. Um then over on the left are the right hand side is what we do with the photographs upon importing. And this is pretty critical. The first thing is, uh, what kind of previews do we want to build? So I'm gonna zoom in here so you can see this because this is a really important area. If we build minimal previews, it will do its job really fast. And it will just take whatever previews were already on this. Cameron, get him in really quickly and it's just gonna it's gonna make real small preview so that you could just see what they are and it's done real fast. If you build standard previews, it will take a little longer to do its job to build those previews. Um but they they'll be a little bit when you look at on full screen that looked pretty good um it won't have to render new ones every time you go to a full screen version of the photograph but it takes a little longer to do it not much but a little bit longer if you build one for one previews it will take a while to get those done because it's building whatever size your original photo was its building a preview that's exactly that same size which means asked to go through pixel for pixel and replicate the photograph to do that takes a little while but when you zoom in and zoom out to see if someone's you know isar sharp or something like that it instantly goes in looks at it and comes back out and you don't have to wait for something to render so for me I always build the one for one's just because I want to be able to quickly see if something sharp are not because to me that really matters sometimes that doesn't matter so much to people whether something's really sharp or not but to me it really matters whether something's tax chart um so if you build one for one previews then you'll have less waiting when you zoom in to see if something sharp and in focus then here's the here's the new feature and by the way if you're on light room for we're below this is not available. Light room five is where this is available. It's called build the smart previews if you build smart previews what it's doing is it? The original file is still in the in the stacks of the library, but it takes a small copy of it and puts it inside of the catalogue itself. So it makes a little tiny roth photograph that's totally editable, which means and not edible editable it it it what that means is that now if I unplugged the hard drives I can start working on photos, I can adjust them. I can do everything to a photo as though it's on the computer with me and it's not and it's a very small file so it doesn't take up a lot of space, but it just allows youto work on the go without the files being attached. And for those of you who have cameras and this may not be the case for most people who are listening this class but there may be a couple p up people out there that have, like a d eight hundred nikon camera and it shoots a really hefty like thirty mega pixel file so it's huge and so light room coughs and splutters on that to some degree because there's, just if you have a lot of those photos it's really a lot of information and if you build the smart previews and then unplug the cat the the uh um hard drive then it's working on a small version of that and it doesn't it doesn't take it's faster it doesn't conference butter on it now because working on a small version of it and then as soon as you plug in the drive again you have access to the full sized version of it so that's a really good trick for those you have cameras that have twenty or more megapixels on your camera um making the smart previews and then unplugging the original dr will actually make light room faster so I like doing that especially when considering I have thousands and thousands of photographs from one day to go through so eso building smart previews is a very, very a useful thing to do if you're someone who will never detach that external drive than building the smart previous is not all that important to you okay, so now that we have built our previews the way we like them notice that we could make a second copy but we don't need to why? Because we have three copies right? Because our hard drive itself is now making the duplicate for us if you don't have a raid one system, then it would be a good idea to start making copies during the import process or make a copy before you ever important um and then at the very bottom here is developed settings I can apply a pre set on the way in, so if I want everything to be black and white or if I want everything to have a punchy color to it or something like that, any pre sets that I'm using inside of light room are available inside of this menu so I could simply go to my, uh one of my packs here and I could say I want everything to be kind of a color portrait film look and as it imports, it will change the photograph from whatever it is to that style on imports, so you never have to actually look at it. I shot a wedding once where I was going to shoot the whole thing in black and white, and I told the client was all going to be a black and white and I didn't I want to be tempted by the color, so on import I turned them all the black and white so that there is no way I could see them in color and like get tempted by the color and s o that could be very useful have you ever gone back and looked? No, I have never looked at I don't ever want teo I thought it was beautiful it's a beautiful wedding, very beautifully done, but it was all black and white school um and you know, it wasn't too long ago where all weddings were shot in black and white and they look just they look wonderful so you know, even though they had bread, flowers or whatever they had I don't know what they were like my mom's wedding I have no idea what color her flowers were because it's all black and white pictures you know? So I don't I don't know what I don't know what color they were um okay and then metadata metadata is important that's another um discussion that will have but meditate is very important and it's all the information about your photograph and about you and about where the photos were taken and all that kind of stuff so that meta data can be added here so I can click on here and add two thousand fourteen standard copyright information so all that's basically doing is adding my copyright information, teo but let me show you what you could add to it. So if you come down here to the bottom of this menu and every menu inside of light room has an edit option, a tte the bottom or an add a new preset option at the bottom so leiterman's full of presets and things that save time and so that's what this is so I'm going to create a new one and this is all the stuff I could be putting in a photo all right, everything from the name of the photo to the gps location to headlines to copyright information to the creator to my website to my email to my phone number, anything can go on a photograph, even you know what instruments were used, who is the director of photography, like all sorts of stuff. So be aware that it's here and you can create presets so that if you constantly air doing one type of thing where you want to add a lot of stuff to it, you can do that, but that's where you would add it, and then once you've created a preset, then you just simply save that save current setting is preset, and then it will be a priest available to you when you come to this metadata menu and click on two thous fourteen standard you know it's just going to add copyright jared plant two thousand fourteen and that's what it's going to do then? This this is important. This is more important than almost anything. I'm gonna talk about a lot of things over the next three days, and this is one of the most important things that I will talk about key warning if you properly keyword your photos, then you will be able to access them and find them at any point in life. And it will be so easy you'll see how easy it is for me to find photographs of my kids or whatever because I'm able to key word so on import I know that these two photographs were shot in china I also know that they're of a city I know that there's water I know that there's buildings in all of the photographs now if I were shooting for a month and it was all in china but it wasn't in a specific city I couldn't add the city name I would just have to say china but I couldn't say you know that it was shanghai because it would be like all over the place but in this case I could um I can also say water and I can say uh you know uh city I can say um I was actually I should say city scape um well I wouldn't say black and white because most of time it's not coming in his black and white these just happened to me because they're j pegs that I just pulled from somewhere and um but I'm gonna put everything that's common toe all the photographs so I'm gonna knock out a big portion of my keyword ing here because common all of them by the way if you will download your photos more often you can do a better job here if because if if you go to disneyland and then you go to cape cod and then you go to china, then you download your not really going to be able to do a very accurate you're gonna be ableto uh, it's on earth that's about it that's all you got, but if you download when you're done with an event or we're done with the trip or something like that, then you can say, oh, this trip was to california so all of its in california, we may have gone to different cities, but at least it's all in california it's all a personal trip it's all so you can start tagging those okay, now, if the kids are in every photo don't put kids as a key word now kids is a good keyword tohave, but not on this photo because there are no kids in these photos so it's all the common key words and then we will import them and when we import them it's simply making so it shows up here, by the way, right up here in the catalog area will show you all photographs or previous imports or previous exports. This area changes based on what you've just done. So sometimes if there's has some error, id photos or whatever, it'll say photos, I can't find right here it'll say missing photos up in this area so, like new ones appear occasionally based on what you're doing and where you know things that you need to know so this catalog area usually just close because it's not all that helpful more important but down here in our family photos if we go down to the bottom you'll see that this creative life folder has now been made so here's you know set a shots of my little girl and here is the next event which is you know, china on creative life right? All right so that is an event that has been added and then we would start going through I'm calling it now let's go back then to our um schematic here and so we've just added it to the catalogue so we put it into the photo drive we put it in the events folder we added it to the catalog now that we're inside the catalog we're going to go through a whole slew of different things that we we're going to do and I'm going to show you how to do all of this stuff we're not going to take you through step by step by step by step by step all the way through because a lot of it is it just is self explanatory but look at look at the things that we might do here well I built the one for one previous on the way in didn't I we could if we need teo at one point we can edit capture time so if your camera is off by a couple hours you can go into the camera photo and you can change the you know it was not five o'clock it was eight o'clock so you can adjust that um we're going to select the image is so we're going to choose images that we want to keep we're going to organize those images maybe they need to be organized into clumps we're going keyword those images so we keyword it on the way in but we're going further keyword them with very specifics like what person is in the photograph where are they what are they doing? Are they playing are they sleeping? Are they eating? We're going to do all of that stuff are there any textures that we want to know? Tate are there any weather events that we want to know? Tate are there clouds? Is there a sky is their city? Is it about architecture all that kind of stuff needs to be keyword then we're going to adjust the images once we get all of the selection done that's when we adjust too many people go back and forth they choose an image going adjusted then they go back and find another image and then they go on adjusted and then they go back and find another image and they adjust it and in my world is a professional that's slow but that doesn't matter for you you don't have to be fast at choosing your family photos but it's inefficient? Not not. I'm not talking about speed now talking about inefficient in the way that you work, you're better off and you're gonna make better decisions about the photographs you're choosing if you stick to the task of choosing photographs. So you you look through your photographs and you and you ingest them and you feel your way through them. And you know what? You know what kind of expressions are being used here? And how does this expression relate to that one? And if I have a photograph of of jackson, do I have another one of britain that looks similar to that one? You know, all those things are going to be lost if you keep going back and forth between the process of selecting and adjusting and then back to selecting and then back to adjusting you, you lose that that you lose touch with the photographs. And so a good editor is someone who khun stay on task and look at the photographs and play with them and, you know, compare them and think about them and think about spreads. And how would this relate to this photograph? And, oh, that photograph would work really well with this photograph, don't worry about what they look like. Black and white or whether they're too bright or too dark that can all be done later what you're looking at is the composition and the information inside of the photograph that's what's important about selecting an image developing an image is the process of making a photograph whether it's a good or a bad photograph look good back up for a second because I miss the purpose of the raw folder so I got the event folder obviously but then raw is that for raw images only or well I call them raw because they are all wrong yeah, so my original captures their always raw if you shoot j pangs or then that folder could be original j pegs or something it's just the original folder where all the photos go but aren't the original in your event folder to yes but you wanted you don't want them in the same folder is say your word documents we're just trying to organize into types of things and so we have all of our photos here we have our documents here we have our you know, videos here we have whatever our plane tickets here I love the way that you're taking the time itjust chronicle you know the whole process of of doing the photos one question though, is with the uh with the categorizing I don't know if you recommend doing the color the color coding or the star method like are you group for sures yeah like grouping because if you're going to take the time to go through all these pictures especially you're doing a big quantity of photos do you recommend kind of grouping them by color or stars for star five start thing I prefer stars because they make more sense one star being okay and five star beings dependence so really you're just you're giving yourself a continuum of of beauty or a continuum of effectiveness is photograph so I prefer using stars flags are are the baby bear minimum so if I flag it I want to keep it and then stars tell me how much I like it um color codes I don't think they're useful for that for how much you like it that's why star ratings were developed that's why when you go to you know, trying to rape a hotel or whatever they don't say do you want to flag this is red or blue because you know and that's why I thought the whole say like the the terrorist threat level was such a stupid idea because they're like its threat level green does that mean go like get out? What does that mean? It's threat level yellow red eye you know is just a dumb color they should've just gone with like the death con one through five or something I know when it gets to five I'm in trouble anyway, so that's why we use star rating because it just makes sense colors are better for things like warnings or uses or something like that. So for instance, if I if I flag something red, I flagged at red is a warning that there's something wrong with the file that I have to work on otherwise it's an unacceptable file if I flagged it as a blue, that means that it's something that one of my event vendors will be interested in looking at. So I have different, you know, the colors to me just label him as things that I might do with them. So when it comes to scrap booking, you might say, oh, well, I'm goingto anytime I see something that's ah uh, a great background image that I could put behind other images, maybe I'll flag it is green or something like that, and then then you could always just go look for all your green photos, and that would be all your images that would work well as a background photograph, something like that so they're better for use is rather than how much I like them. So, do you recommend grouping them first before going through this whole process or d recommend going during the selection process here? And we're going to go through the selection process today, but during this selection process is when you were going to be grouping them it's all going to happen at the same time because it's all one experience so as I go through those photographs I will be choosing whether I'm keeping them telling myself how much I like them and telling myself what kind of things I could do with them all at the same time right um and then of course I do that selection process and then after I've done the selection process that's you notice when the keyword comes in because there's no point in me wasting time key wording images that are going to be thrown away so one and presumably want to throw away most of our images so we should be able to go from say five hundred photos toe fifty a ten percent is a really good way to go if you if you keep about ten percent of what you shoot that that's great do that if you can get it down five percent that's even better I love a harsh editor so I'm with you so if you could if you could be a harsh editor do it I recognize you know there's events that you can't just throw away because they're bad photographs even if they're soft or whatever you still have to keep him and that's fine but just be a cz harsh as you can as an editor so that you get stuff out and you keep on ly the very best so once we've adjusted the images are key word of them we're gonna just him we may reorganize them after that get rid of all those rejects were going to rename those images so you can keep him the same name but I liked at the very end I like to clean it up highlight a mall rename so it's won through fifty but kept fifty it's won through fifty so it's very easy to see him I don't that way I know if I'm missing something because then number three is gone so where is it and then at that point once I re name if you happen to be someone who likes photoshopped you can go into photoshopping work on it I realize that here in our class I'm assuming that most people either don't have photoshopped or don't want to go to photo shop don't use it all that much don't understand it very well because it's a very complicated program I promise you that as a personal photographer like doing your own personal work there is almost no reason for you to go to photo shop almost no reason unless you really want to retouch something and we can do a lot of retouching inside of light room and so most of you out there in the scrapping world can probably get away with not using photo shop unless you're doing digital scrapbook layouts that you want to really you know do a lot of shadowing and and three dimensional text a ring and stuff like that, but most of what you're doing for photos can all be done inside of light room, so we're going to we're going to go on that assumption, and we're not going to go into photo shop to try and trick things out. Um, then we want to share the images at that point. Once we've done all of that it's, time to share and we can share, and I'm going to show you how to share it through facebook. I'm going to show you how to share him on websites to blog's we're going to talk about, you know, book designs, making books right inside a light room sending of directly to blurb, and then print him and send it back to you. By the way, you can also, you know, have them send you back a pdf if you don't wantto by a physical book, you put a pdf on your on interactive book on your ipad, so all of these things can be done straight from light room without ever leaving, and then it'll just be delivered to you on dh. Then, of course, at the very end, we always want to clean things up and make sure that we have all of all of our information in various methods and forms so that if something happened to our catalog, we could always find that information some other way. And so the way we're going to do that is we're going to save the metadata, and we'll talk a lot about that later, so you don't have to worry about if there's something that I'm talking about that's like, what is he talking about? I promise I will explain it. We're just giving you a thirty thousand foot overview here, eh? So we're going to save all that information to the files themselves so that you'll have a catalog with the information, and then you'll have the information at the file itself. A cz well, so that there's redundancy. Um, and then we're going to export our images so we're going to export those images to our ipads, to our iphones, to computers, maybe an apple tv. If you want slide shows going there, they're going to be up on the web so that you can see them on your dropbox or you can see them, you know, on, you know, uh, smugmug or wherever you happen to be posting your photos were going to send all that stuff from light room it's just going to broadcast out to those areas. And we're going to do it as automated as possible and most of the things that I'm gonna teach you are so automated their simple you just simply drag your photos you want to share here and hit publish and it's done and they're all going to get published out all these little places that you want and then from then on out you just when you're on the road and you're hanging out with your friends and you want to show something that you had just worked on inside of light room, you can pull up your phone and you can start swiping through photos they're just magnificently beautiful even though they were shot with your iphone they were brought in tow light room you adjusted and worked on they're ready for their also in a book designed somewhere but they're on your iphone to back on your iphone but they've been adjusted and worked on from light room um and will even show you how to take your photographs from light room and put them on. Did you know that there's an ipad light room so there's light room for ipad as well? You could put him on your light room ipad or your ipad light room it's called light room mobile you could put him on lighter mobile and you can take that with you I've selected an entire wedding on light room mobile while I was watching my sons baseball game so I just sit there, and whenever he was not up to bat, I would just kind of swiped through and select things, and then as soon as I got back to my computer, all of the flags that I had already flagged, we're already on my computer, so then I just had to sort of and then start working on him in the adjustments. So so it's, really it's it's a fun little toy to play with it zits in its infant stage, but it's really a great thing to play with, especially for personal photos, so we're going to show you all of that, but that the goal for our workshop over the next three days is to give you that ability to be organized with your photos, to adjust them and make them really beautiful, no matter what quality they were when you started, make beautiful images and then be able to share them with ease, including designing books and scrapbooking and stuff like that. And for those of you who are physical scrap bookers, this is still important because we want to teach you how to organize those photos, be able to find those photos so that if you're sitting at the scrapbooking table and you realize you need a photograph of your son and it needs tohave him with flowers because you've got a a photograph of your daughter holding a flower, whatever. You're going to be able to find that photo, because you just type in the keywords that you need, that will come up. You can take that hit print, send it to your printer, grab it and physically scrapbooking. So even if you're just a physical scrapbook, er, uh, and I don't mean to say, just even if you are a physical scrapbook. Er, um, this will be important to understand how to utilize the tools that you have in light room, so that you are an efficient scrapbook. Or. And you can spend more time thinking about the beauty of what you're doing and less time worrying about in fussing over. Where are the photographs and what's? My organizational structure.
Class Materials
bonus material with purchase
Free Bonus Material
Ratings and Reviews
Steve61861
I have spent a small fortune buying classes from Creative Live, and I have learned a great deal from many terrific instructors. This class ranks as the #1 best class I have purchased from Creative Live. It was done in 2014, and the changes and improvements in Lightroom since then are far too numerous to count. However, I just watched the entire class again (August, 2018) and I realized that the class is as valuable today as it was when I originally purchased it. The title says it is for Scrapbookers, but it could have been Lightroom for Everyone. Jared covers every part of Lightroom as it existed in 2014, not just Library and Develop! He has a marvelous teaching style that motivates and inspires one to grab a camera and go take great images. Yes, it is dated. Yes, it is a long course - but only because it thoroughly covers a vast amount of information about Lightroom. And, yes, it still has real value in 2018, and I plan to rewatch it once a year now for the motivation it provides and the incentive to bring myself up-to-date on ALL of Lightroom's latest and most valuable features in all modules. Thanks CL for bringing Jared Platt to us, and please bring more of his great classes soon.
a Creativelive Student
Good class. Jared is an excellent instructor and provided good information. I was more interested in Lightroom than scrapbooking and I think the mix was about right for me. While I found the focus on Trajen interesting and heartwarming ... I found that too much information was shared and too much time was spent on his story. It was distracting for me and I think would be hard to listen to over and over again if I were to buy this course. I think that some of the material was rushed because of the time spent covering this and other unrelated topics. I prefer a more focused approach. I was more comfortable when he was showing photos of his kids as examples the first day. However, I enjoyed the class and learned a lot. Thanks!!
cricutDIVA
Thank you soooo much Jared. I am an avid scrapbooker and still an amateur photographer, but you have given me so much helpful information that my pictures are looking really amazing now. I often share on Facebook and the compliments I have been getting since I started applying what I learned from you are astounding. I have never received so many compliments on my photos. Prayers and positive vibes for Trajan and his family and friends!!!