Lessons
Lesson Info
Paper Boutonnieres
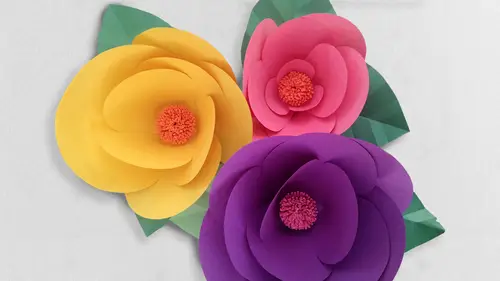
What we want to do in this next session is show you several different ways that you can use all of the paper flowers that we've been making here together and transform them into some event and party decor. Now, one place that I think is great for inspiration is pinterest, and in particular, I have a paper floor pinterest board that weaken, scroll down a little bit and see there are hundreds of pins in this particular board, and it might be worth spending a little bit of time just scrolling through there to see some of the other projects that crafty people around the world have put together and posted there. There, you can see are paper flowers that we've been working on in the last session, but again, it's just a nice visual for you, and it kind of helps you do a little brainstorming and imagine ways that you can transform them in your own unique way. So let's, get started, my friends, we're going to kind of pick up right where we left off with our last segment of making the beautiful ...
little crepe paper flowers, and this is just a very simple way to transform them into a boot near or course, aj, perhaps you're planning a wedding, you're getting ready for prom, anything along those lines, and you wanna have ah, lovely little boot near for your lapel or even a course aj for your wrist. What we're going to be focusing on primarily is a boot near today, although the transformation from a boot near to a course aj is really simple and I'll show you how to do that. So, ladies, in our audience, if you just want to take a couple of the flowers that you have created from the last session, you certainly can mix and match. We did two varieties we did. One is this beautiful sort of coral trumpet shaped flower. And we also did these delicate little peach and marry gold color flowers that almost looks like a combination of, say, a dandy lion and a carnation. Um, pick two or three and I am going, tio let's. See what we want to do here. I think I am going to take two of my carnation looking flowers and one of the trumpet flowers, and I'm just going to bundle them together in a little bo kay in my hand. We did make some extra leaves for the trumpet flowers, and you might wantto position them as well. And the wonderful thing about these is because they are on wire it's very easy to position and reposition and the multiple times, so don't worry about having your competence composition exact the first time around. What you really want to pay attention to is the heights, and in general, you want to stagger them a little bit. Working in pairs of three is always a nice idea when you're putting these together, so you want to have one that is the tallest one that is slightly staggered down in height, and then I do no with these trumpet flowers, oftentimes it's nice to kind of bend them a little bit off to the side here you can see, of course, our boot near that I did, where I've got one that sort of positioned up one that's a little off to the side, which I think is lovely, so you've got your stems altogether. The bottom of your stems now you just want to gently fold them up, and this is going to serve a couple of purposes. You don't want any jagged bits on the bottom of your boot near and it's also going to just make it look a little bit more finished now, once you have done that, were going to take. There are a couple of ways actually, that you could secure it, and what I'm going to recommend you all still have some of the crepe paper at your table from our last session. I'm just going to set the little bouquet down for a moment. I'm going to go over to the green crepe paper that we used in our last session and cut out another strip. We're cutting out a strip that is going to get a regular pair of shears here that is about a quarter to a half of an inch, and with I'm cutting across the grain down the length of the crepe paper, and again, if you caught the last segment, we were cutting strips akin to this to wrap down the stems of are flowers, and it really gave it a nice finishing touch. We're going to use these in this session to secure part of our boot near together, so what we're going to do now is take our strip, decide which color we're working with, a double sided crepe paper, one color a different color on either side decide which side you want to be facing out put a little bit of white, tacky glue on the end, I'm applying this with a toothpick uh, it just tends to make it a little bit easier to apply you don't need a tremendous amount only because it works really well with the crepe paper and helping it too had here to itself and then I'm going to return to my boot near and I'm going to hold it in one hand, I'm just going pick a portion that is maybe I would say about an inch up from the base and what I want to do is I want to cover up all of the ends of the wires that we have bent up from the base and it's all right? If you're covering up the the bottom portion of a couple of the leaves it's not an issue, but what I'm doing now is in gently stretching the crepe paper around. I'm adding a little bit of tension as I pull it around with my right hand straight crepe paper has that wonderful stretchy fabric like quality, and then I'm slowly just wrapping it down now I'm not going to wrap it all the way to the base. I'm going to stop about a half an inch from the base, so you see some of those lovely little loops that we created when we bent up our wire stands at the bottom when you get to the end, then go ahead, give it a little snip to get rid of the access portion of that strip and we're going to return to our toothpick and apply a little bit of the tacky glue then to the end smeared on their rapid around and then hold it for just a moment to secure it. Now, honestly, at this stage of the game, you really could have a completed boot near you might just mess around with the position of your flowers, but just to kind of give it a little bit of a finishing touch you all have at your tables here in the studio, a couple different kinds of jute twine. Now you obviously could do this with ribbon. You would want to select a color that coordinates with whatever your event or your flowers might be and what I'm going to do for this. I think I'm gonna work with this. I've got this lovely jute and mint colored twine. I'm going to take the stem and I'm gonna position the end of the piece of rope here. I've taken it, overlapped it with the base, and then I'm going to start wrapping it around and essentially what I'm doing is I'm covering up that tail as I'm wrapping it is that visible to you guys in the studio? What I'm doing? Okay, great wrapping it up and I'm going to do this just to create a little decorative cuff. That could be anywhere from you know, three quarters of an inch to an inch and a half depending on how long you created your stem. What you don't want to be mindful of is you give yourself enough of a tail there to tie a little bit of a knot so I'm going to backtrack a little bit because I didn't leave myself a lot of room but I'm going to wrap it around and tie a simple not at the top justice secure the top of that rope in place you see what I did there so I wrapped it all the way up when I got to the top I just kind of looped it through as if I were tying a simple knot and pulled that tight and of course we do have this little unsightly tail hanging out of the back there. What we can do is just make sure that your not is really secure given an extra little tug take your shears and you can cut it really pretty close to the base but just to make certain that it doesn't unravel, I'm going to take a little bit of that tacky glue which will dry clear even though it's going to be a white when I apply it and I'm going to stick it just to that little frayed end matt it down just a bit and we're going to give that a few seconds to dry but what that's going to do is it will secure it nice and neat, and because the glue does dry clear, you'll never know it was there. So once you've done that now, you've got a beautiful little decorative cuff at the base and the added the added advantage to having one of these cuffs on is it really gives you a good place to put your boot near pin through when you're pinning it to your lapel or whatever your outfit might be, because if you were going just through this, the crepe paper there's a higher likelihood that the paper may report tear on depending on the event. If you're wearing this to prom, you obviously don't want it falling off in the middle of the dance floor, even at your wedding reception, that sort of idea. So now that we've done that let's, just play around with our positions with our flowers a little bit. So again, this is really just in a matter of trial and error fussing with it until you kind of feel like it looks the way you want to for these, I'm going to be maybe fluffing out the little marry gold flowers a little bit more, robert a view of the mixed fresh flowers with paper flowers. Maybe if something's not in season. You know, I have seen on my pinterest board people that have done that and it's been beautiful. I've been a little hesitant. I am sometimes afraid tio do that only because I don't want any moisture from the live flowers to affect the crepe paper flowers. Um but I know people have done it successfully. And it's written been really beautiful. So you can see that is a really sort of easy peasy way, tio. Create a little wearable floral art. You can see from some of the things that I prepared earlier. I did a little one with just the trumpet flowers. And then I did a base of the one with just the sort of carnation style. Marry gold color flowers. So how are we doing in the audience? Everybody's got it well positioned and put together. Excellent. You could see these air really simple and a really nice way to apply those flowers that you put so much effort into. So nice everybody's holding them up to the world that I love that well. That's, that's where they go that's where they go. All right, excellent. Well done. Well done. And the nice thing, too, about these one last word about the boot in years is that it's a nice memento from an occasion. These obviously are never going to die and wilt. I will say that you want to keep the crepe paper out of direct sunlight, unless you do want it to fade away. I loved that little anecdote that you shared from earlier about your mother putting the crepe paper out to fade one side to give her a different color. But for your finished flowers, you'll probably want to keep them in the color palette that you've created them in.
Class Materials
bonus material with purchase
Ratings and Reviews
user-c468fb
Thank you to Robert for giving me inspiration. The flowers were beautiful and it has motivated me to go out and purchase the supplies to make some of the projects. I feel that his voice was relaxing and he took his time in explaining how to do the projects. I would definitely make these not only for events but for personal use as well. Great job. It's obvious that he has been doing this for some time,
Elle
Excellent class! It was easy to follow along and create the items exactly as demonstrated.
Student Work
Related Classes
Paper Craft Ideas