Lesson Info
12. Type Inside And Mockups
Lessons
Class Introduction
03:57 2Document Set Up: Love Note Card
07:34 3Add An Image: Love Note Card
06:14 4Create And Place Type: Love Note Card
14:30 5Add Color And Layering Fonts: Love Note Card
15:32 6Add Additional Graphics: Love Note Card
17:12 7Image Inspiration For Greeting Cards
03:36 8Work With Multiple Images: Thank You Card
07:38Lesson Info
Type Inside And Mockups
Let's take a look at the inside because I thought this was really clever, ha ha. So the inside of the card or the back side if you did a flat card would say I've been trying to embrace my imperfections & apparently I'm quite the over-achiever. So I got so good at embracing my imperfections that I ended up doing something that now I want to apologize for. So I thought that was kind of funny. But this is the same thing we've been doing all along. It's just a bunch of different type faces and different doodles and dingbats and all put together in a way that created this fun hand-letter look. You'll notice that if we open the type panel here or my group collection of my fonts, you can see that a number of the fonts like the word apparently has been warped. I know that because the T in front of apparently has a little curved line under it showing that that's been warped so I warped the word here apparently. I warped over-achiever and imperfections was also, oh no that wasn't I'm quite t...
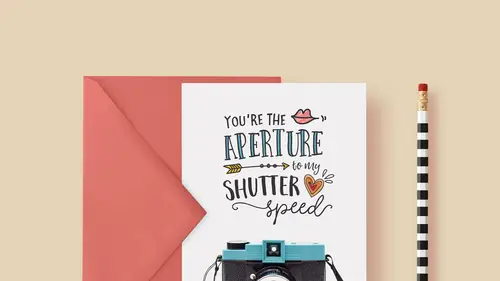
he, that got warped a little bit too. So if you've ever bought hand-written fonts before and then you've piled them all into a design, and you thought it doesn't really look very hand-drawn, that could be because the base line of those fonts is flat and it won't look very hand-drawn or it will look really incredibly perfect if you don't mess with it. So it's a really good idea if you're really striving for that hand-drawn look and you don't happen to be a lettering artist yourself, you can buy hand-drawn fonts from other lettering artists and then you can work with them in Photoshop and warp them to adjust those base lines a little bit and create more of a messy thing. So when you're creating this hand-drawn look, it's nice to be able to embrace the messiness and this is a place where it actually works well. And if you love playing with fonts it's fun because a lot of times when you're designing something it's generally frowned upon to combine a whole bunch of different fonts in one document 'cause it looks kind of cartoony and silly, but in this case if you're creating this hand-drawn look, it's like the one place where you get to work with a ton of different fonts and it's not a problem. It's actually a good thing. So I love playing with fonts and this hand-drawn thing just really works for me. So if you like it too, this is a look that you can really enjoy. So that is a peek at that. When you get all done with this, I'll show you what can also be done and what's included in the bonus materials is mockups so it's a good idea to mock up your piece if you're gonna send this to your clients. They're gonna have a hard time maybe seeing your piece and what it's going to look like if you don't mock it up. So for example, here is a mock-up that I put together for the dinosaur card. So if I was gonna try to sell this to a client or if I was gonna try to sell my design on Etsy or something, I really need to showcase it and make it look good. And there's a number of ways you can do that. You can make your own mockups, you can make 'em from scratch. You can photograph, I mean you could just print the whole thing and put it together and photograph it. That takes a lot of time, so depending on your schedule. But in this case this is actually just a background I made just from nothing. There's nothing special about this. It's just a flat color fill. This card itself is nothing more than the card, like the a JPG of the finished file. And then here is a photo of an envelope. We've got pencils and all these little toys. These things were all, actually I put the envelope in here. But everything else came from different collections of mockup templates from Creative Market. And I link to those and the resource guide too. But it allows you to build your document so you can put it in here. Here's just my envelope, and then you can create whatever kind of look you want for your piece. So you can just see a couple of these examples. Here's another one, and it just dresses up your design and helps your client see it and helps you sell it. So that's kind of a neat thing. But yeah so I hope you enjoyed it, and again I'd love to see your work so share it on Instagram, you can take me @kplicanic and with the hashtag CLCARDS and I look forward to seeing all the great stuff that you make. Thanks so much.
Class Materials
Free Bonus Materials
Bonus Materials with Purchase
Ratings and Reviews
a Creativelive Student
I bought this class and love it! I learned so much - Khara is a great teacher. She has packed in heaps of detail and new ideas, and is very easy to listen to. I am now a Creative Market addict and have had lots of fun making my own cards. Thanks Khara!
Pat Taylor Schink
I found this really really useful in many ways, like photoshop shortcuts, how to incorporate glyphs and patterns and more. I bought the Sunshine Daisies and the Fontbox pkgs and also discovered that a year ago I had purchased some other packages with glyphs/patterns/dingbat fonts and brushes and never really knew how to use until this. I have watched portions over and over because I didn't take very good notes. Khara is a great instructor. I recommend her, too.
Christal user-9a70d686
Khara has really inspired me to try making my own cards. She has taken the intimidation factor out of the process for me. I'm purchasing her class, but I sincerely hope she'll do a follow-up class with yet more ideas. I'd particularly like to see her work through a folded card with text inside. I must say that as a teacher I think she is one of the best I've seen yet on Creative Live. She doesn't flit around too fast and really explains when she is doing (and UN-doing) various steps. Thank you, Khara!